
If you’re running out of storage space on your Mac, your photo library might be to blame. Photos can take up a lot of space, especially if you have hundreds or even thousands of them.
Backing up your photos on iCloud is a great solution for freeing up space on your Mac and saving your precious memories. But after you back up your photos, a copy will stay behind on your Mac. So, how can you delete photos from Mac, but not iCloud?
Let’s get into it!
Table of Contents
Key Takeaways
- There is currently only one surefire way to delete photos from your Mac without deleting them from iCloud using only your Mac and iCloud devices. Be careful when playing with your storage settings, and make sure you always have a backup.
- Turning off iCloud Photo Syncing on your Mac prevents the synchronization of photos to iCloud, allowing you to delete photos from your Mac without affecting iCloud.
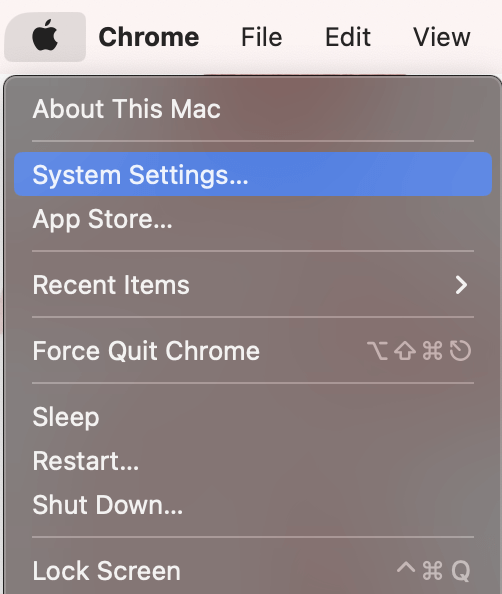
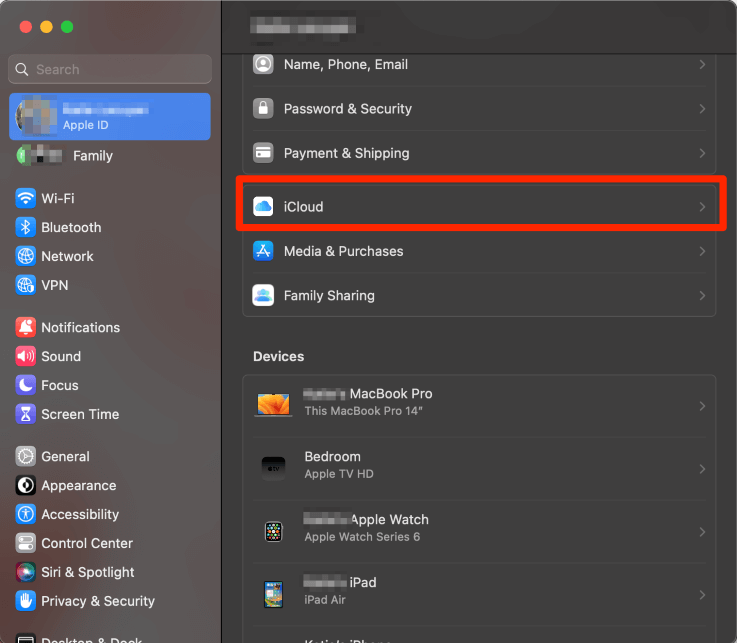
- To turn off iCloud Photo Syncing, go to Apple Menu > System Settings > Apple ID > iCloud > Photos and toggle it off.
- Disabling iCloud Photo Syncing also means you won’t receive new photos taken on your iPhone on your Mac.
- To access specific photos on your Mac, you can use AirDrop to transfer them directly from your iPhone to your Mac. This workaround enables separate photo management on your Mac while still having access to desired photos.
- Enabling iCloud Photo Syncing will resync the photos with iCloud, so the deleted photos will reappear in your library. If you want to make sure your photos stay in iCloud, and not on your Mac, keep this setting turned off.
How Can You Delete Photos from Mac, but Not iCloud?
This will likely come across as a little surprising, and it was to me as well, but there is currently only one sure-thing way to delete your photos from Mac, while NOT deleting them from iCloud using only your Mac and iCloud devices.
Of course, there are always the options to utilize hard drives, USB drives, or other photo storage sites such as Amazon Photos, Google Photos, etc., but this article will focus solely on allowing you to utilize Apple/Mac Photos and iCloud.
Turn off iCloud Photo Syncing
Before we get started, we should mention that turning off iCloud Photo Syncing is only a temporary solution, as once you turn the option back on, iCloud will resync the photos with what is stored on the cloud.
To Turn off iCloud Photo Syncing on your Mac, you can take the following steps:
Open the Apple Menu and System Settings.
Navigate to your name on the left (Apple ID) and click iCloud.
Find the Photos option and turn it OFF.
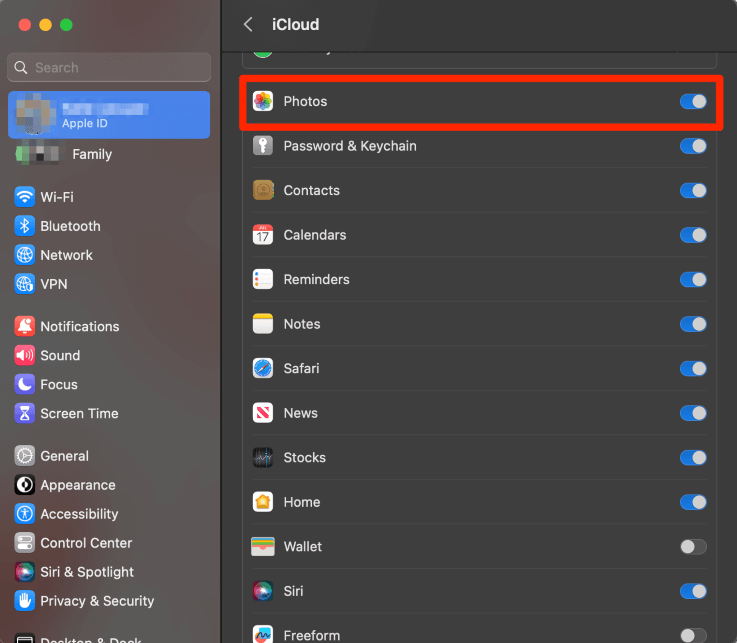
The photos option will now look like this.

Now, iCloud will no longer sync the photos on your Mac to iCloud. This means that not only are you able to delete photos without worrying about deleting the photos from iCloud, but you will also no longer receive the photos taken from your iPhone onto your Mac (assuming that iCloud photo sync is ON on your iPhone).
A suggested workaround for this is if you would like certain photos from your iPhone on your Mac, you can easily select the photos on your iPhone and click Share, AirDrop, and send them directly to your Mac.
On your Mac, you can then move these files into your Photo Library if and as desired. This way, your photo management on your Mac (i.e., deleting photos on Mac, but not iCloud) can remain separate from your iPhone while still having access to the desired photos on your Mac.
Conclusion
iCloud photo sync is a great feature for your Mac when you are someone who desires to have all of your photos accessible on all of your Apple devices that are synced with iCloud. However, this can make it difficult to manage photo storage on individual devices.
This article explains how the temporary fix of removing the Photo Sync ability from your Mac will allow you to delete photos as desired from your Mac without deleting them from iCloud. However, if you turn this feature back on in your Mac settings, the photos will reappear in your library.
Did this work for you? What are your thoughts? Let us know in the comments below!