Virtual Machines or VMs have become a vital tool in the software world. They allow us to run multiple operating systems and hardware configurations on one computer, enabling users to develop, test, and demonstrate software systems in different environments.
One of the more popular hypervisors (software tools that create and manage virtual machines) around is Oracle VirtualBox. You can download it for free.
One of VirtualBox’s drawbacks is that it requires a little more technical knowledge and know-how than some other hypervisors. You can read more about VirtualBox and other VM software in our best virtual machine roundup.
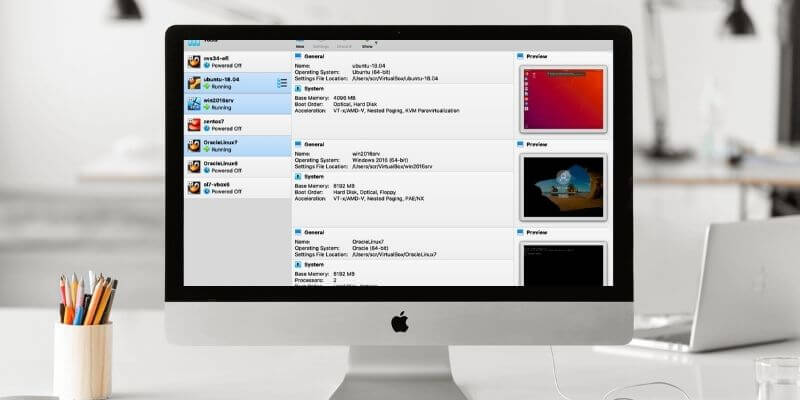
Deleting a virtual machine is an essential part of the development and testing process. Let’s take a look at why you might need to remove a VM, and how to do it in VirtualBox.
Table of Contents
Why Would I Need to Delete a Virtual Machine?
Virtual machine software gives you the ability to create multiple VMs. You can create numerous environments with different operating systems and hardware configurations. You can even create identical VMs to test various software versions in the same environment.
No matter how you use virtual machines, at some point, you will need to delete them. Why? Here are some of the top reasons that we need to get rid of virtual machines.
1. Drive Space
Freeing up disk space is probably the number one reason for deleting VMs. The VM image, and the files that go along with it, may take up many gigabytes on your hard drive. If you are getting low on disk space and have some virtual machines that you are not using, delete them!
2. Corrupted VM
If you use a VM for testing, there is a good chance you will corrupt it. It may get a virus, you might destroy the registry, or something else might happen that causes issues.
In many cases, it’s easier to delete the VM and start over with a new one. This redundancy is one of the main benefits of using virtual machines for testing and development.
3. Completed Testing
If you use virtual machines to test in a software development cycle, it’s often wise to delete your test VMs once development is complete. You normally do not want a test machine that has already been used; it may have modifications left from previous tests.
4. Sensitive Information
You may be using a VM to store sensitive or private information. If that’s the case, delete it—and the confidential information along with it.
Before You Delete a Virtual Machine
There are a few things to consider before you delete any virtual machine.
1. Delete or Remove
With VirtualBox, it is possible to remove a VM without deleting it from your hard drive. It will no longer show up in the list of VMs in the VirtualBox application, but it is still there, and you can import it back into Virtualbox.
On the other hand, deleting the VM will permanently remove it from your hard drive, and it will no longer be available.
2. Data
When you decide to get rid of a VM, remember that you may have data on the virtual machine’s hard drive. Once you delete it, that data will be gone forever. If you want to keep it, backup the VM hard drive first.
If your VM is connected to a network, you may have shared drives that were made available to other users or systems. These shared drives will be gone once you delete the VM; they will no longer be able to access them.
Make sure other users aren’t using that data before you proceed. Another possibility is that you are using virtual drives with your other VMs.
If you are unsure who or what accesses your shared drives, consider shutting the system down for a few days, seeing if anyone complains, or seeing if your network applications are unable to connect.
3. Backup
If you have anything you think you may need in the future, consider backing up the VM. You may be trying to free up disk space, but you can copy the files to an external hard drive, a USB drive, cloud storage, or even an optical disk so you have a backup.
4. Configuration and Setup
If the VM has been set up and configured a specific way and that configuration is something that you plan to use in the future, you may want to record those settings before you delete it. You could take screenshots or write down the information from the settings screen.
You can also clone the VM or export it. I often clone my virtual machines when I set them up, then clone them again before testing. That way, I can re-create the original configuration if I need it.
5. License information
If you have any licensed applications or software, you may want to save it if you are going to use it on another system. Be sure to copy any license files or keys and keep them on another drive or machine.
6. Users
If your VM has multiple users, you may want to note those users and what access they have. You might need this information when creating a new machine.
How to Delete a Virtual Machine in VirtualBox
Once you have decided to delete a virtual machine and have prepared to do it, the process is quite simple. Just use the following steps:
Step 1: Open Oracle VirtualBox.
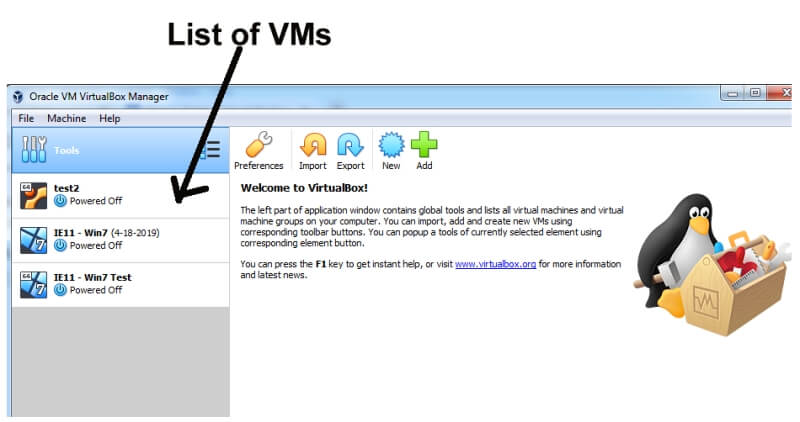
Open VirtualBox on your desktop. The list of VMs will be on the left side of the window.
Step 2: Select the Virtual Machine.
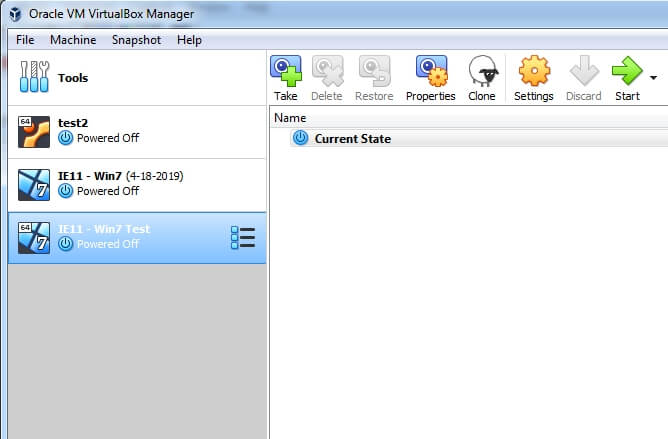
Click on the virtual machine that you would like to delete.
Step 3: Remove the Virtual Machine.
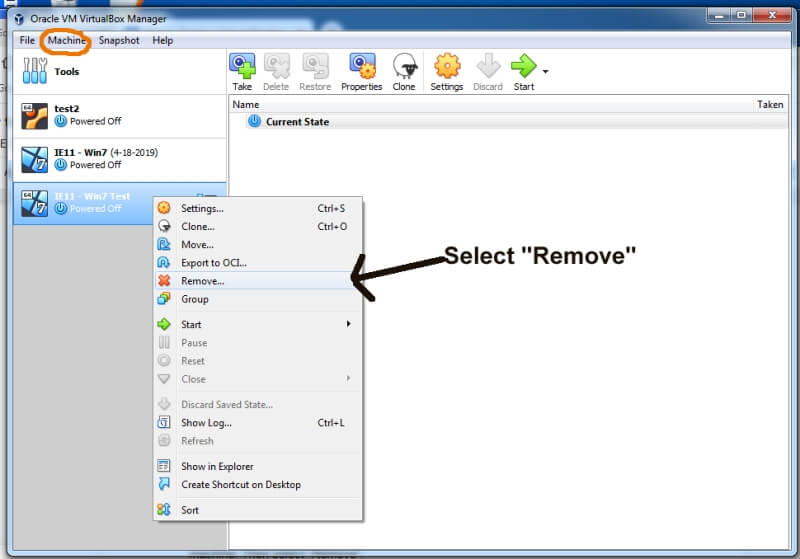
Right-click on the VM or select “Machine” from the menu, then select “Remove.”
Step 4: Select “Delete all files.”
A popup window will appear asking you if you would like to “Delete all files,” “Remove only,” or “Cancel.” Selecting “Delete all files” will remove all files from your drive, and the VM will be permanently deleted.
If you choose “Remove only,” VirtualBox will only remove the VM from the application. It will remain on your hard drive and can be imported back into VirtualBox at any time.
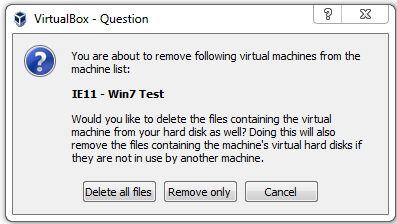
Once you have decided which action to take, click the appropriate button. The virtual machine should now be deleted.
That wraps up this tutorial article. I hope you find it helpful. As always, let me know if you have any problems trying to delete a machine in VirtualBox.
