When you’re used to working with word processors, InDesign can seem strangely complex when it comes to performing simple tasks like page numbering.
While it is often frustrating to new InDesign users, this complexity is necessary to allow for the wide range of different document formats you can create in InDesign.
Let’s take a closer look!
Table of Contents
How Page Numbering Works in InDesign
It’s possible to add page numbers by hand to every single page of your InDesign document, but this seemingly simple solution can create more problems than it solves. Any time you have to add or remove pages, you’d have to edit the number on every single page by hand.
The proper way to add page numbers to InDesign documents uses a special character that can be placed anywhere in your layout. This special character acts as a placeholder, and InDesign automatically updates it to display the proper page number for its current location.
The most common method is to place the page number special character on a parent page. Parent pages function as layout templates for consistently repeating design elements, including page numbers.
You can use two different parent pages to allow for different page number placement on the left and right pages of your document, or you can use as many different parent pages as you need.
Adding Your Page Numbers in InDesign
Here’s how to add page numbers in InDesign for a typical multipage document with different page number placement on the left and right pages.
Step 1: Find Your Parent Pages
Open the Pages panel, and locate the parent pages section at the top (highlighted in red below).
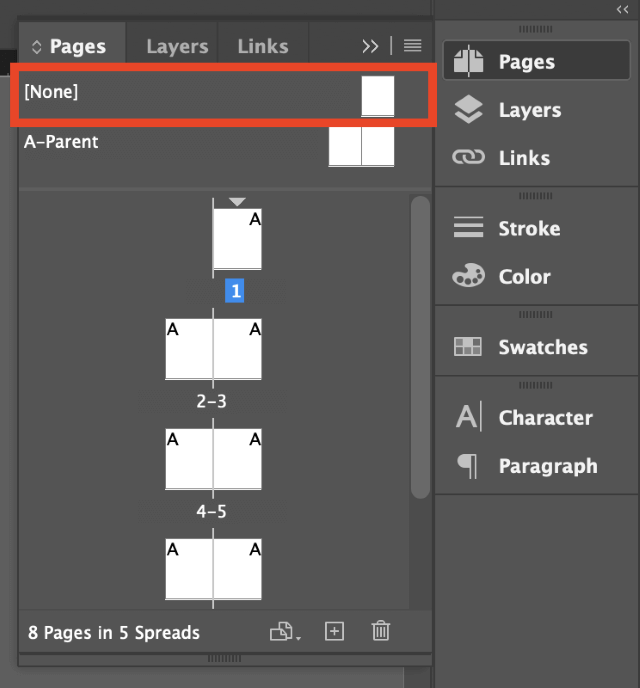
In all new documents that use facing pages, InDesign creates two blank parent pages named A-Parent that correspond to the left and right page layouts and then assigns each page in the document the appropriate left or right parent page, as indicated by the small letter A visible in each page thumbnail above.
In documents without facing pages, InDesign only creates one parent page by default.
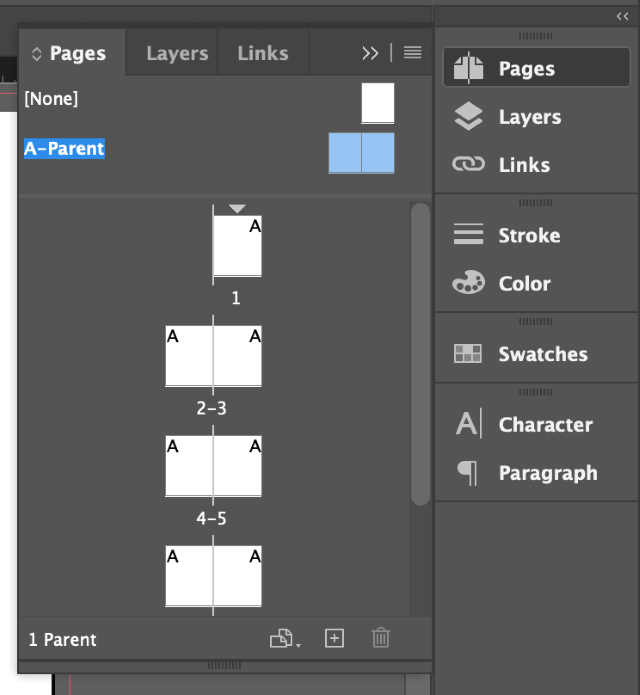
Double-click the A-Parent entry to display the parent page templates in the main document window, ready for editing.
Step 2: Insert the Page Number Special Character
You may want to zoom in a bit while working on this part just to get the placement perfect. Select an area on the left A-Parent page where you want to place a page number, and switch to the Type tool.
Click and drag at your selected location to create a text frame.
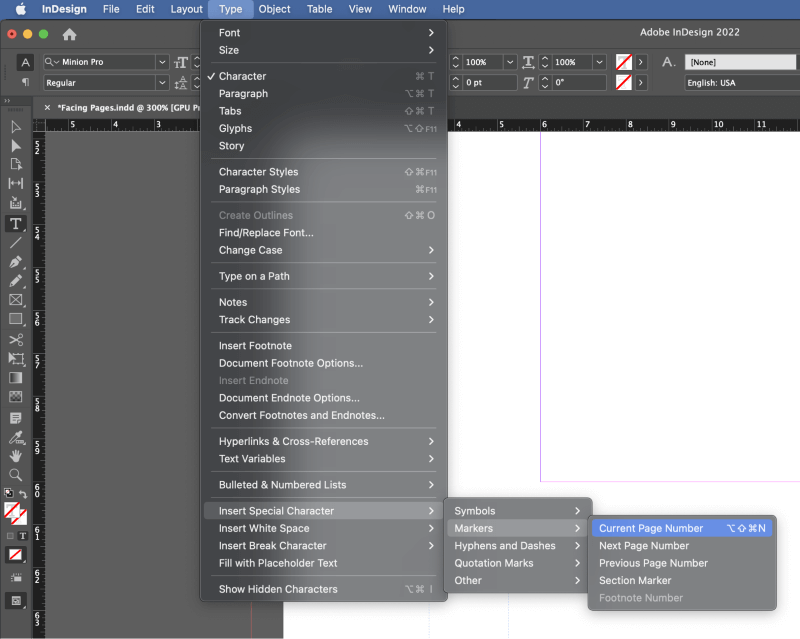
Next, open the Type menu, select the Insert Special Character submenu down at the bottom, then finally select the Markers sub-submenu and click Current Page Number.
You can also use the keyboard shortcut Command + Shift + Option + N (use Ctrl + Alt + Shift + N if you’re using InDesign on a PC).
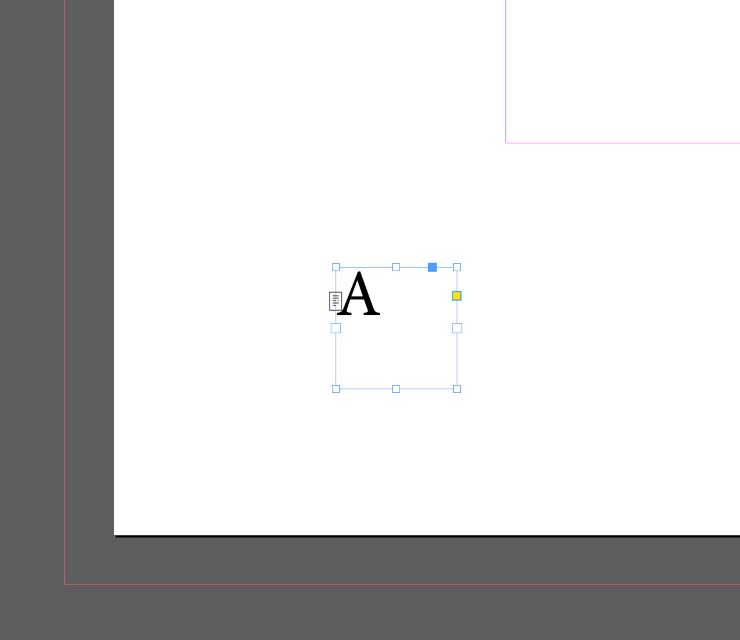
InDesign uses the capital letter A to represent the page number in this case because you’re working with the A-Parent templates. If you create a second set of parent pages, B-Parent, then InDesign would use the capital letter B to represent the page number, and so on.
When you switch back to your document pages, the special character will update automatically to match the page number instead of displaying the letter A.
Step 3: Styling Your Page Numbers
Last but not least, you can now style your page number any way you want, just like it was any other text in InDesign.
Switch to the Selection tool, and select the text frame containing the placeholder character. (If applicable, you can select both the text frames on your left and right pages at once to save some time.)
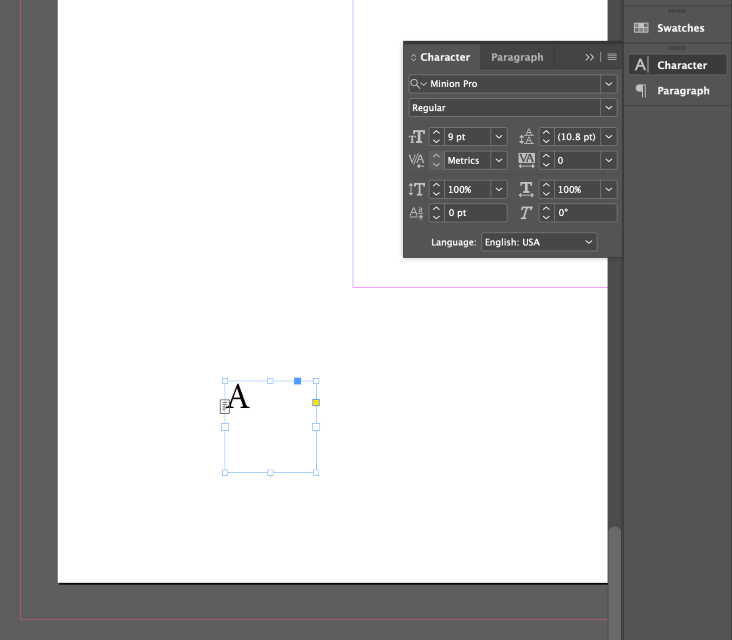
Open the Character panel, and set your typeface, point size, and any other type options you choose. Remember that in most cases, page numbers are set in a smaller point size than your main body copy, although they don’t have to be.
Using InDesign Layers to Control Page Number Display
Just like in most other Adobe Creative Cloud apps, InDesign allows you to use layers to organize your files and control the way elements are displayed.
The top layer is visible above all others, so if you want to ensure that your page numbers will never be covered by images or other content from your layout, you can create a new layer and add your page numbers there.
Keep in mind that this isn’t always the best option. For example, if you’re creating a book with full-page images, you may not want your page numbers to print over top of them.
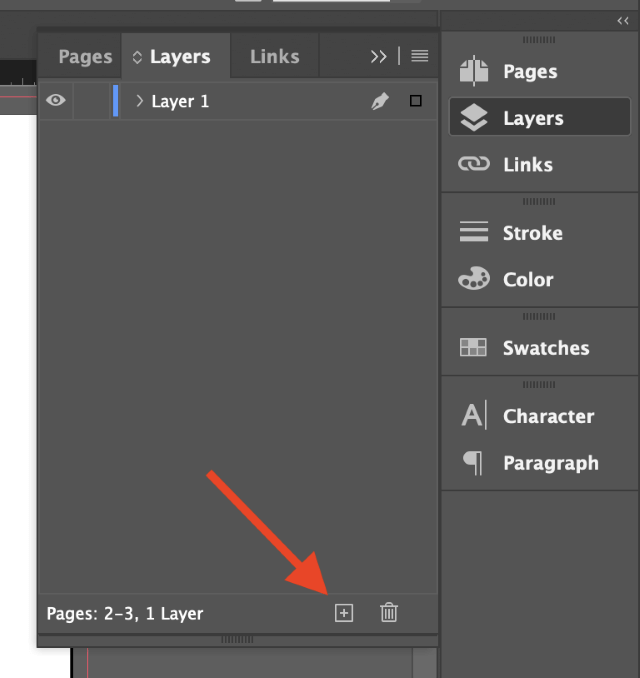
Open the Layers panel, and click the Create new layer button (shown above).
Double-click the entry in the Layers panel to open the Layer Options dialog, give your new layer a descriptive name, and click OK.
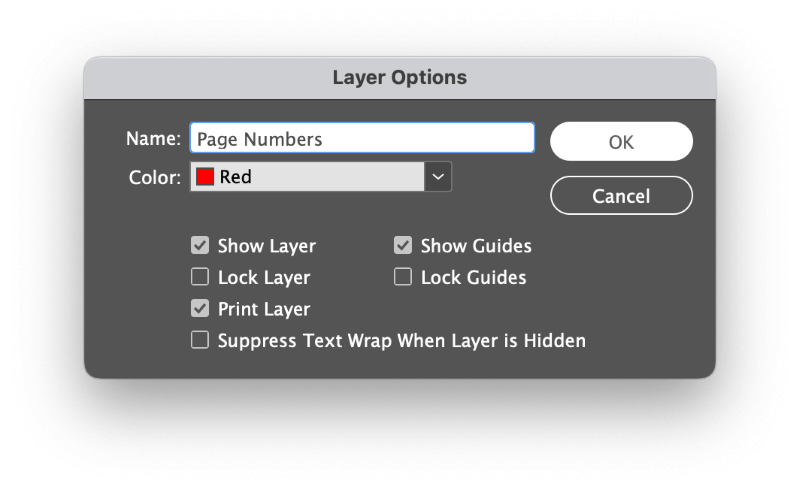
Make sure that your new layer is selected when adding your page numbers, and then switch back to your original layer (named Layer 1 by default) to add the rest of your document contents.
FAQs
I’ve compiled a few of the most frequently asked questions about page numbering in InDesign, but if you’ve got a question that I missed, let me know in the comments below!
How Do I Hide Page Numbers on a Single Page in InDesign?
The simplest way to hide page numbers and section information on a single page of an InDesign document is to apply the blank parent page using the Pages panel. Above your A-Parent pages is another entry labeled [None], which is used to remove any association with a parent page.

Click and drag the [None] page thumbnail to the lower section of the pages and then release it on the thumbnail of the page you want to skip. It will no longer use the previous parent page as a template and should not display page numbers or any other repeating information.
How Do I Skip Numbering on the First Pages?
To skip numbering on the first few pages of an InDesign document, set up your page numbering, and then return to page one of your document. Open the Layout menu and select Numbering & Section Options.
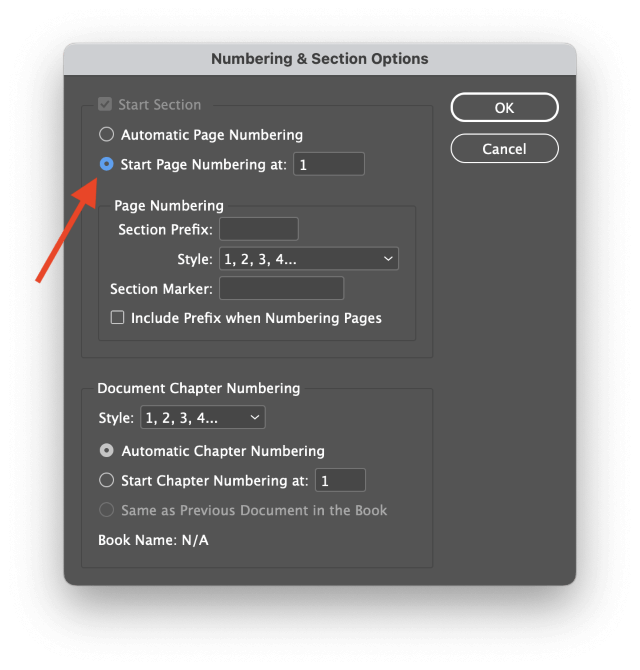
Select the Start Page Numbering option, enter the page number you want to start numbering from, and then click OK.
If necessary, you can also apply the [None] parent page template to stop numbers from being displayed on the first few pages of your document and ensure that the numbers match properly.
Can I Use Roman Numerals as Page Numbers in InDesign?
Yes! Open the Layout menu, and select Numbering & Section Options.
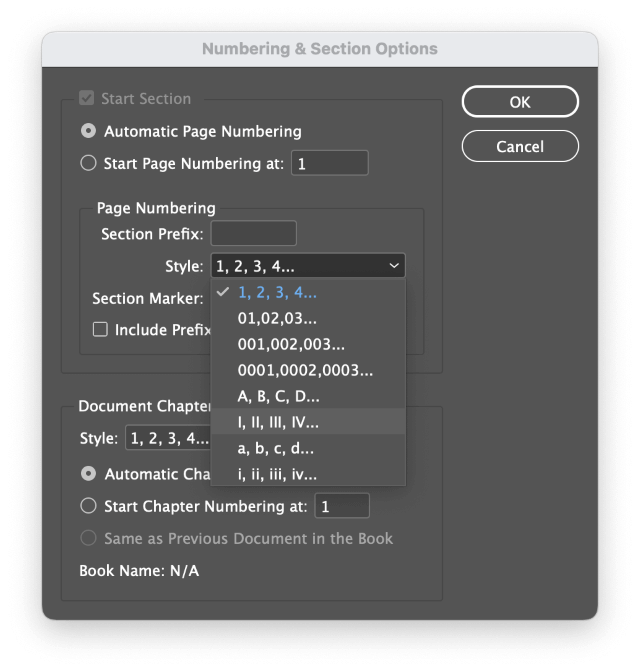
In the Page Numbering section, open the Style dropdown menu and select the entry displaying roman numerals. Click OK, and all your page numbers should update to the new system.
How Do I Add a Header and Page Number in InDesign?
Now that you know the trick of using parent pages to add page numbers in InDesign, you can use the same idea to add any kind of consistent page element.
Open the Pages panel and double-click the appropriate parent page to display it in the main document window. Use the Type tool to create a new text frame and type in the header contents.
Now any page that uses that parent page as its template will display your header text along with the page number. You can repeat this process for any element you want to repeat on every page.
It’s also possible to add dynamic text variables to automatically display a range of other header content, but that deserves its own dedicated article!
A Final Word
That’s just about everything there is to know about how to add page numbers in InDesign! Some of the more complex numbering systems can be tricky to add, but once you know the basic premise, it’s easy.
Happy Typesetting!
