Transition can take your project to a final level, limit the jump cuts in your project, and make it look professional and amazing. The easiest way is to right-click in between the two clips and apply the default transition which is a cross dissolve transition.
I am Dave. A professional video editor. I have been using Adobe Premiere Pro since I was 10 years old. I have used and applied both internal and external transitions to my project over the years.
In this article, I will be explaining how to add transitions between your clips, how to add transitions to multiple clips at once, how to set the default timing for your transition, how to change your default transition, and finally how to install transition presets.
Table of Contents
How to Add Transitions Between Clips in Premiere Pro
Transition is like a bridge that joins a clip to another clip. It takes us from one clip to another. You can easily travel from United State to Canada in your project with transitions. You can show time passing with transition, and use the transition to make a disappearing image. Sweet right?
There are several ways by which you can add a transition to your project. Note that we have audio and video transitions.
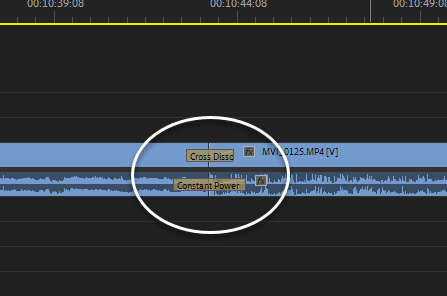
The fastest way is to right-click in between the clips, then click on Apply Default Transition. The default transition for Video is Cross Dissolve and Constant Power for Audio in Premiere Pro.
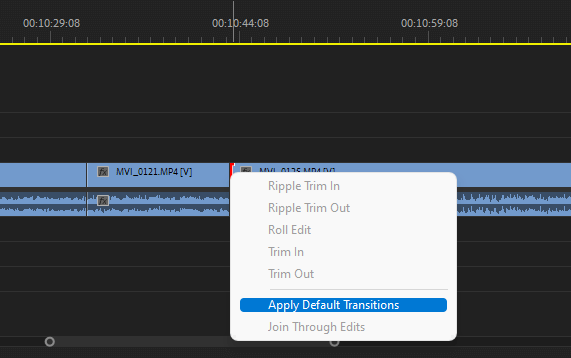
This will slowly fade from one clip to another. And for the audio, the transition will slowly fade from one audio to another.
Premiere Pro has a lot of internal transitions which you can choose to apply to your clips. To access them, go to your Effects Panel, and you would see both Video and Audio Transitions. Browse through them, and look for the one that suits your project the best.
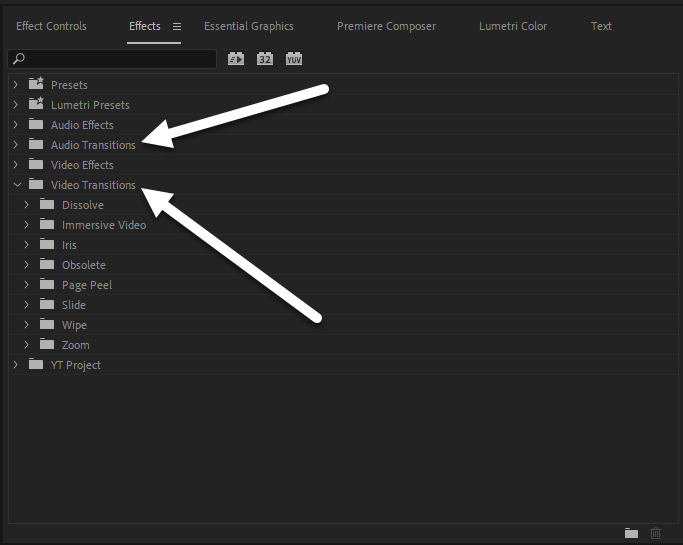
To apply it to your clip, click and hold the preferred transition then drag it onto the clip, in between, the beginning, the end. Anywhere!
Please do not overuse transitions, it can be frustrating and very boring to the viewers. Most time planned camera transitions are better even a jump cut is great.
How to Add Transitions to Multiple Clips at Once
Adding transitions to over 20 clips can be tiring and frustrating. You will have to apply the transition to each clip one after the other. But, Premiere Pro understands us, all you need is just to highlight all the clips you want to apply transitions to and press CTRL + D to apply the transition.
Note that this will only apply the default transition to all the clips. But it’s handy.

How to Set the Default Timing for Transition in Premiere Pro
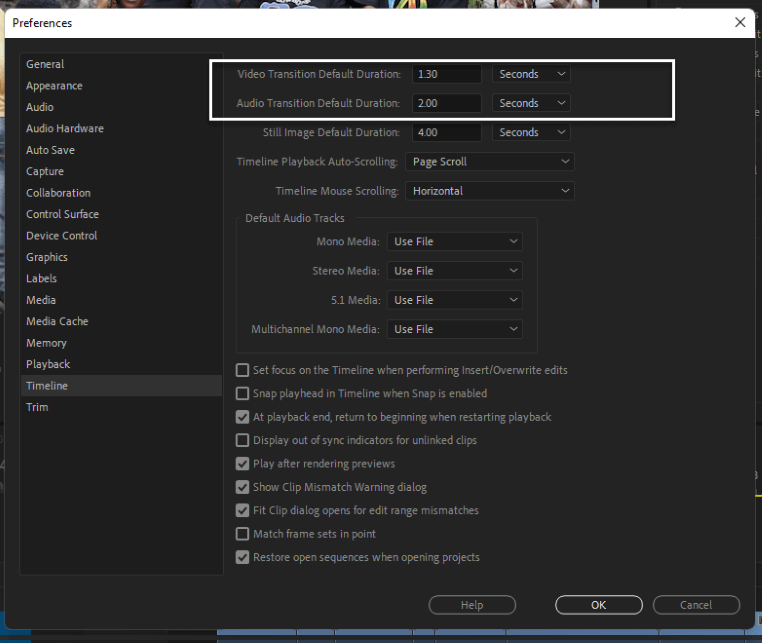
You would notice my transitions are no longer than 1.3 seconds. That’s how I want them, swift and sharp. You can choose to elongate or shorten yours by clicking on the transition and pulling it out or in.
The default timing is around 3 seconds, you can change the default timing simply by going to Edit > Preferences > Timeline.
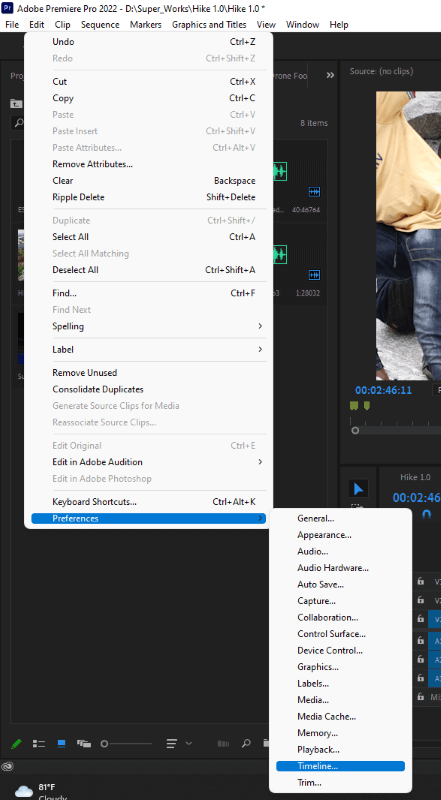
You can change the Video Transition Default Duration, also you can change the timing for Audio Transition. Anyhow you want it.
How to Change Default Transition in Premiere Pro
So I said the default transition for Video is Cross Dissolve and for Audio is Constant Power. You can change them. All you have to do is go to Effects Panel, locate the transition you want to set as default, right-click on it, and select Set as Default Transition.
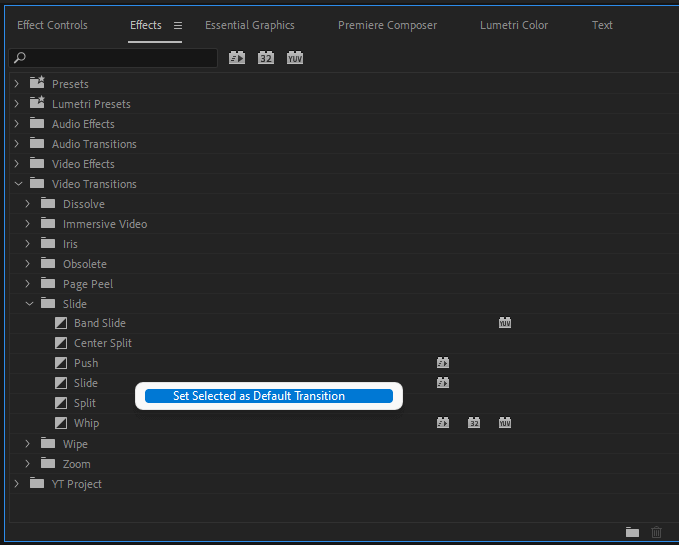
You can do this also for Audio Transition. Premiere Pro really makes life easier. Didn’t they? Yes, they do!
How to Install Transition Presets
If you are not satisfied with the transitions in Premiere Pro, you can choose to buy some external transitions preset and install them. Some of them are really worth the money. You can buy from Envato elements and Videohives among others.
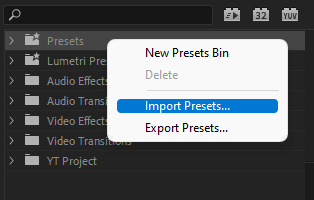
Most of them come along with their tutorial on how to use them. But generally, you can just right-click on the Presets folder, then select Import Presets. Locate and import the transitions. You would see them appear under the presets folder, you can use them as you want.
Conclusion
I am an advocate of using Keyboard shortcuts, it hastens work, and limits the time you use to drag and hover around with your mouse. To add the default video transition only, you click in between the two clips, and press Ctrl + D.
To apply the default audio transition only, you follow the same process and this time around you press Ctrl + Shift + D. These shortcuts are applicable on Windows but should be the same process with Mac just keyboard differences.
Do you need my help with the application of transition in your project? Put it in the comment section below. I will be there to provide a solution to it.
