“That’s an amazing preset!” Says your photographer friend. “Would you mind sharing it with me?” You’d love to help your friend, but you’re not sure how to share presets on the Lightroom mobile app.
Hey there! I’m Cara. Most of the time Lightroom makes things super easy. This isn’t an exception to the rule, but you need to know where to look because it isn’t overtly obvious how to share presets on Lightroom mobile.
It only takes two steps to share Lightroom presets on the phone. Let me show you how!
Note: the screenshots below are taken from the Windows version of Lightroom Classic. If you are using the Mac version, they will look slightly different.
Step 1: Apply the Preset to an Image
This is the step most people miss. If you know how to export presets in Lightroom, you just go straight to the preset and export it.
However, Lightroom’s share button won’t appear until after you apply the preset to an image. Well, actually, the share button is there, but it shares the image, not the preset.
To share the preset, you actually have to share the image as a DNG. It’s not very intuitive, I know.
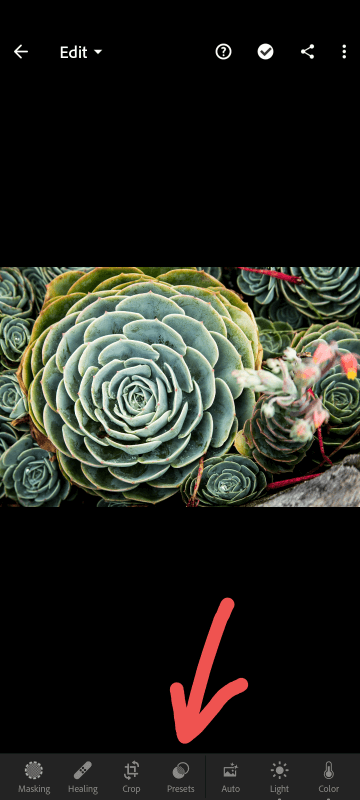
To do this, first apply the preset to an image. Tap the Presets button at the bottom of the screen.

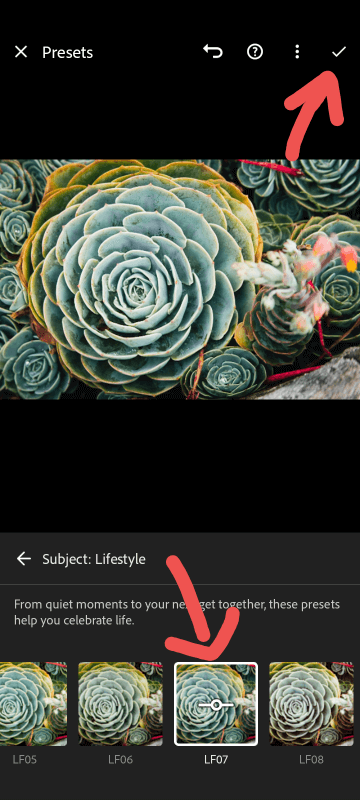
Choose the preset you want to share and tap the checkmark in the top right corner of the screen.

Step 2: Export as a DNG
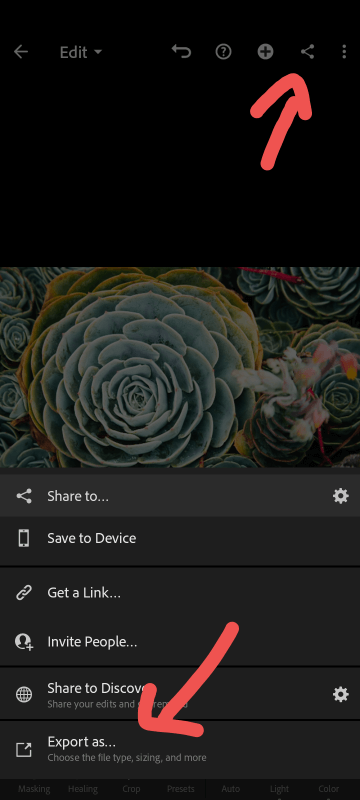
With the preset applied, tap the Share button in the top right corner of your screen.

Skip over the Share to… option and head down to Export as…

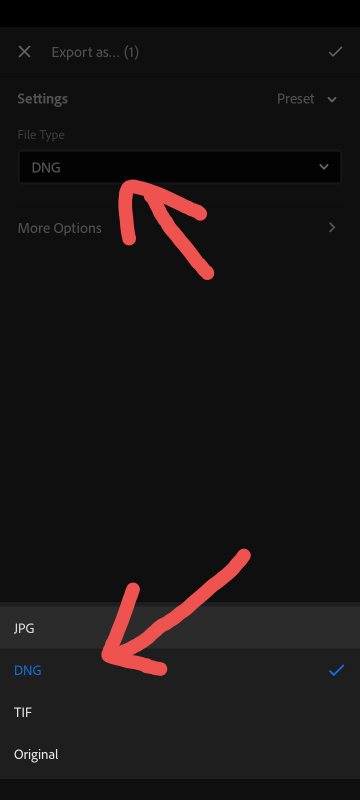
Tap the File Type dropdown and choose DNG as the file type. Tap the checkmark in the top right corner.
From here, you can share the file as you normally would. Share it directly with a friend through a text message or upload it to a cloud storage location, such as Dropbox or Google Drive.
Then, your friends can access the file and download the preset for themselves. Check out our tutorial on how to install presets for more information.
That’s it! Now you and your friends can swap Lightroom mobile presets all you want.
