
To draw a rose on Procreate, start by drawing an oval shape in the center of the rose and then draw a rough outline of the outer edges of the rose. This will act as a guide so that you can keep your proportions correct throughout the drawing process.
I’m Carolyn and I’ve been using Procreate to run my own digital illustration business for over three years. This means I spend hours and hours of my days drawing and editing on the app so I like to think I have developed a certain level of skill when it comes to digital drawing.
One of the most popular things to draw on Procreate is flowers. They are a versatile design and the process of drawing them can be quite therapeutic and enjoyable too. Today, I’m going to get you started with the simple steps to navigate your way around drawing a rose.
Note: Screenshots are taken from Procreate on iPadOS 15.5.
Table of Contents
Key Takeaways
- Always start your rose by drawing the center point and the outer edge of the flower.
- Start by filling in the base color and then move on to add shading, highlights, and lowlights.
- Add the final details last like texture and highlights to make your rose look more realistic.
- Your rose drawing can be used for future projects like creating patterns or adding flowers to existing artwork so don’t forget to save your progress.
How to Draw a Rose in Procreate (Detailed Steps)
This method is designed for freehand drawing a simple rose design in the Procreate app. To get started, all you need is an iPad with Procreate installed, an Apple Pencil or stylus, and a blank canvas. Here we go:
Step 1: Draw the center point of the rose. If you don’t want to draw from scratch, feel free to add a photo somewhere on your canvas that you can use as a visual resource.
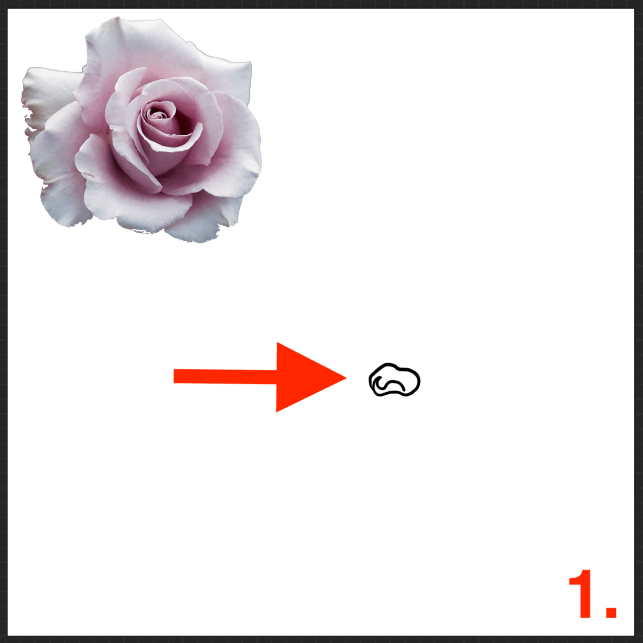
Step 2: Draw the outline of the rose. Having the inside and outside will help you get the proportions right when filling in the rest of the petals.
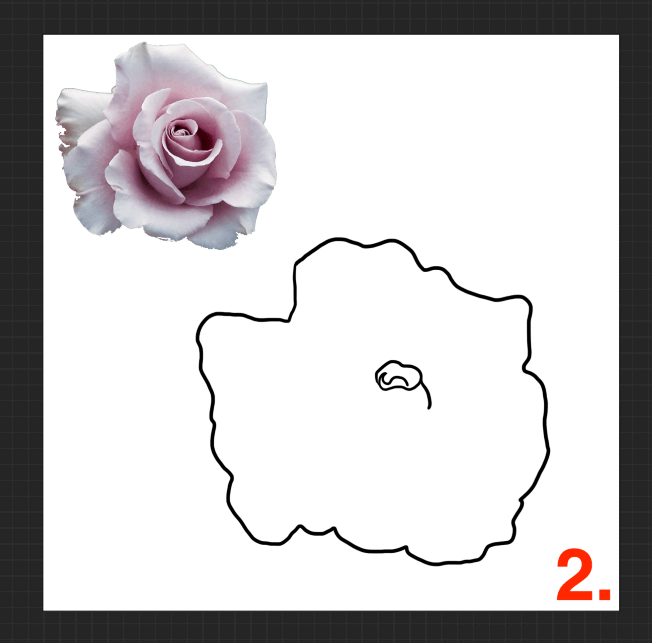
Step 3: Start drawing in the petals around the center of the rose. These lines will be sporadic, uneven, and wavy but will eventually all connect to each other in some way.
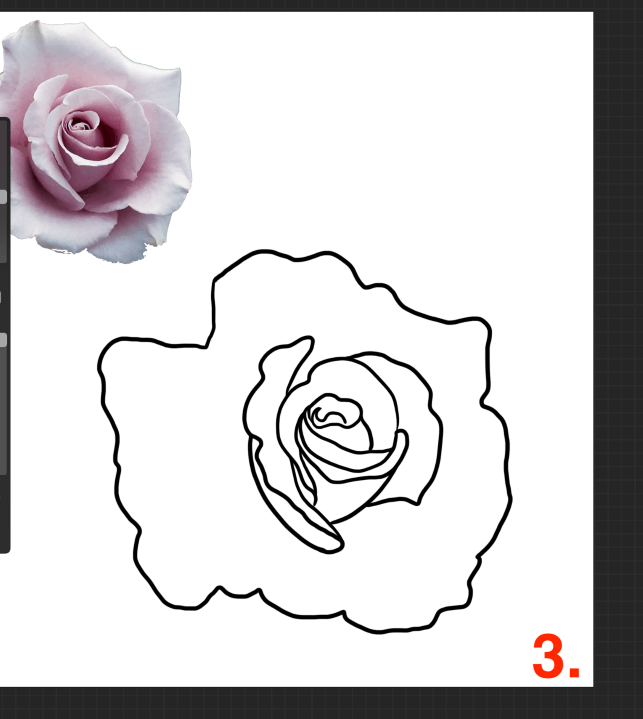
Step 4: Complete the lines of the petals so that the center is now connected to the outer lines of the rose.
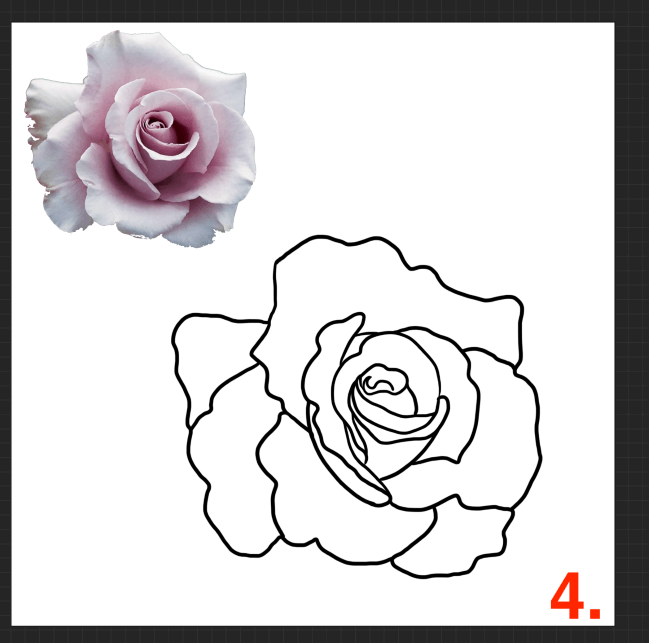
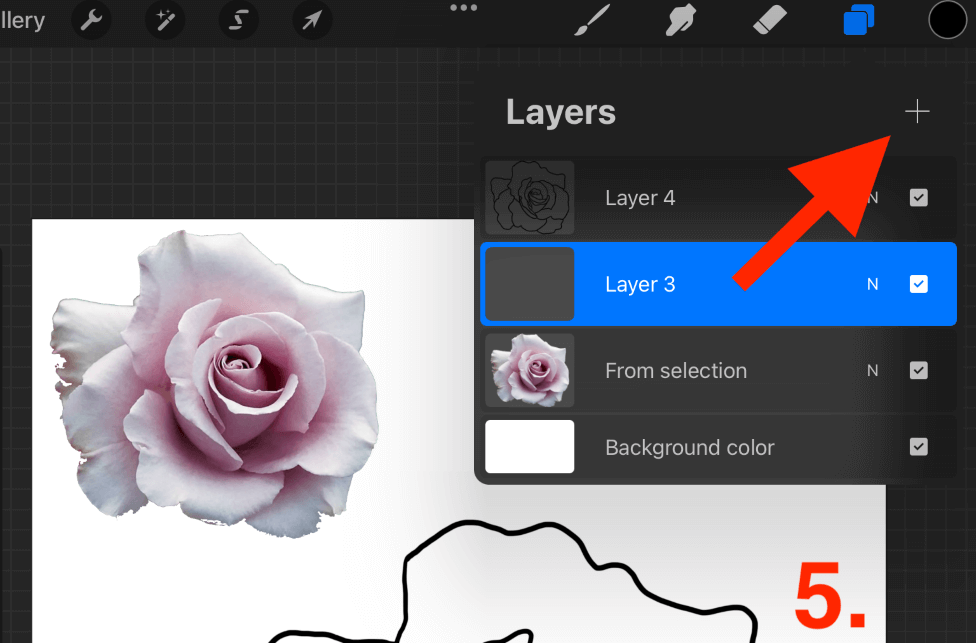
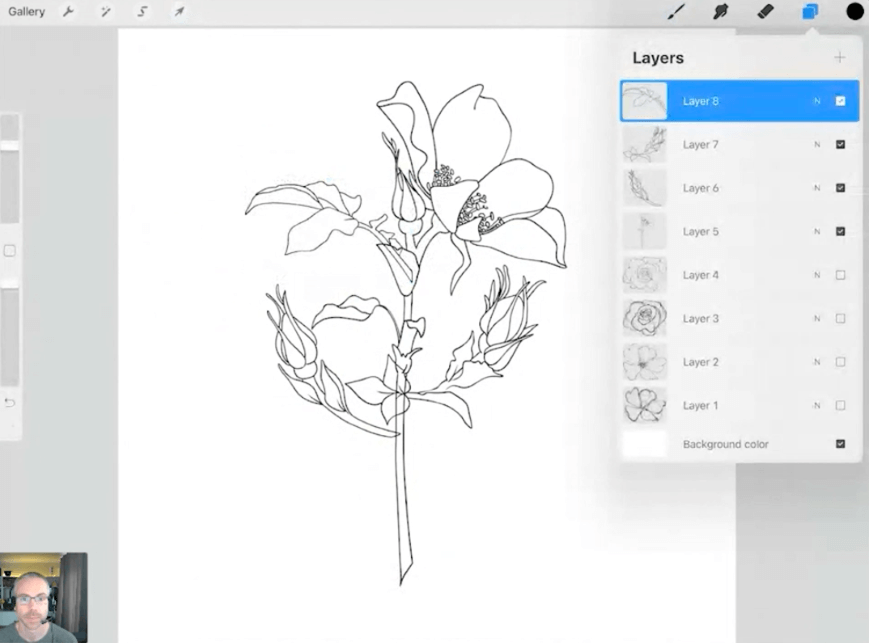
Step 5: Once you have completed the outline of the rose, create a new layer beneath the outline layer by tapping on the + symbol in your Layers menu.
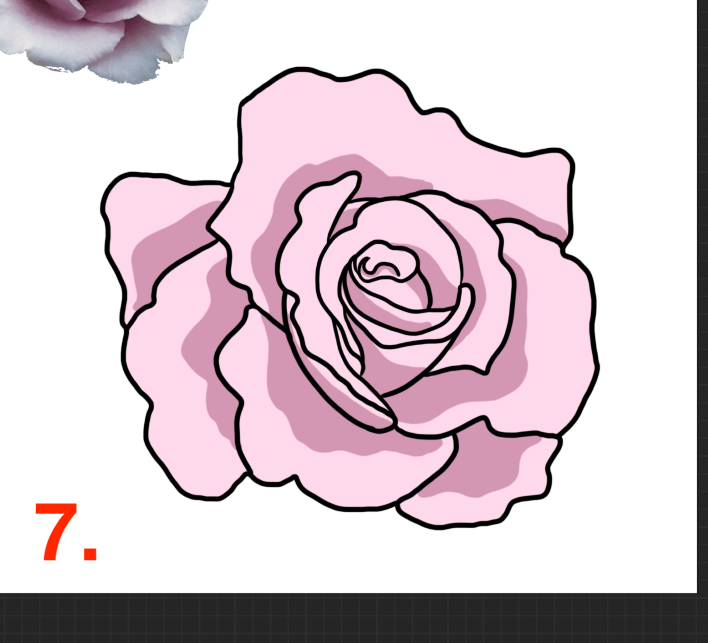
Step 6: Fill in a base color of your rose, something in between the brightest and darkest shade. Then Alpha Lock the layer to stay within the lines.

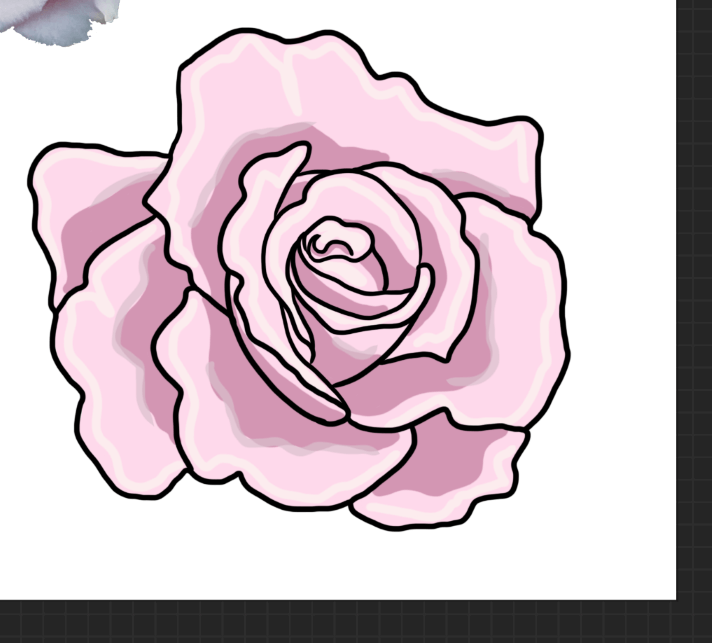
Step 7: Using your brush with reduced Opacity, add in the darker shades, the lighter shades, and the mid-tones of your rose.

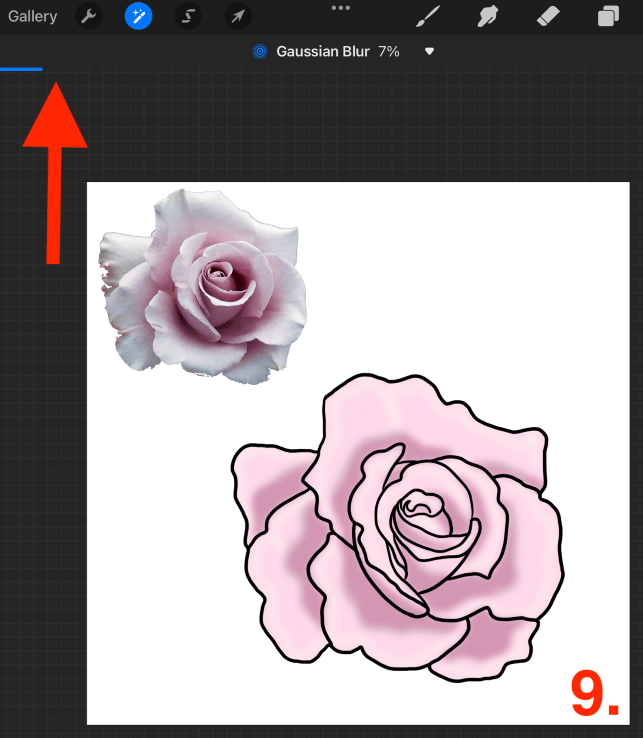
Step 8: Blend your highlights and lowlights by using the Gaussian Blur feature. You can access this by opening your Adjustments tool by tapping on the magic wand icon.
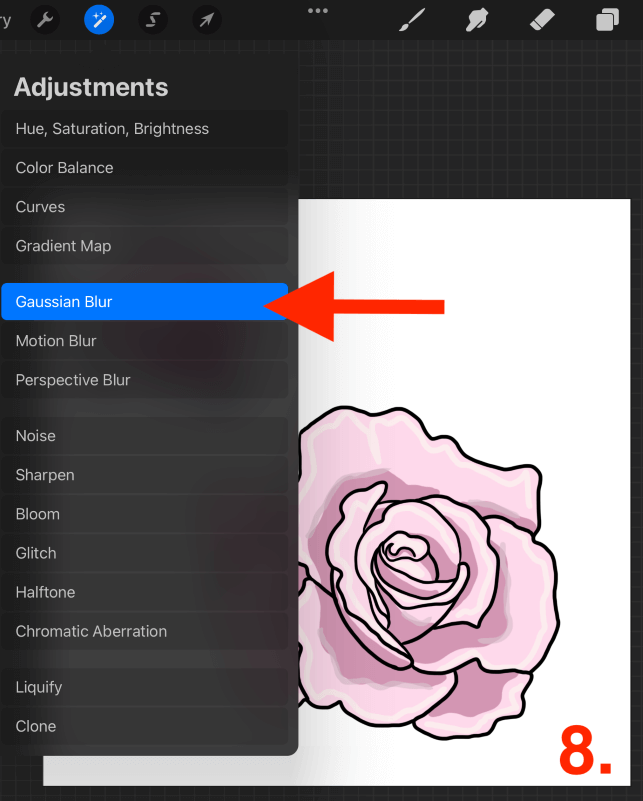
Step 9: Tap and drag right on your canvas until you achieve the desired percentage of blend with the Gaussian Blur.
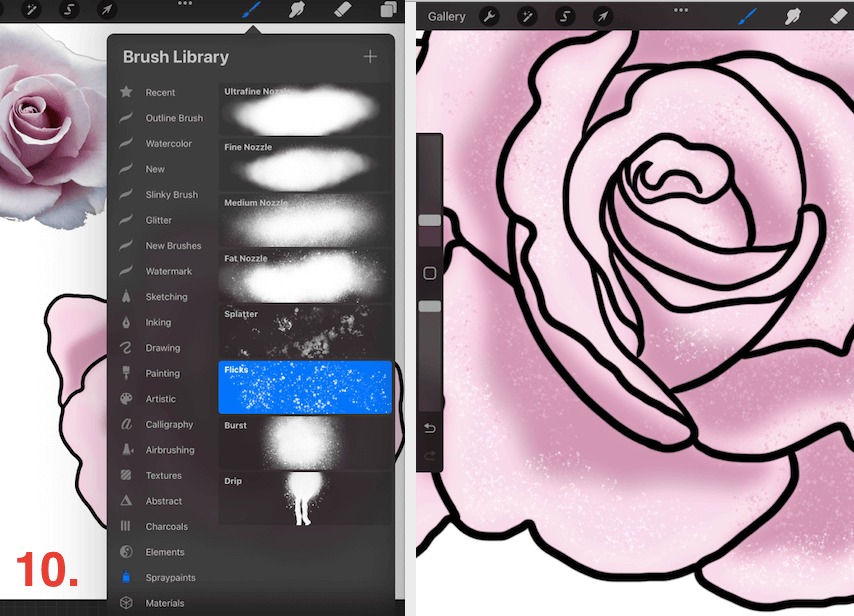
Step 10: Add some texture by using the Flicks brush in the Spraypaints palette of your Brush Library. Access this by tapping on the paintbrush icon.
Step 11: Add finer details like highlights by using the Lightpen in the Luminance brush palette. You can add highlights to the brightest areas of the rose where the light hits.

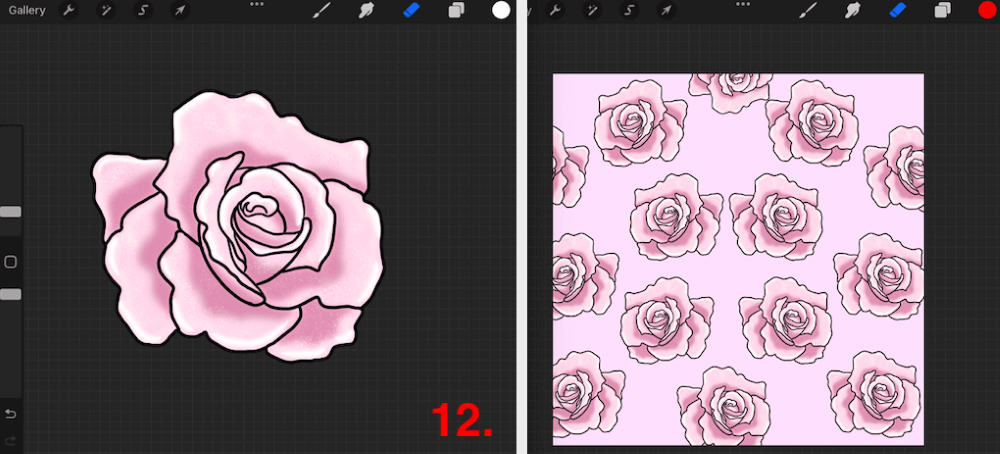
Step 12: Once you are happy with your rose, you can save it to your device or create a new pattern by duplicating the shade using your Drawing Guide.
Other Resources
Flowers are a great subject to draw for beginners as you’re getting used to drawing on an iPad and also studying the color values, shading, and composition through a digital medium. If you’re new to Procreate and want to practice your drawing skills, this is a great place to start.
If you’re more of a visual learner, there are some awesome video tutorials online on how to draw all kinds of flowers.
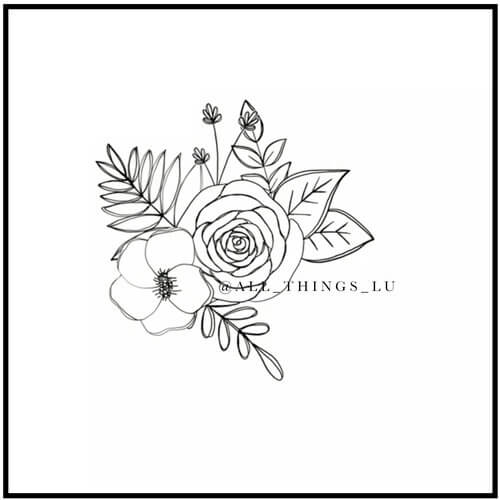
This video from allthingslu.com is a quick time-lapse that shows the process of how they draw their simple line flowers.
Kris Lauren has some handy tools to help you get started with flower drawing too like this flower tutorial.
This is an awesome tutorial by Wooly Pronto and shows you how you can cheat the system and use some of her personalized flower brushes to create some amazing imagery.
FAQs
I have collected some of your frequently asked questions about drawing a rose in Procreate.
How to color roses in Procreate?
I like to add a base color first. Then I go in and define the darkest areas where there are heavy shadows and then I like to define the brighter areas like they have more light. Then blend them together using Gaussian Blur to remove brush strokes and have a smooth blend.
How to draw a realistic rose in Procreate?
The key to drawing a realistic rose is to ensure that you add finer details like texture and highlights to make it look more real. Adding a water droplet or reflection can take your rose to the next level.
Are there any Procreate rose brushes for free?
If you don’t feel like learning how to draw your own rose, there are roses brushes available online. However, I like to pay for brush downloads to support the digital art community so I don’t have any recommendations for free brushes.
Can you draw a rose in Procreate Pocket?
Yes, you can draw roses in Procreate Pocket. However, this will be quite difficult especially if you’re a beginner because of the smaller screen size compared to the size of your hand. It will be harder to draw successfully without using a stylus.
Final Thoughts
Learning to draw a rose is the perfect start for a beginner looking to improve their digital drawing skills in Procreate. This teaches you patience but also gets your hand used to draw on an iPad rather than paper or a journal. And yes, practice makes perfect.
If you are an experienced digital artist and you haven’t tried your hand at drawing a rose on the app, I suggest trying it today. It may humble you… or you may discover your true calling. Either way, it’s great practice and can produce some beautiful imagery for your collection.
How do you draw roses on Procreate? Leave your feedback in the comments section below to share your secrets.