
The Audacity software provides several ways to zoom, but the quickest method is to use its keyboard shortcuts.
To zoom in and out in Audacity, press Ctrl + 1 (zoom in) and Ctrl + 3 (zoom out). On a Mac, use Command (⌘) + 1 and Command (⌘) + 3.
Hello, I’m Andrew, and I’ve been using Audacity for over a decade to capture and record audio. In this article, I’ll show you the various methods at your disposal for zooming in and out so you can choose the one that works best for you.
We’ll look at keyboard shortcuts, menu options, horizontal vs. vertical scrolling, and more! Keep reading for all the details.
Table of Contents
How Do You Zoom in on a Timeline in Audacity?
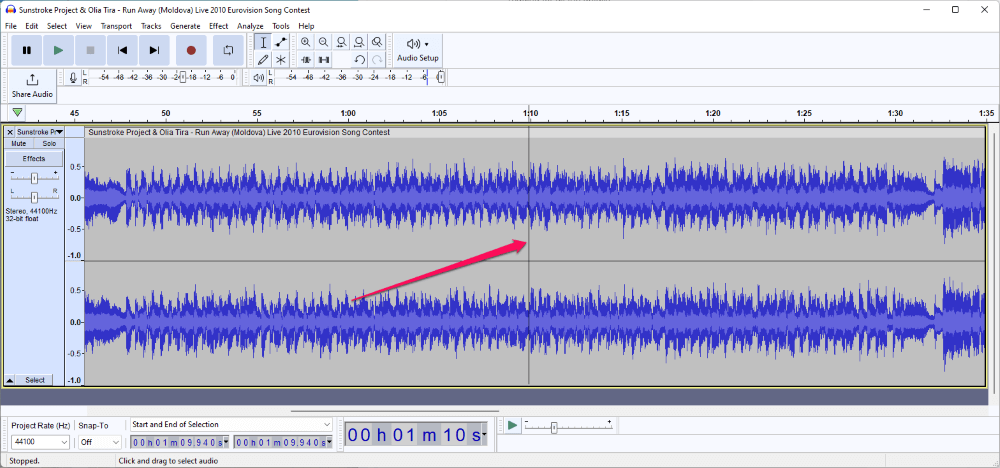
Also known as horizontal zoom, timeline zoom in or zoom out expands or shrinks the width of your audio, respectively. Zooming in allows you to see your audio waveform in more detail while zooming out will let you see more of your project simultaneously.
Horizontal zoom is the most common type in Audacity, and there are many ways to accomplish this kind of zoom. We’ll look at each option below.
What are the keyboard shortcuts for zooming in or out in audacity?
As stated above, the two main keyboard shortcuts are Ctrl + 1 to zoom in and Ctrl + 3 to zoom out (Command + 1 and Command + 3 on a Mac).
Ctrl + 1 doubles the zoom level of your current view. Ctrl + 3 cuts the zoom level in half. In other words, if ten minutes of your project is visible, a zoom-in will increase the detail to where five minutes would be visible. A zoom-out from ten minutes would expand the timeline so that twenty minutes are visible.
The standard zoom-in and zoom-out options will center your zoom around where the current edit cursor lies.
While these two zoom options are handy, there are others. Ctrl + 2 (⌘ + 2) reverts to Zoom Normal, which equates to five to fifteen seconds’ worth of audio.
Shift + Z toggles between two predefined zoom settings. The first is the zoom default (the same as zoom normal), and the second is 4 pixels per sample which show just a fraction of a second.
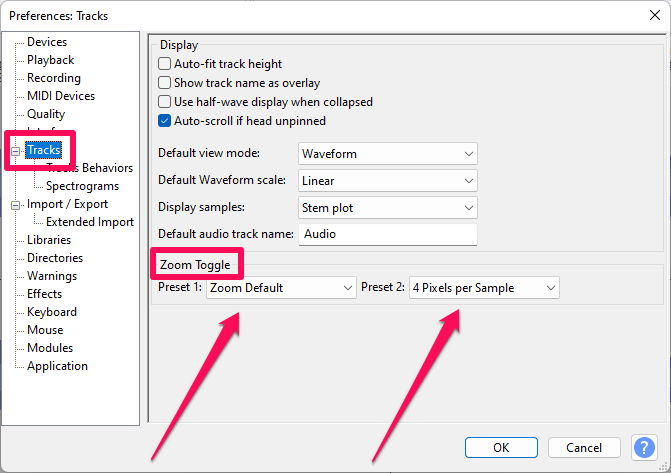
While this zoom mode is useful on its own, you can also customize the two presets to quickly toggle between them. To customize these settings, click Edit on the menu bar, then choose Preferences. Click Tracks on the left side of the window.
Under Zoom Toggle in the right pane, use the two dropdown menus to select your zoom presets. Click OK to confirm your changes.
Now when you use Shift + Z, your project will zoom to your selected settings.
Yet another keyboard shortcut is Ctrl + F (⌘ + F), which fits your entire project to the width of your project window. This function is useful if you want to quickly see your entire project without the need to scroll.
The last keyboard shortcut is Ctrl + E (⌘ + E), which will zoom your project so that your selected audio will fit the window’s width. This function only works if you have some audio chosen, but it can be handy if you need to zoom in on a particular section of audio.
One other shortcut involves both the keyboard and mouse (or trackpad). Hold down the Ctrl key and then scroll up or down with the mouse’s scroll wheel. Audacity will zoom your project in or out as you scroll up or down.
On a Mac, you might have to hold down both Command (⌘) and Ctrl while scrolling, depending on your macOS version and system settings.
You can find most zoom functions by going to View > Zoom on the menu bar. Here you’ll find Zoom In, Zoom Normal, Zoom Out, Zoom to Selection, and Zoom Toggle.
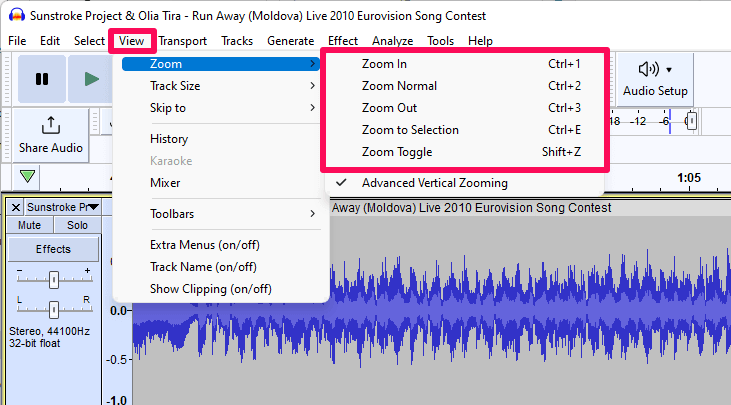
The only option missing from the keyboard shortcut section above is Fit to Width, but you can find Fit to Width in the View > Track Size menu.
How to zoom in or out in Audacity using the Edit Toolbar
Audacity includes several convenient buttons on the Edit Toolbar to adjust zoom settings. The buttons are as follows (from left to right):
- Zoom In.
- Zoom Out.
- Fit selection to width.
- Fit project to width.
- Zoom Toggle.
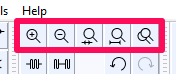
Simply click on the corresponding button to apply the zoom function. Note that there is no button for Zoom Normal on the Edit Toolbar.
How to Zoom Vertically in Audacity
Vertical zoom involves homing in on the wavelength from top to bottom in greater detail. Essentially, a vertical zoom-in cuts off the top and bottom of the track so you can see a larger view of the center portion of the audio.
To accomplish vertical zoom, simply right-click on the vertical scale to the left of the timeline and click Zoom In.
Other options include Zoom Out, Half Wave, Zoom x2, and Zoom x1/2.
Half Wave will display only the top half of the waveform with 0.0 as the cutoff.
If you want to return to the default view, select Zoom Reset.
Another vertical zoom option is to enable advanced vertical zoom. Click Advanced Vertical Zooming from the View > Zoom menu to do so.
Once enabled, you’ll notice your mouse cursor change to a magnifying glass when you move it over the vertical scale. When you see the icon change, simply left-click to zoom in. The zoom will center over the portion of the scale you click on. You can zoom out by holding down Shift while clicking.
Last but not least is the option to Fit to Height. This isn’t a true vertical zoom, or really a zoom at all, but rather it shrinks the height of your tracks so that you can see them all at once. Nevertheless, the tracks have a minimum height, so if you have too many, they still won’t all fit on the screen at once.
Go to View > Track Size > Fit to Height or press Ctrl + Shift + F (⌘ + Shift + F) to use the Fit to Height function.
Final Thoughts
As you can see, Audacity provides many options for zooming in and out because the zoom is a critical function when editing projects. You can accomplish a basic zoom-in with Ctrl + 1 and a zoom-out with Ctrl + 3, but that’s just the beginning of the list of options at your disposal.
Try each of these options out until you find a method that you like.
Which zoom method do you prefer?