Do you want to add a bullet list in Adobe Illustrator but don’t know how? Fear not. You can add bullet points easily in the Paragraph panel. All you need is a couple of minutes to spare.
My name is Elianna. I have a Bachelor of Fine Arts in Illustration and used Adobe Illustrator for more than six years. I’ve used Adobe Illustrator to create vector illustrations in my academic and professional career.
In this post, I will show you how to add bullet points to your text in Adobe Illustrator so you can troubleshoot less, and design more. Let’s get into it!
Note: This tutorial is based on Adobe Illustrator 2023 version. If you are using an older version, some features may be unavailable or look different on your screen.
Table of Contents
Key Takeaways
- Add bullets to your paragraphs with the Bullet Points Icon, Paragraph > Bullets, or by right-clicking your textbox and selecting Bullets and Numbering > Add Bullets
- Edit your bullet points with Bullet Options
- You can add custom bullet points such as *, #, > and +
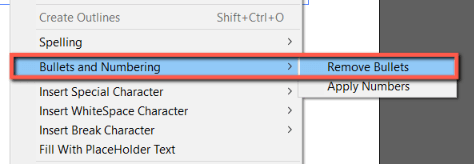
- To remove bullet points right-click and select Bullets and Numbering > Remove Bullets
Method 1: Paragraph > Bullet Point
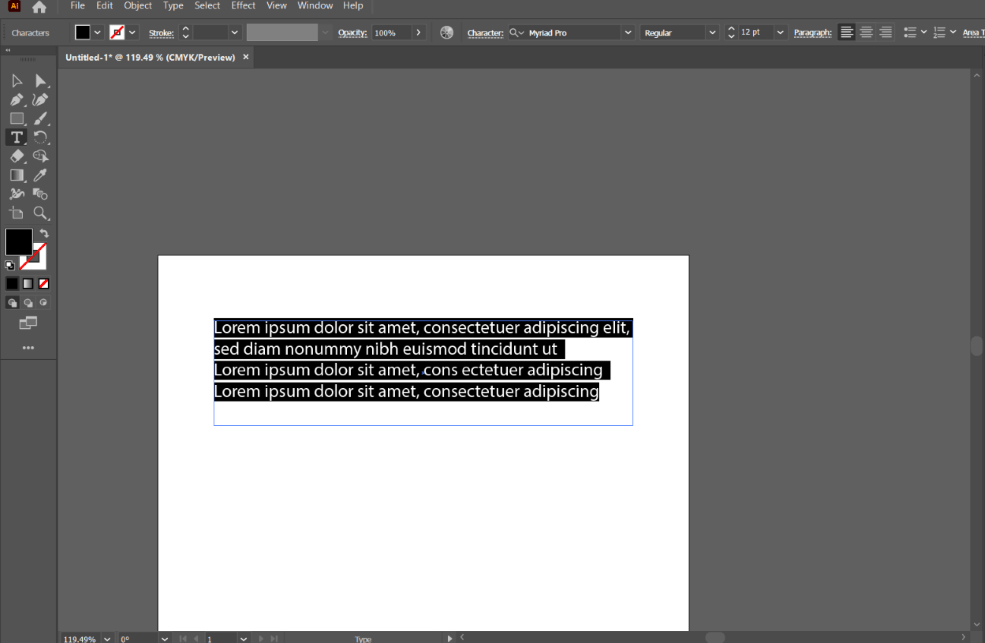
You can find the bullet point options on the top toolbar, next to the paragraph option.
Step 1: Open your document in Adobe Illustrator and select the text in the paragraph you would like to add bullet points.
Step 2: Click on the Bullet points icon.
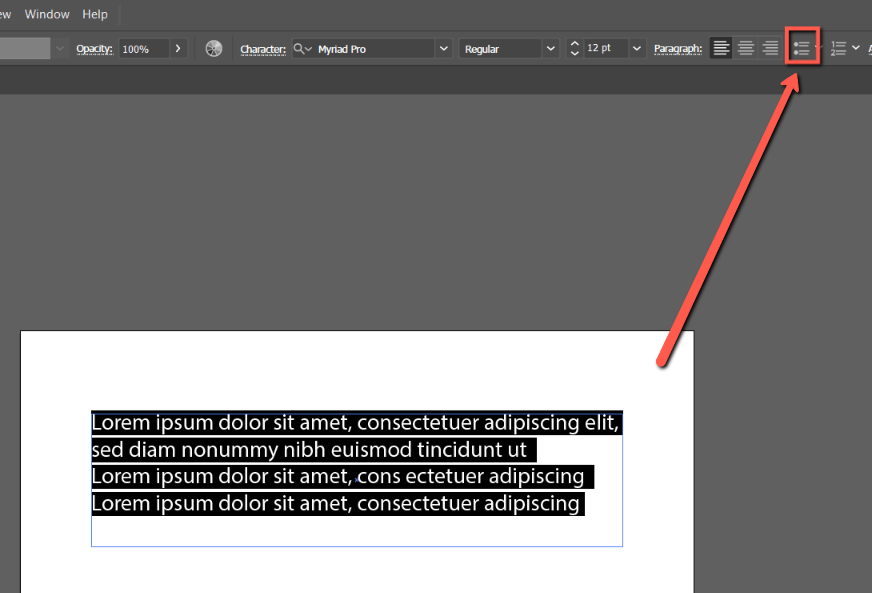
Bullet points will now apply to every paragraph in your text box.

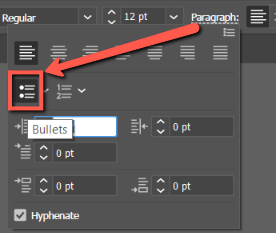
You can also click on the Paragraph and then choose Bullets so that you can add the bullet settings.

Method 2: Right Click the Text
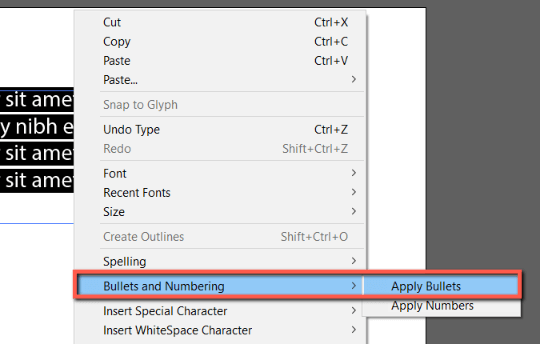
The third way you can add bullet points to your text is by right-clicking your paragraph and selecting Bullets and Numbering >Bullets. Here’s how:
Step 1: Select the text you would like to add bullet points to, if you want to select all text, use the keyboard shortcut Command/Ctrl + A to select all.

Step 2: Right-click the text and select Bullets and Numbering > Apply Bullets.
How to Edit Bullet Points in Adobe Illustrator
Now that you know how to add bullet points to your paragraphs in Adobe Illustrator, here is how you can edit them:
Step 1: With you text selected, Click on Paragraph.

Step 2: Select the Drop-Down Arrow next to Bullets. This will open Bullet Options.
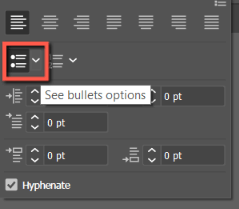
Step 3: Choose a bullet point style from the menu.
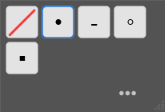
Step 4: To add a custom bullet point, click None. This will remove the bullet point in your paragraph (selected text).
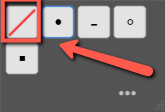
Step 5: In the space where your bullet point was, type *, #, >, or +, and then press the Spacebar on your keyboard. For this example, I am using +.

Hit Enter on your keyboard after your text. You will see your custom bullet point appear for each new paragraph.

How to Remove Bullet Points in Adobe Illustrator
Now that you know how to add bullet points in Adobe Illustrator, here is how you can remove them if you don’t need them anymore.
Step 1: Click on your text box.

Step 1: Right-click and select Bullets and Numbering > Remove Bullets.
FAQs
Here are some answers to questions related to adding Bullet Points in Adobe Illustrator.
How do I space between text and bullets in Illustrator?
You can add space between your text and bullet points in adobe illustrator using the TAB key.
How do you style bullet points in Illustrator?
You can change the style of your bullet points in Illustrator using the presets located in Paragraph > Bullet Points > Bullet Point Options. Alternatively, you can use the following custom bullet points: #,*,>, and +.
Final Thoughts
Bullet points can add visual appeal and useful organization to your text and paragraphs in Adobe Illustrator. They’re easy to add from the Paragraph panel, and Numbering > Add Bullets and Paragraph > Bullets.
Furthermore, you can customize your bullets by changing the style type or customizing your own. Experimentation is key to the best design result.
Furthermore, you can use Bullets and Numbering > Remove Bullets to quickly delete bullet points in your text.
How did your bullet points turn out? Tell me in the comments below!
