Rotating and reflecting objects in Adobe Illustrator is a straightforward task that can be achieved in many different ways. All you need is a couple of minutes to spare.
My name is Elianna. I have a Bachelor of Fine Arts in Illustration and have been using Adobe Illustrator for over six years. I use Adobe Illustrator to create posters, illustrators, business cards, and more.
In this post, I will show you various methods to rotate and reflect images in Adobe Illustrator using the Bounding Box, Free Transform Tool, Transform Panel, Rotate Tool, and Reflect Tool. You’ll learn how to reflect and rotate objects by a specific angle, and how to rotate and reflect multiple objects at one time.
Let’s get into it!
Table of Contents
- Key Takeaways
- Reflect vs Rotate in Illustrator
- Useful Shortcuts
- Rotate and Reflect Objects with the Bounding Box
- Rotate Objects with the Free Transform Tool
- How to Use the Rotate Tool in Adobe Illustrator
- How to Use the Reflect Tool in Illustrator
- How to Rotate/Reflect Multiple Objects
- How to Rotate/Reflect Objects in Illustrator for iPad
- Final Thoughts
Key Takeaways
- The fastest way to rotate in Adobe Illustrator is using the bounding box.
- Useful keyboard shortcuts: Rotate Tool (R), Reflect Tool (O), and Free Transform (E)
- Use Shift/Alt while rotating to rotate by precise angles. Hold down Shift/Alt while reflecting to keep proportions.
Reflect vs Rotate in Illustrator
Rotating and Reflecting objects in Illustrator is essential to edit elements in your document. Here is how they work:
Rotating an object in Illustrator moves an object around a defined axis, usually its center point. You can rotate objects in Illustrator around their center point, or by a defined reference point on the artboard. You can also rotate multiple objects at once, and by the same angle in place.
Reflecting an object “flips” it across a defined axis in Illustrator. You can reflect objects by specific angles, and reflect multiple objects at the same time. You can also change the angle of a reflection, and define your own axis line.
Useful Shortcuts
Here is a list of useful keyboard shortcuts to use while performing rotate and reflect operations in Adobe Illustrator separated by Tools and Functions. These shortcuts will be discussed in each example as they come up, but it can be useful to see them all at once.
| Tool | Shortcut | Function | Shortcut |
| Selection Tool | V | Transform Again | Ctrl+D |
| Free Transform | E | Transform Each | Alt+Shift+Ctrl+D |
| Rotate | R | Constrain Proportions | Shift/Alt (while dragging) |
| Reflect | O |
Rotate and Reflect Objects with the Bounding Box
One of the easiest methods to rotate and reflect objects in Adobe Illustrator is using the bounding box (the box that surrounds an object when you click on it with the Selection Tool). Here’s how:
Step 1: Open Adobe Illustrator. Select the object(s) you would like to rotate or reflect with the selection tool. The keyboard shortcut for the Selection Tool is V.
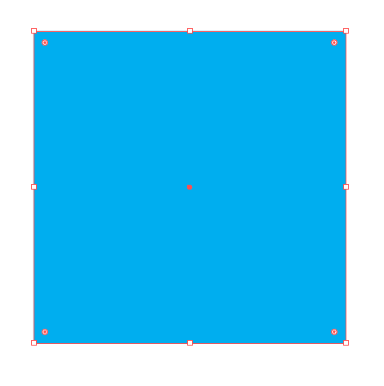
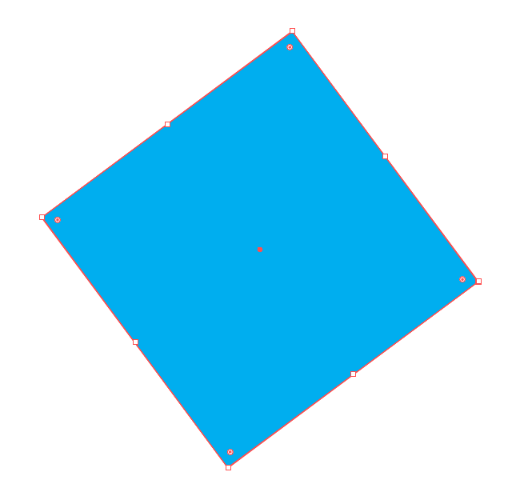
Step 2: Move your pointer so it changes to and then drag to rotate your object. If you would like to rotate your object by more precise angles, hold down Shift while dragging.
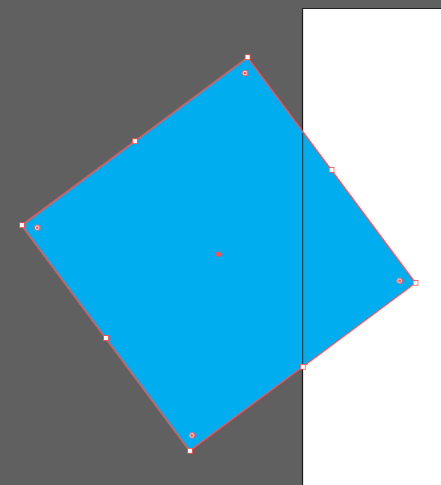
Step 3: To reflect your object, click on a corner anchor point and hold down Shift while dragging across the x or y-axis.
Rotate Objects with the Free Transform Tool
You may not see the Free Transform Tool in your basic toolbar. You can quickly add it by changing your toolbar to Advanced toolbar from Window > Toolbars > Advanced.
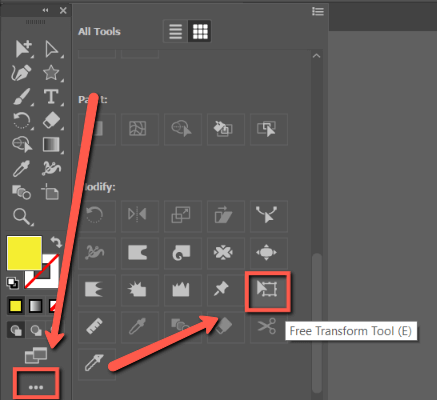
Step 1: Select the object(s) you would like to rotate or reflect with the Selection tool. Select the Free Transform tool. To access it quickly, use the keyboard shortcut E.

Alternatively, you can access the Free Transform Tool by clicking on the hidden edit toolbar menu and clicking on the Free Transform Tool icon under Modify.
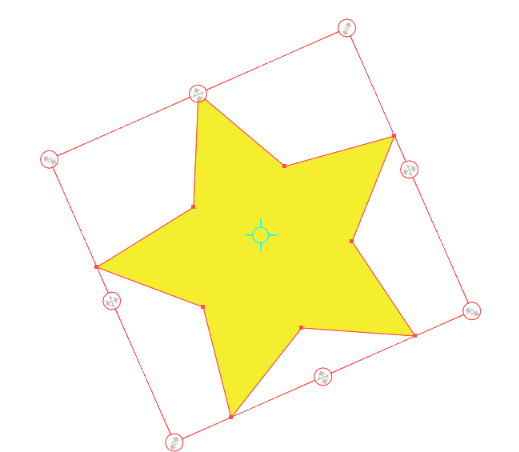
Step 2: Click on your object. And select an anchor point. Move your pointer so it changes to and then drag to rotate your object.
How to Use the Rotate Tool in Adobe Illustrator
Another way to rotate and reflect objects in Illustrator is by right-clicking your object. Here’s how:
Step 1: Click on the Rotate tool in the toolbar, or use the keyboard shortcut R.

Or you can right-click on your object, and choose Transform > Rotate. This will open the Rotate menu.
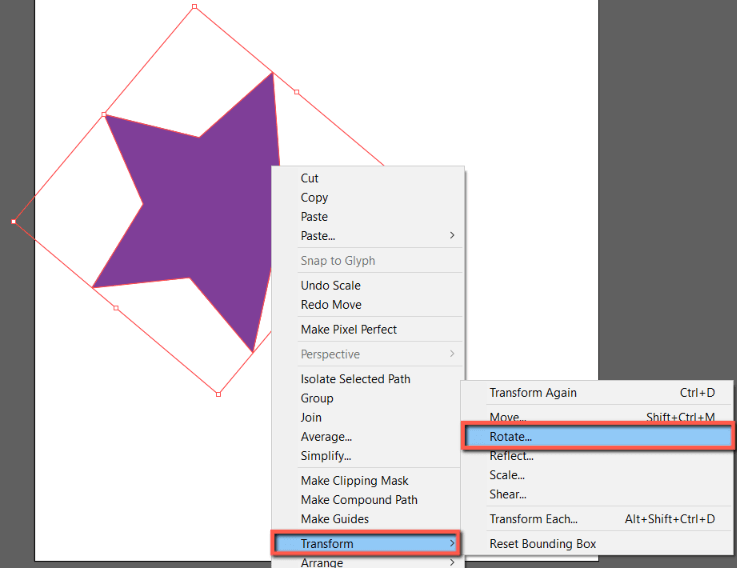
This method allows you to rotate objects at a specific angle.
Step 2: Adjust your rotation angle. Under Angle enter a rotation value. Angles with negative values will rotate an object clockwise, while positive values will rotate objects counterclockwise.
For this example, I am setting my angle value to 100.31.
If your objects have patterns, check Patterns to rotate the pattern with your object. Uncheck Objects if you want to only rotate your pattern.
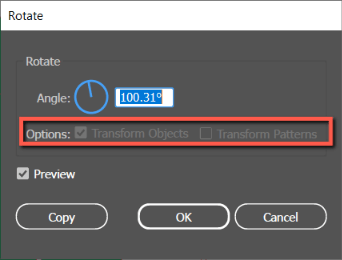
When finished, Click OK.
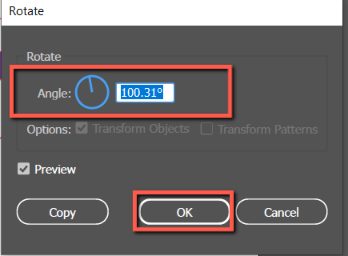
If you want to rotate your object freely, follow this step for step 2:
Rotate your object around its center point, around a different point, or rotate a copy of your objects using the following methods:
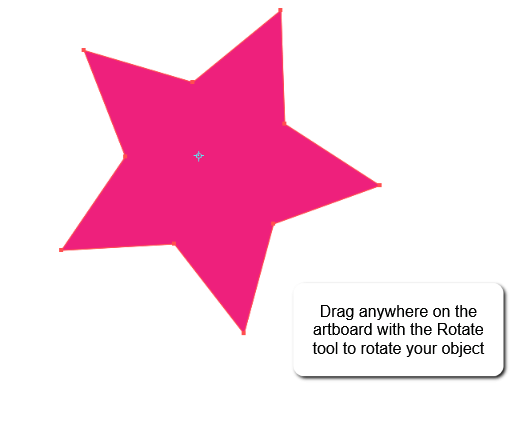
To rotate your object around its center point, click and drag anywhere in your artboard in a circular motion. To do so with more precise measurements, hold down Shift while dragging.
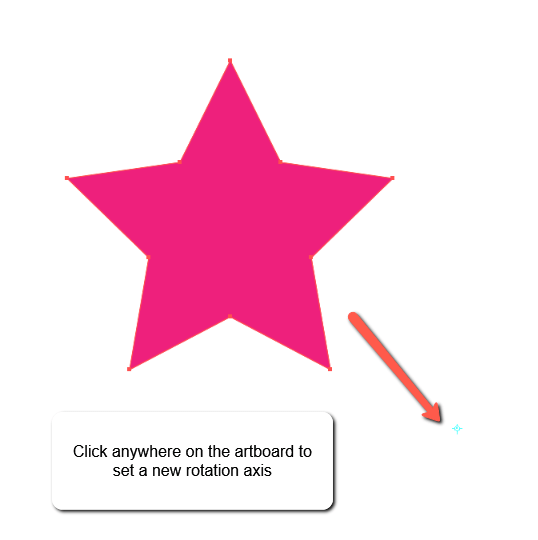
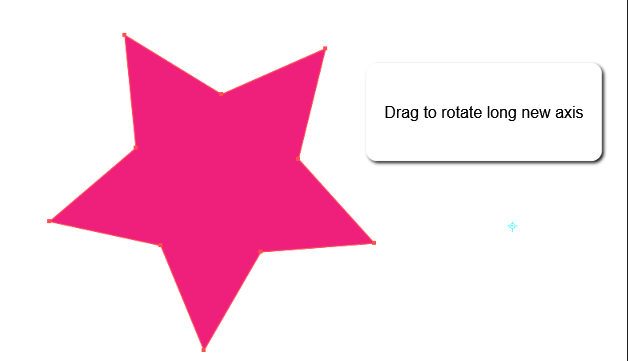
To rotate your object around a different point, click anywhere in your artboard. This will reposition the point that your object is rotated around. Then click and drag to rotate your object.
To rotate a copy of your original object, hold Alt or Option while dragging.

How to Use the Reflect Tool in Illustrator
You can do a free-hand reflect or reflect a specific angle.
Step 1: Choose the Reflect tool in the toolbar, or use the keyboard shortcut O. Select your object.

Step 2: You will now need to draw the line that your object will reflect across. Click to set the first axis point.

Step 3: Click to set the second axis point. Your object will reflect across the line.

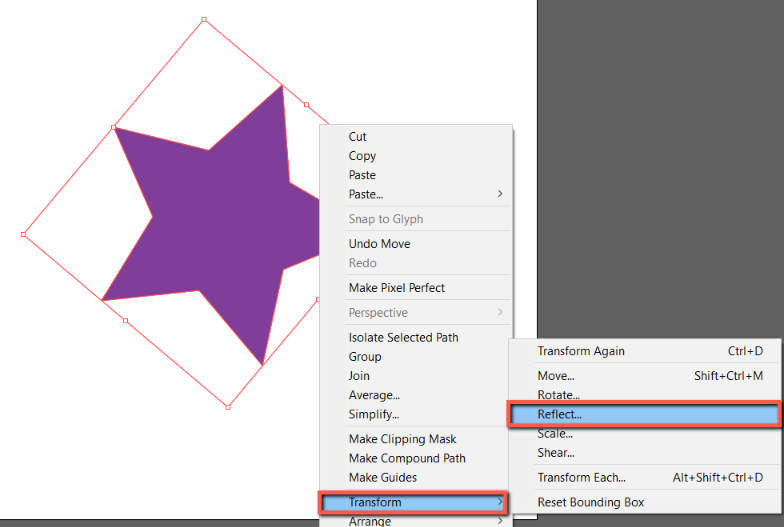
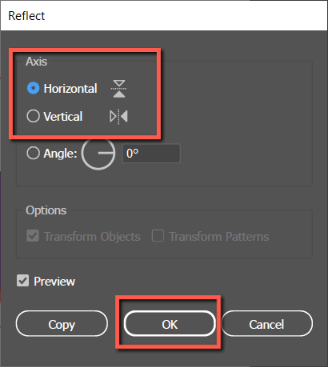
Alternatively, you can right-click on the object, and click on Transform > Reflect to open the Reflect menu.
Step 2: Select Horizontal or Vertical. Adjust your angle of reflection. When you are done click OK.
How to Rotate/Reflect Multiple Objects
In some instances, you may want to rotate or reflect more than one object by the same angle in place simultaneously. Here’s how to do it:
Step 1: Select your objects.

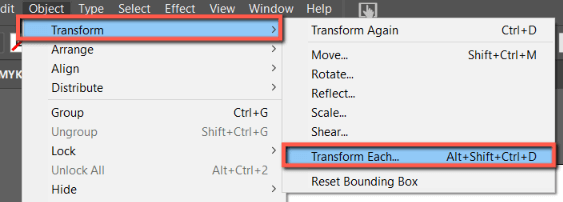
Step 2: Click on Object > Transform > Transform Each. This will option the Transform Each menu. Alternatively, you can use the keyboard shortcut Alt/Option + Shift + Ctrl/Command + D.
Step 3: To rotate your objects, change the Angle under Rotation. To reflect your objects, check Reflect X or Reflect Y. When you are done click OK.
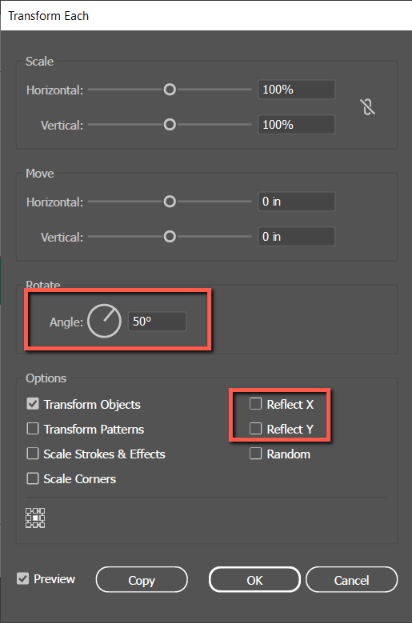
Step 3: Your objects will reflect your modifications.

How to Rotate/Reflect Objects in Illustrator for iPad
Flipping objects in the Illustrator iPad version is different. Here’s how:
Step 1: Select your object(s).
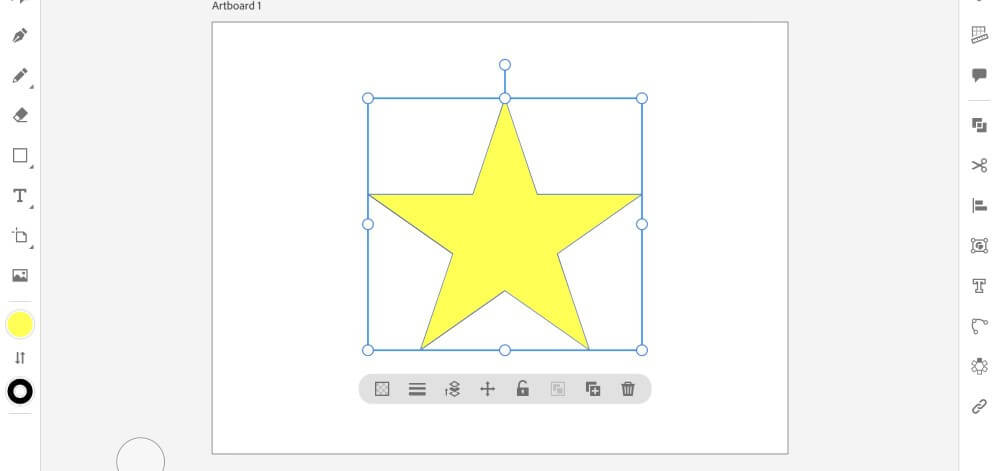
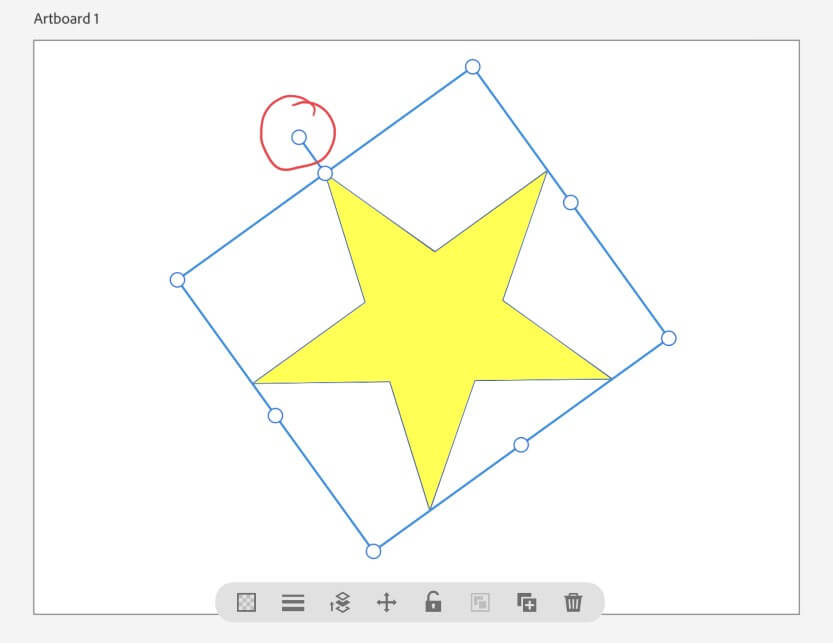
Step 2: Using the rotate point in the bounding box, click and drag to rotate your object.
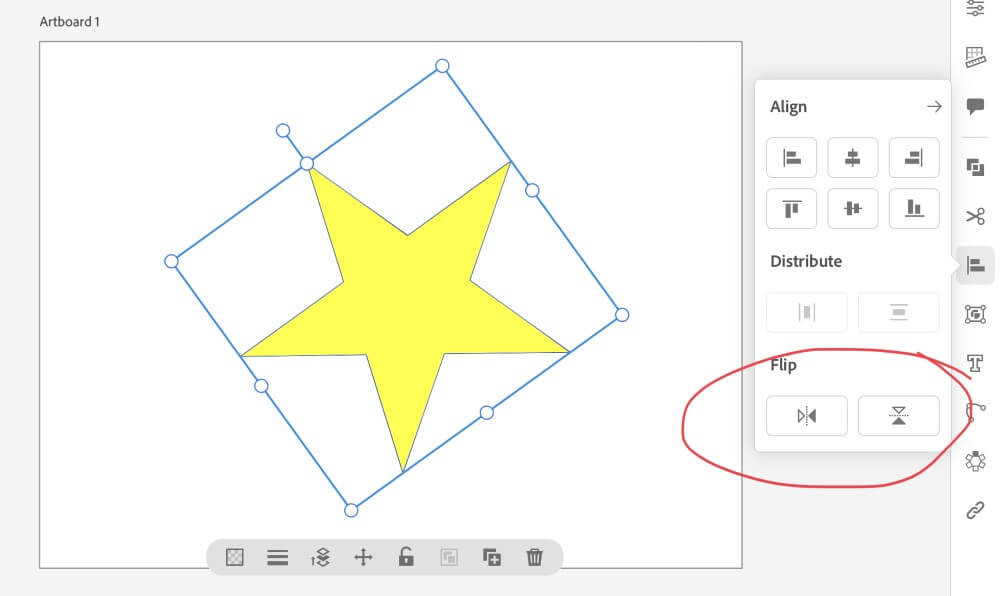
Step 3: To reflect your object, click on the Flip Horizontal or Vertical icons.
Final Thoughts
There are many ways to rotate and reflect objects in Adobe Illustrator using the Bounding Box, Free Transform Tool, the Transform Panel, the Rotate Tool, and the Reflect Tool. Learning each individual method can seem tedious, but can be useful for optimizing your future illustrator workflows. Experiment to find which method you like best.
Furthermore, remember the keyboard shortcuts for the Selection, Rotate, Reflect and Free Transform tools. The ability to easily access tools will further optimize your design process.
Which method to rotate and reflect objects in Adobe Illustrator did you like best? Tell me in the comments below!
