Learning how to create and extract illustrations with a transparent background is crucial for various outcomes like creating designs for printing, websites, and more. It allows you to easily blend your art into any setting without being limited by a background.
Hey there, I’m Zoe, an illustrator and graphic designer. Through my work, I’ve come to understand the importance of ensuring my artwork can easily have a transparent background. Even if you didn’t plan it that way initially, you might want to showcase your character, blend elements, or create products like posters or t-shirts using your artwork.
In this tutorial, I’ll take you through the steps of achieving transparency in Clip Studio Paint. We’ll cover everything from setting up a new canvas to be transparent, toggling your background layer, erasing the paper from hand-drawn sketches, manually removing backgrounds, and properly exporting your artwork with transparency.
Let’s get started!
Table of Contents
Key Takeaways
- Begin with a background you can toggle on and off, as well as separate layers for future flexibility in isolating elements.
- Combine different selection tools, both manual and automatic, to handle different parts of your artwork.
- Always choose PNG format for images with transparency.
Note: All screenshots from this tutorial are taken from the CSP Mac version.
Here’s the step-by-step guide to making your background transparent in Clip Studio Paint.
How to Add a Transparent Canvas in Clip Studio Paint
When starting a new image, you can ensure a transparent background right from the beginning. Here’s how:
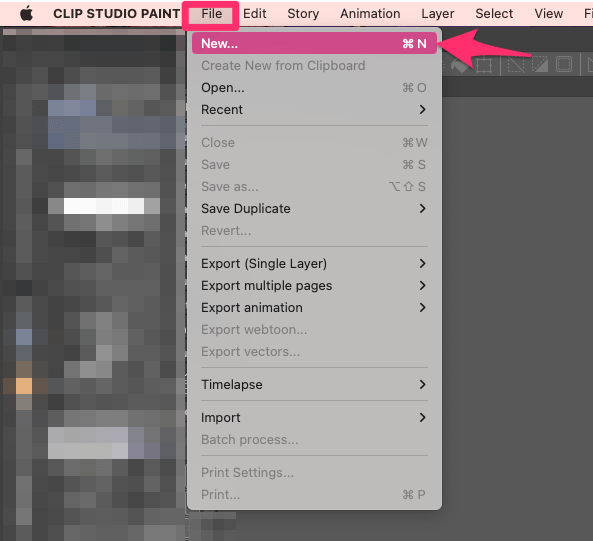
Step 1: When creating a new illustration, go to the overhead menu File > New.
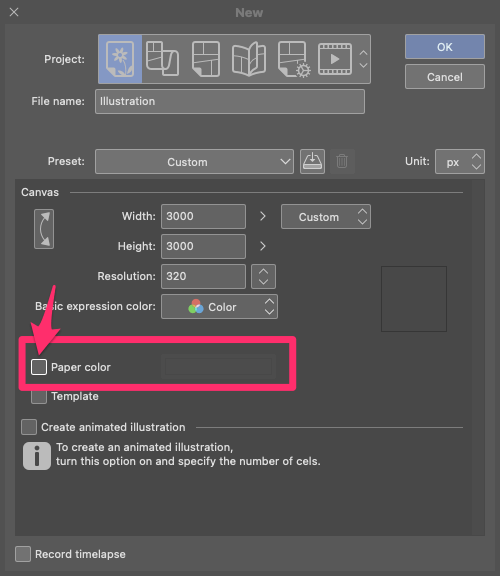
Step 2: In the window that opens, configure your canvas settings (such as size and resolution) and uncheck the Paper Color option.
It’s a good practice to create your drawings on separate layers, even if you plan to include a background. This approach gives you the flexibility to isolate elements later on if necessary.
Toggling your Paper Layer On and Off in Clip Studio Paint
If you have an existing Clip Studio Paint file with a background and want to make it transparent, follow these steps:
Step 1: Open the .clip file in Clip Studio Paint.
Step 2: Hide the paper layer by clicking the visibility icon in the Layer palette. The transparent area will appear as a checkerboard pattern.
With these steps, you’ll be able to manipulate your artwork in a more flexible and creative way.
Extracting Scanned Line Art in Clip Studio Paint
To turn your hand-drawn line art into a digital format that’s ready for coloring, you can use Clip Studio Paint’s Convert Brightness to Opacity function:
Step 1: Open your hand-drawn line art in Clip Studio Paint.
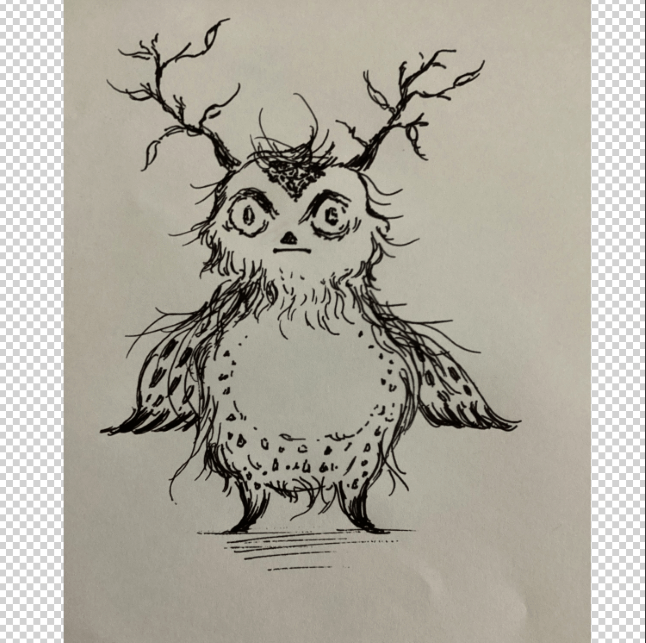
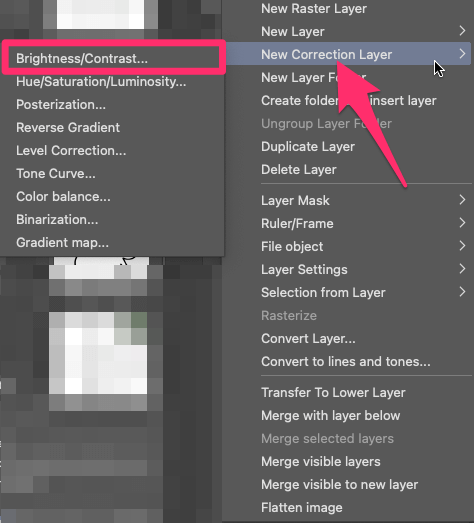
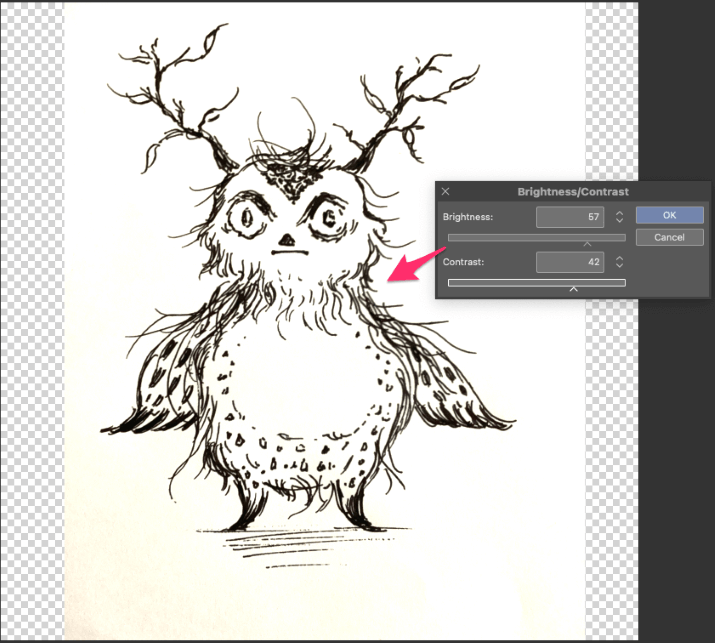
Step 2: If your background is grayish, you may want to adjust the brightness before converting your drawing. Simply right-click on the Layer Palette, then navigate to New Correction Layer > Brightness/Contrast.
Step 3: Modify the sliders until your lines clearly stand out from the background, maintaining their quality.
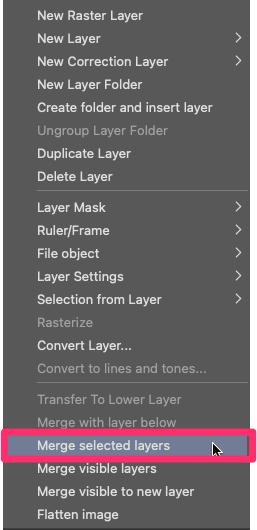
Step 4: Merge your Correction Layer(s) with your drawing layer. To achieve this, select the layers, right-click, and opt for Merge Selected Layers.
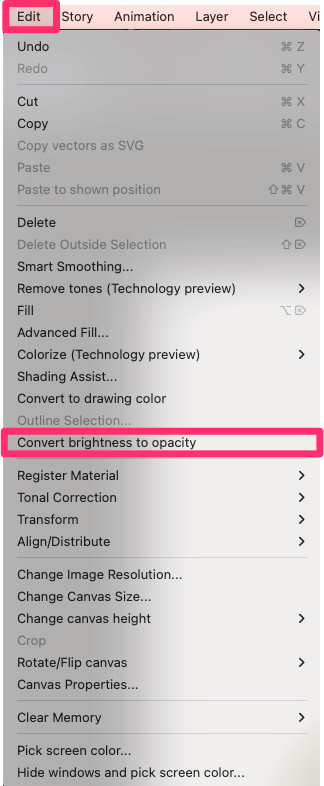
Step 5: Go to Edit > Convert Brightness to Opacity. This function detects the white areas in your drawing and makes them transparent.
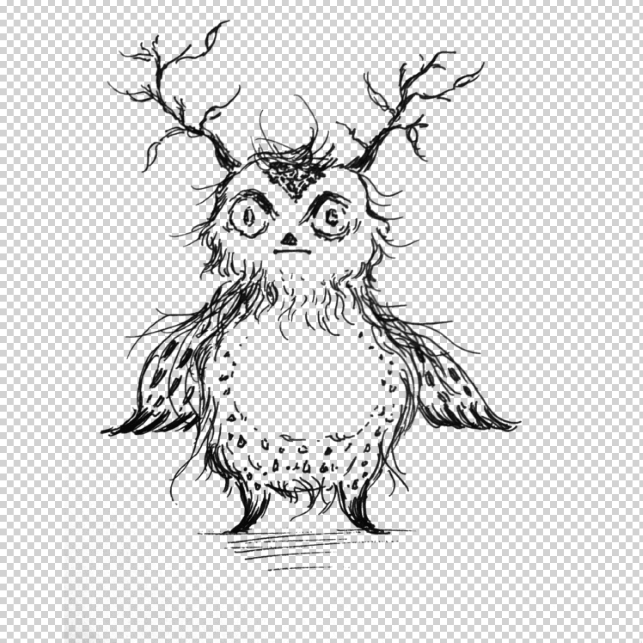
The Convert Brightness to Opacity function is great for scanned pencil or ink drawings, but it’s not intended for removing backgrounds from colored images. If the image is colored, it might remove lighter colors and the outcome may not be as neat.
Making Colored Images Transparent in Clip Studio Paint
When it comes to colored images, Clip Studio Paint doesn’t provide the same advanced selection and isolation methods as, say, Photoshop. You’ll need to take a more hands-on approach.
Here are a few techniques you can use to achieve a transparent background:
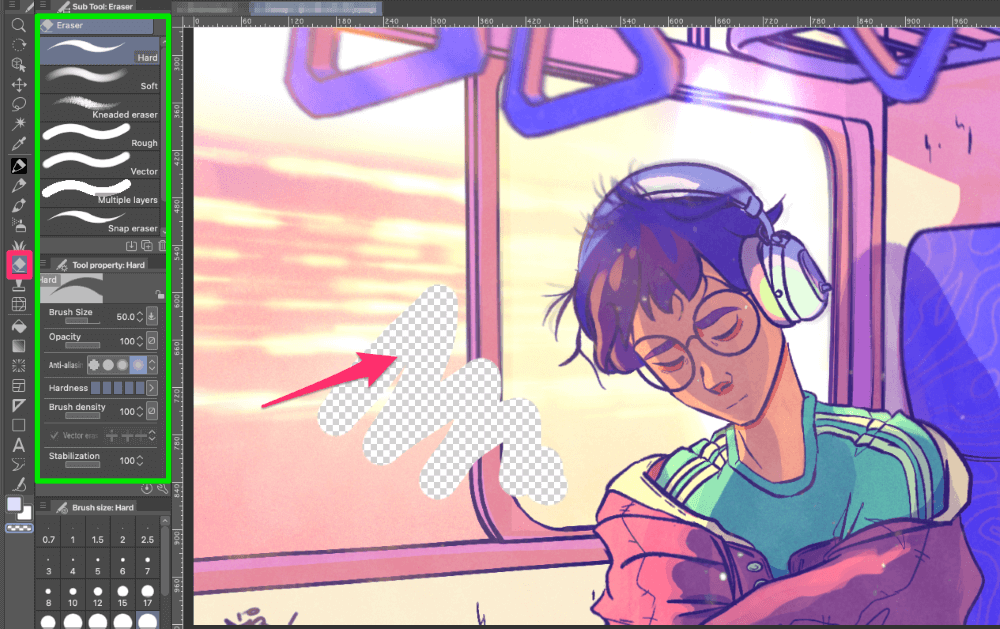
Eraser Tool: Choose the Eraser tool and erase the areas around the element you want to isolate.
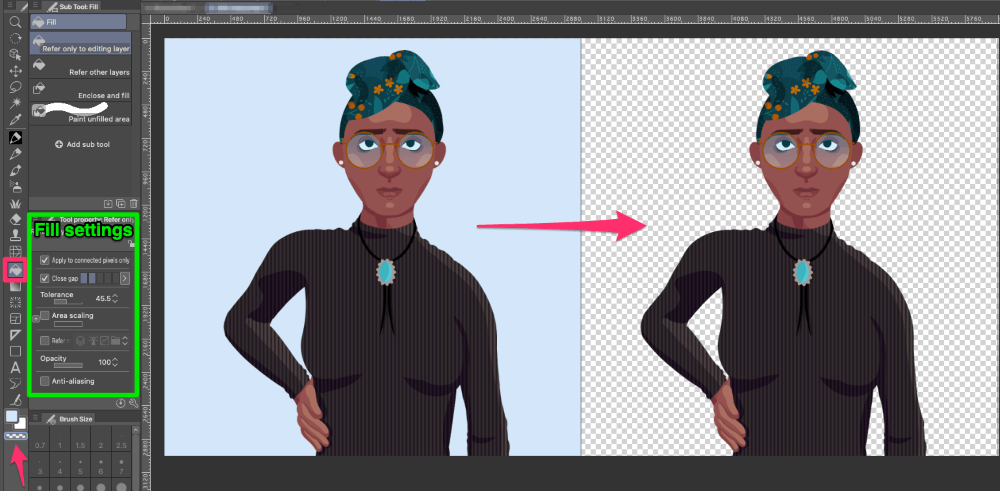
Fill Tool: If you’re dealing with a white or flat-colored background, this method works well. Pick transparency as the drawing color with the Fill tool selected, and then fill in the background areas using the transparent color.
You can fine-tune the tolerance to control which colors are affected.
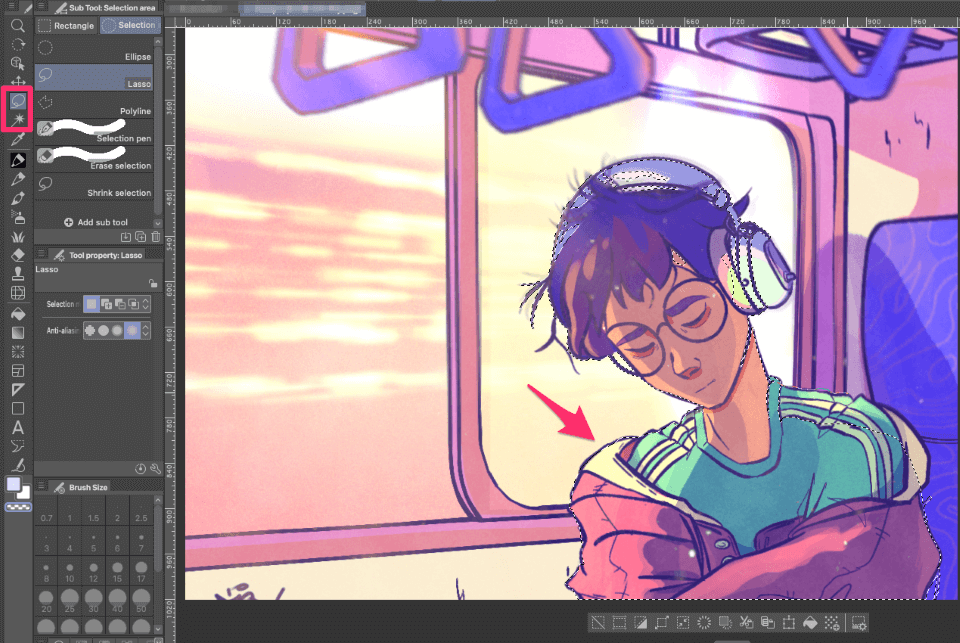
Selection Tools like Lasso Tool or Auto Select Tool: If your subject is tricky to capture automatically, manual methods can be helpful. Use the Lasso Tool to manually draw an outline, refining edges in the Select Menu as needed.
For subjects with continuous areas of the same color, the Auto Select Tool might work well. You can add to your selection using the Shift key.
Just remember, every image is unique. You might need to try different methods or even use a combination of them for different parts of one image. Feel free to try out these techniques and see which ones work best for your artwork. Mix and match as needed!
Exporting a Transparent Image in Clip Studio Paint:
Once you’ve successfully created a transparent background, it’s important to export your image in the correct format to keep the transparency. Here’s how:
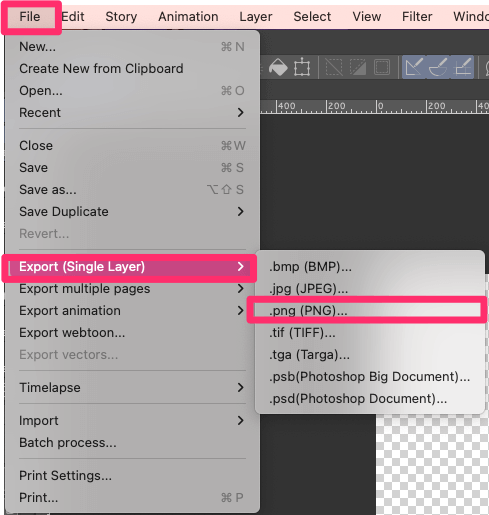
Step 1: Click on the File menu at the top of the screen. From the dropdown menu, select Export (Single Layer) and choose the .png option from the export format options.
Step 2: Select the destination folder where you want to save your exported image.
Step 3: Give your image a name and click the Save button.
By following these steps, you’ll make sure your transparent background stays intact when exporting your image in Clip Studio Paint. To maintain transparency, always choose the PNG format over JPEG or BMP.
Final Thoughts
Whether you’re starting with transparency, hiding layers, using tools like Convert Brightness to Opacity, or isolating elements with selection tools, these techniques give you more control over your background.
This is very handy for creating designs for websites or print materials like brochures, posters, or portfolios that might be printed on different colored paper. They also help you layer elements effortlessly, useful for creating complex designs or making quick edits without background hassles.
Any questions or insights about working with transparent backgrounds? Share them in the comments below!
