Previewing is essential in video editing and animation, enabling you to check your work with a quick spacebar glimpse or a detailed Numpad-0 RAM preview, without needing a final render.
Hi, I’m Zoe, a graphic designer and avid After Effects user. For anyone familiar with After Effects, the value of the preview feature is undeniable. It allows you to view and refine your work, frame by frame. From creating detailed animations to perfecting video edits, I’ve depended on these preview features to make sure my final outputs align with my creative vision.
In this post, I’ll guide you through the essentials of using the Preview panel in After Effects. We’ll cover the basics of previewing, explore different preview shortcuts, how to play your video step by step, understand the significance of each option under the video preview, configure preview behaviors for optimal results, and fix lagging previews.
Let’s get started!
Table of Contents
Key Takeaways
- Caching and RAM are key to smooth previews; they store and process your frames for playback.
- The spacebar is for quick, real-time previews but may not always be smooth if your system lacks sufficient RAM.
- Numpad-0 offers a detailed RAM preview, caching frames first for smoother, more accurate playback.
- Different previews (like Spacebar and Numpad-0) serve varied purposes, from quick checks to detailed inspections.
- Configuring preview settings in After Effects lets you customize previews to fit your specific project needs.
- If your preview is lagging, solutions include lowering resolution, clearing cache, or using proxy files for efficiency.
Note: All screenshots from this tutorial are taken from the After Effects Mac version.
This article is a comprehensive guide on using the Preview panel in After Effects.
How Does Video Preview Work
First things first, it’s essential to grasp the basics of the preview function in After Effects. Previewing is a crucial part of the editing process, allowing you to see your work in motion before the final render.
Let’s break down some technical terms to understand this better:
- RAM (Random Access Memory): This is where your computer temporarily stores data. In After Effects, RAM is used to store and playback frames during the preview.
- Cached Frames: These are frames that have been processed and stored in RAM. Caching frames helps in smoother playback as they don’t need to be reprocessed.
Keyboard Shortcuts and Their Functions
After Effects is equipped with several keyboard shortcuts to facilitate previewing:
- Spacebar: Commonly used for quick previews, it plays back with audio using available RAM. If there’s not enough RAM to cache the entire sequence, the playback may be less smooth and slower than real-time. It’s faster for brief checks since it doesn’t cache the entire sequence first.
- Shift + Spacebar: Useful for visually checking your work as it plays back the video without audio.
- Numpad – 0: Initiates a smoother, more accurate preview of both video and audio by caching the entire sequence in RAM beforehand. This can delay the start of playback as After Effects prepares frames for smooth, real-time playback. Ideal for detailed reviews and checking synchronization.
- Shift + Numpad – 0: Initiates a RAM preview from where your current time indicator is positioned, focusing on a specific segment.
- Option/Alt + Numpad – 0: Ideal for a rough, quick preview, this starts a RAM preview with draft quality, sacrificing resolution for speed.
How to Use Preview in After Effects
Now that you understand the different types of previews and how to initiate them, follow these steps to play a standard preview of your video in After Effects:
Step 1: In the Timeline panel, choose the composition you wish to preview. If it’s a new project, drag your video file onto the timeline to create a composition.
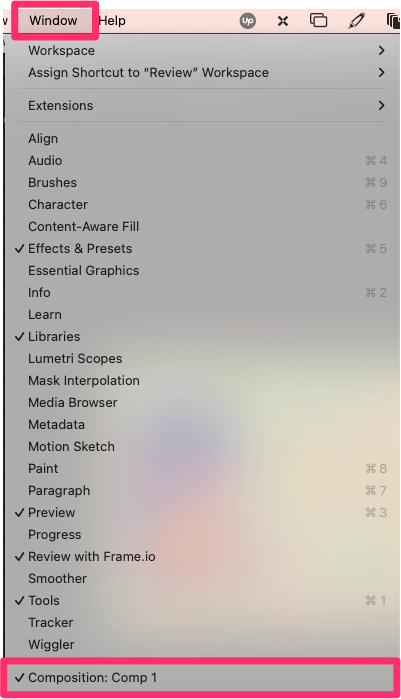
Step 2: Access the video preview, usually located above the Timeline Panel. If it’s not visible, you can find it under Window > Composition [your composition’s name].
Step 3: Simply hit the spacebar to begin the preview. To stop, hit the spacebar again.
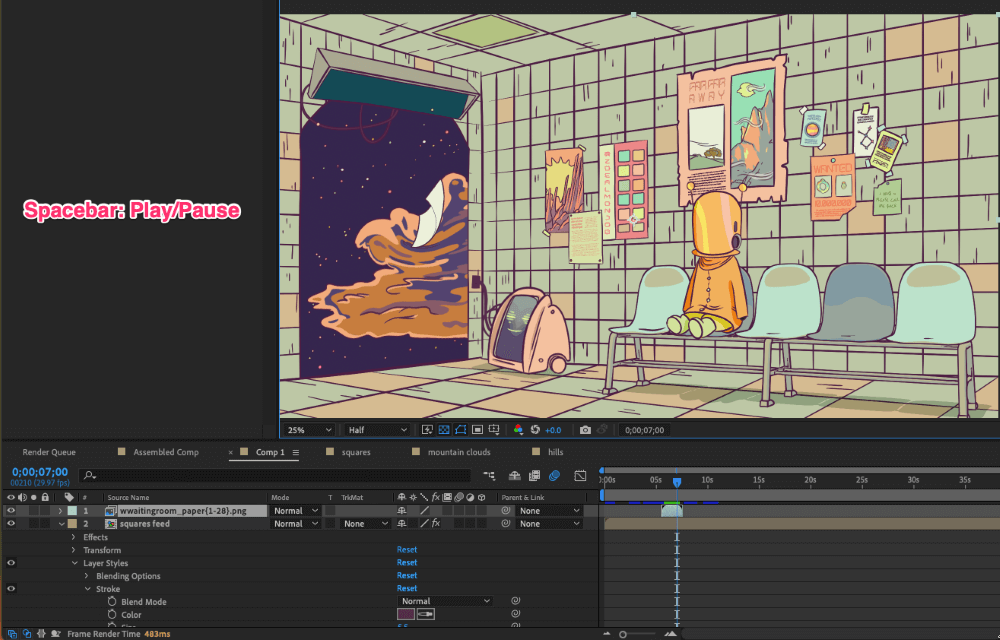
You can now initiate a preview from any point by positioning the playhead on the timeline and pressing the spacebar!
Preview Options
The options under the video preview enhance your control over how you view your composition:

- Magnification Ratio controls the zoom level of your preview, allowing you to focus on details or see the bigger picture.

- Resolution: Changing this alters the clarity of your preview. Lowering the resolution can make previews run faster, as it requires less processing power.

- Fast Preview icon offers modes like wireframe or draft quality for quicker previews, especially useful when working on complex compositions.

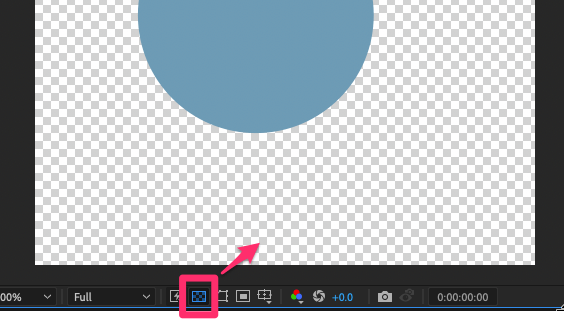
- Toggle Transparency Grid icon shows or hides the transparency grid, useful for checking transparent areas in your composition.

- Region of Interest icon enables you to focus on a specific area of your composition, saving time and resources by only previewing that segment.

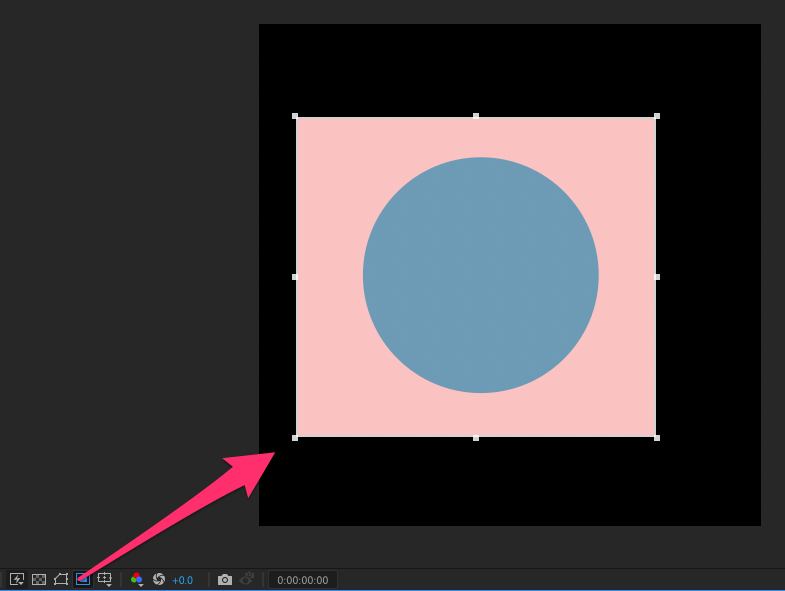
- Grid and Guide icon toggles the visibility of grids and guides, aiding in alignment and composition.

- Preview Time adjusts this to enter a specific time for your preview, useful for examining particular moments in your composition.

Using these tools, you can customize how you preview your work in After Effects, making your editing faster and more focused.
Configuring Preview Behaviors
The Preview Panel is usually located on the right side of After Effects. If it’s not visible, you can find it under Window > Preview.
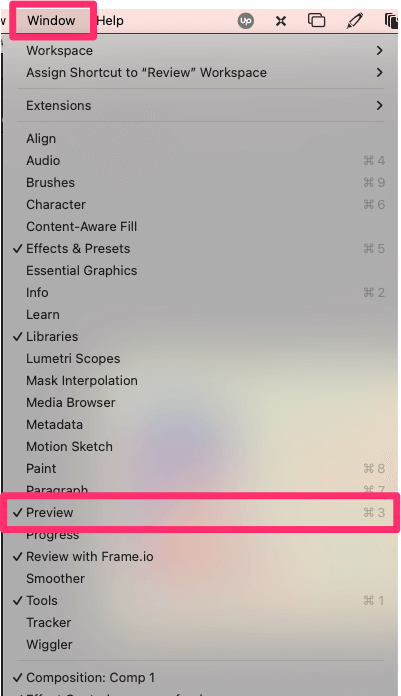
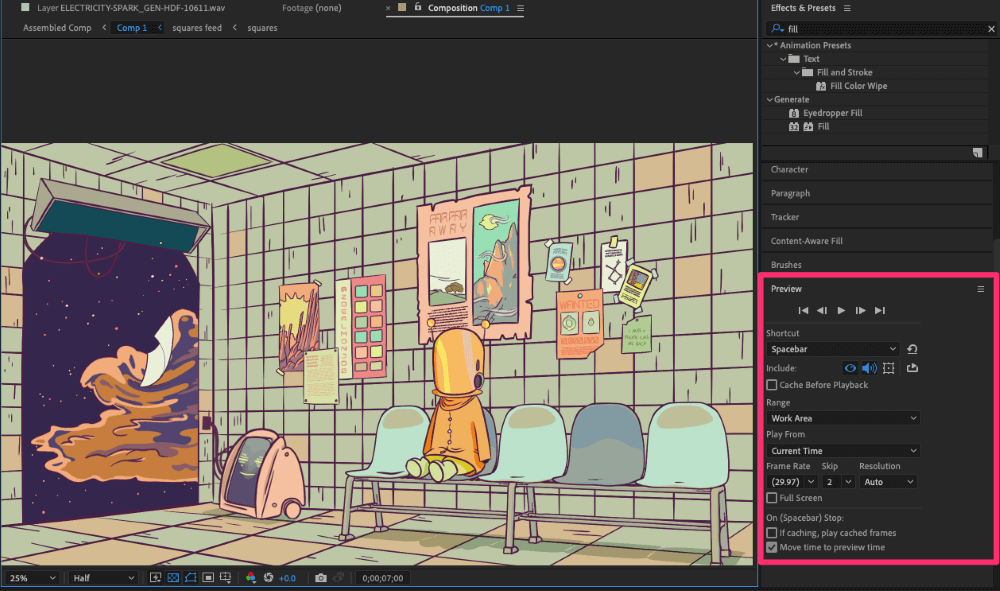
The Preview Panel provides deeper customization options to enhance your preview experience:
- Playback Control Buttons: Here, you’ll find buttons for First Frame, Previous Frame, Play, Next Frame, and Last Frame, which allow detailed, frame-by-frame navigation within your composition.
- Configure shortcuts: Personalize the behavior of each keyboard shortcut for previews.
- Include video/audio/overlays: Select the elements you want in your preview.
- Loop Options: Decide if your preview should loop and how it should do so.
- Cache before playback: This option lets After Effects process and store frames in RAM before playback, ensuring smoother previews.
- Range: Set a specific section of your composition for previewing.
- Play from: Choose whether the preview starts from the current time or a pre-defined range.
- Frame rate and resolution: Adjust these for varying preview qualities, balancing clarity and playback speed.
- Full-screen checkbox: Toggle this for an immersive full-screen preview.
- On spacebar stop options: This setting determines what happens when you pause the preview, like whether to play cached frames or move the time indicator.
With these Preview Panel settings, you can make your previews work just the way you need them to.
Troubleshooting Lagging Previews in After Effects
Experiencing lag in your After Effects previews can be frustrating, especially when it disrupts the flow of your creative process. Common reasons include insufficient RAM, high-resolution settings, complex effects, or a large number of layers. Knowing the cause can help you choose the most effective solution.
Let’s go through the steps for each solution to help you achieve smoother previews.
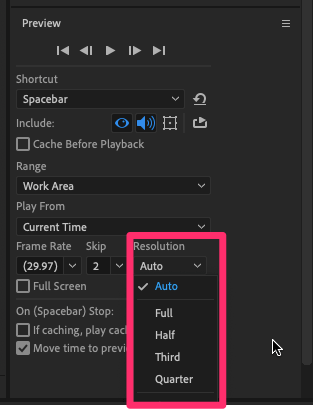
- Lower the Resolution: In the Preview Panel, find the Resolution dropdown. It’s usually set to Full by default. Click on it and select a lower setting, like Half or Third. This reduces the detail level of your preview, easing the load on your system.
- Use RAM Preview: Press Numpad – 0 instead of the spacebar. This allows After Effects to cache your frames to RAM before playback, which can help with smoother previews.
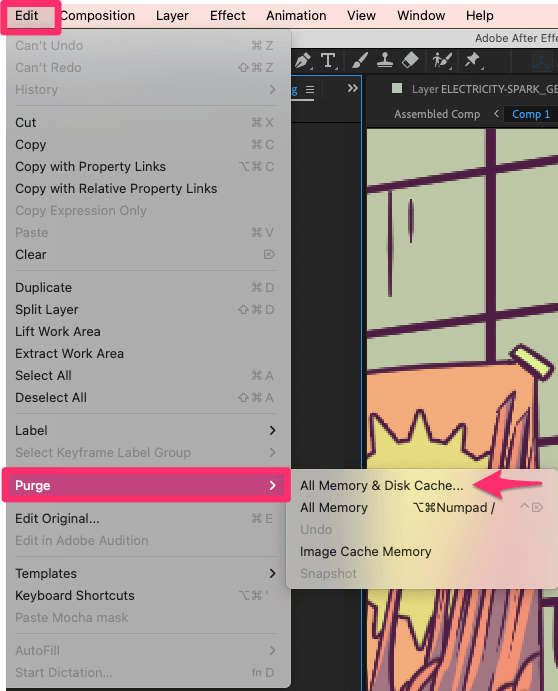
- Clear Cache Regularly: Go to Edit > Purge > All Memory & Disk Cache. This clears the cached data and can free up system memory.
- Simplify Your Composition: Temporarily turn off effects by clicking the fx icon next to the layer names. You can also hide layers that aren’t essential for your current preview by clicking the eye icon next to them.


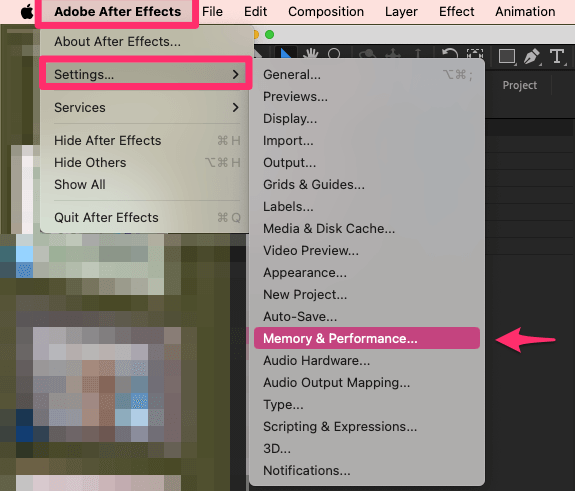
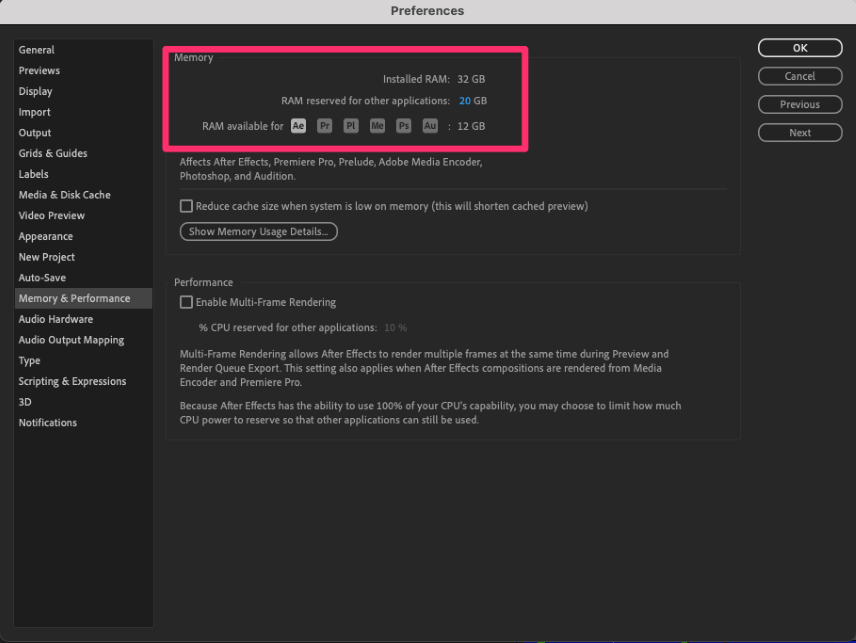
- Allocate More RAM to After Effects: Go to Adobe After Effects > Settings > Memory & Performance. Here, you’ll see an option to adjust the amount of RAM allocated to After Effects. Increase this amount for better performance, but ensure other applications have enough memory too.
- Adjust Preview Frame Rate: In the Preview Panel, find the Skip option. Set this to skip frames (like 1 or 2), reducing the frame rate of your preview for smoother playback.
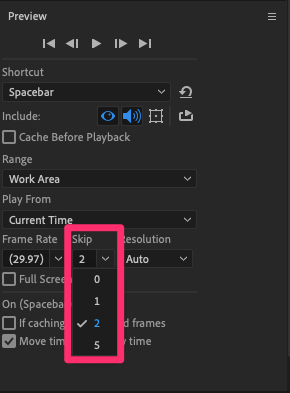
By following these steps, you can tackle the issue of lagging previews in After Effects, leading to a more fluid and efficient editing process.
Final Thoughts
Previewing in After Effects is a vital part of the video editing and animation process. By understanding how to use the Preview Panel and its associated keyboard shortcuts, you can streamline your workflow and enhance your editing experience.
Got any questions, or perhaps a cool trick you’ve discovered in After Effects? Feel free to share in the comments section below!
