
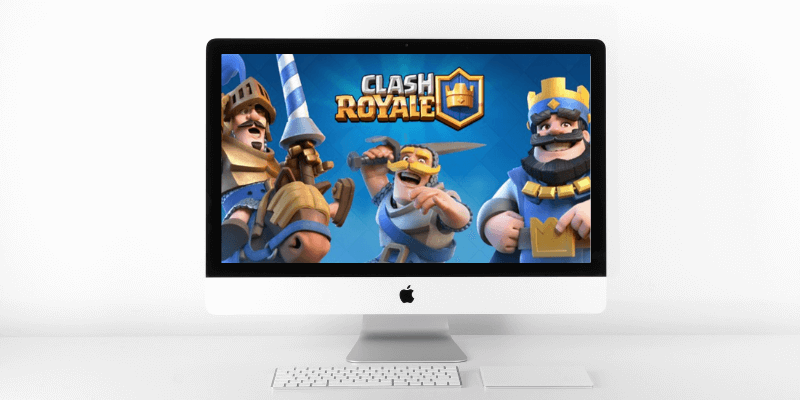
Whether you are a college student or a working adult, life can get pretty stressful. Sometimes you just need to take a break, put your responsibilities aside, and chill. One of my favorite ways to wind down is to play games — and one of the most popular is Clash Royale, a mobile game with 120 million+ players.
Clash Royale is a tower rush video game that combines elements of card collection, tower defense, and multiplayer online battle arena (MOBA) style games. While there is a rank ladder to climb in the game, each match only lasts about 2 minutes. This means fitting a game during a break is easy.
Table of Contents
Why Play Clash Royale on Your Mac Instead of on Your Phone?
There are several reasons: The first, and most important, is the larger screen. Playing Clash Royale on the Mac also makes the in-game controls easier, since you don’t have to use your fingers to press small buttons. It’s also a great solution if you don’t have a smartphone or tablet that supports the Clash Royale app.
How Can You Play Clash Royale on Your Mac?
Because Clash Royale does not offer a macOS app, you must use an emulator to play it on your Mac. An emulator enables a computer system to imitate the functions of another computer system, i.e. it allows the Mac iOS to imitate Android so that you can play Clash Royale on your Mac. We’ll show you how to do this with two of the most popular emulators.
Method 1: Nox App Player
Nox App Player is an Android emulator that allows you to play mobile games on your Mac.
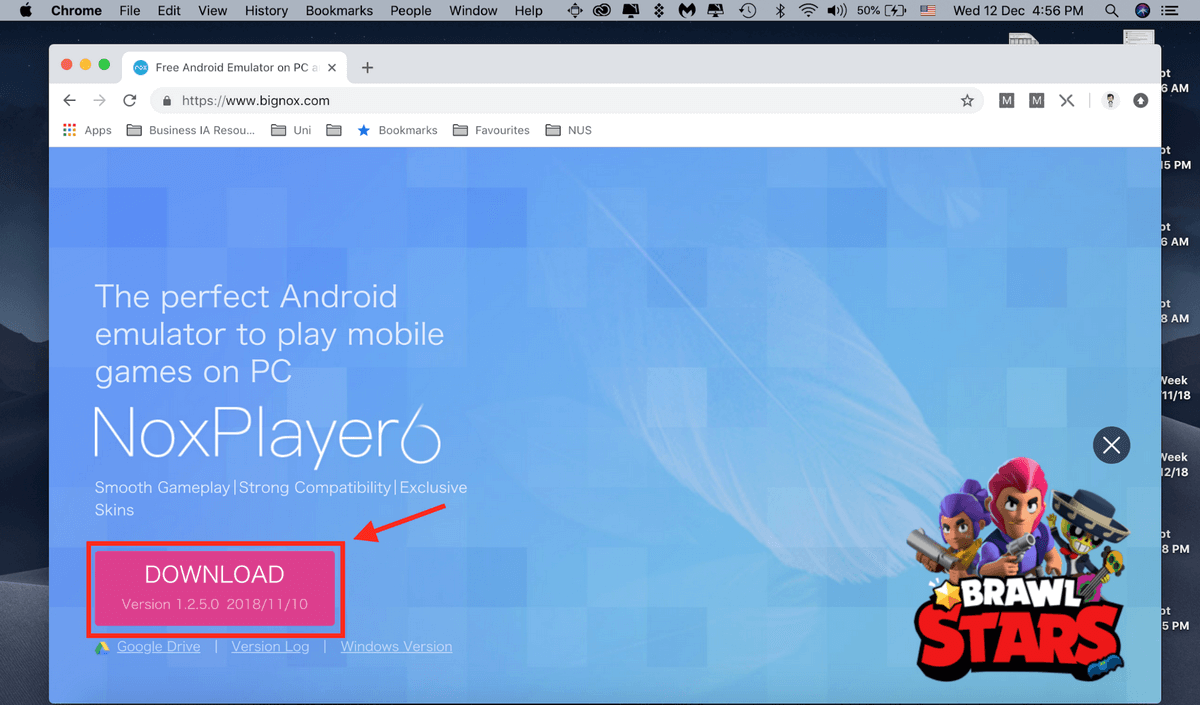
Step 1: Download Nox App Player.
Go to https://www.bignox.com/ and download Nox App Player.
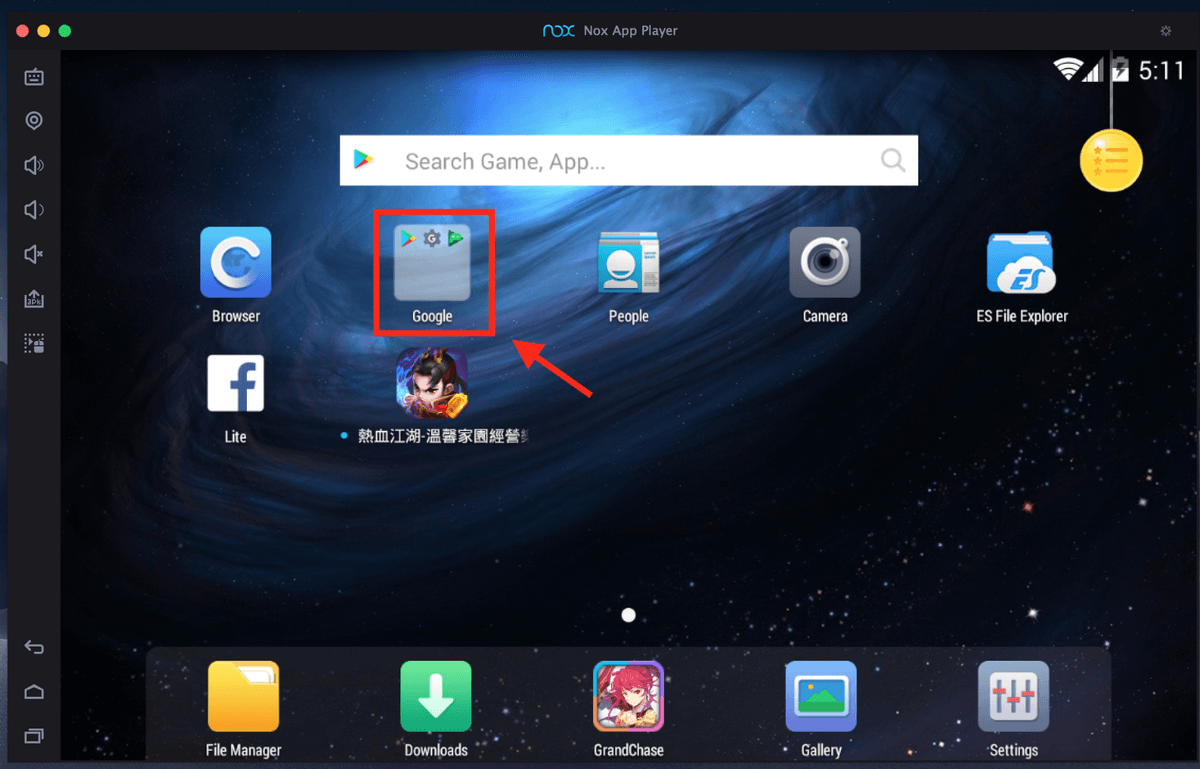
Step 2: Launch Nox App Player.
Upon launching the Nox App Player, you will be directed to the interface that is shown below.

Step 3: Launch Google Play Store.
As you can see, the emulator functions like an Android mobile phone. Next is to launch the Google Play Store. To do that, start by clicking Google.
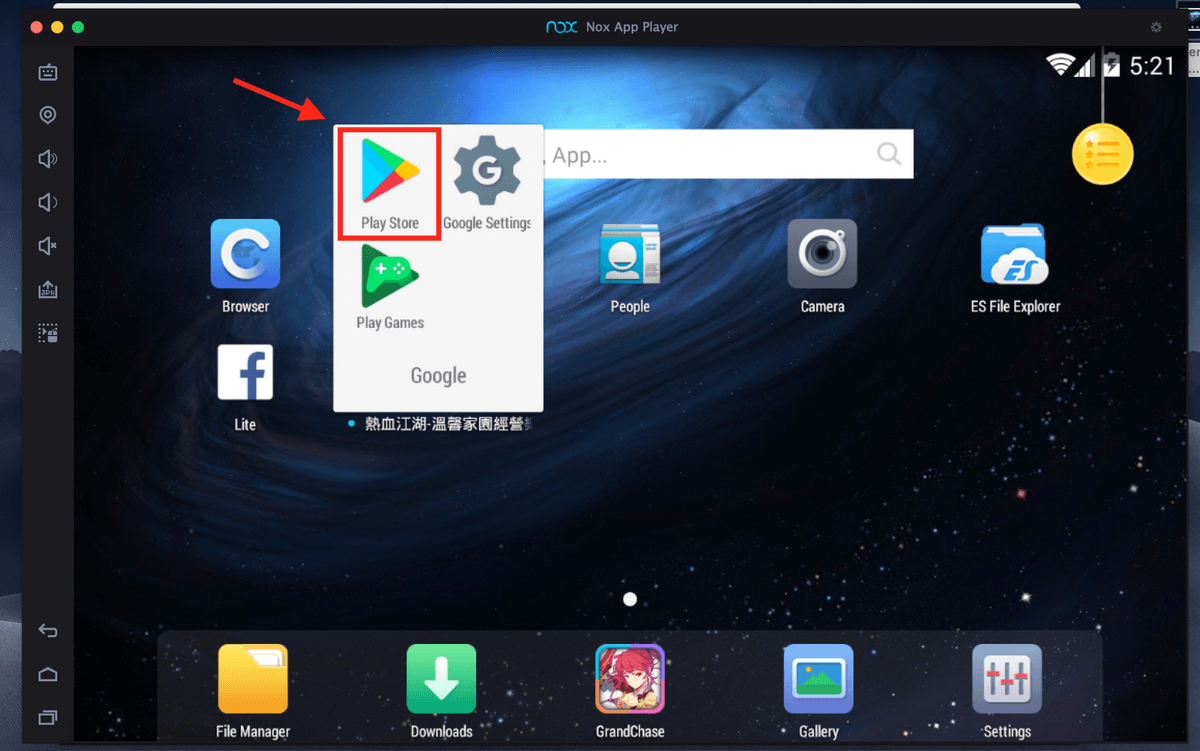
Next, click Play Store. This is the Android version of the App Store.
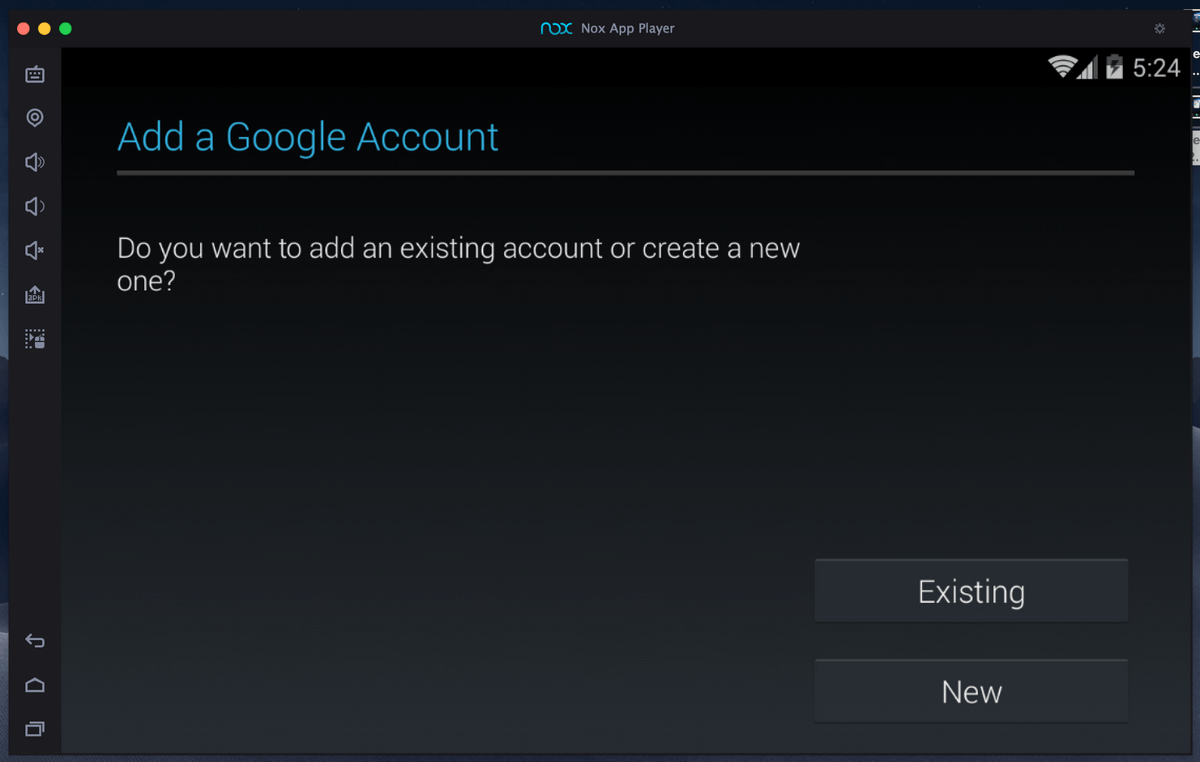
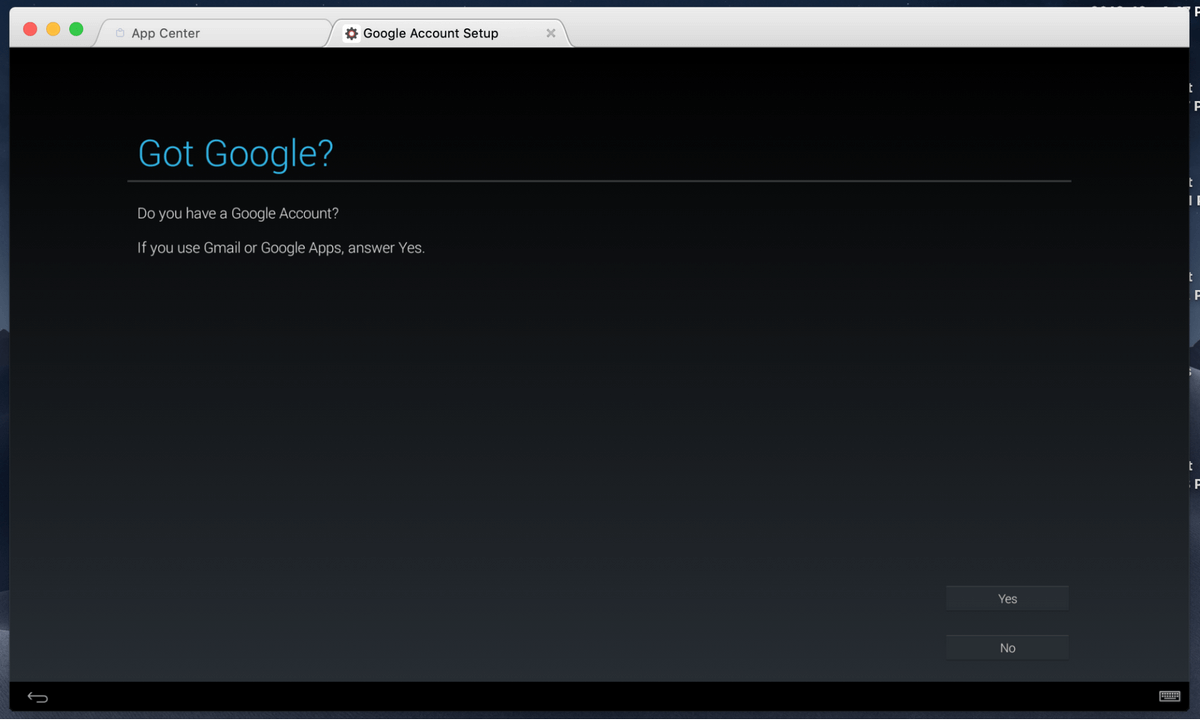
You will then be asked whether you own a Google account. If you do not have an existing Google account, you should go and create one before we move on. To do so, click New. If you already possess a Google account as I do, click Existing.
Step 4: Sign in to Google Play Store.
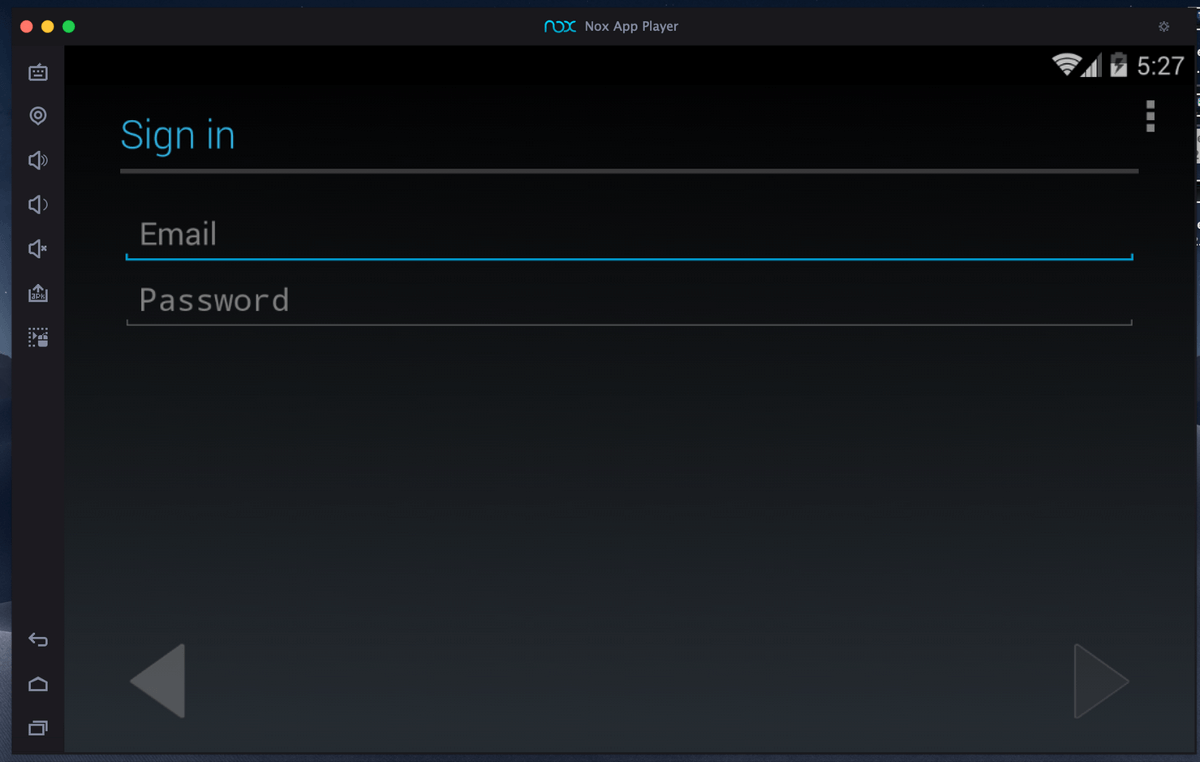
After you have clicked Existing, you will have to key in your email address and password to log in.
Step 5: Install ‘Clash Royale’.
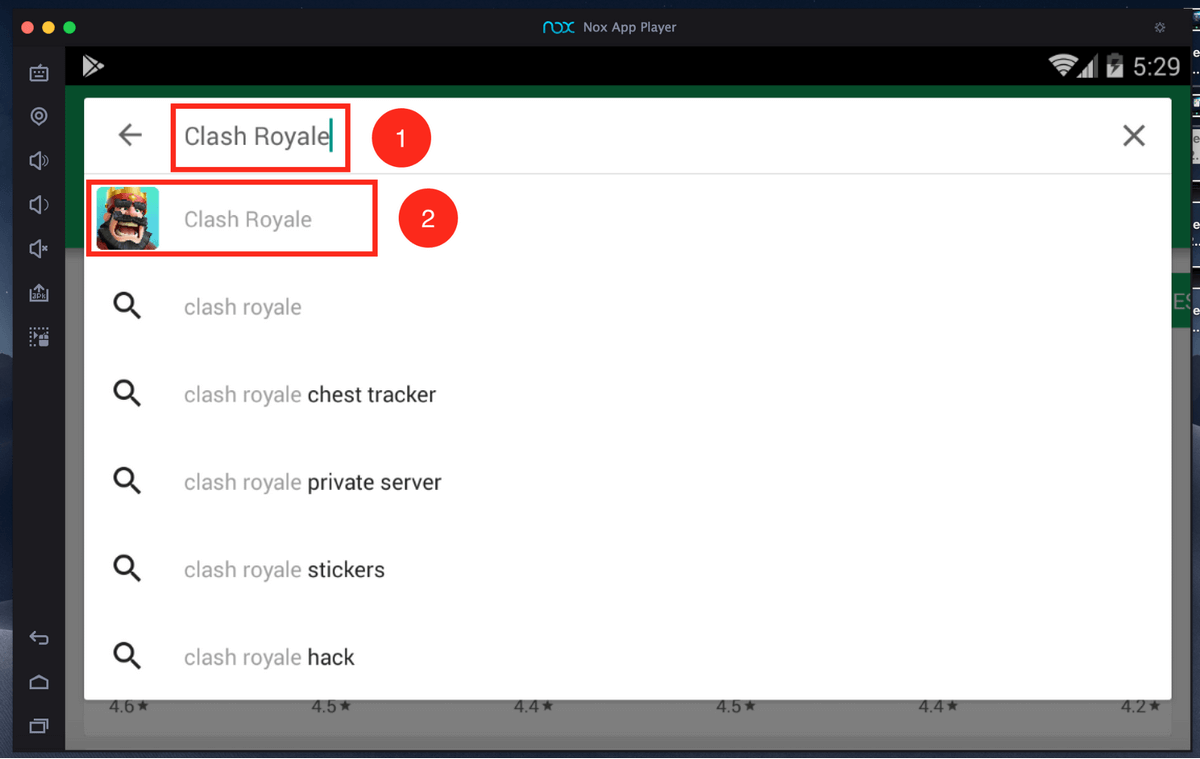
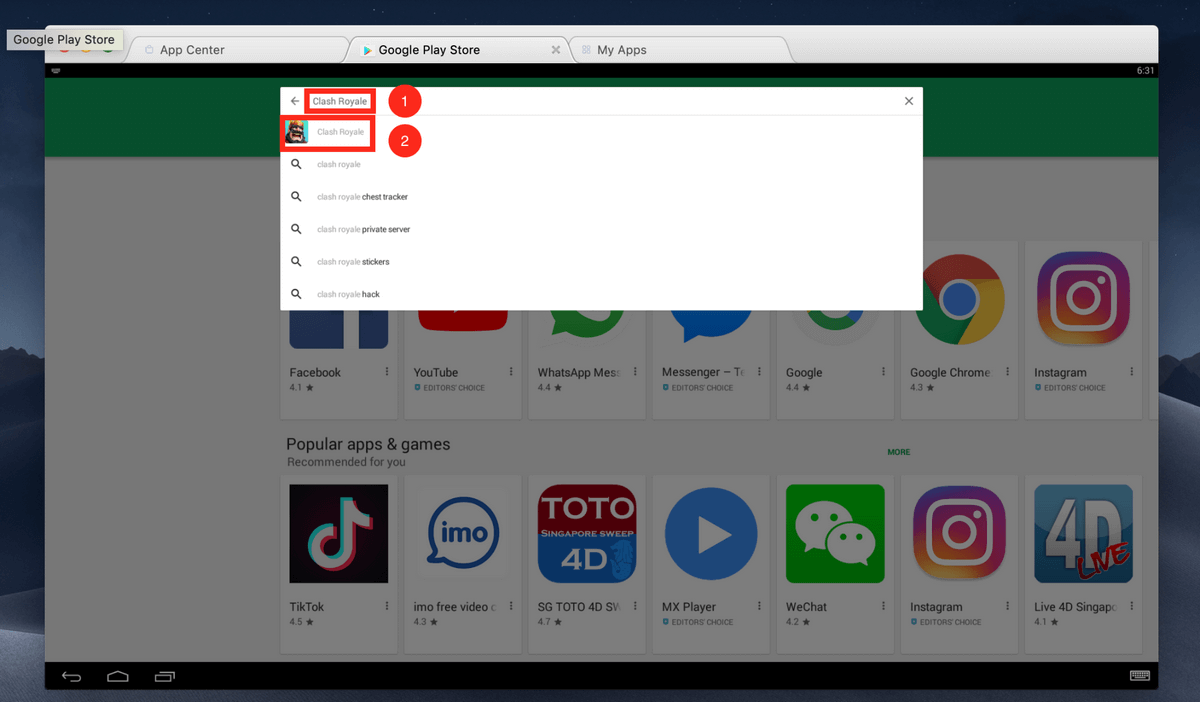
After successfully logging in, search for Clash Royale in the Play Store. Type ‘Clash Royale’ in the search bar. Clash Royale should show up at the top as the first result. Click on it.
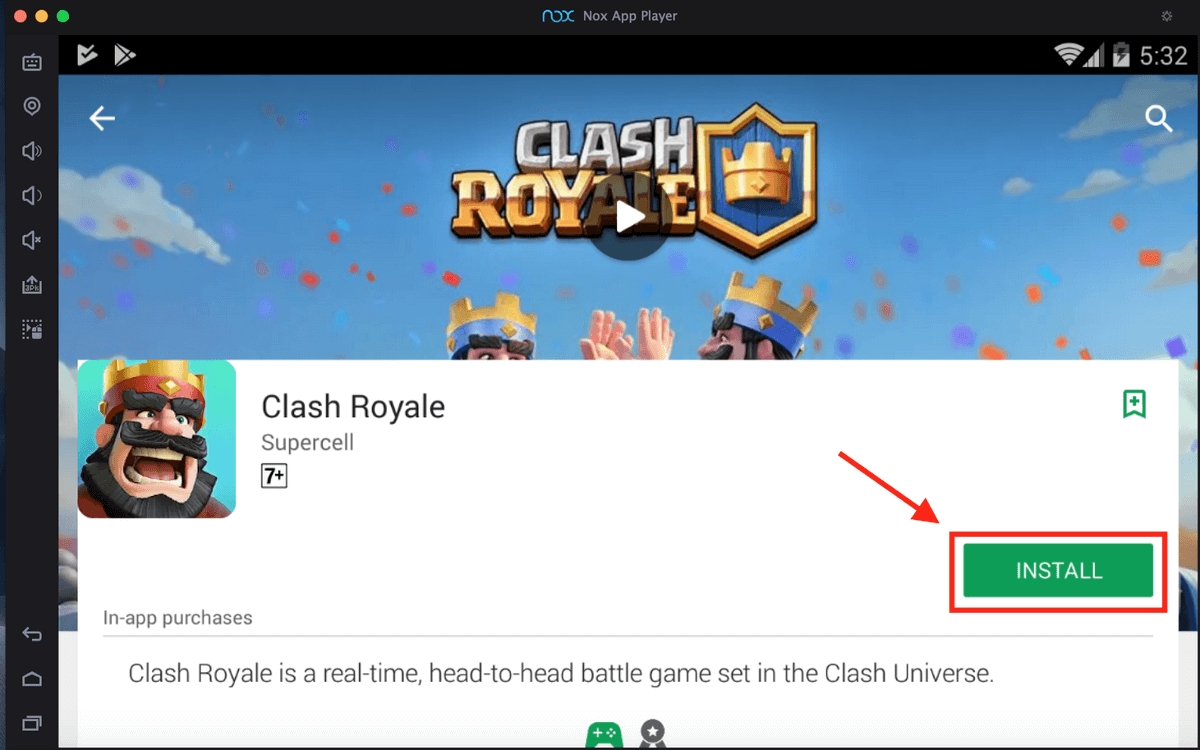
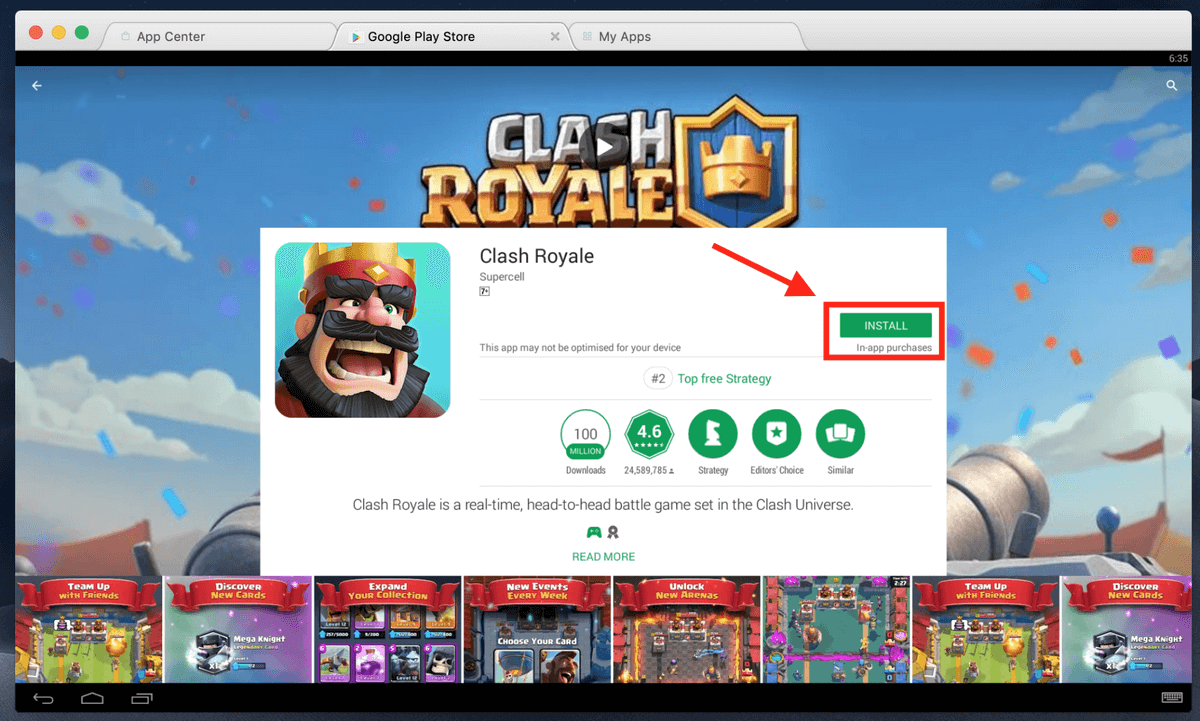
Next, click Install.
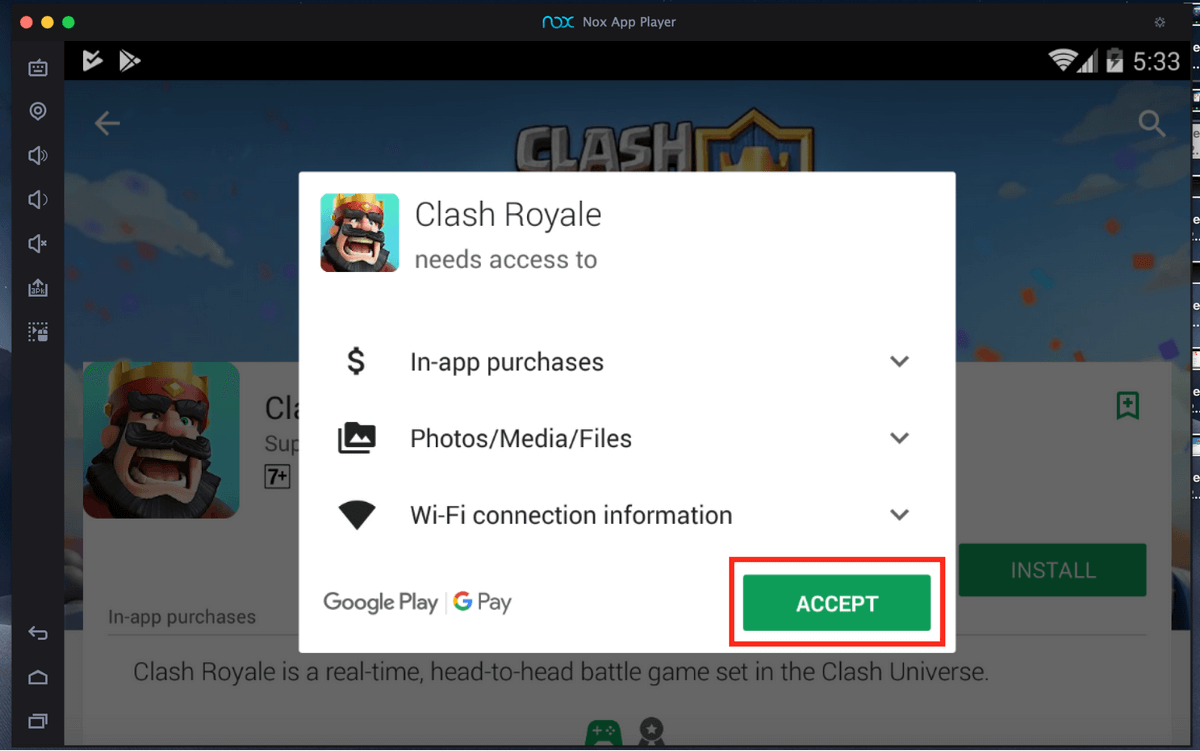
You will be prompted for a confirmation. Click Accept.
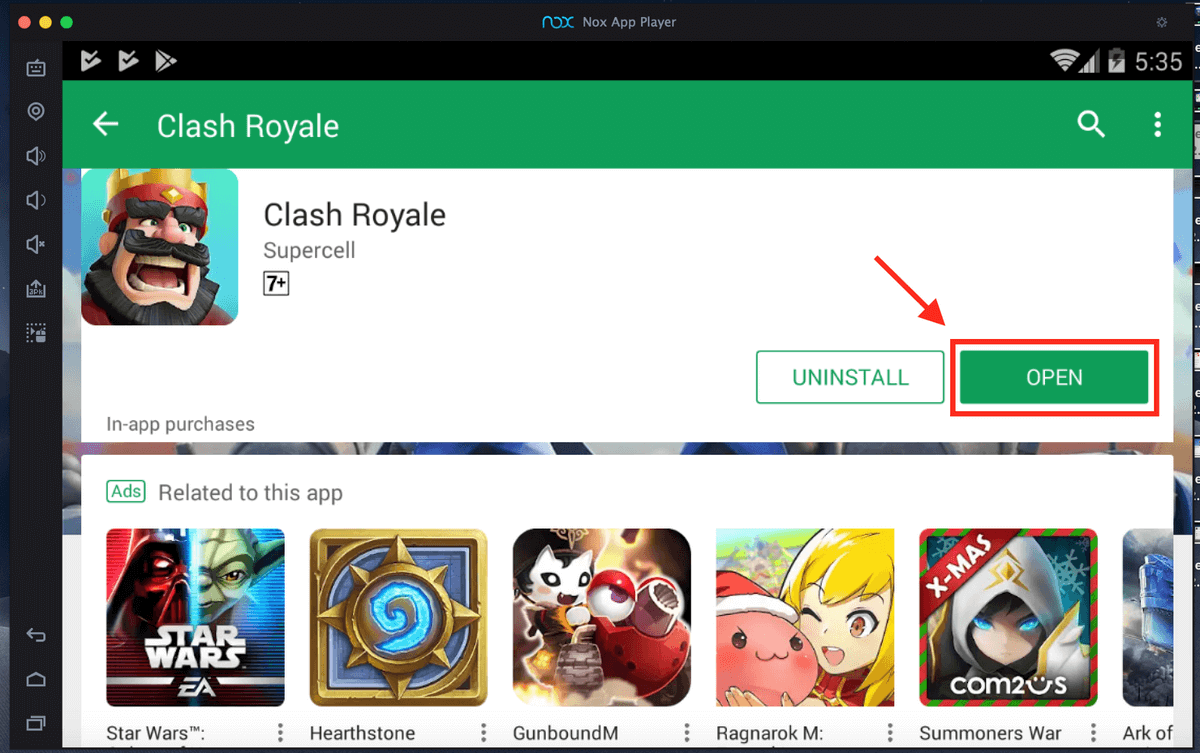
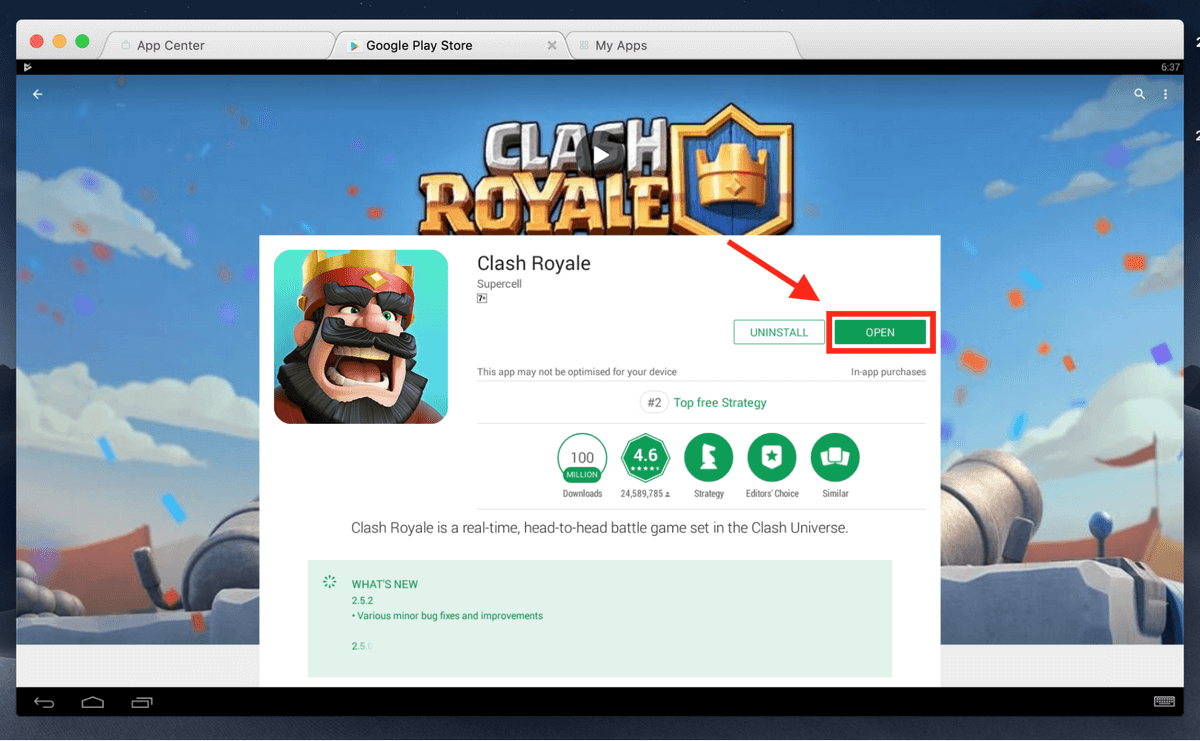
Your download will begin. Once Clash Royale is downloaded, click Open to launch the app.
Method 2: Bluestacks
The second emulator you can use is BlueStacks. It is the oldest and most established Android emulator. You might find it slightly less user-friendly than the Nox App Player.
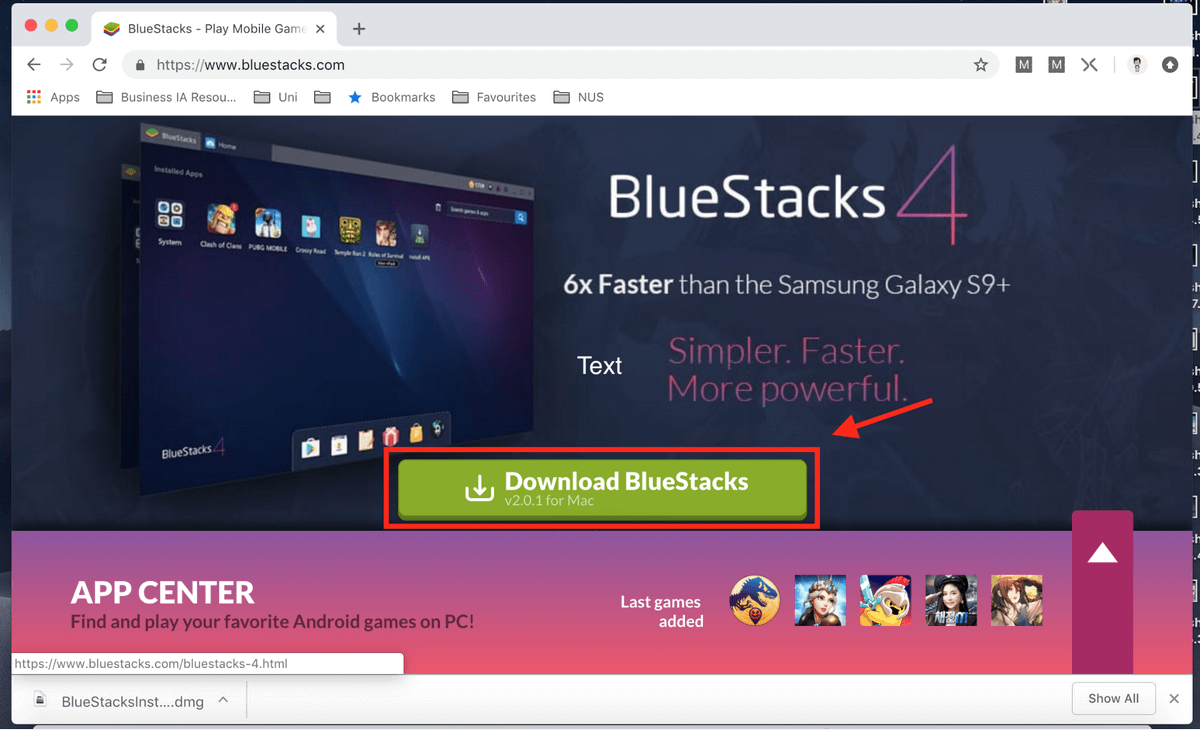
Step 1: Download Bluestacks.
First, go to https://www.bluestacks.com/ and download Bluestacks.
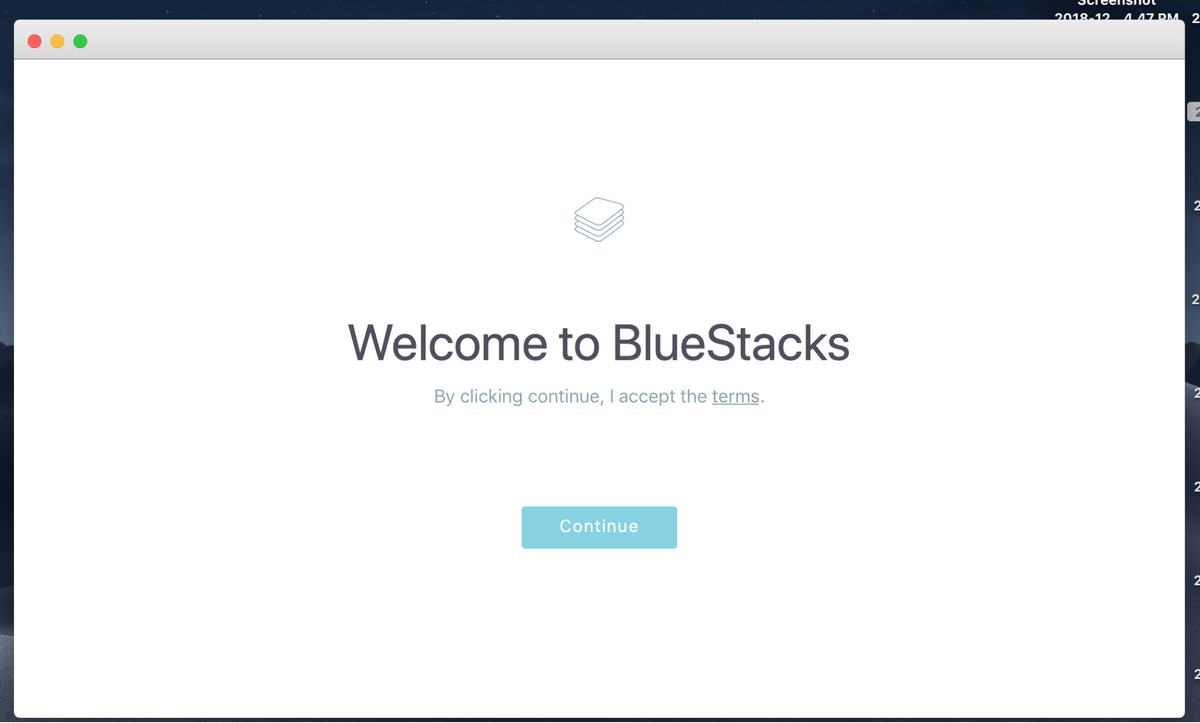
Step 2: Launch Bluestacks.
Upon launch, you will be directed to the interface that is shown below.
Similar to the Nox App Player, you will need a Google Account for Bluestacks.
Step 3: Download Clash Royale.
After successfully logging in, you will be directed to the homepage. Type ‘Clash Royale’ into the search bar and click on the correct result.
Next, click Install to download Clash Royale.
Just like the Nox App Player, click Accept when prompted. After the app has finished downloading, launch it.
How Do You Transfer Your Clash Royale Account to Your Computer?
At this point, when you have launched Clash Royale on your Mac, you will have noticed that you have a brand new account and all your progress on your mobile phone has not been transferred. Normally, switching between the computer and your smartphone means you have to start over. Luckily, there is a way for you to transfer your account to your computer. To do this, you will need a Supercell account.
Step 1: Register for SuperCell ID on Your Mobile.
If you do not already have one, register for a Supercell ID on your mobile by clicking on the Settings icon at the top right corner (Supercell is Clash Royale’s parent company).
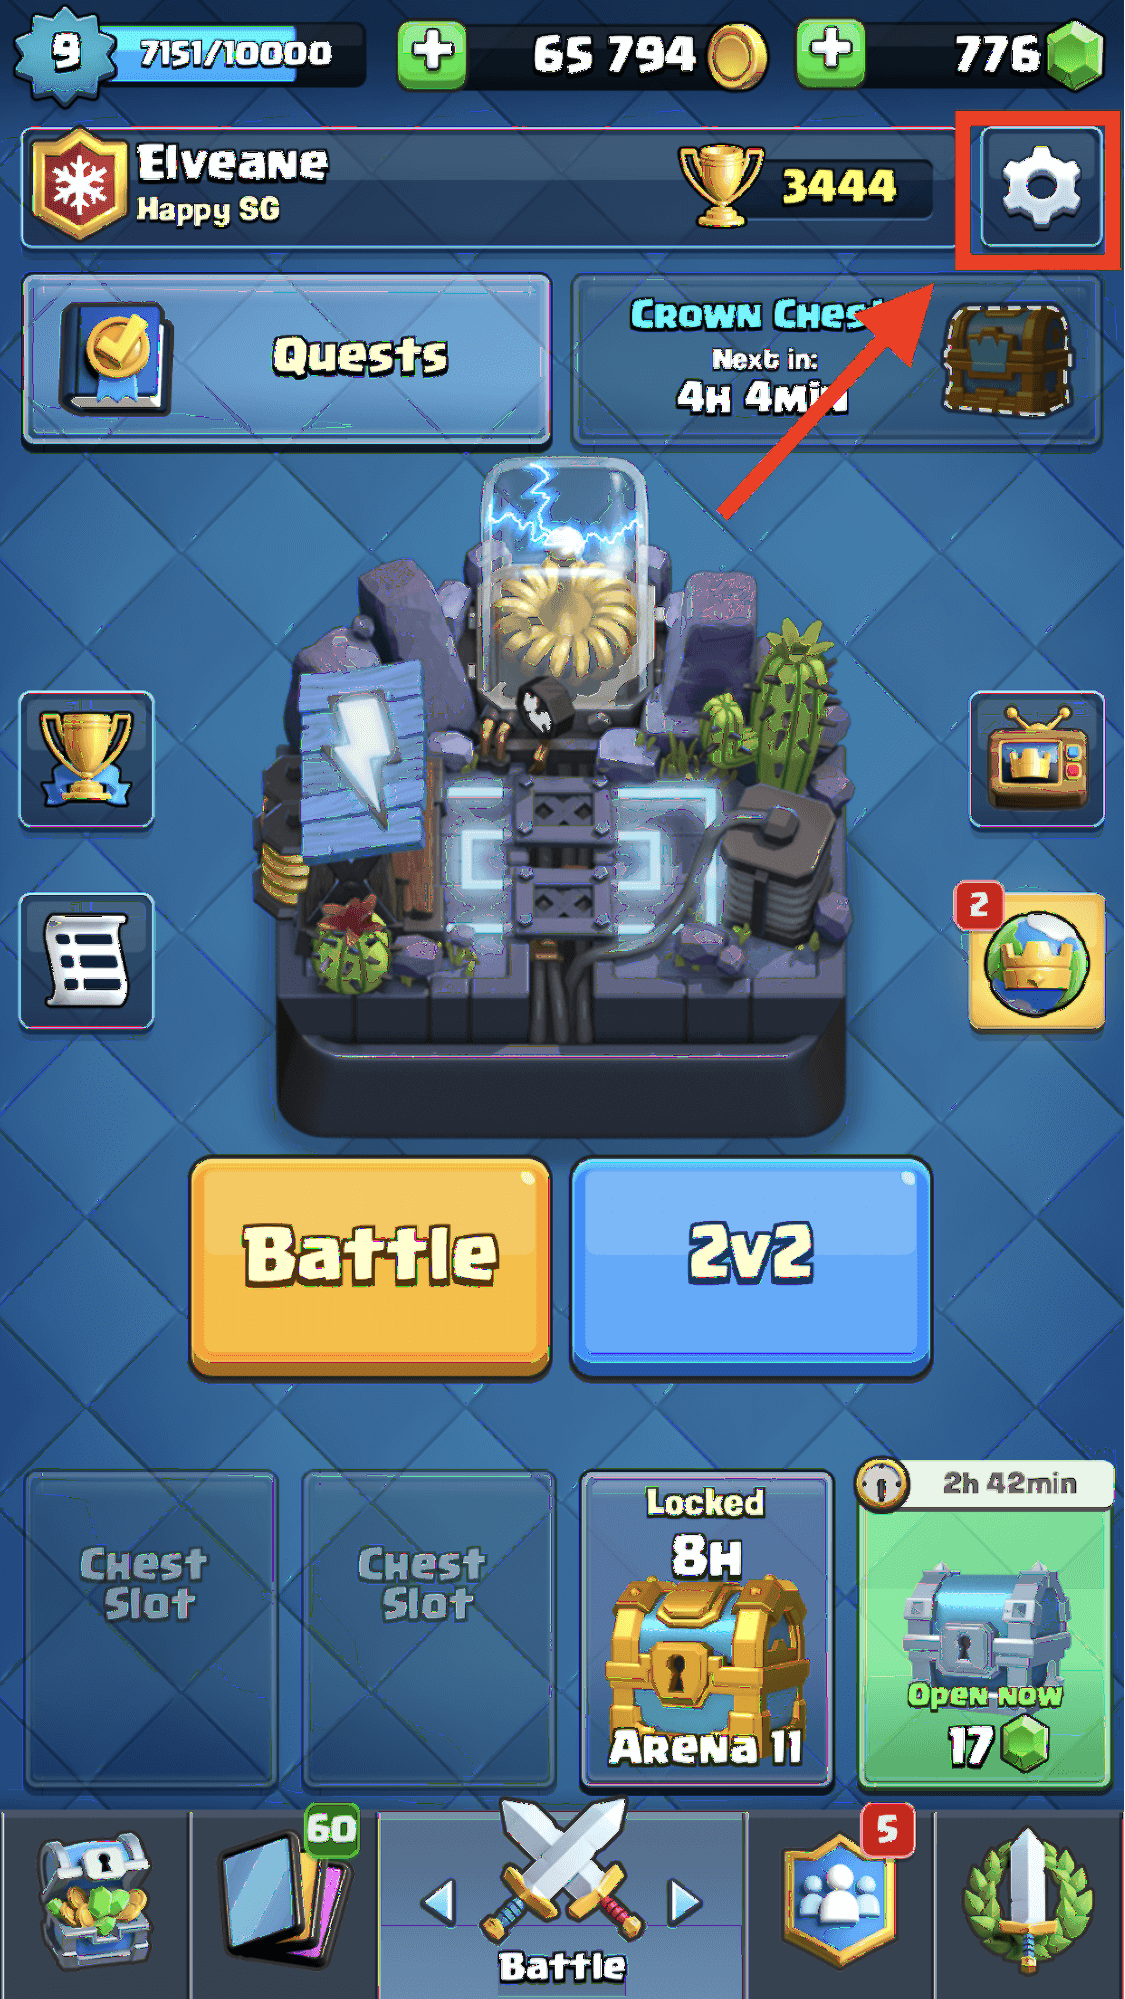
Click on the button below SuperCell ID.
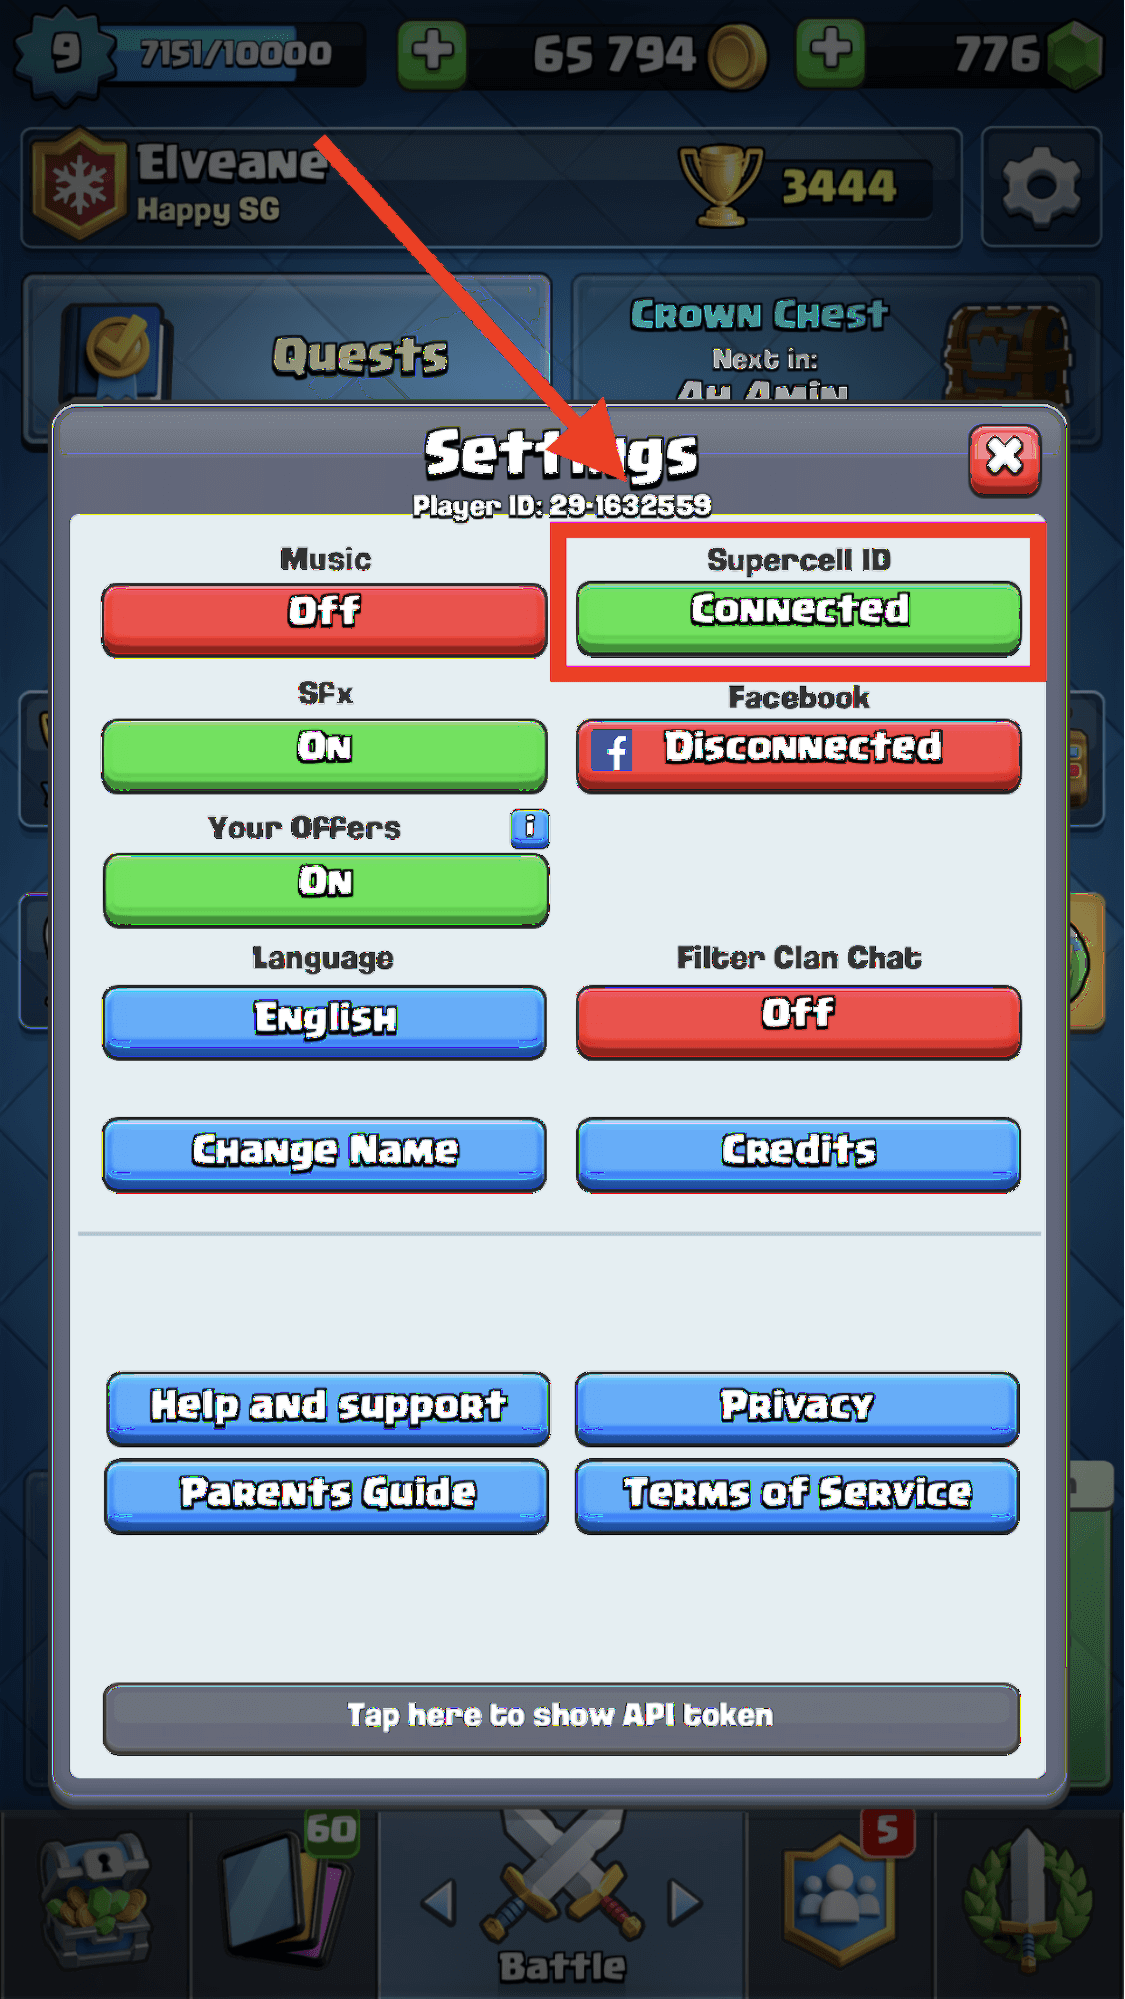
Click Continue.
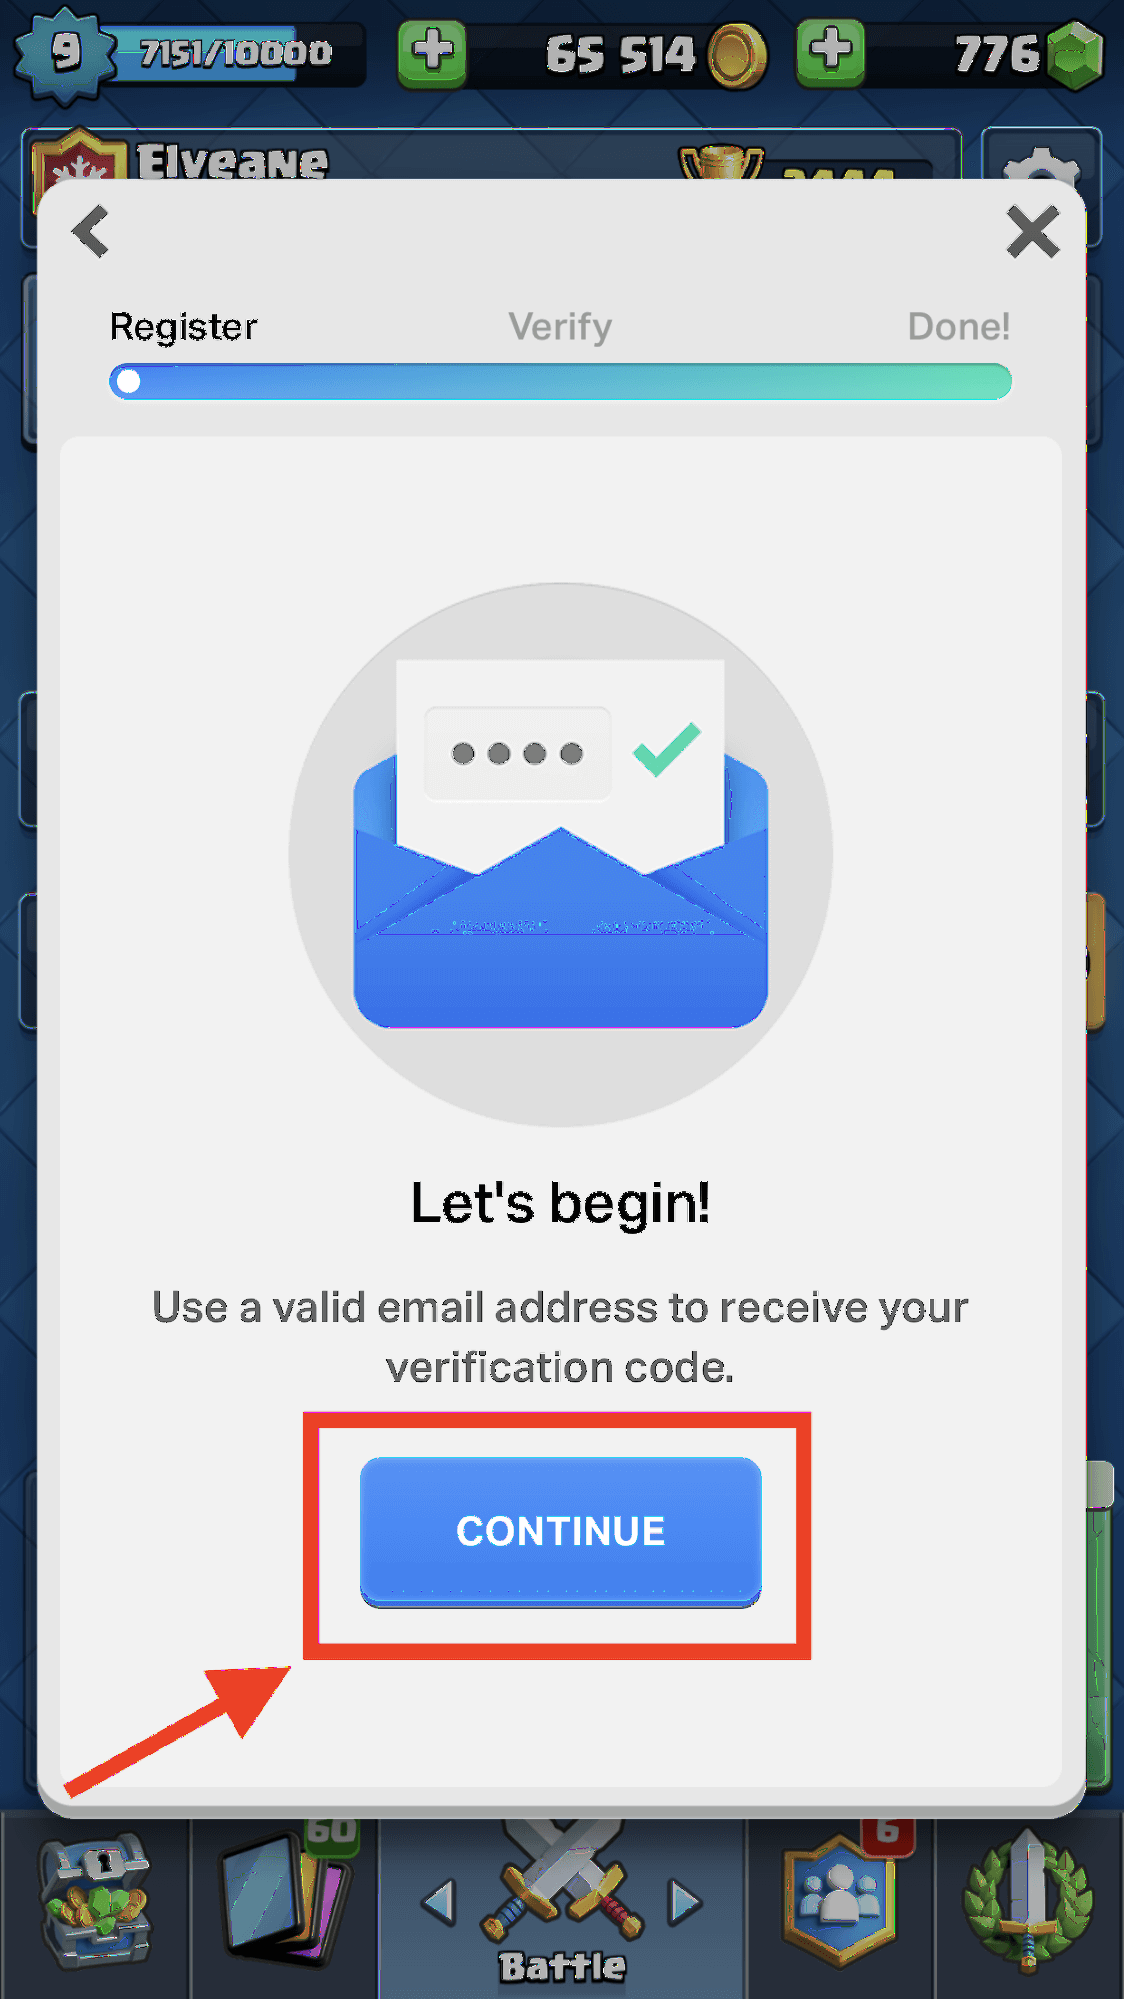
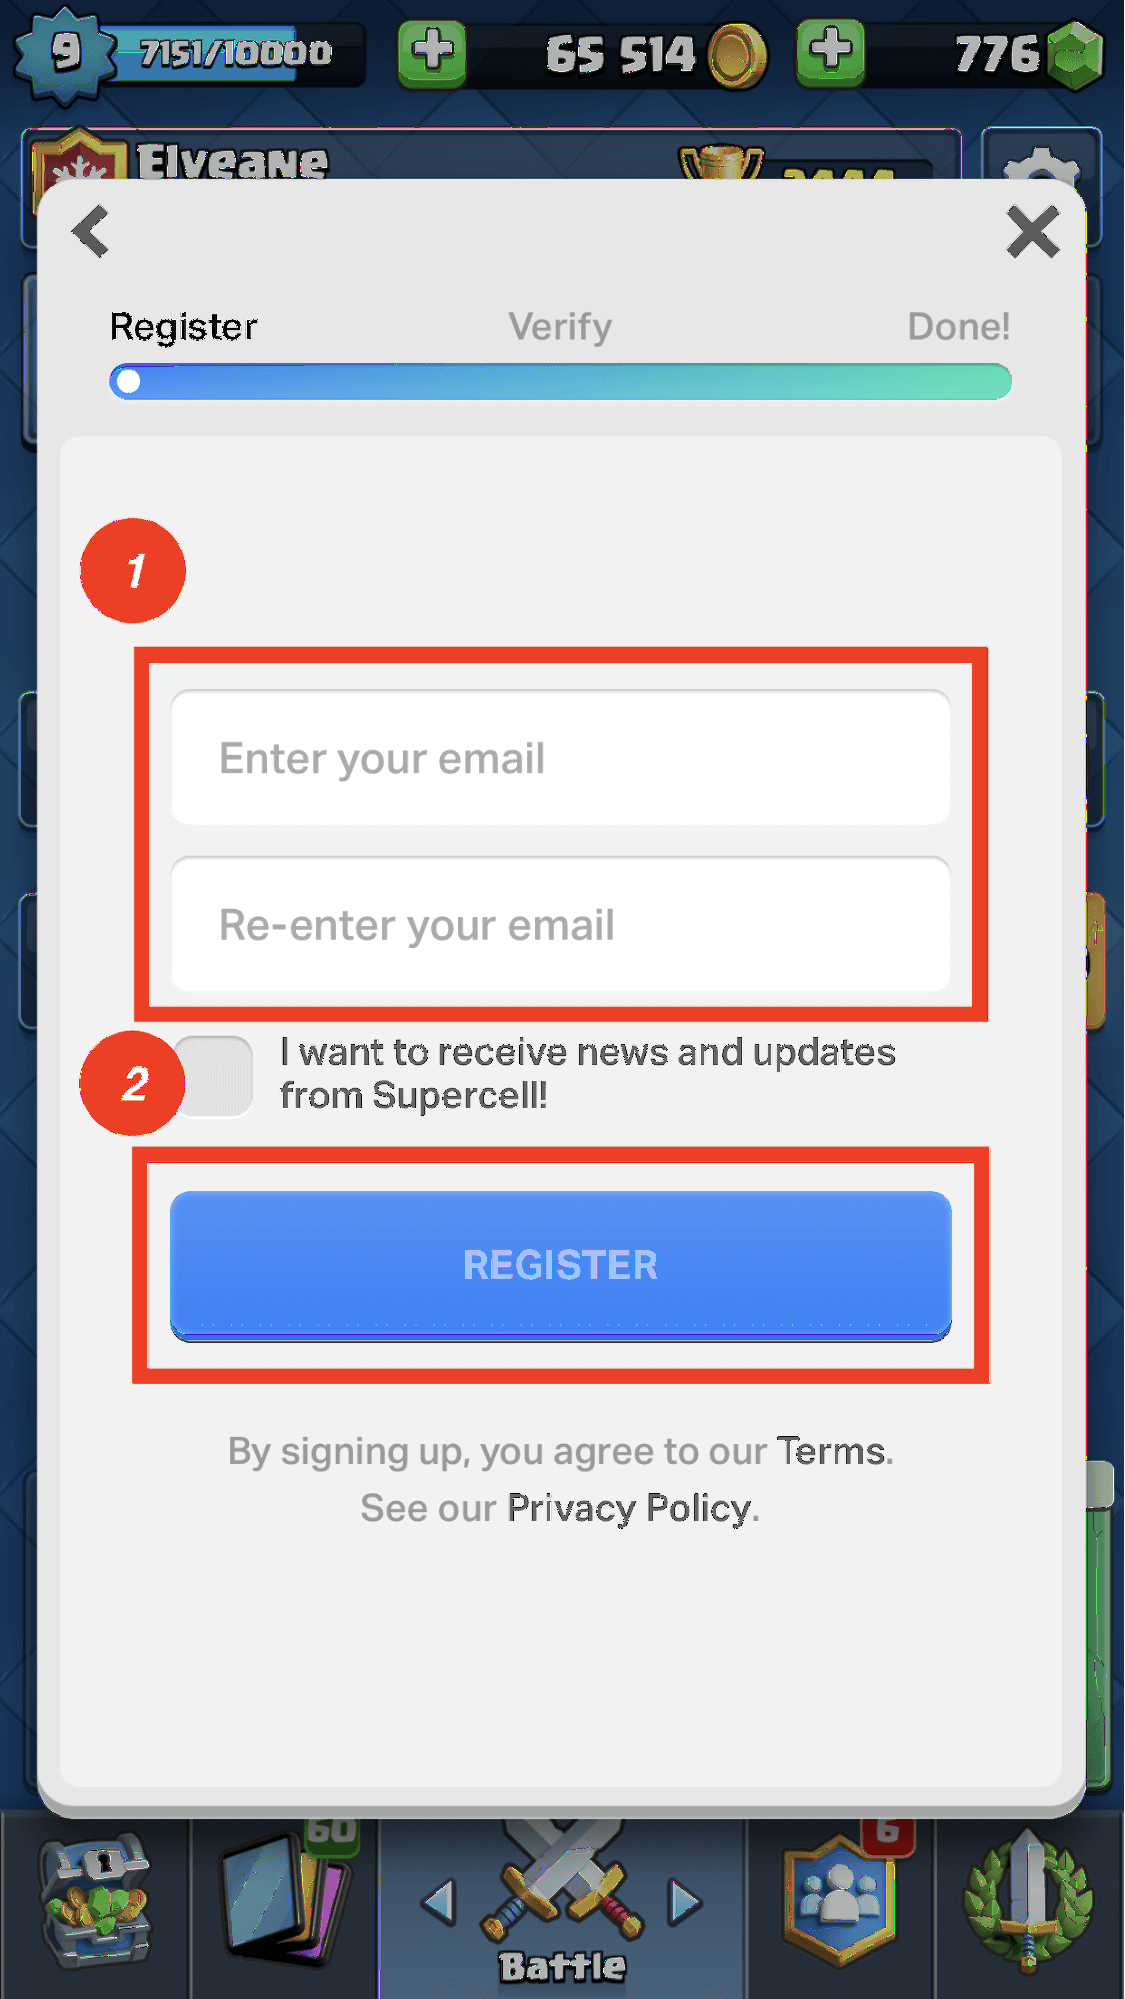
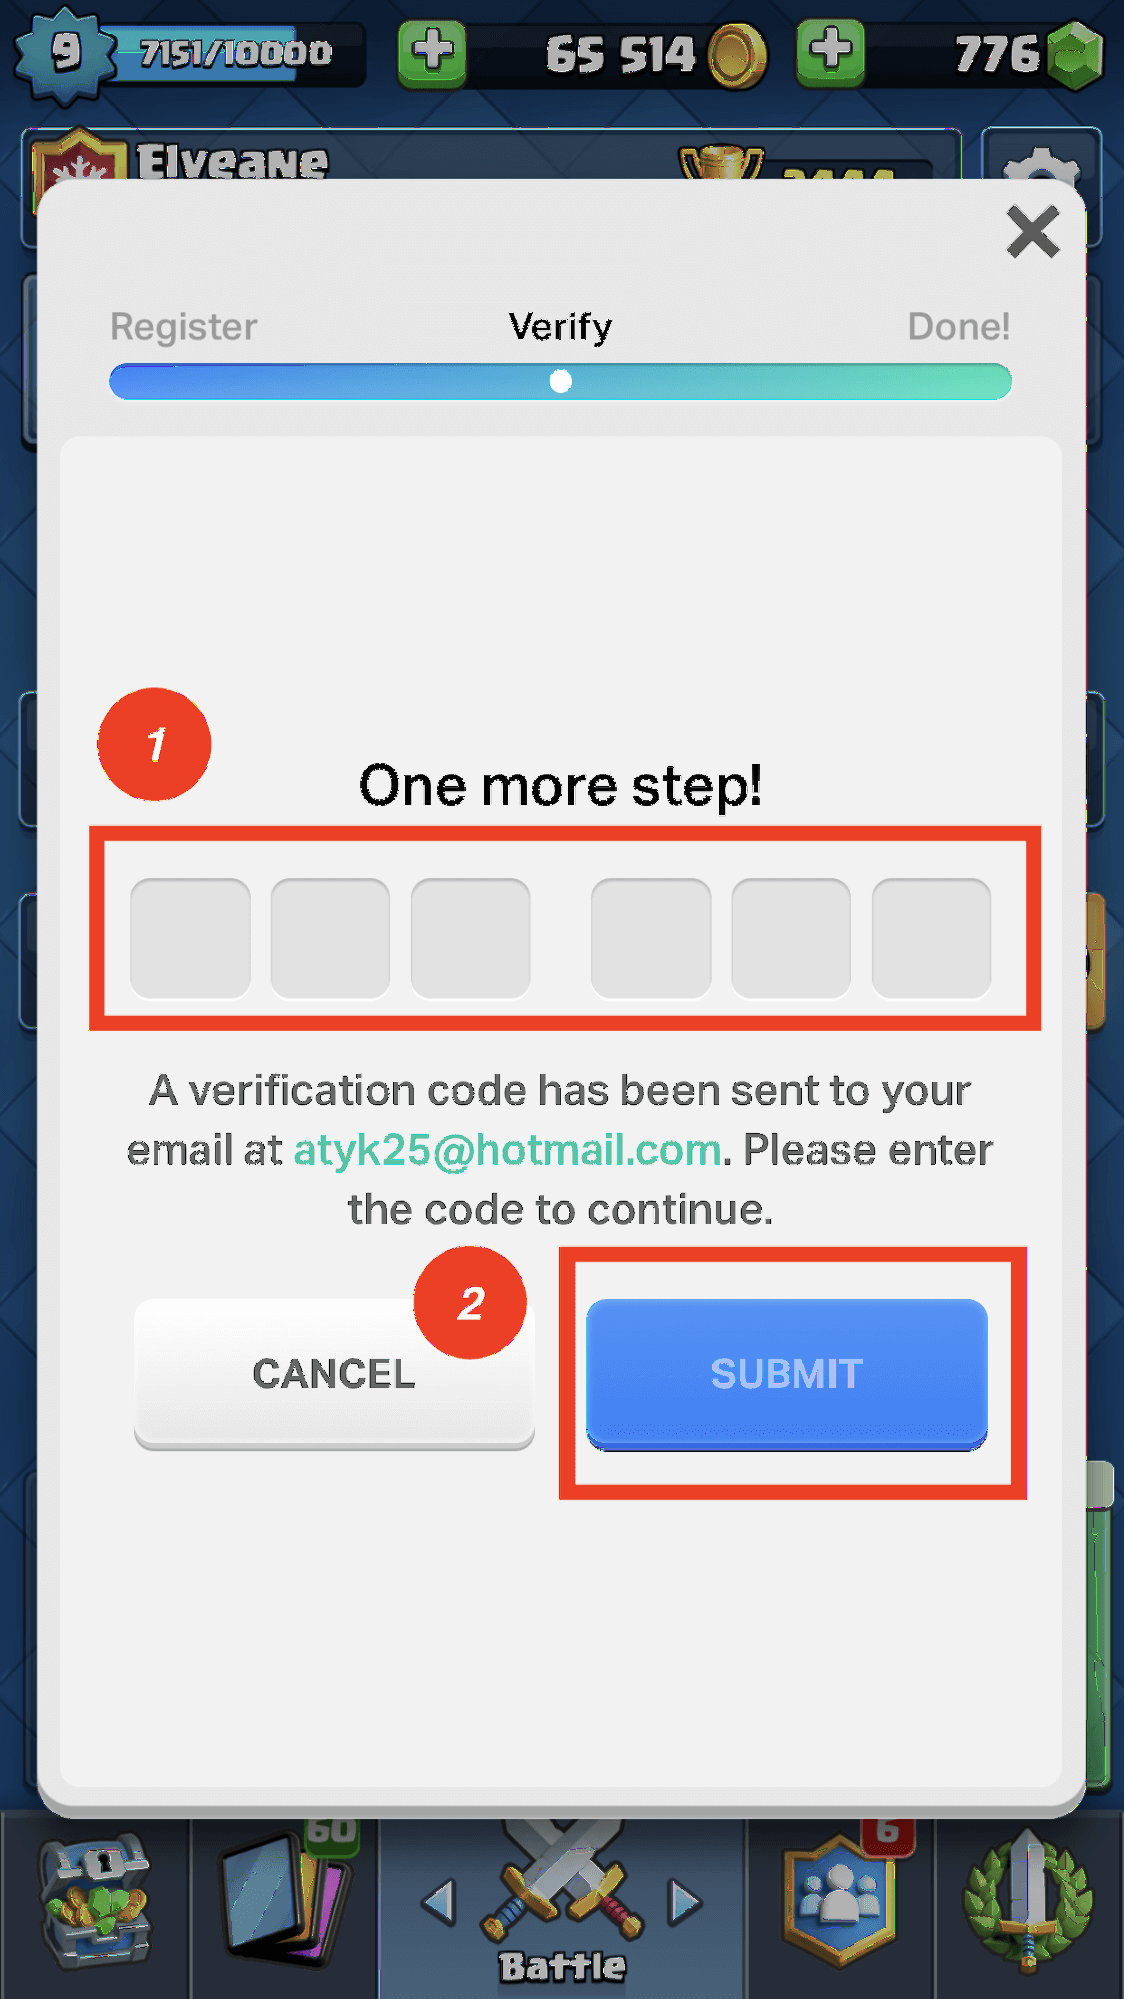
You will be directed to the next page. Simply enter your email and click Register.
Next, a 6-digit verification code will be sent to the email you entered in the previous step. Log on to your email to get the code, enter it, and click Submit.
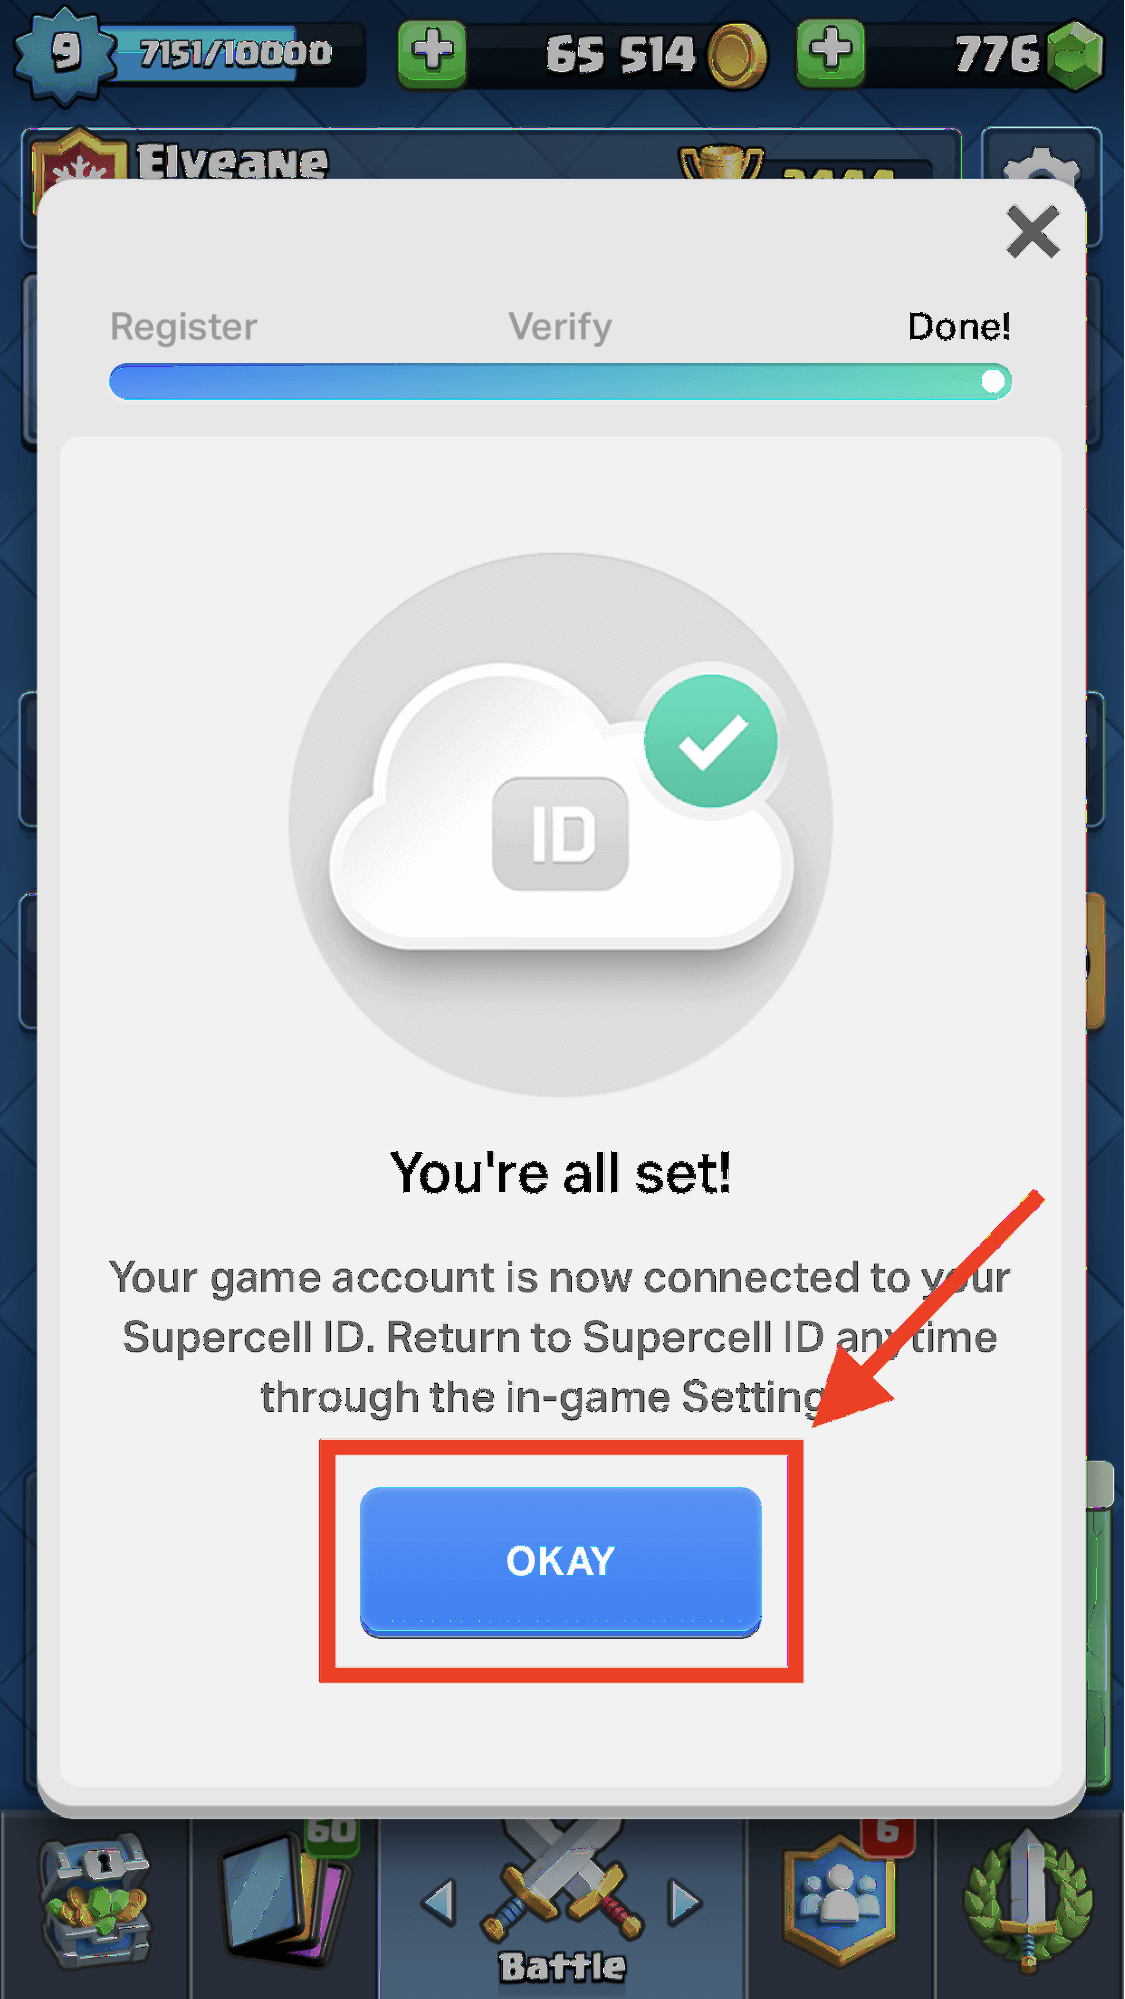
Click Okay and your Clash Royale account will be successfully linked to a Supercell ID. Now, just do the same thing on the emulator on your Mac.
Step 2: Connect to Your Supercell Id from Your Mac
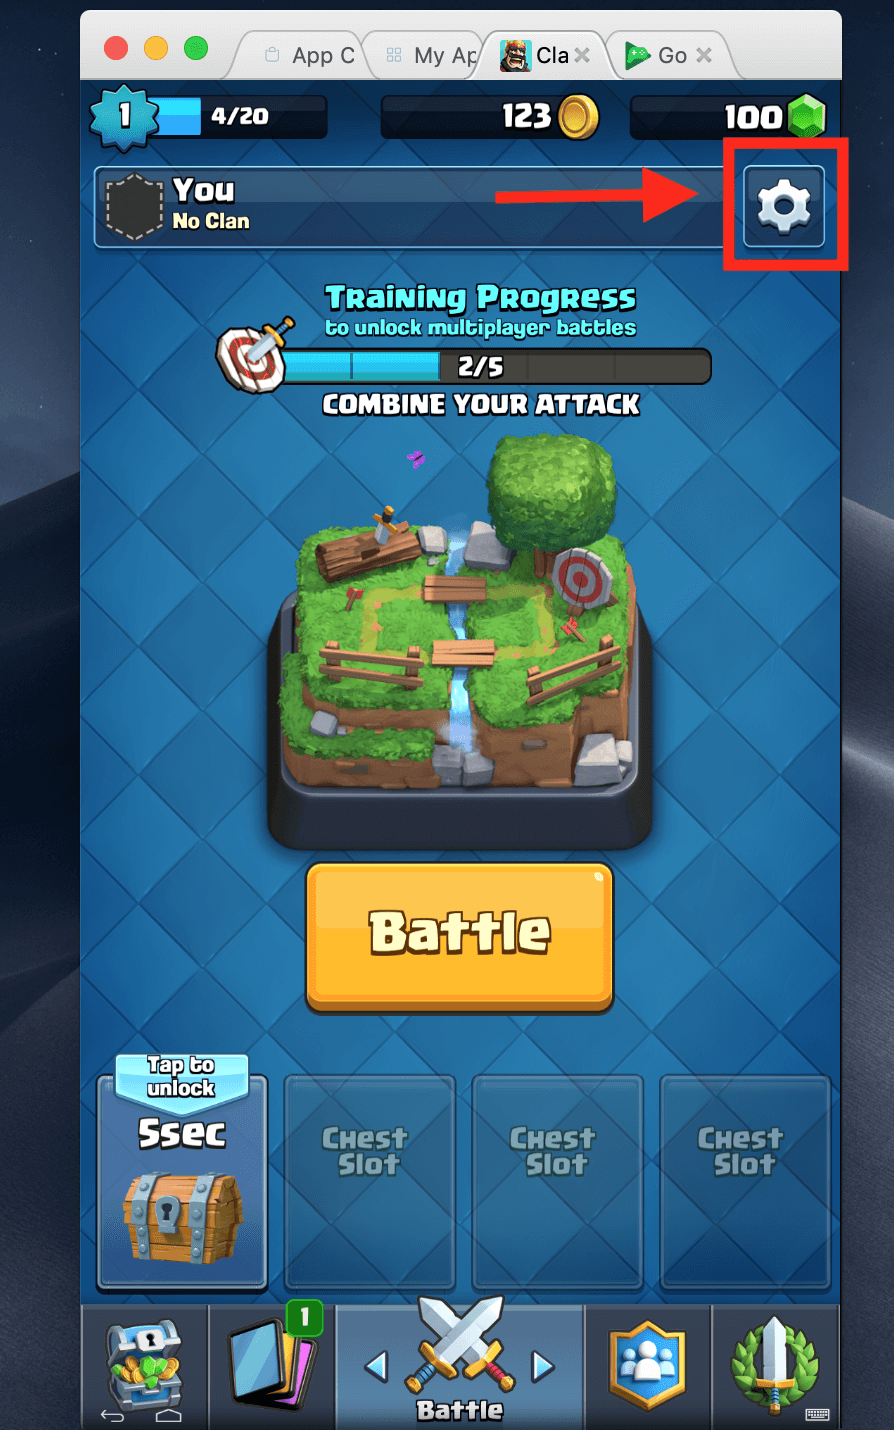
Firstly, log in to your emulator and click on the Settings icon at the top-right corner after launching Clash Royale.
Click on Disconnected under Supercell ID to connect to your account.

You will be directed to the page shown below. Click Login.
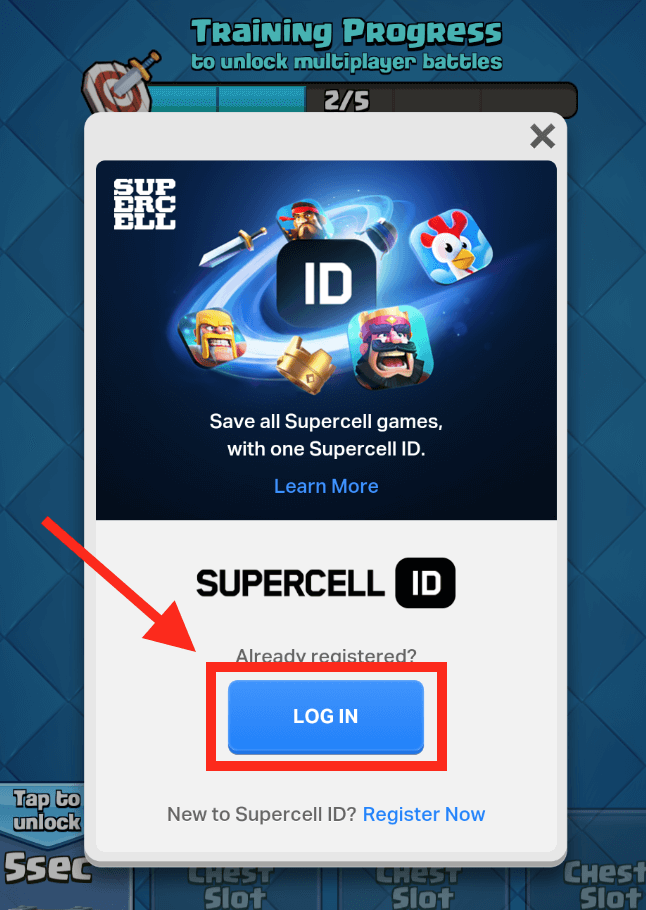
Enter the email address you linked to your Supercell ID account and then click Log In.

That is all! Your Clash Royale account will be restored. Now you can play Clash Royale on your Mac.
As you can see, the whole process is fairly simple. If you have any thoughts or questions, feel free to leave a comment below!
I have an issue where it says that I need to go to general in Security and Privacy and click a button called allow, except that button doesn’t exist. What should I do?