To add a font to Premiere Pro, download your desired font and extract it from the zip file. Then double-click on the font extracted to open it and select install. Your font will be installed on your computer and shown in your Adobe Premiere Pro.
In this article, I will explain how to add fonts to your computer, apply fonts, add a font from Adobe Font into Adobe Premiere Pro, and resolve missing fonts.
Let’s get started.
Table of Contents
How to Install Fonts to My Computer
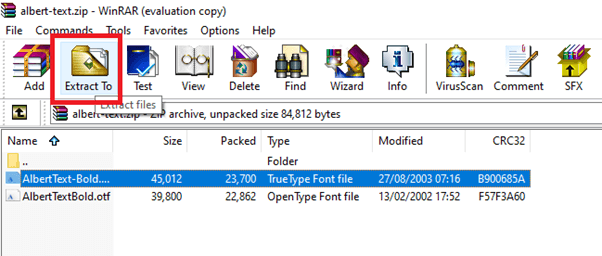
Installing a new font into your computer is very simple. You will need to first download the font file. Once the font file is downloaded, you will need to unzip the file. After unzipping, open the extracted folder. (I will use “Albert-text” as a sample text for this Article).
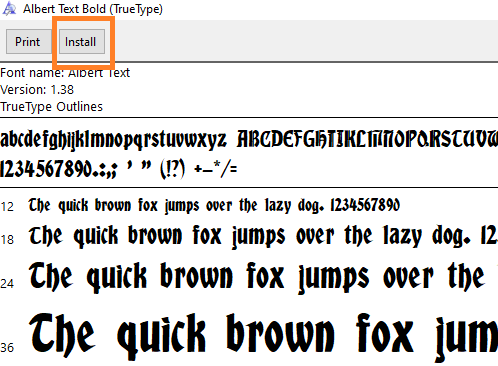
Double-click on the extracted font file. A window will open, and select Install. Then your font has been installed successfully.
How to Import Fonts to Premiere Pro
There are already many valuable and captivating default fonts in Adobe Premiere Pro, but that should not hinder you from adding more font styles.
Below are step-by-step processes to add fonts to Premiere Pro so you can use them for captions and subtitles.
Step 1: Download your desired font “.zip” file. It is obtainable from websites such as DaFont, Google Fonts, and Abstract Fonts, among others.
Step 2: Extract the file, open up the extracted folder, double click on the font file, and select “Install” to install the font inside your computer at a time.
Step 3: Now that you have installed the new font on your computer, you should be able to use it within any program.
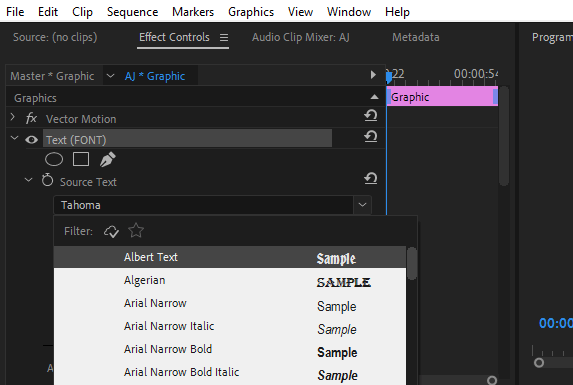
Step 4: If you want to see if the font has been properly installed, launch Premiere Pro and go to the font toolbar. Check if the Albert font is available in the font options list.
How to Apply Font in Adobe Premiere Pro
You can use fonts in Adobe Premiere Pro in a few different ways. One way is to use the text tool to create titles.
With the text tool selected, click on the area of the video where you want to add text. This will bring up a text box where you can enter your text.
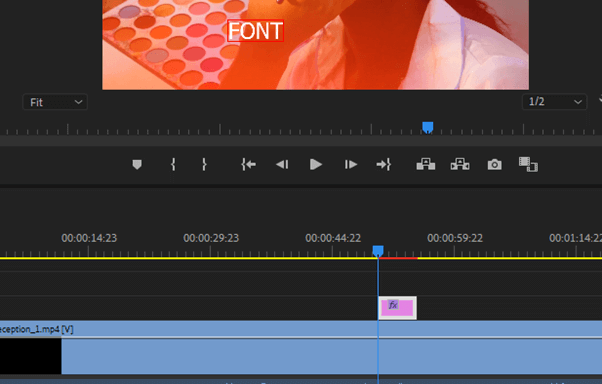
Once you have entered your text, you can select a font from the effect panel. You can also choose a font size, style, and color.
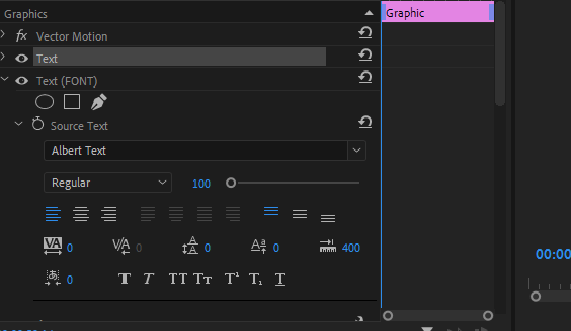
How to Change Caption Font
Go to File Menu > New > Caption to add subtitles to your project. From the dialogue box, select your choice of subtitle. This will create the caption file in your Project Panel. Drag it down into your sequence timeline.
Then go to Windows > Caption, and the caption panel will open. The caption control lets you choose your desired font size, color, and style.

How to Resolve Missing Fonts in Premiere Pro
If you want to add a MOGRT file to your project, and the font used as default in the MOGRT file isn’t available, in most cases, Adobe will look for the font in Adobe Fonts and resolve the issue right away on its own.
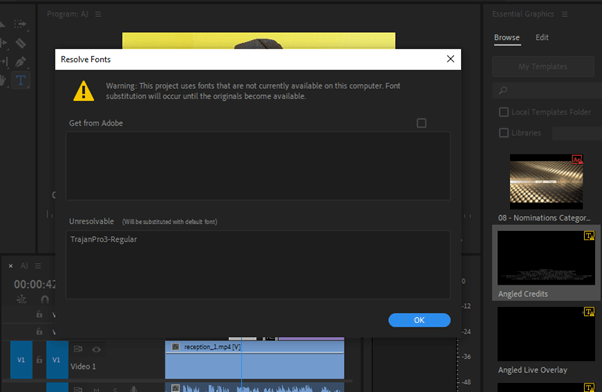
But in some cases, if Adobe cannot find the font, you can find it manually, install it, and change it as desired in your Essential Graphics Panel.
How to Replace Font in Premiere Pro
When you have more than one or two graphics text created in sequence, and you want to replace it with the same font all through with another. It will take too much time to edit it one after the other.
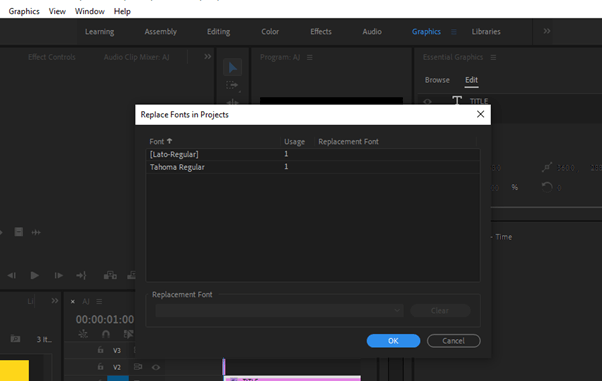
Thanks to Adobe, we have a feature where you can replace all the fonts in your project with just a single click. To replace the font, go to the Graphics Menu > Replace Font in Projects.
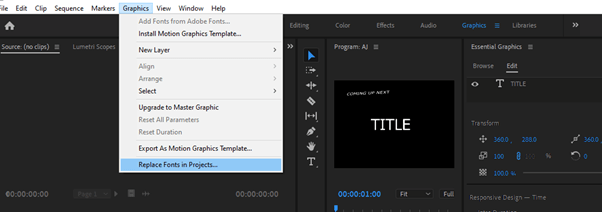
A function panel will pop up, leaving you with the replace font option. Select your desired font, which will replace all the fonts in the project. Note that this only applies to the fonts created with the essential graphic panel.
Conclusion
Installing fonts to Premiere Pro is quite simple; you only need to install the font directly to your PC, and it will reflect in all your programs. Download the font, extract it, and install it!
If you find it tough to understand anything from the article, send me a question in the comment box below.
