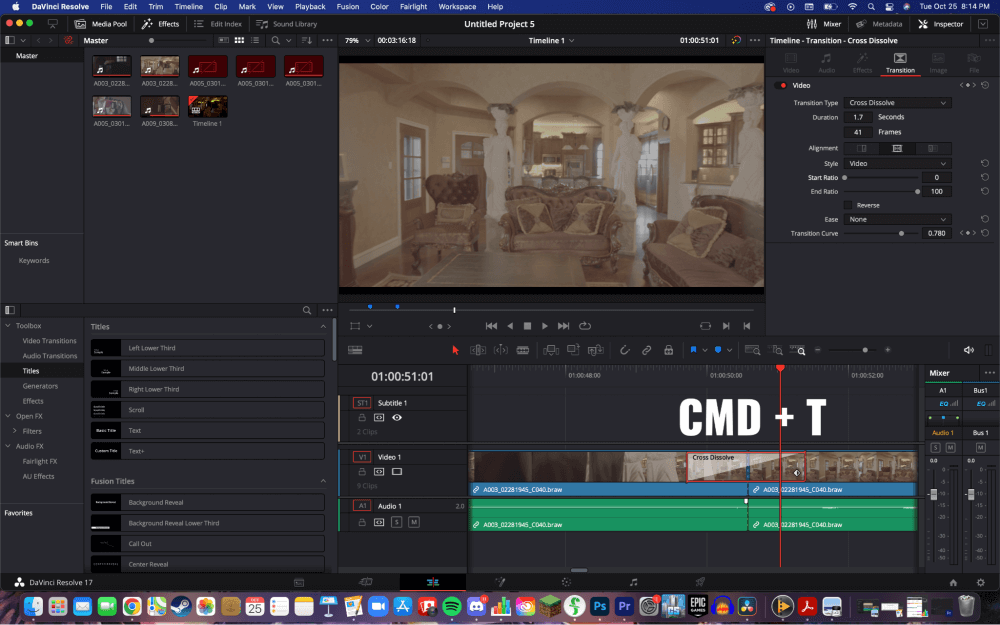
There are many great ways to move from one clip to the next. This is called a transition. Using a transition is a great way to add some professionalism to your projects. With DaVinci Resolve, there is a wide selection of preset transitions for you to choose from.
My name is Nathan Menser. I am a writer, filmmaker, and stage actor. When I am not doing these things I am editing videos, so during the last 6 years of my video editing career, I have utilized transitions to add professionalism and quality to my work every time!
In this article, I will show you how to add transitions from DaVinci Resolves’ list of preset transitions.
Table of Contents
Method 1
From the “Edit” page, left-click and drag on your timeline to select the clips you need transitions between. Then press Ctrl+T for Windows users and Command+T for Mac users. This will add transitions between all selected audio and video clips.

To add transitions only to the video clips, click the unlink button from the horizontal menu at the top of the timeline. Then, select only your video clips and press Ctrl+T, or Command+T again. This will add transitions between all your video clips, but not your audio clips.
Method 2
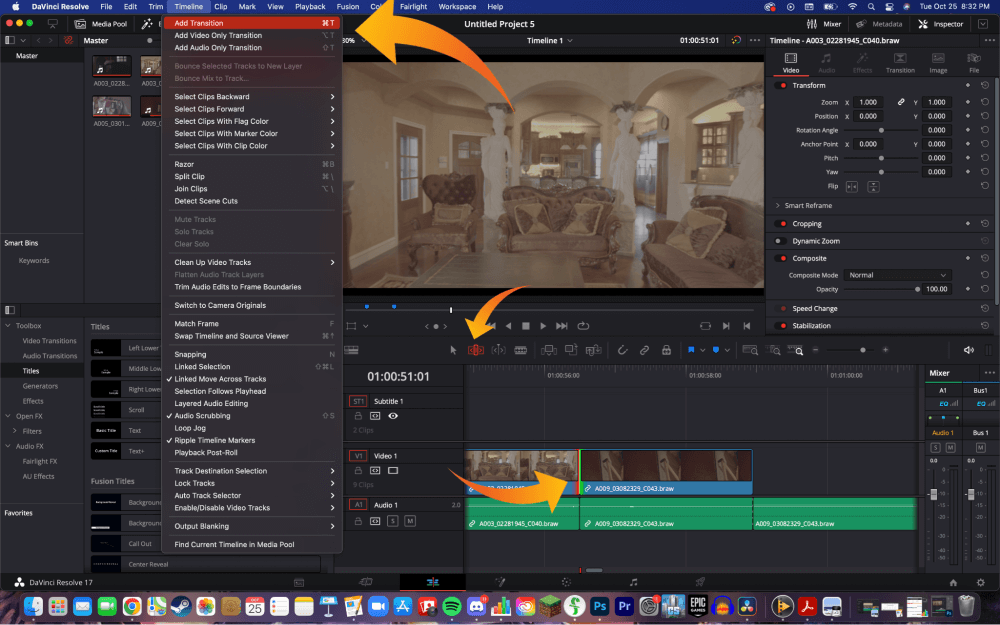
Navigate to the “Edit” page. From here, select the button titled ”Trim Edit Mode.” On the timeline, click the end of the first clip and the start of the next clip.
Then, click on the “Timeline” button from the horizontal menu in the top left corner of the screen. This will open a vertical menu below. Choose “Add Transitions.”

Typically, you’ll get a little pop-up explaining that some of your clips may need to be trimmed a little to fit the transitions. DaVinci Resolve will do this for you automatically when you click “Trim Clips.”
You can make the transition last longer or shorter by dragging the edge of the transition left and right.
Pro Tips
For both of these methods, You can change the length of the transition by right-clicking on the clip. This will open a pop-up menu, and you can select the duration of the clip by changing the number in the box next to “Duration.”
To change the type of transition, navigate to the “Inspector” tool. It’s located in the top right corner of the screen. Make sure you’re on the “Transitions” page inside the “Inspector” tool. You can choose from several different types of transitions, colors, and angles to make your video look more professional.
There are also dozens of transition presets available to you through DaVinci Resolve 18. Go to the top left corner of the screen and click “Effects.” This will open a toolbox in the bottom left corner of the screen. Choose “Video Transitions.” From here, you can play around with different effects until you find the perfect one for your video.
Conclusion
Simple as that, you now know how professional transitions in between clips, making your video less abrasive and more professional.
Drop a line in the comment section if this article has helped you learn how to add transitions to your video in DaVinci Resolve. Let me know what you liked about this article and what you didn’t like, and also what you would like to hear about next.
