Backing up your iPhone without iCloud requires plugging the device into a PC or Mac and then using iTunes or Finder, respectively. The computer stores the iPhone backup on its local hard drive.
Hi, I’m Andrew, a former Mac administrator, and I’ll cover both of these methods in more detail below.
Let’s get started.
Table of Contents
How to Back Up Your iPhone to a PC
You must first install iTunes to back up your iPhone to a Windows PC.
Step 1: Install iTunes
While Apple ditched iTunes on its Macintosh computers years ago, the company still supports the software for Windows computers.
To install iTunes, visit https://support.apple.com/en-us/HT210384 and click on Download iTunes for Windows 10 from the Microsoft Store. (This link works for Windows 11 too.)
Click Get in Store app. Your browser might prompt you to open the Store app. If so, click Open Microsoft Store.
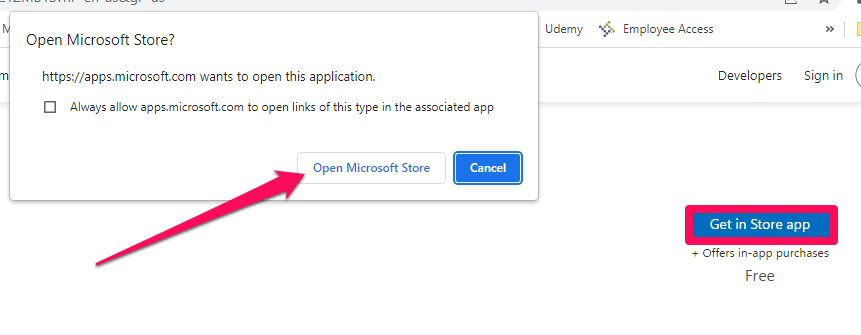
Click Install.
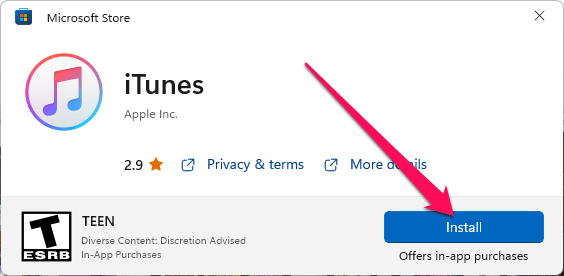
When the software finishes the installation, click Open, then click Agree on the Software License Agreement screen.
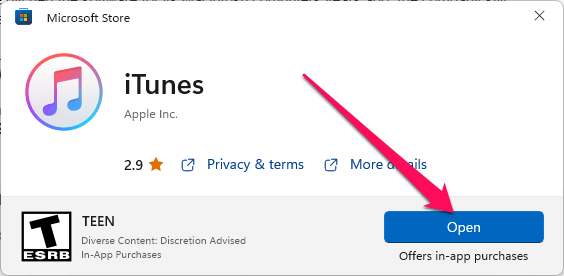
If you have trouble installing the software from the store, you can also use the direct download links from Apple’s iTunes download page.
Step 2: Plug in your phone and trust the PC
With iTunes installed and running, you’re now ready to back up your iPhone.
Using the sync cable that came with your phone, plug one end into the charge port on your iPhone and the other into a USB port on your PC.
Unlock your iPhone.
Back on your PC, click Continue when prompted by iTunes to allow the computer to access your phone’s information.
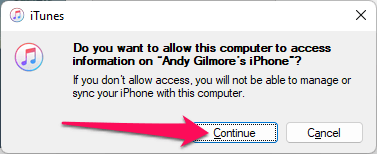
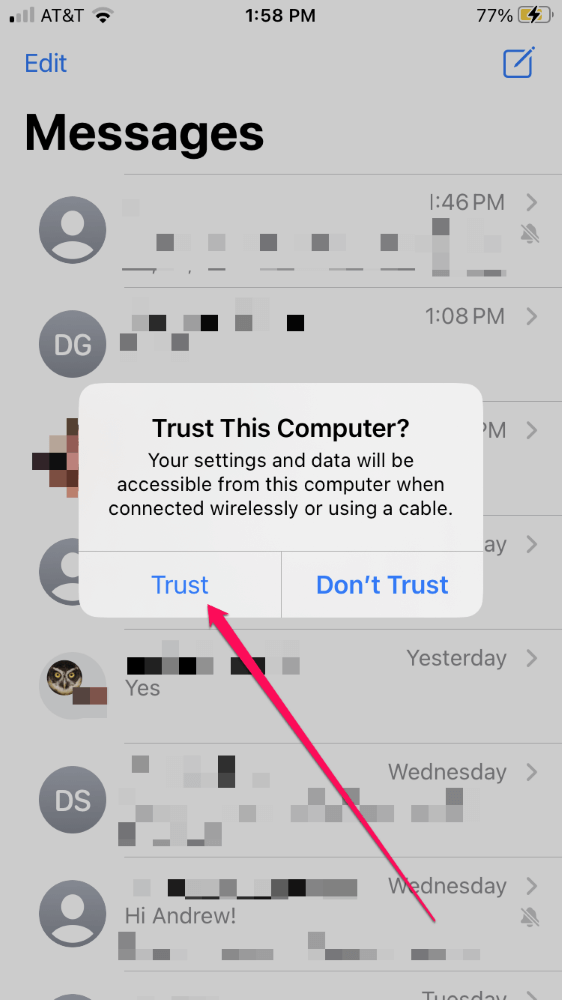
On your iPhone, tap Trust on the Trust this Computer? pop-up, and then enter your passcode if prompted.
Step 3: Back up the iPhone
Once you’ve established a trust relationship with the PC, your iPhone will show up in iTunes.
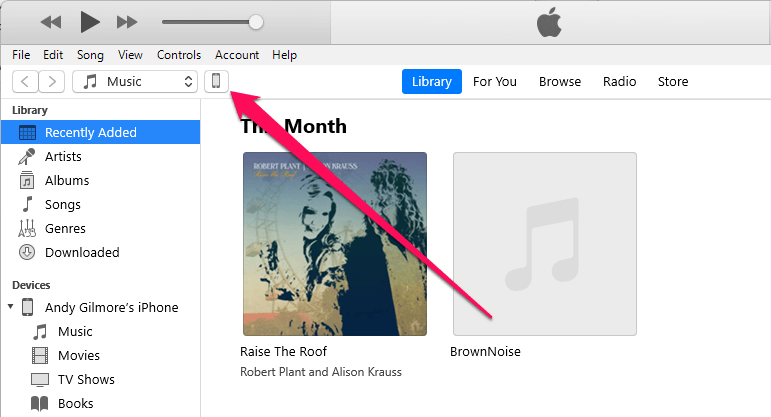
Click on the phone icon in the top left corner of the window (beneath the menu bar).
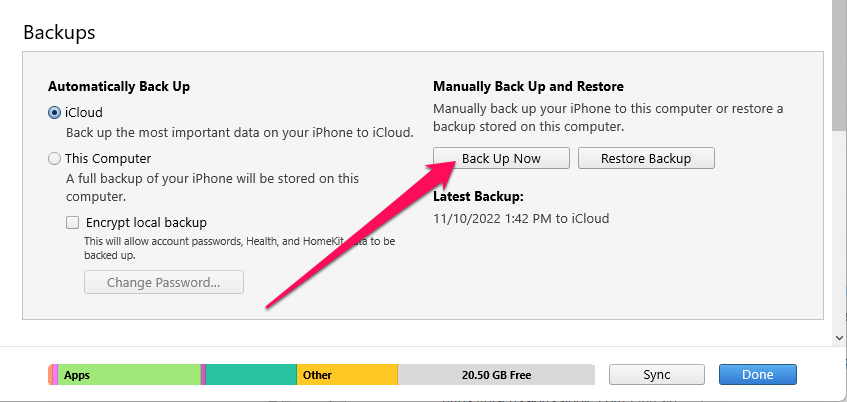
Click the Back Up Now button.
The backup process can vary in length depending on how much data is on your phone. My 40 GB backup took about 10 minutes.
You can confirm the backup completed successfully by looking under Latest Backups. iTunes should report a backup Today <time/> to this computer.
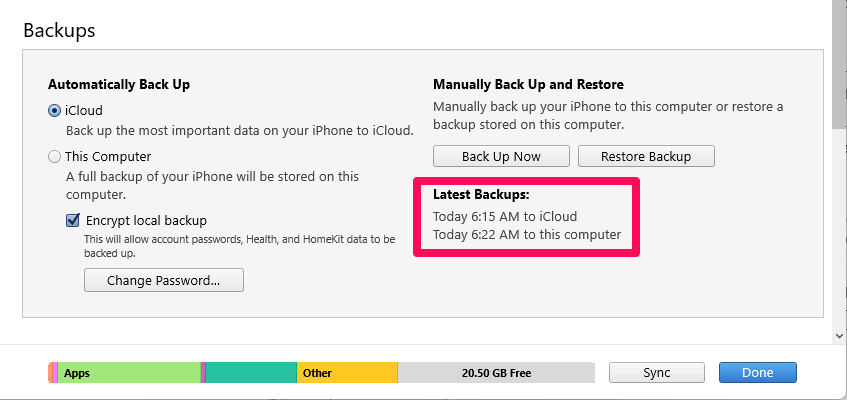
It is worthwhile to consider selecting the Encrypt local backup option. Encrypting the backup will give you a more complete backup, including things like call history, saved passwords, and web history.
If you encrypt the backup, you’ll be prompted to provide a password. Do not forget this password. Document it somewhere, if necessary. If you forget the encryption password, your backup is useless; you must supply it when restoring from that backup.
How to Back up Your iPhone to a Mac
The process for backing up an iPhone to a Mac is similar to backing up the device to a PC. The main difference is that you don’t need iTunes. When Apple removed the software from macOS with the release of Catalina in 2019, they shifted the iPhone backup functionality to the Finder app.
Step 1: Plug in Your phone and trust the Mac
Unlock your phone and then connect it to your Mac with your sync cable.
Tap Trust on your phone to allow the Mac to access data on your iPhone. Enter your passcode if prompted.
Step 2: Use Finder to back up the phone
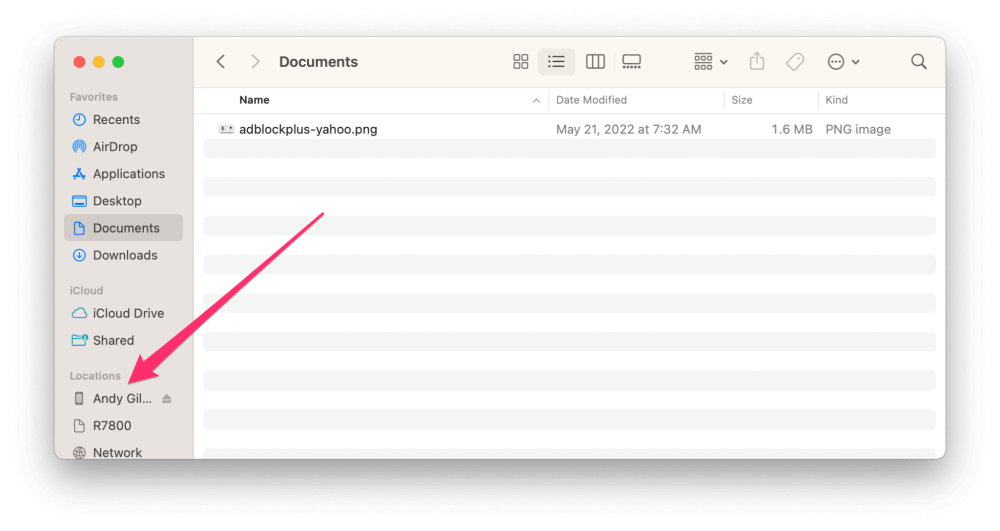
Open the Finder app and click on your iPhone from the sidebar under Locations.
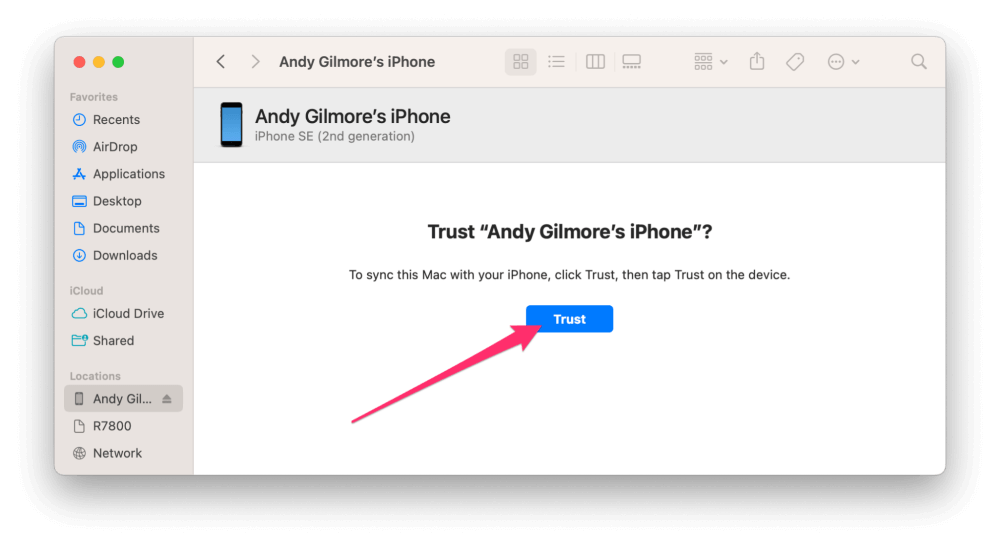
Click Trust on the Mac, if prompted.
Click Back Up Now to initiate the backup process on your Mac. Watch your phone because you may be required to enter the passcode again.
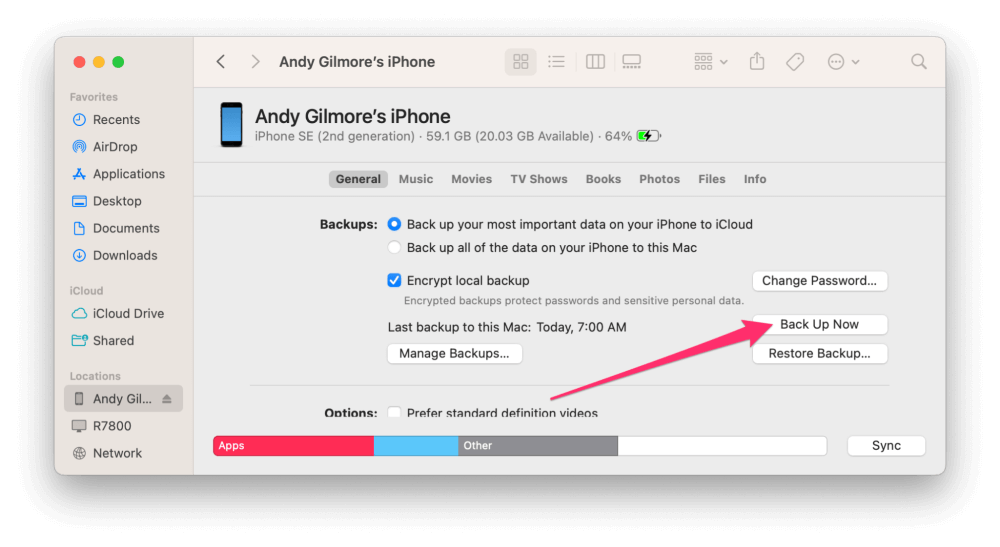
Finder doesn’t display a remaining time estimate like iTunes for Windows does, but you will see a progress bar at the bottom of the Finder window indicating how much of the backup job has completed.
When finished, verify the backup succeeded under Last backed up to this Mac.
Backing up without iCloud
Backing up your iPhone to a PC or Mac is an excellent way to ensure your data is safe in case you lose or damage your phone. I recommend using local backups and iCloud backup so that you have a copy of your files in both places.
The downside to local backup is that the process is not automatic like iCloud backup is; you must remember to physically connect the phone to your computer to back it up. So if you plan on using this method exclusively, ensure you are consistent.
Were you able to back up your iPhone? Let us know in the comments below.
