In the digital age, formatting work for the web and print has never been easier. Color modes are an essential aspect of proofing work for different formats. Thankfully, changing color modes in Adobe Illustrator is easy by using File > Document Color Mode.
My name is Elianna. I have a Bachelor of Fine Arts in Illustration and have been using Adobe Illustrator for over six years. I use Illustrator to create posters, illustrators, business cards, and more, with various color mods.
In this post, I will show you how to change the color mode of your document in Adobe Illustrator, as well as how to change the color modes of specific objects, and the color mode of your color panel.
Let’s get into it!
Table of Contents
- Key Takeaways
- What Are Color Modes?
- How to Change Document Color Mode in Adobe Illustrator
- How to Change Color Panel Color Mode in Adobe Illustrator
- How to Change Color Panel Color Mode in Adobe Illustrator with Edit Colors
- How to Change Object Color Mode in Adobe Illustrator
- How to Change Color Mode in Adobe Illustrator for iPad
- Final Thoughts
Key Takeaways
- Adobe Illustrator currently supports two color modes for documents: RGB, and CMYK.
- You can change the color mode of your color palettes, and the color modes of specific objects on your artboard in the Color panel.
- You can easily change the color more of colors in your document with Edit > Edit Colors.
What Are Color Modes?
Color modes are settings that designers use to ensure consistency in the look of a design across a variety of formats.
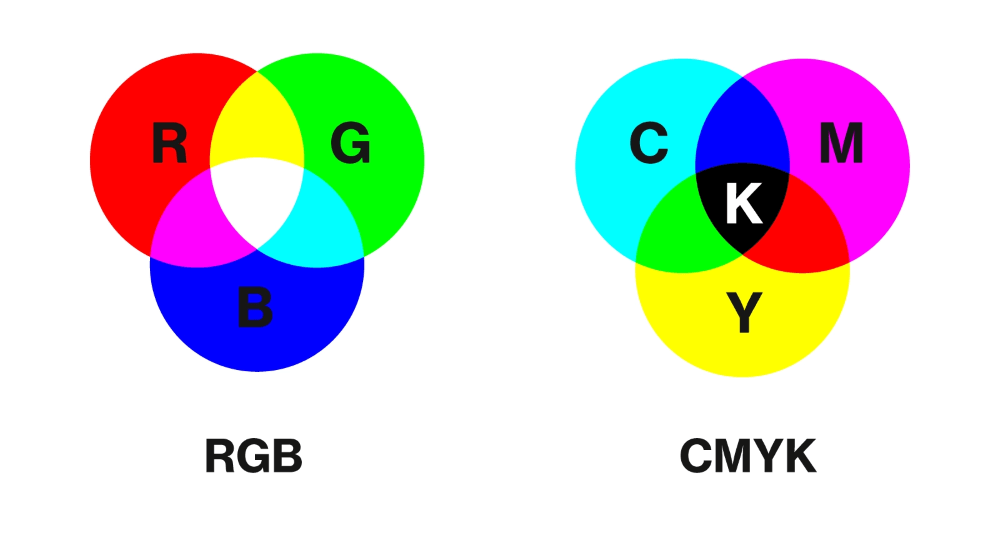
Across various print and web applications, different color modes are used to achieve the best results, using additive and subtractive color mixing. Here is a list of the most commonly used color modes and their applications:
| RGB | Is an additive color mode that uses Red, Green, and Blue hues to create color variations. It is used in digital formats for mobile and computer screens. When creating images for the web, RGB is the most popular choice. |
| CMYK | Is a subtractive color mode that uses Cyan, Magenta, Yellow, and Key (Black) hues to create color variations. CMYK is the standard color mode used for printing. |
| LAB(CIELAB) | Is a color mode based on the human experience of color. It comprises three channels. One for Lightness, and two for Color (The greed-Red axis channel, and the Yellow-Blue access channel). LAB color is device independent and maintains a consistent look across a variety of applications. However, due to its size, LAB can delay file load time. |
| HSB/HSV | Is a color mode that uses Hue, Saturation, and Brightness (or value) to make color variations. |
| Grayscale | Is a color mode that uses one component, lightness, to create variation. In digital applications, pixels have values ranging from 0 (black) to 225(white). In print, values range from 0%(white) to 100% (black). This value structure refers to the amount of black ink used. Using a grayscale color mode results in a black-and-white photo. |
| Bitmap | Is a color mode that consists of black and white pixels, with no shades of gray. In print, black dots represent ink, while in digital format, black and white pixels are represented. |
Adobe Illustrator currently supports two color modes for documents: RGB, and CMYK. However, you can also access Grayscale, and HSB color palettes in a few different menus.
Is Adobe Illustrator RGB or CMYK?
Illustrator files default color mode to whatever preset is in your existing document. You can set the color mode of your design when creating a new artboard. If you do not know the color mode of your document, it is best to check with File > Document Color Mode rather than assume.
How to Change Document Color Mode in Adobe Illustrator
Now that you know more about colors and how they function, here is how to change document color mode in Adobe Illustrator.
As stated previously, Illustrator currently supports two color modes for documents: RGB and CMYK, and they can be accessed through File > Document Color Mode. Here’s how:
Note: If you are looking for how to change the color mode in the Illustrator app for iPad, skip to the last section in this article.
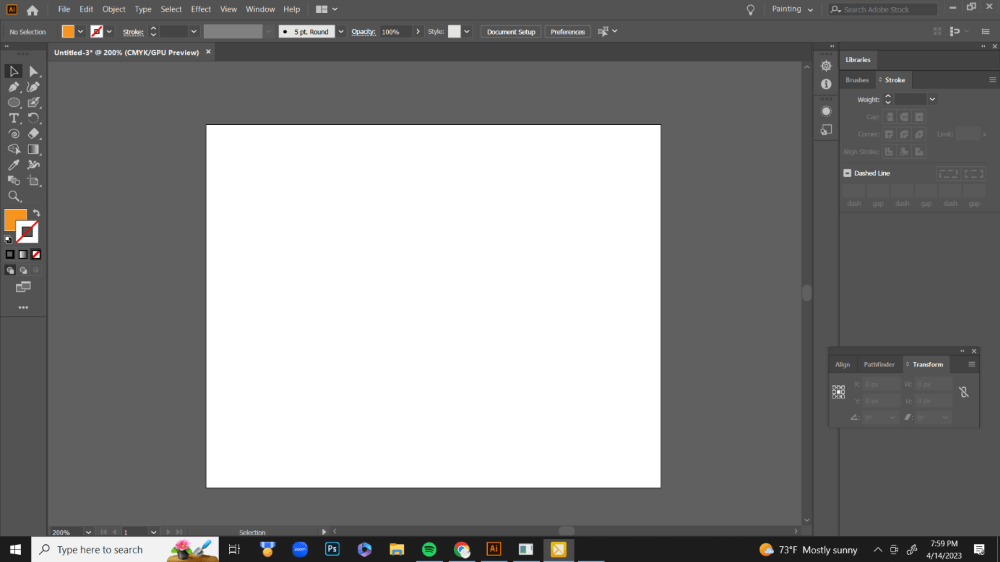
Step 1: Open your document in Adobe Illustrator.
Step 2: Go to File > Document Color Mode.
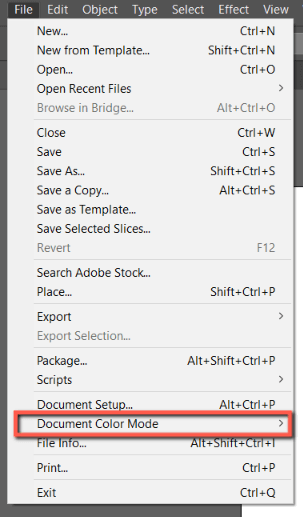
Select RGB or CMYK depending on the use of the design. The standard use is CMYK for print and RGB for digital.

After you apply a new color mode, you may notice a difference in the colors on your design.
How to Change Color Panel Color Mode in Adobe Illustrator
Although you can only select RGB and CMYK in Document Color Mode, you can access RGB, CMYK, Grayscale, HSB, and Web Safe RGB color modes in the color panel. Here’s how:
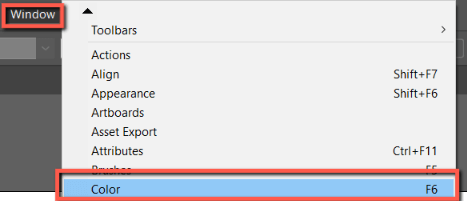
Step 1: Open the Color panel using Window > Color. If your color panel is already opened by default, you can ignore this step.
Step 2: Click on the more options icon.

Choose a color mode.
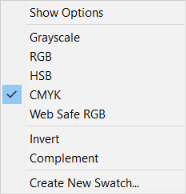
Step 3: If you do not see the color modes, make sure that you have the Color menu open, and not the Swatches menu. You will not be able to edit color panel color modes in the swatches panel.
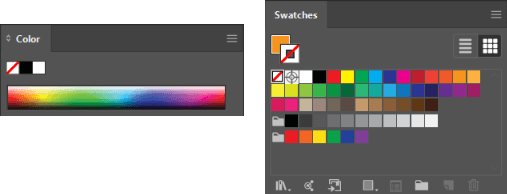
You will now see your color panel change to your selected color mode.
How to Change Color Panel Color Mode in Adobe Illustrator with Edit Colors
Another way to change color panel color mode in Adobe Illustrator is with Edit Colors. Here’s how:
Step 1: Go to the overhead menu and click on Edit > Edit Colors.
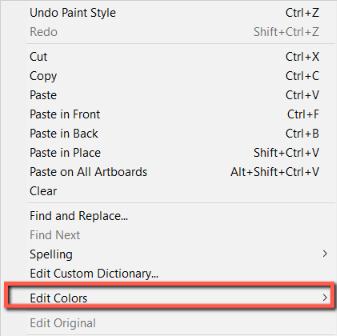
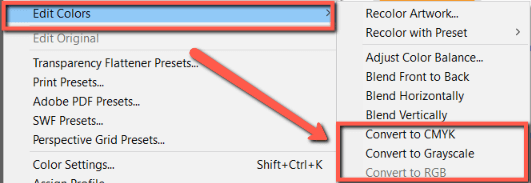
Step 2: Select a color mode from the list. Note that if you use this method to change the color mode, it will change convert the artwork to the color mode, instead of the document color mode.
How to Change Object Color Mode in Adobe Illustrator
Additionally, you can also change specific object color modes on your artboards in Adobe Illustrator using the color panel. Here’s how:
Step 1: Select the object you would like to change the color mode.
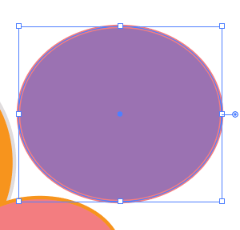
Step 2: Open the Color panel using Window > Color.

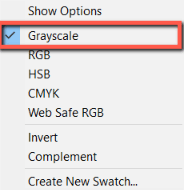
Step 3: Click on the more options icon.

Step 4: Select your color mode of choice. For this example, I am using Grayscale.
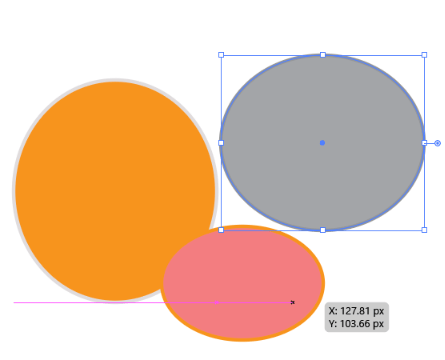
Your object will now change according to the color mode selected.
How to Change Color Mode in Adobe Illustrator for iPad
You can also change the color mode of your document in the Illustrator version for iPad. Here’s how:
Step 1: Open the Adobe Illustrator App on your iPad and create a new document.

Step 2: Click on Color Mode. Select RGB or CMYK.
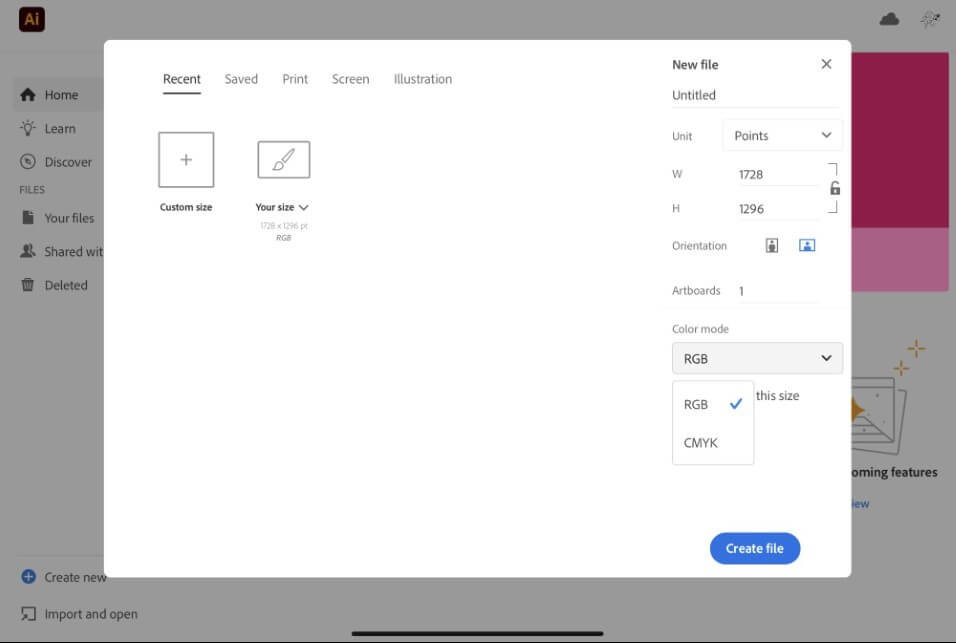
Hit Create file. Your document will now be created.
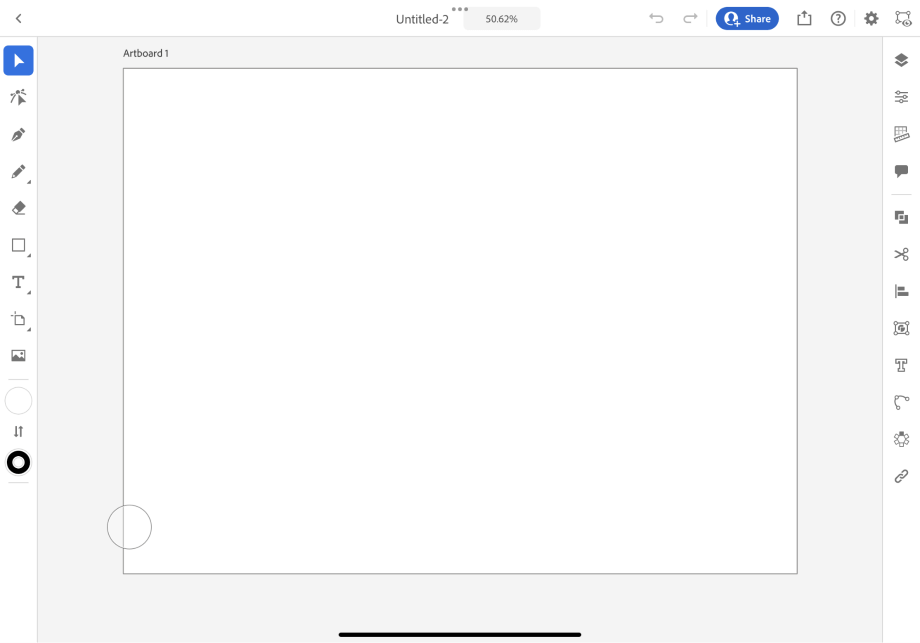
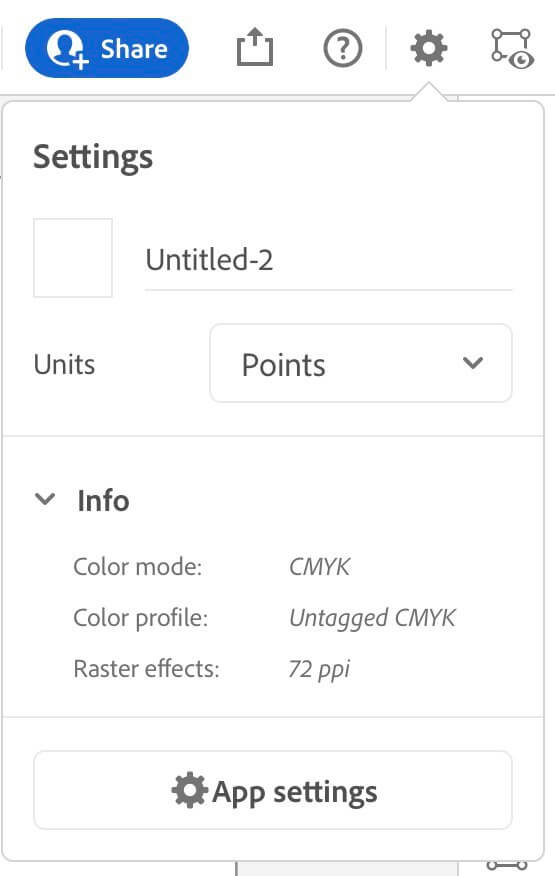
To check the Color Mode of your document, click on the Gear icon.

Your color mode will be listed under Info.
Final Thoughts
Color modes are an essential element of graphic design and illustration. Adobe Illustrator gives access to two of the most popular color modes for web and print, allowing artists the flexibility to create work across a variety of platforms.
Adobe Illustrator also gives users the ability to toggle the color modes of color panels and objects using the Color panel and Edit > Edit Colors.
Always keep your end product in mind when selecting a color mode for your piece. As a general rule, RGB is suitable for the web, while CMYK works best for printed images. The right color mode will ensure the highest quality of your work.
What color modes do you use most often in Adobe IllustratorI? Let me know in the comments below!
