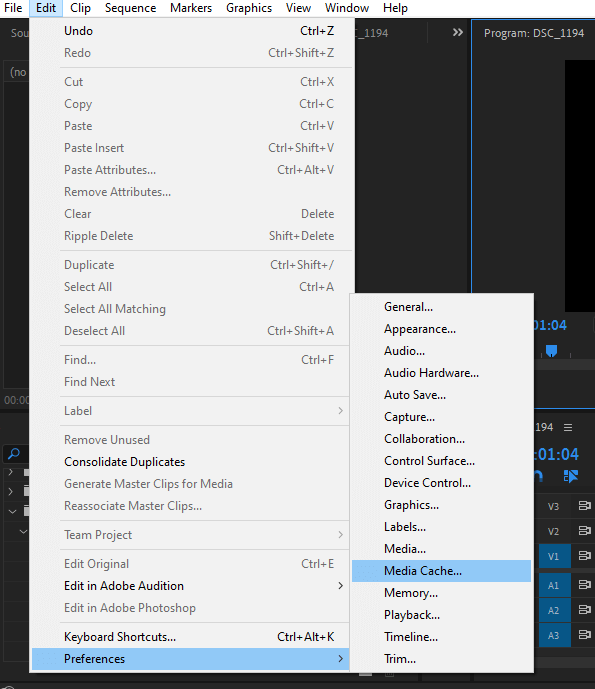
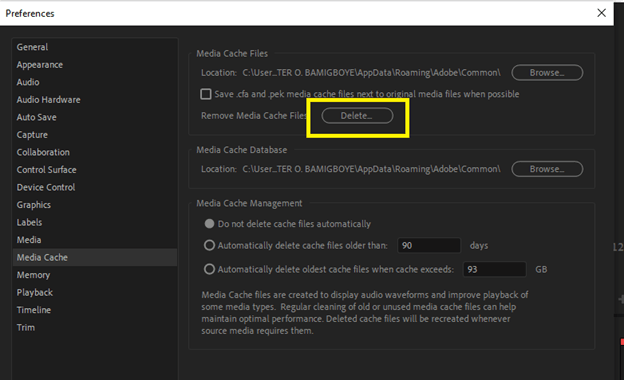
To clear the cache file in Adobe Premiere Pro, go to the Edit menu > Preferences > Media cache. Under the Media Cache section, click the “delete” button to delete “Media Cache Files.”
If it’s your first time here, you’re welcome! I am David, a professional video editor, using Adobe Premiere Pro for the past few years. I use Windows PC, and this article provides steps for Windows; I believe it’s the same process for MAC users.
In this article, I will explain what cache is, why it can cause problems in Adobe Premiere Pro, and how you can clear your Premiere Pro cache to keep your system running smoothly. We’ll also review some additional advice to help you use Adobe Premiere Pro to streamline your workflow.
Follow me, and let’s go!
Table of Contents
- What is Premiere Pro Cache?
- How to Clear the Cache File in Adobe Premiere Pro
- Why Clear the Cache File in Adobe Premiere Pro?
- What Else Can I Do to Free Up Space in My Computer Using Adobe Premiere Pro?
- How to Change the Cache Location
- Frequently Asked Questions about Cache Files in Adobe Premiere Pro
- Conclusion
What is Premiere Pro Cache?
As a video editor, you need a fast and reliable computer. The Adobe Premiere Pro cache is where Premiere Pro stores temporary files while you’re working on a project. If the cache becomes full, it can slow down your editing process. If you’re experiencing lag or slowdowns, try clearing your cache.
How to Clear the Cache File in Adobe Premiere Pro
Open Adobe Premiere Pro and go to Edit > Preferences > Media Cache.
Under the Media Cache section, click the “delete” button to delete “Media Cache Files.”
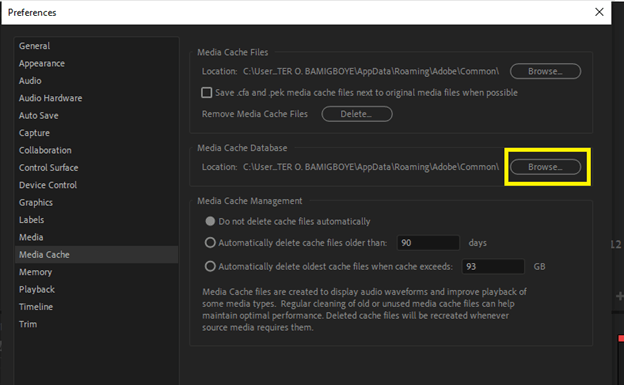
You can also click “Browse” to locate it on your computer. From there, you can now highlight the cache files and then delete them.
A confirmation window will pop up, asking if you want to delete the files. Click OK to confirm.
Why Clear the Cache File in Adobe Premiere Pro?
You can clear the cache in Adobe Premiere Pro for several reasons. One reason is to free up space on your hard drives. Premiere Pro creates temporary files such as preview and autosave files.
Over time, these temporary files can take up a lot of space on your hard drives. Clearing the cache can free up some space if your system is low on storage.
Another reason to clear the cache is if you’re experiencing performance issues with Premiere Pro. Rendering video can be a resource-intensive process, and if there are a lot of temporary files taking up space on the hard drive, it can slow down Premiere Pro. Clearing the cache can help improve performance.
Clear the cache files if you’re having problems with playback or exporting video from Premiere Pro. Sometimes temporary files can become corrupt and cause issues during playback or export. Clearing the cache can delete any corrupt temporary files and help fix these issues.
What Else Can I Do to Free Up Space in My Computer Using Adobe Premiere Pro?
You can do a few things if you want to clear space in Adobe Premiere Pro. One is to delete any unused assets from your project. Go through your project and delete unused video, audio, or image files you no longer need.
Another way to clear space in Adobe Premiere Pro is to export your project as a MPEG file. Exporting as MPEG will create a smaller file that takes up less space on your hard drive.
Finally, you can also delete temporary files from your computer. To do so, press Window + R,
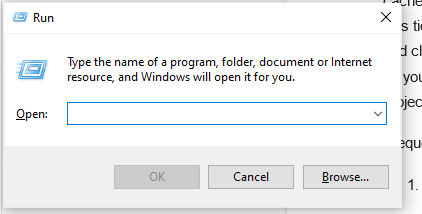
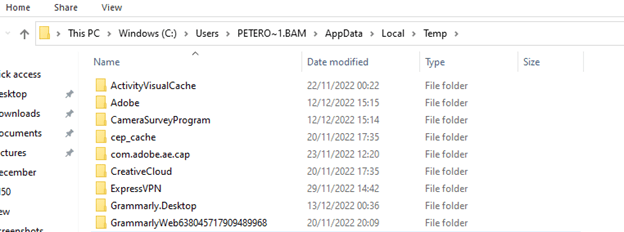
then type %temp% to bring up all the hidden temp files that are taking up space on your system.
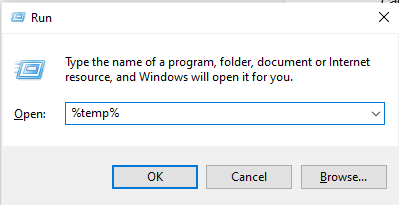
Select all and then press Shift + Delete. A confirmation window will pop up, asking if you want to delete the files. Click OK to confirm. Then your system will be free.
How to Change the Cache Location
Here’s how to change your cache location to keep your project files tidy and organized. If you’re working with Adobe Premiere Pro, you will need to clear your cache at some point.
To change your cache location, go to Edit > Preferences > Media Cache and click the “browse” button. You can browse your desired location and select it as your new cache folder. Adobe Premiere Pro will automatically create a new folder for each project inside this location, so all your files will be kept tidy and organized.
Frequently Asked Questions about Cache Files in Adobe Premiere Pro
Here are some questions about cache files in Adobe Premiere Pro.
Can caching files free up my hard drive space?
Yes, deleting the cache files can free up space on your hard drive since cache files are temporary files that you don’t always need after use.
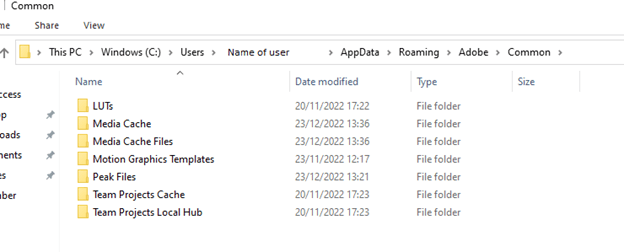
Where is the cache file location?
To see where your cache files are on your computer. You must first show the hidden files by pressing the view menu. After that, navigate downward to see where to activate “hidden files.”

Conclusion
Therefore, clearing the cache file in Adobe Premiere Pro is to free up space for a smooth workflow. Feel free to drop your message in the comment section if you find it challenging.
