If you thought cutting shapes with real scissors and paper was easy, cutting shapes with Adobe Illustrator is even easier. You can cut shapes with a variety of tools in Adobe Illustrator including the Eraser, Scissors, Knife, Eraser, Pathfinder, and more. All you need is a minute and some creativity to spare.
My name is Elianna. I have a Bachelor of Fine Arts in Illustration and have been using Adobe Illustrator for over six years. Cutting and combining shapes in Illustrator is my absolute favorite process.
In this post, I will show you how to cut shapes in Adobe Illustrator using different tools for different results.
Let’s get into it!
Table of Contents
Key Takeaways
- Use the Scissor tool to cut split shapes with straight lines.
- Use the Knife tool to draw freehand cuts along drawn paths on shapes.
- Use the Pathfinder for a variety of options to cut shapes.
- Use Cut Path at Selected Anchor Point to cut/split anchor points.
- Use Divide Objects Below to cut shapes out of other shapes like a cookie-cutter.
- Use Split into Grid to cut modifiable rectangular columns and rows out of a shape.
List of Useful Shortcuts
Here is a list of useful shortcuts for the commands and tools used in this post.
| Tool/Function | Keyboard Shortcut |
| Eraser | Shift + E |
| Scissor | C |
| Knife | |
| Pathfinder | Shift + Ctrl/Command + F9 |
| Cut Path at Selected Anchor Points | |
| Divide Objects Below |
Method 1: Eraser Tool
The Eraser is an obvious method to cut your shapes. With the Eraser, you can quickly erase through paths of shapes to divide them. Here’s how:
Step 1: Select the Eraser icon or use the shortcut Shift + E.

Step 2: Draw across your shape with the Eraser to split it into two parts. Use the Selection tool to reposition the cut shapes.

Method 2: Scissors Tool
The Scissors tool allows you to split paths, shapes, text frames, and graphics frames along segments or anchor points. This tool is best used to create fast straight cuts along the objects it is applied to. Here is how to use it:
Step 1: Click and hold on to the Eraser tool under you see the Scissors and select it.

Step 2: Click on a path or point of an object with the scissors where you would like to cut it. When clicked, the scissors will split the path, creating two endpoints.

Method 3: Knife Tool
The Knife tool is represented by a Knife icon and allows you to make freehand cuts along drawn paths, dividing objects into their own separate shapes.
In previous versions of Illustrator, the knife tool could be found by clicking and holding the Eraser or you can find the Knife tool under the Edit toolbar.
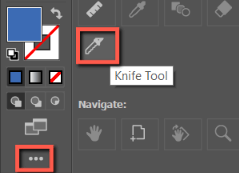
Here is how to use it:
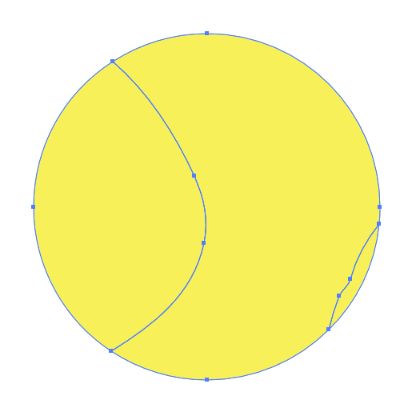
Step 1: Click and drag your knife over the path you would like to cut. To make a curved freehand cutting path, simply click and drag as desired. If you would like to make a freehand straight cutting path, hold down Alt (Windows) or Option (Mac) while dragging.
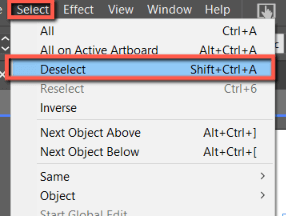
Step 3: Click on Select > Deselect or use the keyboard shortcut Ctrl/Command + Shift + A.
Step 2: Use the Selection tool to click and drag each part of your cut shape away from each other.

Method 4: Pathfinder Tool
Pathfinder is not one tool, but a group of functions and effects that can be used to modify, trim, cut, and join overlapping objects. There are seven pathfinder options that can be used to cut shapes, including Minus Front, Exclude, Divide, Trim, Crop, Outline, and Minus Back.
Here is how to use it:
Step 1: Select two overlapping shapes.
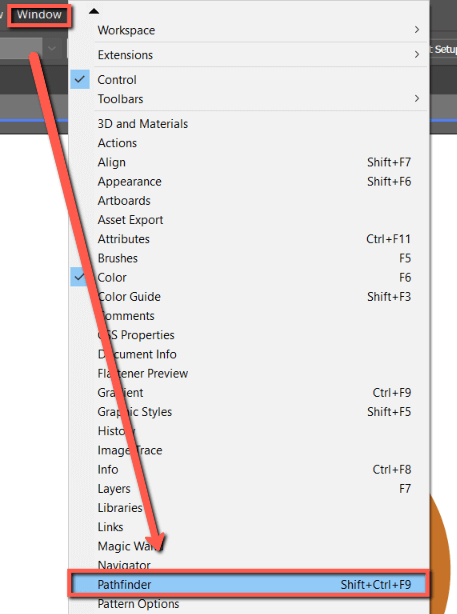
Step 2: Open the Pathfinder using Window > Pathfinder or the keyboard shortcut Shift + Ctrl/Command + F9.
Step 3: With your two shapes selected, choose an option from the Pathfinder menu. For this example, I am using Minus Back.
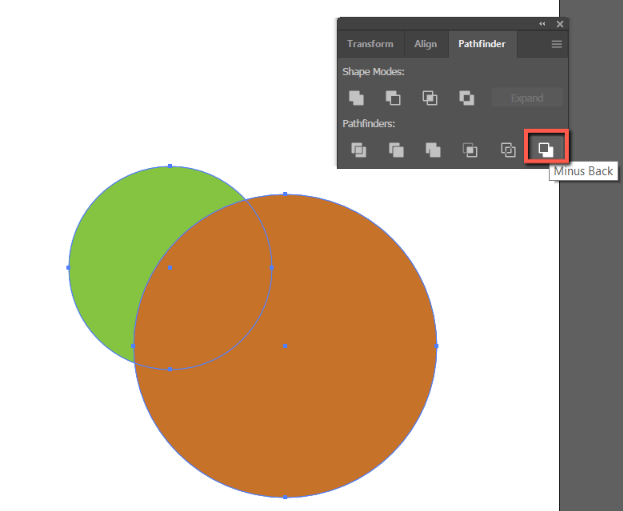
Step 4: Experiment for best results.

Method 5: Cut Path at Selected Anchor Points
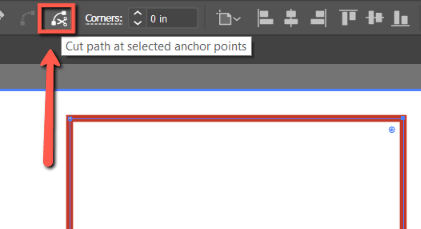
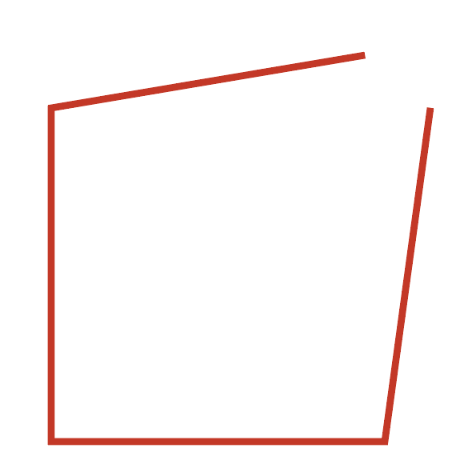
The Cut path at selected anchor point tool allows you to cut a path at the anchor point of a segment or shape, splitting an anchor point into two. This function is useful for quickly editing shapes like ellipses, squares, stars, and more. Here is how to use it:
Step 1: Use the Direct Selection Tool to select an anchor point on your object.
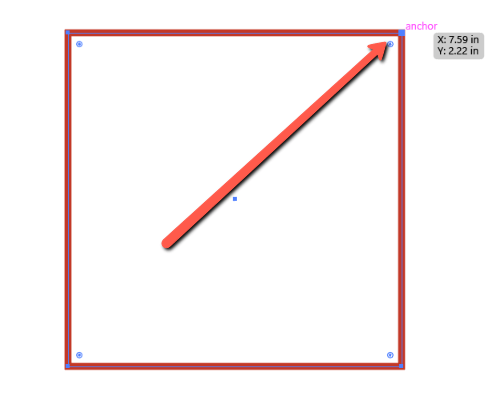
Step 2: Click on the Cut path at selected anchor point icon in the Control panel.
Step 3: Use the Direct Selection Tool to modify your split anchor points.
Method 6: Divide Objects Below
Divide Objects Below is a command found in the Object menu that allows you to cut through overlapping objects like a cookie cutter. Here is how to use it:
Step 1: Select two objects on your artboards, or create two objects and position the object you would like to act as the “cutter” over the object you intend to cut.

Step 2: Select Object > Path > Divide Objects Below.
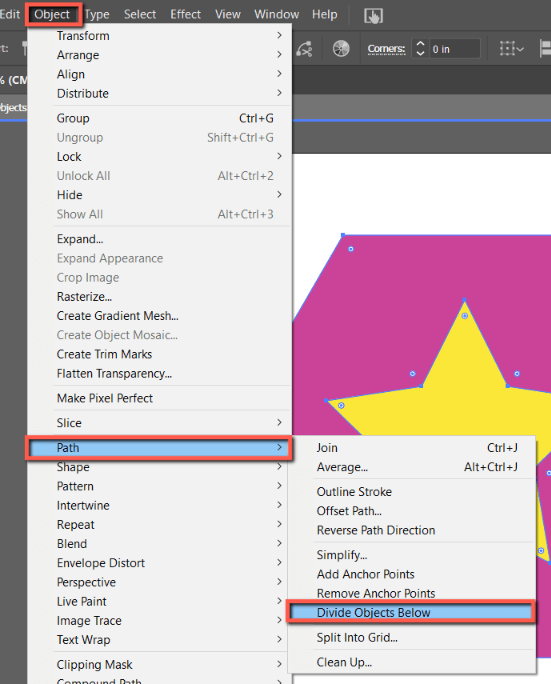
Step 3: Select the shape you cut out and reposition it as desired.

Method 7: Split Into Grid
Split into Grid allows you to divide one or more shapes into rectangular objects. These rectangular objects are arranged into rows and columns and can be modified to change fields such as height, width, and more.
This function is especially useful when reading artwork that requires precise measurements for rows and columns, and to make quick guides to lay out designs.
Here is how to do it:
Step 1: Create an object and select it with the Selection tool.

Step 2: Select Object > Path > Split into Grid. This will open the Split into Grid options menu.
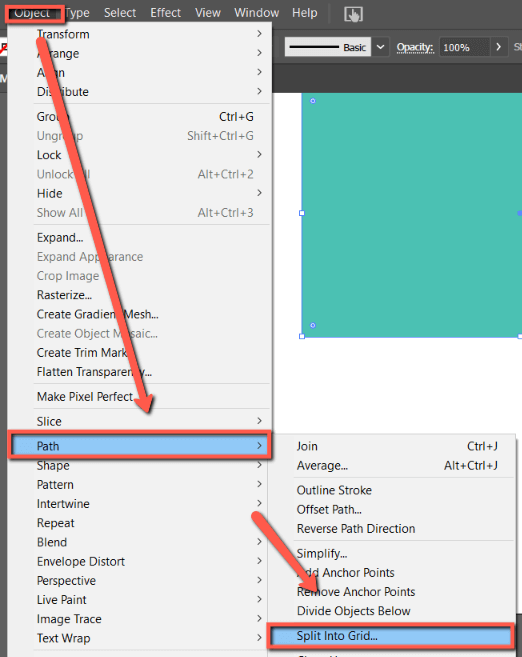
Step 3: Check Preview to view your modifications and edit your grid as desired. You can modify the number of rows and columns, specify height and width, edit gutters, edit size, toggle guides, and more.
For this example, I am giving my grid 3 rows and columns and setting my gutters to .25 inches. When you are finished click OK.
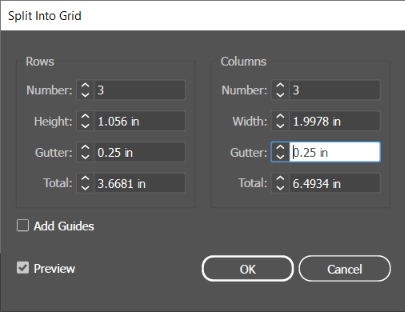
Step 4: Your grid will update with your preferences.

Final Thoughts
There are many ways to cut shapes in Adobe Illustrator, each with its own pros and cons. Learning how to use them all can help you identify the unique properties of each and the best practices when utilizing them in your workflow. Experiment for best results.
What is your favorite tool to cut shapes in Adobe Illustrator? Tell me in the comments below!
