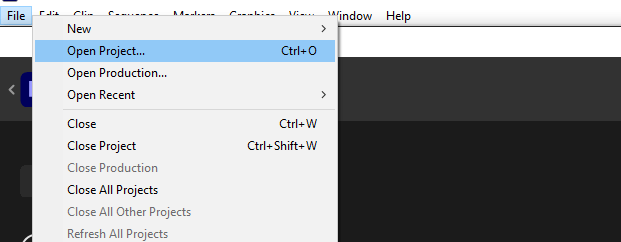
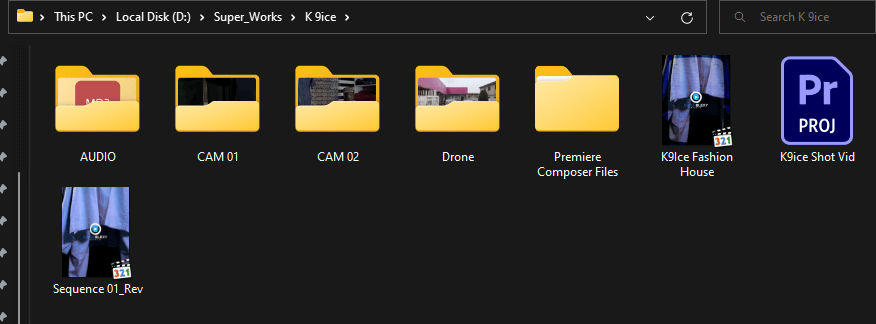
To delete projects in Adobe Premiere Pro, select File Menu > Open Project. In the explorer menu, select and delete the project from there right away.
There are a few reasons why you might want to delete projects in Adobe Premiere Pro. Sometimes we simply don’t need them anymore or want to clear up space on our computers. In other words, you might be unhappy with how they turned out and decide to start fresh with new projects. Whatever the reason, deleting projects is a pretty straightforward process in Adobe Premiere Pro.
In this article, I will show you how to delete projects in Premiere Pro, clear the cache in the preference menu, delete rendered files, and remove any project from your recent project lists.
Table of Contents
How to Delete Projects in Premiere Pro
First, open your Premiere Pro. Select File Menu, then click on Open Project, or you can simply press the shortcut keys CTRL KEY + O. You will see a Window Explorer pop-up that lists your saved projects.
Select any projects of yours you would love to delete, and hit the DELETE key on your keyboard to get rid of them right away.

As I always say, Adobe Premiere Pro has different ways of doing things. You should go with the one that’s easiest for you. To delete projects, you can also search for them manually on your PC, and from there, you hit the DELETE button.
Project files usually save up in Documents > Adobe > Premiere Pro > Version Number. But if you are like me – an advocate of being organized. I save my projects in each project folder I create alongside their footage and assets.
How to Delete Recent Project
Immediately after firing up your Premiere Pro, you will be shown several recent projects lists. If the project you intend to delete is part of this project, all you need to do is right-click on that project name in the recent projects.
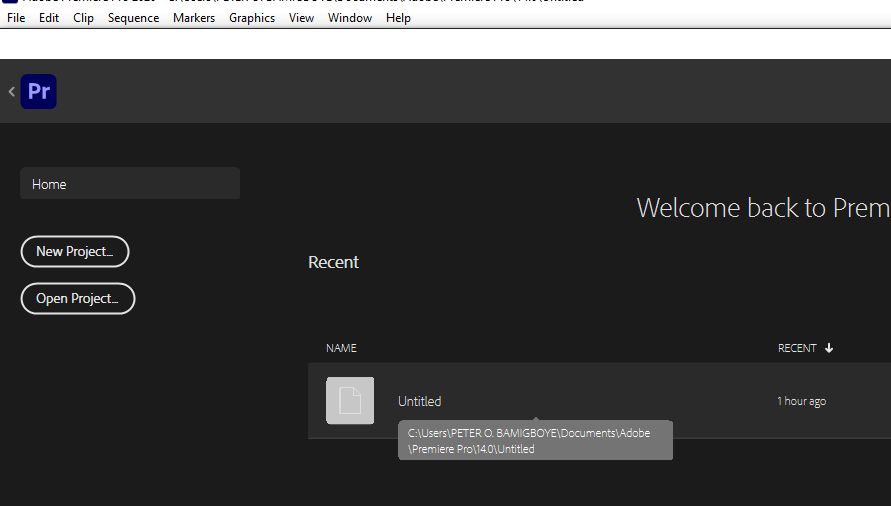
A notification box will pop up, showing the path where the Premiere Pro project file is saved on your system. All you need is just to follow the path through your window explorer. Find it, select and delete it.
Then, quit Premiere Pro, fire it up again, and phew! The project is gone from your recent projects.
To delete multiple projects, just follow the above process. Delete all the files and restart your Adobe Premiere Pro. This will clear the entirety of the recent list.
Deleting Cache in Adobe Premiere Pro
Cache files can take up valuable space and can slow down your system’s performance. By clearing out the cache, you are freeing up space for effective system performance.
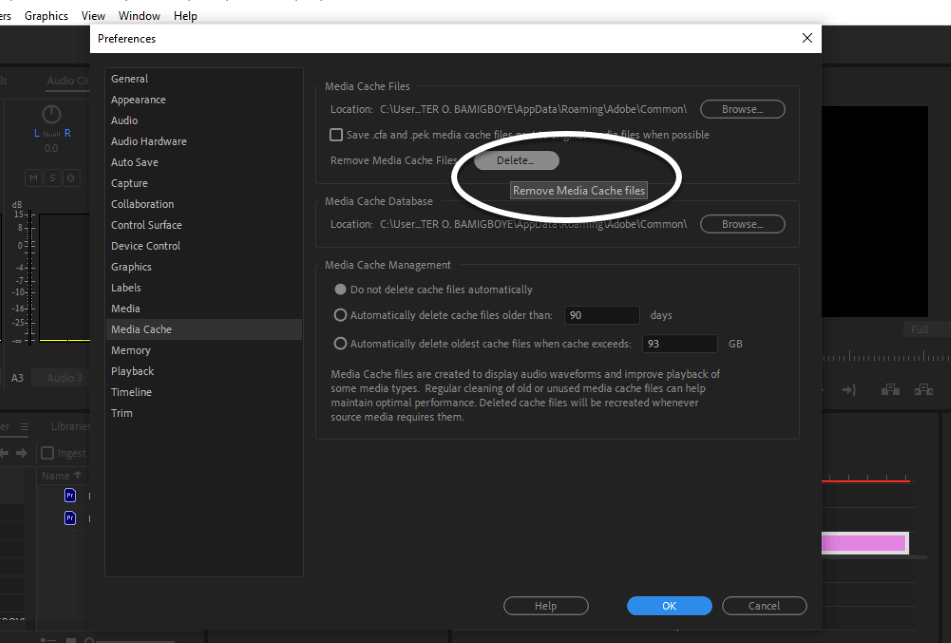
To do this, Go to Edit Menu > Preferences > Media Cache.
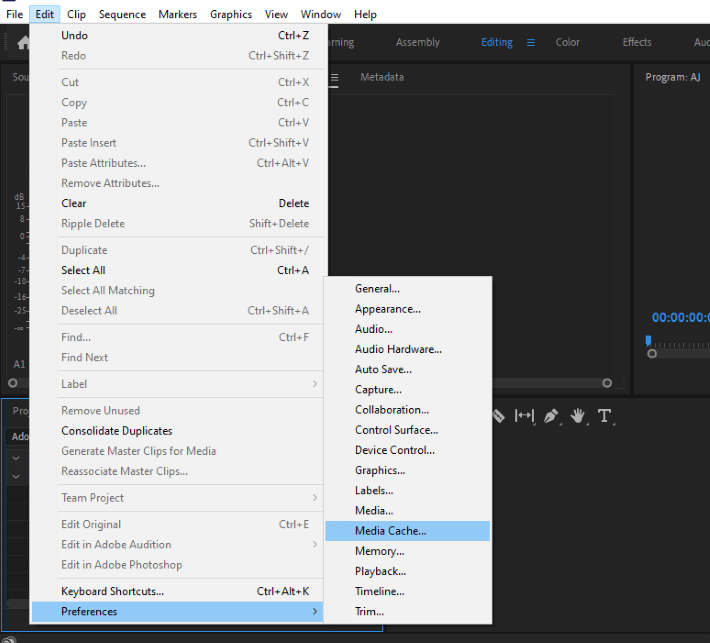
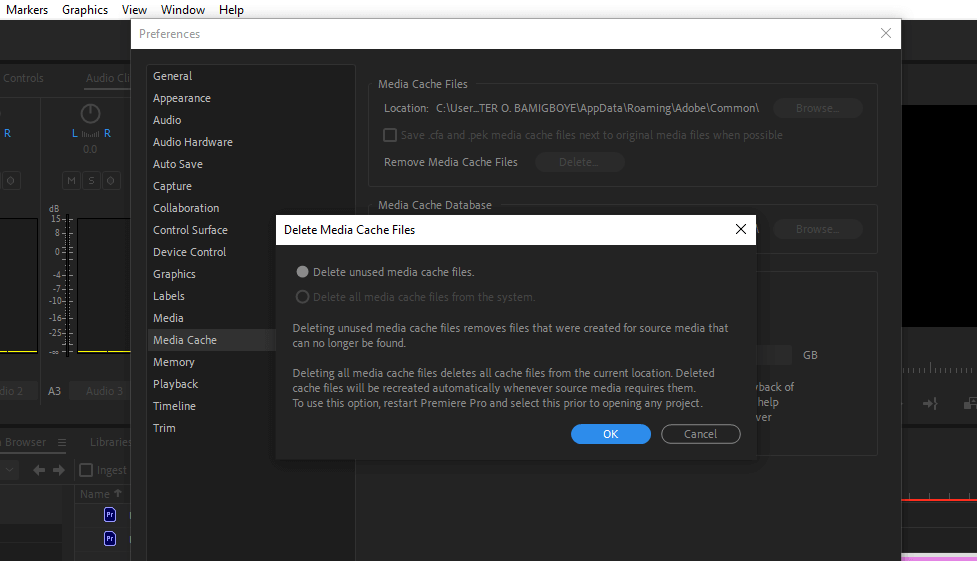
In the dialogue box, you can delete unused cache files or all media cache files from the system. Select one of the options and click OK.
Immediately it will start to clean up the cache files. This will hugely free up your disk space.
How to Delete Rendered Files in Premiere Pro
Sometimes, Premiere Pro can have trouble opening old rendered files. So, deleting them can help fix that issue. It can also help free up a large amount of space on your PC
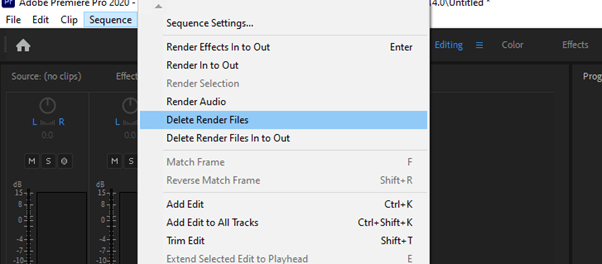
To delete rendered files from your present sequence, just select the Sequence Menu > Delete Render Files.
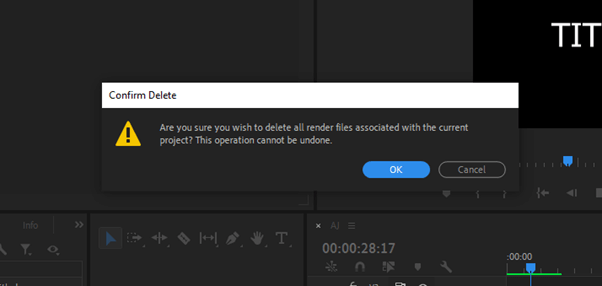
After doing this, a notification box will pop up, seeking your consent on whether to continue or cancel. Just click OK, and the deleting process will start.
Similarly, you can delete your render files stored in window explorer, named after your project, in either the render file folder or audio render the file.
How to Delete Unused Media from Premiere Pro
To delete unused media from Adobe Premiere Pro, identify the video clips used and unused from the project panel. The clip is in the sequence if you have a blue color under each thumbnail. The one without blue color means they are not used in any sequence.
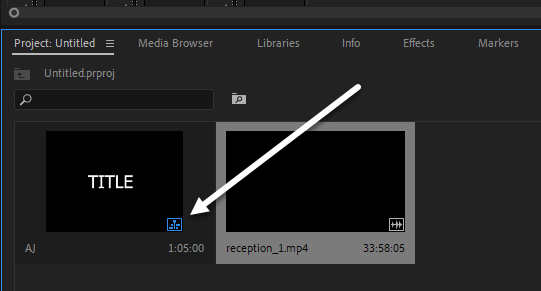
With that, you can select and delete them one after the other.
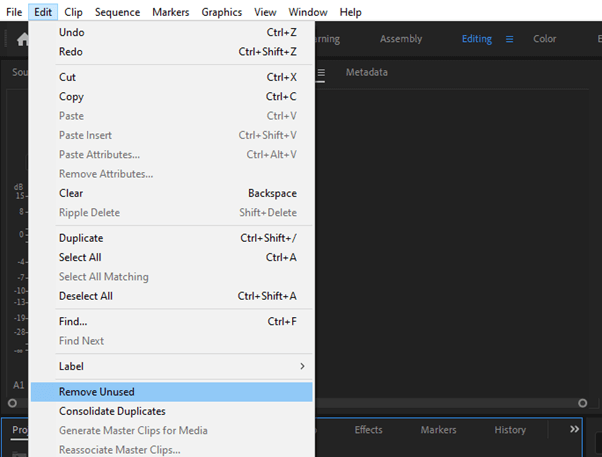
A pro tip to delete unused media files fast – just go to the Edit Menu and Select Remove Unused. This will then remove the unused media clips from the project panel.
Conclusion
Deleting project files is simple as deleting anything in your explorer. Search for the project and delete it right away.
Now that you’ve learned how to delete your project file, render file, and cache files from Premiere pro, I believe you can now do that on your own effectively.
If you are still finding this challenging, don’t be troubled. Please drop your question in the comment box, and I will respond promptly.
