Using pattern fills in Adobe Illustrator can level up your work in seconds. All you need to do is click on an object and select a pattern swatch to apply it. You can also draw patterned strokes with the Blob Brush.
My name is Elianna. I have a Bachelor of Fine Arts in Illustration and have been using Adobe Illustrator for over six years. I use Adobe Illustrator to create posters, illustrators, business cards, and more. Pattern fills are one of my favorite design elements to use in Adobe Illustrator.
In this post, I will show you how to fill objects, strokes, and text with pattern swatches, and how to edit the pattern swatches.
Table of Contents
- Key Takeaways
- What Are Pattern Fills in Adobe Illustrator
- How to Add Patterns to Shapes in Adobe Illustrator
- How to Draw Pattern Fills Using the Pen Tool
- How to Draw Patterns Using the Blob Brush
- How to Fill Text with Pattern in Adobe Illustrator
- How to Edit Pattern Fills in Adobe Illustrator
- Final Thoughts
Key Takeaways
- You can add fill objects and text with patterns in Adobe Illustrator
- You can draw strokes with a pattern using the Blob Brush. The keyboard shortcut for the Blob Brush tool is Shift + B
- The keyboard shortcut to Create Outlines is Shift + Ctrl/Command + O
- You can Scale, Rotate, and Layer patterns
What Are Pattern Fills in Adobe Illustrator
Pattern Fills are pattern swatches that you can use to fill object or text in Adobe Illustrator. Within Illustrator, there are numerous pattern swatch libraries that you can access in the Swatch menu. You can also import your own custom pattern swatches, define new pattern swatches, and edit existing pattern swatches in Illustrator.
There are three default pattern swatch library categories in Adobe Illustrator. They are as follows:
- Basic Graphics: Consists of line, dot, and texture pattern libraries
- Decorative: Consists of the following two libraries: legacy and vonster patterns. These libraries contain geometric, ornamental, and culturally-inspired pattern swatches
- Nature: Consists of nature-inspired foliage and animal skin pattern swatches
How to Add Patterns to Shapes in Adobe Illustrator
You can add pattern fills to shapes and closed paths. Here’s how:
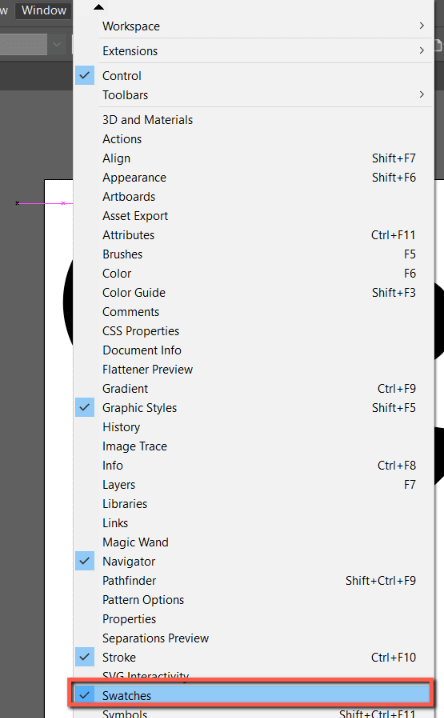
Step 1: Open the Swatches menu in Window > Swatches.
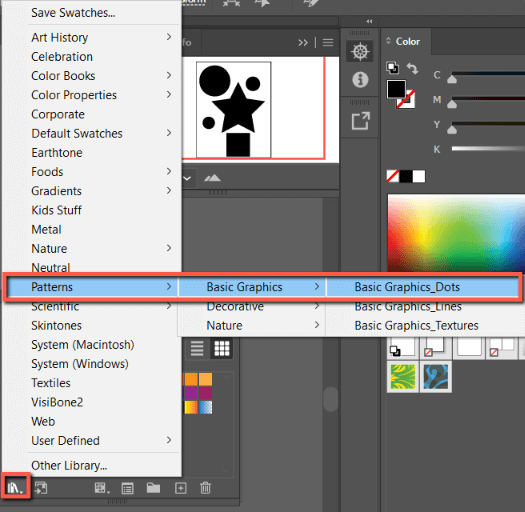
Step 2: Click on the Swatch Libraries icon at the bottom of the Swatch panel. Then select Patterns and choose a library from the categories listed. For this example, I am using Basic Graphics Dots.
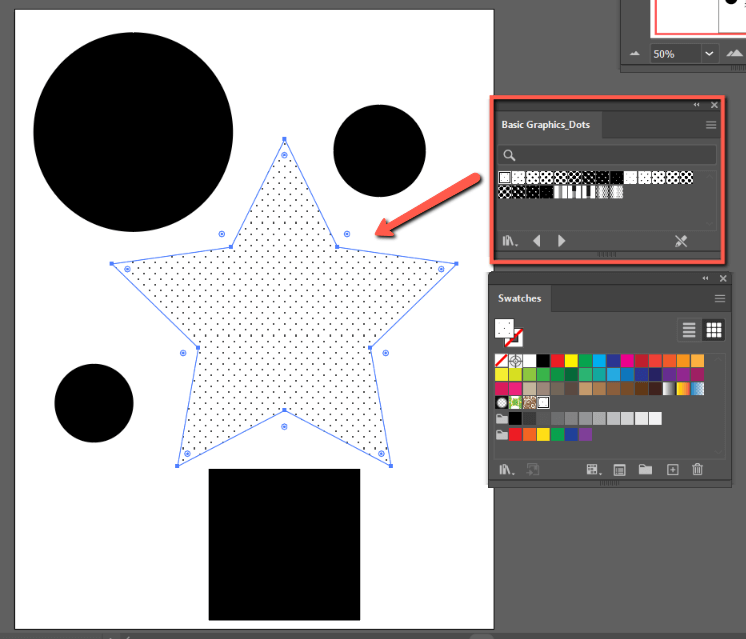
Step 3: Click on an object/shape/text in your artboard. Then click on a pattern swatch to fill the selected object.
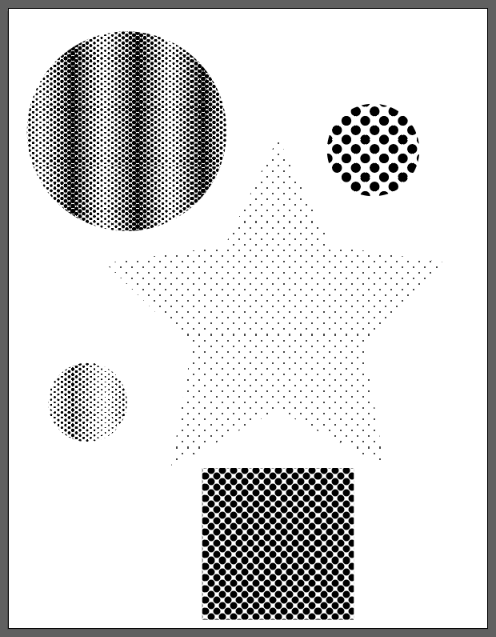
You can repeat it as many times as you want.
You can use the same way to add a pattern to shapes created by the Pen tool.
How to Draw Pattern Fills Using the Pen Tool
You can also draw shapes with pattern tools using the Pen tool. Here’s how:
Step 1: Select a pattern that you would like to do from the pattern swatches menu. Then click on the Pen Tool, or use the keyboard shortcut P.
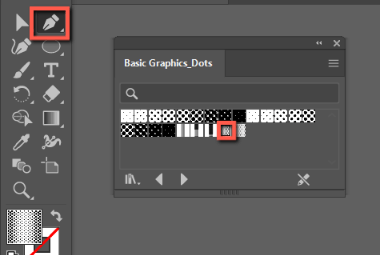
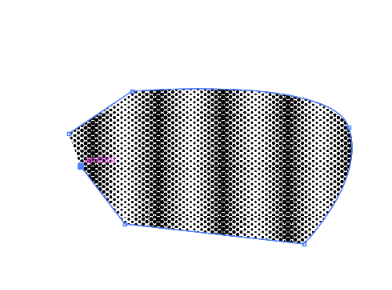
Step 2: Draw a shape with the Pen tool. Your pattern will apply to the shape as it is drawn.
How to Draw Patterns Using the Blob Brush
If you would like to draw a custom stroke/shape with a pattern fill, you can do so using the Blob Brush.
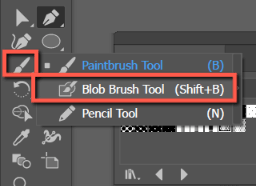
Step 1: Right-click on the Brush tool and select the Blob Brush, or use the keyboard shortcut Shift + B.
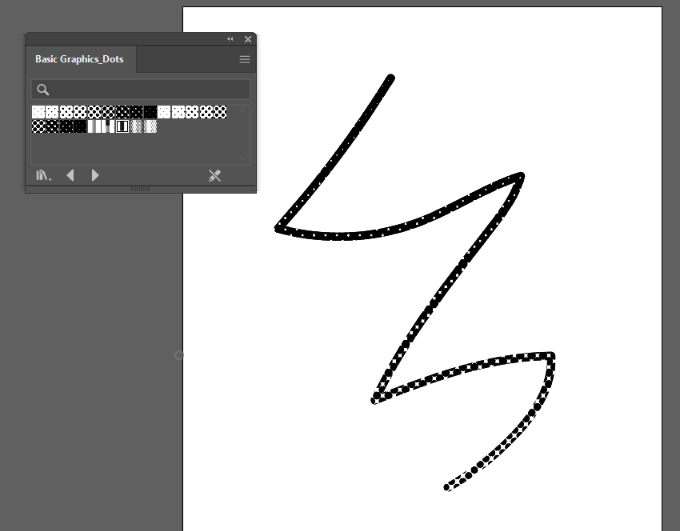
Step 2: Select a pattern swatch of choice, and then use the Blob Brush to draw. Your pattern will apply to the stroke.
How to Fill Text with Pattern in Adobe Illustrator
To fill text with a pattern swatch, you must complete an extra step, because text itself cannot be filled with a pattern. To do so, you must first Create Outlines. Here’s how to do it.
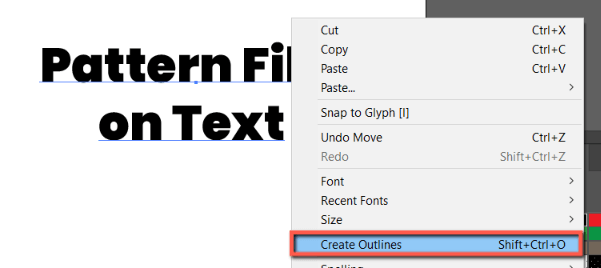
Step 1: Right-click on the text you would like to fill with a pattern and select Create Outlines. This will convert your text into a vector object, or use the keyboard shortcut Shift + Ctrl/Command + O.
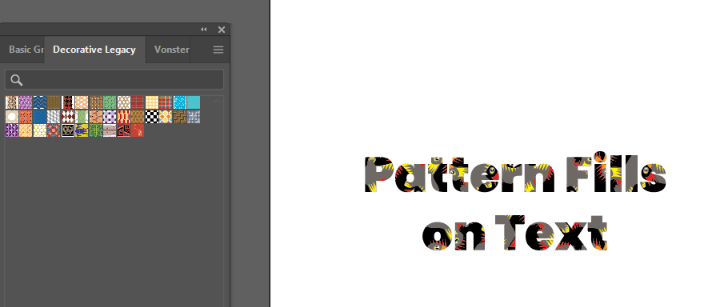
Step 2: Fill the text shape with the pattern of your choice.
How to Edit Pattern Fills in Adobe Illustrator
After you have applied your pattern swatch to your objects, or strokes, you can edit them. For example, you can resize, rotate or add different layers of patterns in Illustrator. Here’s how:
How to scale a Pattern Fill
Step 1: Click on your object with the pattern fill you would like to scale.
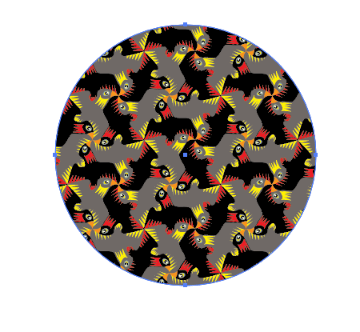
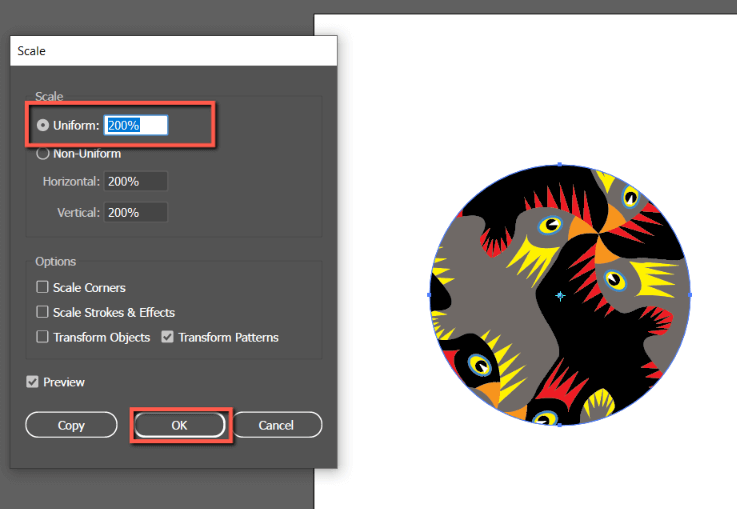
Step 2: Double-click the Scale Tool from the toolbar. Check Transform Patterns and uncheck all other options.
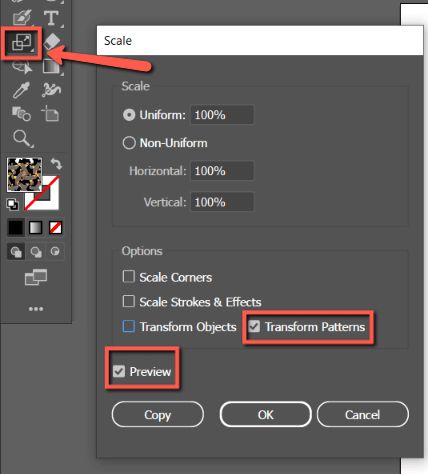
Step 3: Modify the scale percentage next to Uniform. When you are done, click OK.
How to Rotate a Pattern in Adobe Illustrator
Step 1: Click on the object with the pattern fill you would like to rotate.
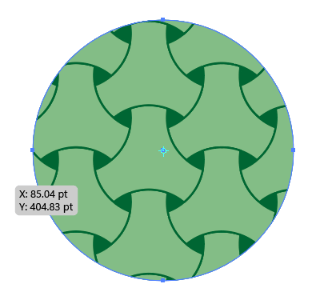
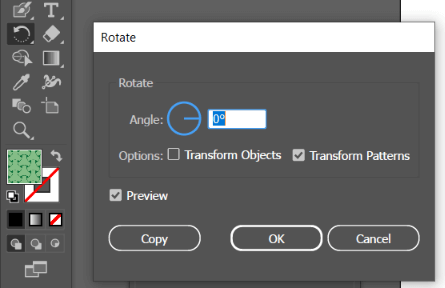
Step 2: Open the Rotate tool in the toolbox, or use the keyboard shortcut R. Double-click on it to open the Rotate options.
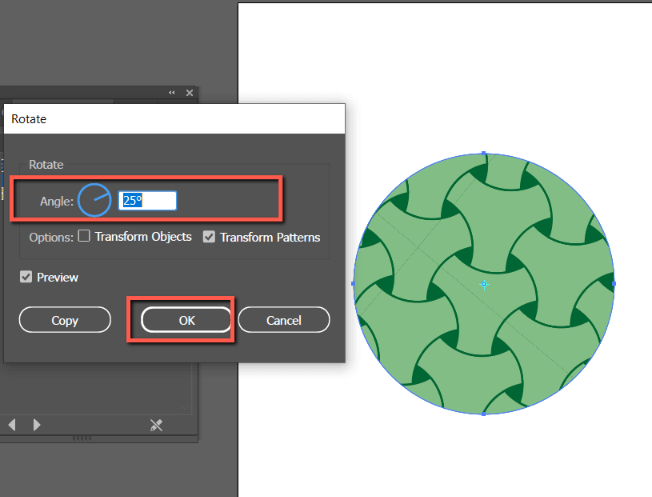
Step 3: Modify the angle of rotation as desired. For this example, I am rotating the pattern 25%. Click OK when finished.
How to Layer Pattern in Adobe Illustrator
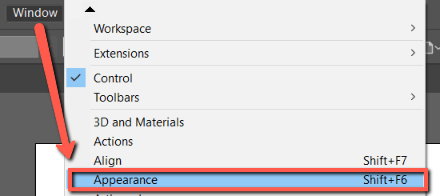
Step 1: Click on an object that you would like to layer pattern fills on. Open the Appearance panel with Window > Appearance, or use the keyboard shortcut Shift + F6.
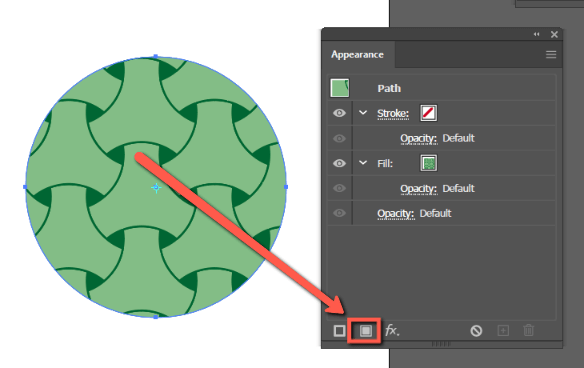
Step 2: Click on the Add New Fill button.
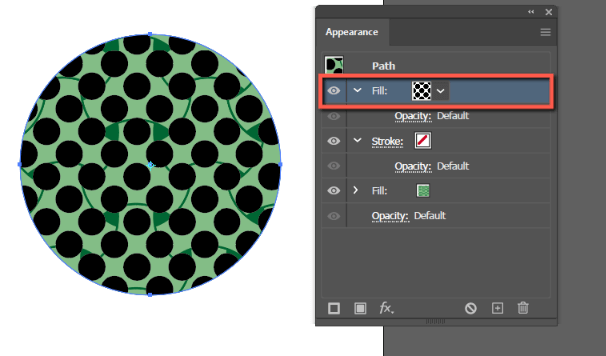
Step 3: Select a new pattern fill. Your pattern will apply on top of the previously applied pattern fill.
Final Thoughts
Adding pattern fills to your shapes and text in Adobe Illustrator takes seconds, and can bring the finish of your work to the next level. Not only can you add preset and custom pattern fills to pre-existing elements, but you can also edit your fills to further suit your design needs. Experiment for best results.
What’s your favorite pattern to use in Adobe Illustrator? Tell me in the comments below!
