Grouping and managing your layers properly in Photoshop is an extremely important habit to develop as you continue to master the program. While it’s sure to be an advantage when pursuing a career professionally, it will also serve to aid in upping your expediency and cutting down on unnecessary work time.
My name is Skyler, and I currently work as a freelance sequential artist while attending my last year at the Savannah College of Art and Design. I’ve got lots of experience applying these methods and techniques to create polished works for presentation and application professionally.
There’s nothing worse than not being able to find what layer, or where when you’re working on a project. This might be because it’s not labeled properly, or you haven’t grouped your layers. To avoid endlessly scrolling and checking each layer for your intended selection, read on!
Table of Contents
Useful Keyboard Shortcuts
- Select the layers you want to group by highlighting each while holding down on Command/Ctrl. Once they’re all highlighted, you can click Command/Ctrl + G to group your selected layers together.
- Select the folder you want to ungroup and press Command/Ctrl + Shift + G to separate them.
- To create a subgroup, open up the desired group and select only the layers you’d like to put into the subgroup. Once they’re all highlighted, you can click Command/Ctrl + G to group your selected layers together.
How to Create a New Layer Group in Photoshop
In order to create a new group, you’ll first need to make your selections. You’ll need at least two layers to make a group, so ensure you have that or more before attempting to group.
For example, I want to group these five layers. Here are the steps to group them.
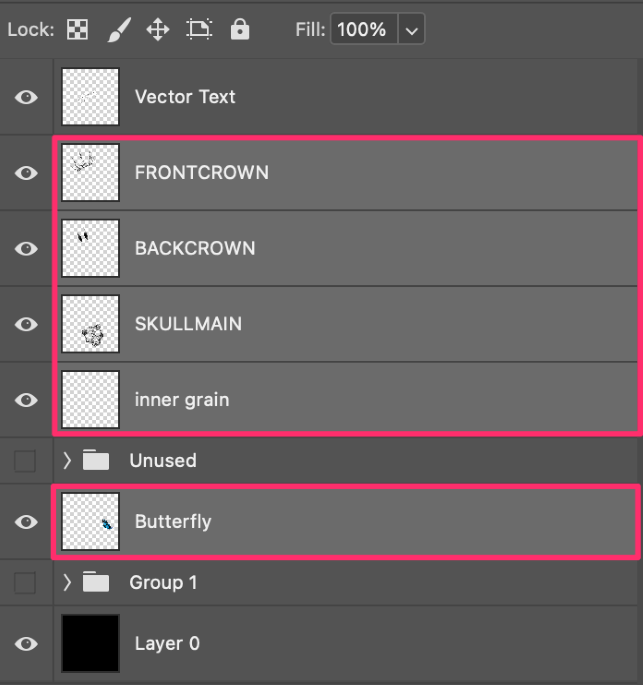
Step 1: Click on the layers you want to group while holding down the Command/Ctrl key to select the layers.
Step 2:Click on the Create a new group (folder icon) at the bottom of your panel with your layers selected.
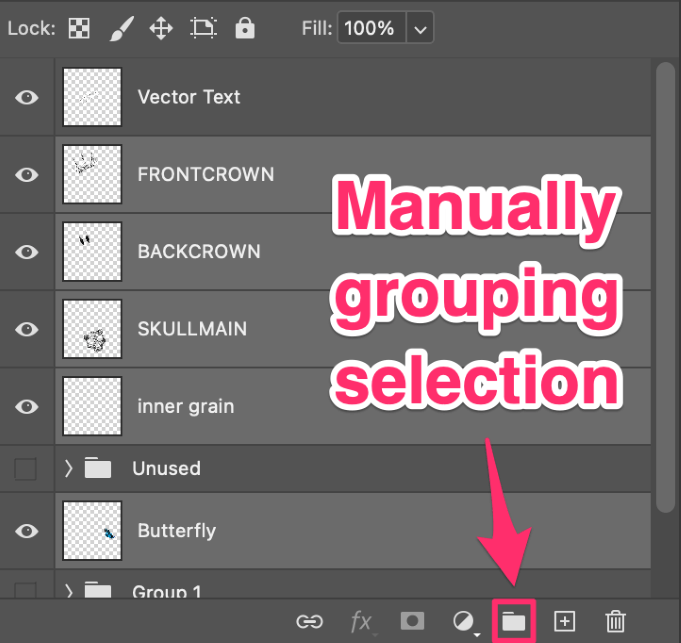
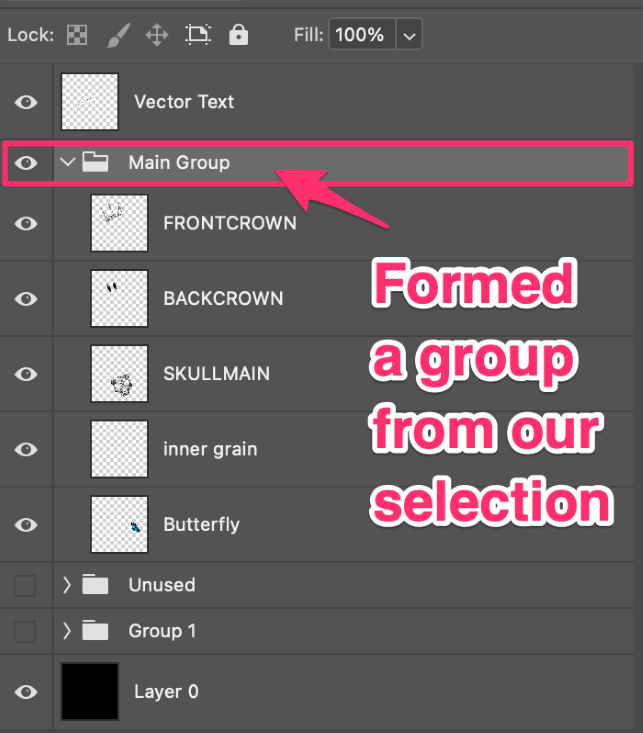
Alternatively, you can also use the keyboard shortcut to group layers in Photoshop. Simply select the layers you want to group, and click Command/Ctrl + G to group your selected layers together.
How to Add a Layer to an Existing Group
Now if you’ve already made a group, but left a layer or two out the solution is simple. All we have to do is identify the layer(s) we wish to put into our group and select them.
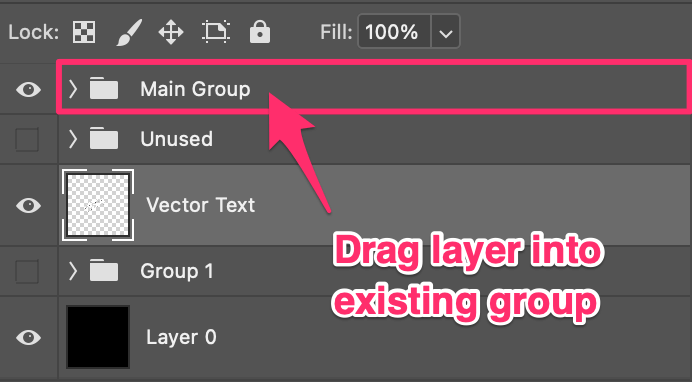
Now all that’s left is to do is drag your selection into the existing group.
How to Remove a Layer from a Group
To perform the opposite action, the same is true! We can simply drag a single layer, or multiple layers out of the group by dragging and dropping them elsewhere in the Layers panel.
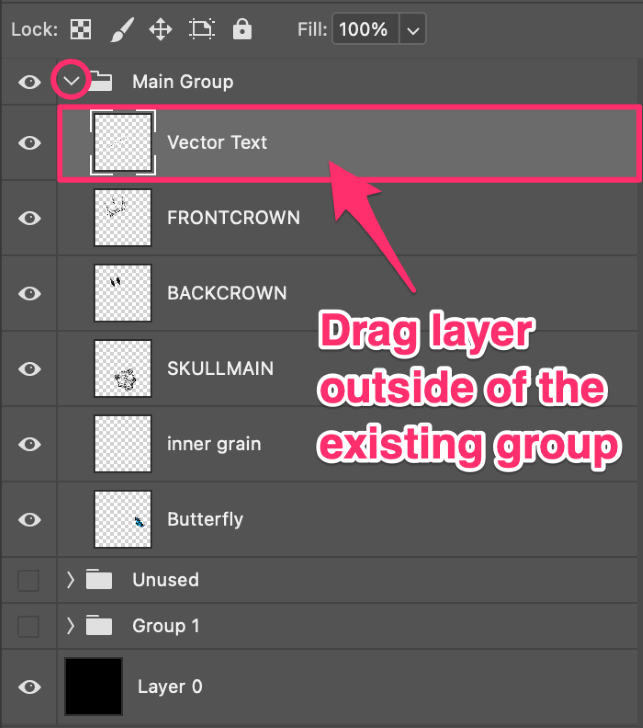
Once this is done, your selected layer will be outside of your grouping again.
How to Ungroup Layers in Photoshop
This one is for when you want to break up the entire group you’ve created. In order to perform this action, we’ll need to right-click on our group folder and find the Ungroup Layers option from the menu.
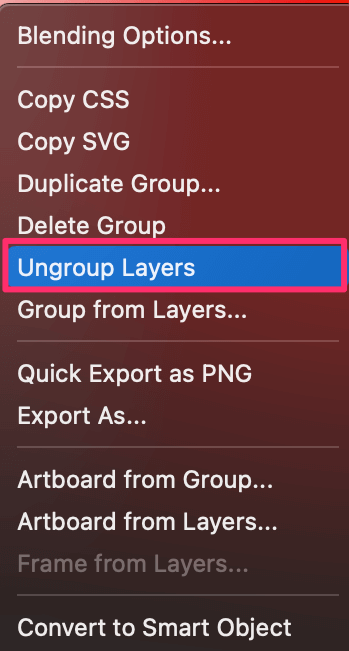
If you’d like to complete this action a bit more efficiently, you can also use our keyboard shortcuts. Simply select the folder you want to ungroup and press Command/Ctrl + Shift + G to separate them. Easy as that!
How to Create Sub Layer Groups
Creating subgroups isn’t nearly as hard as you might’ve imagined! It’s essentially recreating the process we used to make a new group but within an existing one.
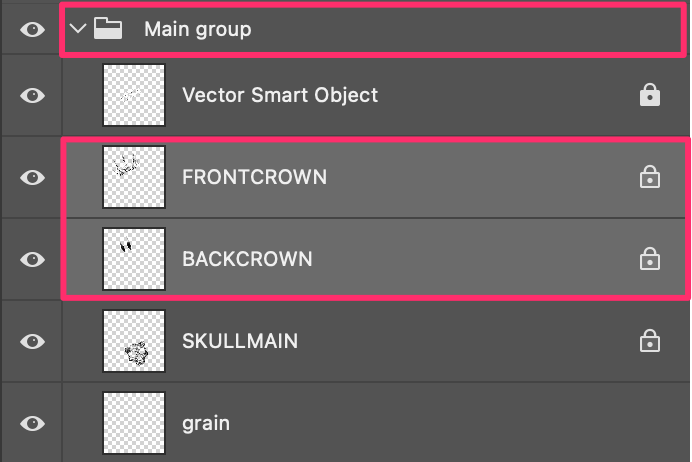
First things first, make sure that you are inside your intended group so we can create a sub-group folder. Select at least two layers from within your group, and use your keyboard shortcut Command/Ctrl + G to group your selected layers together.
Alternatively, we can click the folder icon again at the bottom of our panel screen.
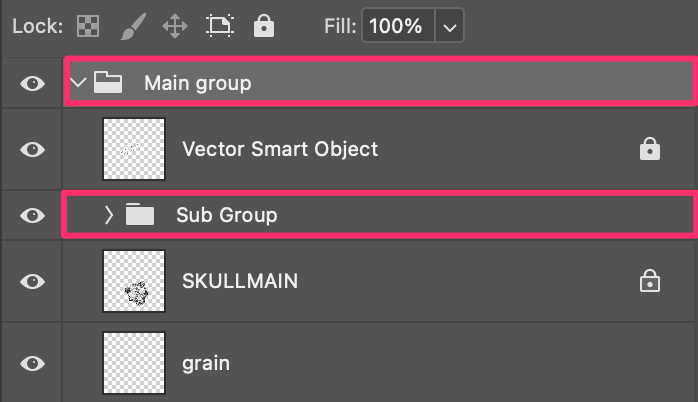
As you can see, we’ve successfully created our first sub-grouping! These grouping skills are key to organizing your layers and folders professionally, in addition to cutting down on unnecessary time spent searching for the right layer.
Final Words
Great job working with your layers and learning to group them appropriately! Grouping your layers can really help organize your work. All in all, this is a habit you should try and stick to, so be sure to review this information as necessary until it’s really sunk in.
