While it’s possible to create a great layout using purely typographic design elements, most InDesign projects use images to help create mood, showcase data and provide relief from endless walls of text.
But inserting an image in InDesign is a different process than the one found in many other design apps, so let’s take a closer look at how it all works.
Table of Contents
Using Linked Images in InDesign
InDesign is often used as a collaborative program, with different teams working on various elements of the project at the same time. As a result, images are rarely embedded directly into InDesign documents, but instead, they are treated as ‘linked’ images that refer to external files.
InDesign creates a preview thumbnail of the image and inserts it into the document for use during the design phase, but the actual image file itself isn’t saved directly as part of the InDesign document file.
That way, if the graphics team needs to update some of the image files used in the InDesign document during the layout process, they can simply update the external image files instead of interrupting the layout team’s work.
This approach has some collaborative benefits and a few potential downsides in the form of missing links, but it’s the standard method for inserting images in InDesign.
Two Methods for Inserting an Image in InDesign
There are two primary methods for inserting an image in InDesign, depending on the way you like to work and how you set up your files. For some long-forgotten reason, the command used to insert images in InDesign is called Place instead of Insert, and once you know that, the rest of the process is relatively easy.
Method 1: Inserting Images Directly into InDesign Layouts
The simplest method is to insert your images directly into your current working page.
Step 1: Open the File menu, and click Place. You can also use the keyboard shortcut Command + D (use Ctrl + D if you’re using InDesign on a PC).
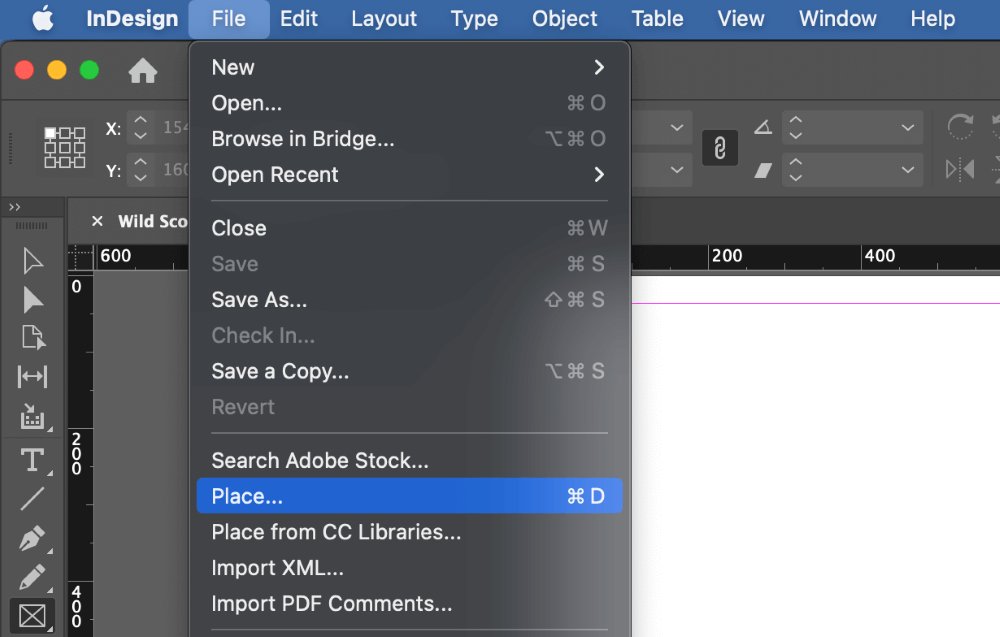
InDesign will open the Place dialog.
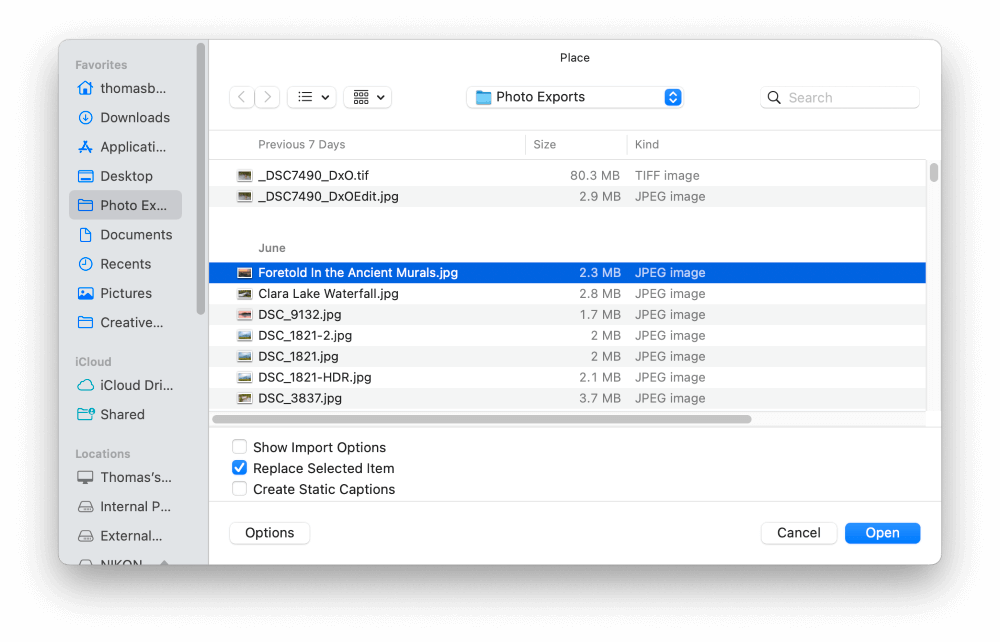
Step 2: Browse to select your file, but before you click the Open button, it’s time to review the options in the Place dialog window:
- The Show Import Options checkbox can be useful if you need to insert an image with a clipping path or a different color profile than the rest of your document, but it’s not necessary for most situations.
- The Replace Selected option is also useful but quite self-explanatory; when in doubt, leave it unchecked.
- The Create Static Captions allows you to generate captions automatically using the available metadata, but most of the time, it’s going to be a better design choice to create them yourself!
Step 3: Once you’re happy with the settings, click the Open button. Your mouse cursor will transform into a small thumbnail of the image, and you only need to left-click once in your desired location on the page to insert the image at that spot.
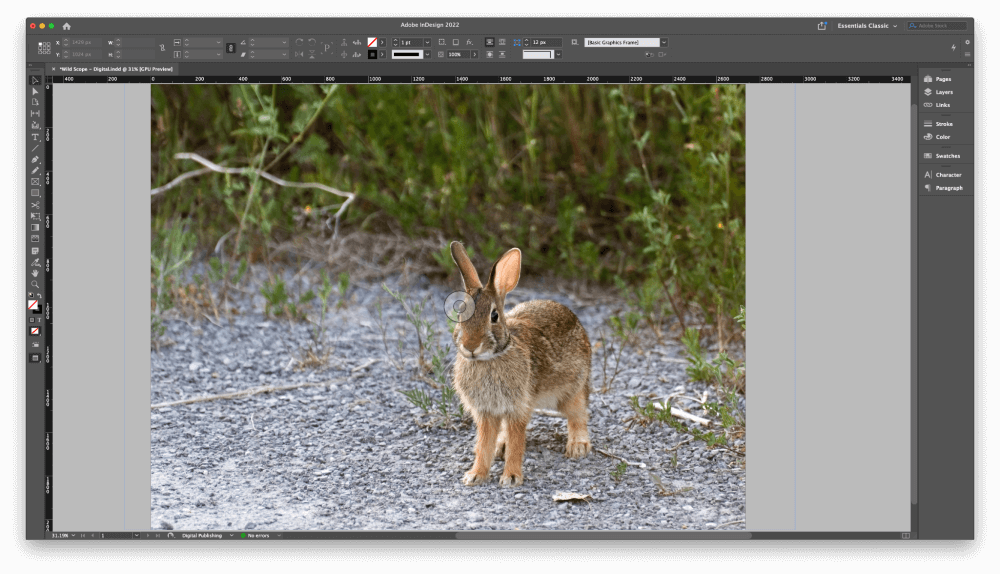
If you want to adjust the size or location after this point, switch to the Selection tool using the toolbar or the keyboard shortcut V. This is the general purpose tool used to select various layout elements and adjust their placement and size.
Repositioning is as simple as clicking and dragging to move the blue-outlined frame, and you can reposition your image object within the frame by using the circular anchor point in the center of the image frame (shown above), but resizing can be a bit more tricky.
InDesign uses two different types of bounding boxes to define images: one for the frame (outlined in blue), which controls how much of the image is displayed, and one for the actual image object itself (outlined in brown).
You can switch between the two by double-clicking on the visible part of your image displayed in the frame.
Method 2: Inserting Images into Frames in InDesign
Sometimes it’s necessary to begin creating your InDesign layouts without having access to the image files that will be used.
Instead of placing images immediately, you can create frames to act as image placeholders, ready to be filled when the final artwork is available. Frames also act as a clipping mask, only displaying the section of the image that fits within the frame.
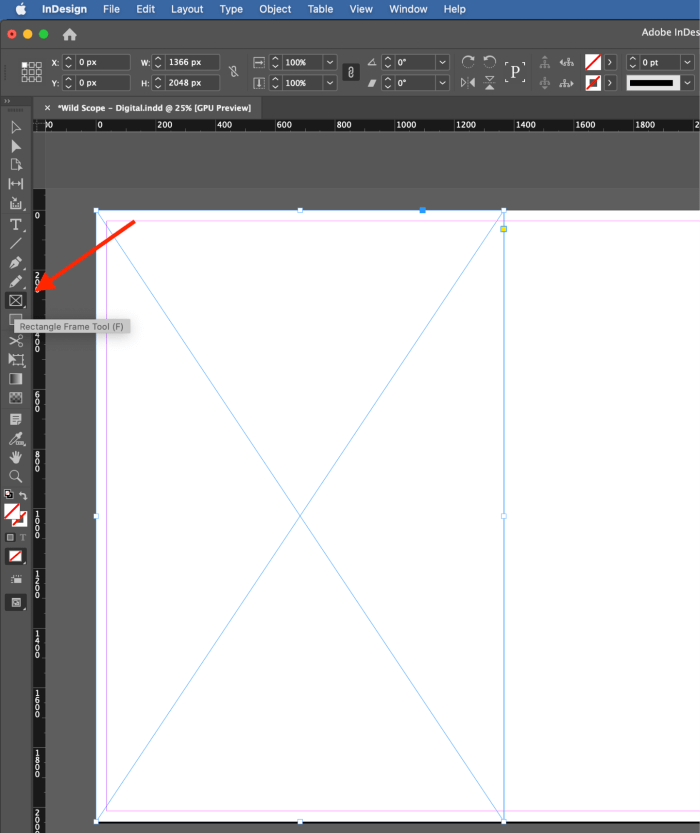
Frames are created using the Rectangle Frame Tool, which is accessible using the toolbox or the keyboard shortcut F.
You can also use the Ellipse Frame Tool for round frames and the Polygon Frame Tool for freeform shapes. Frames are distinguished from other objects by their diagonal crossed lines (shown above).
One of the most useful things about working with frames is that it’s possible to insert multiple images contained in your document without having to run the Place command each time.
InDesign “loads” your mouse cursor with each selected image, one at a time, allowing you to place each image in the correct frame.
Here’s how it works.
Step 1: With your document loaded and frames ready, open the File menu and click Place.
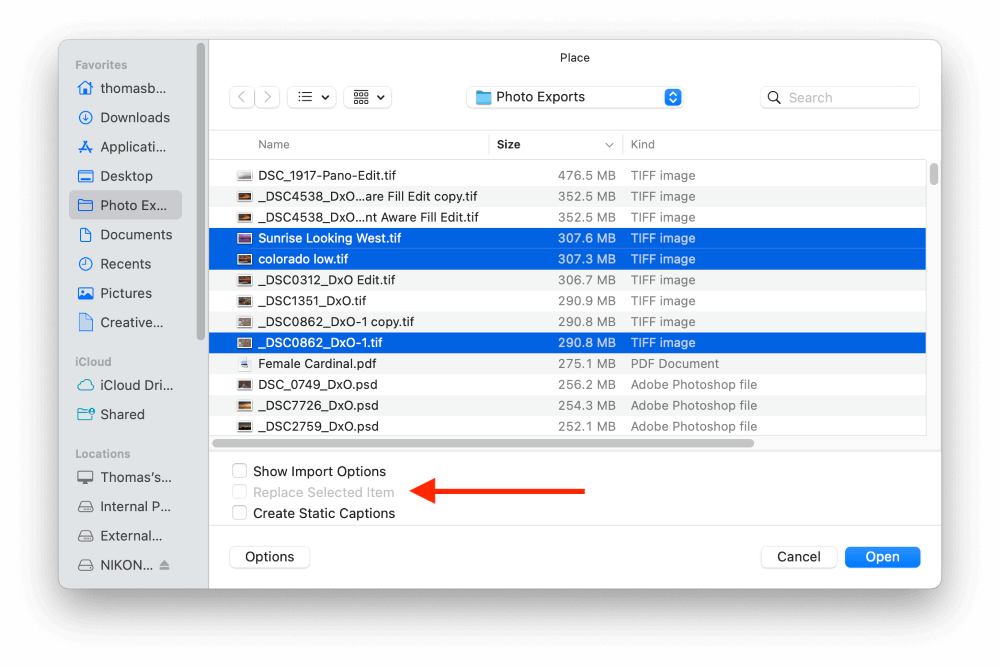
InDesign will open the Place dialog. Use the file browser to select as many image files as necessary, and make sure that the Replace Selected option is disabled if you’re only adding a single image.
Step 2: Click Open and InDesign will “load” the first image into the cursor, displaying a thumbnail preview so that you know which image you’re working with.
Simply click the appropriate frame, and InDesign will insert the image. The cursor will update with the next image to be placed, and you can repeat this process until you’ve inserted all your images.
Bonus Tip: How Do You Insert a Picture into a Paragraph in InDesign?
Now that you know the two most commonly-used methods for inserting images in InDesign, you may be wondering if there is a better way to integrate your images with your body copy. (Spoiler alert: there is!).
Remember that there are two bounding boxes for every image in InDesign: a blue bounding box for the frame, and a brown bounding box for the object.
Combined with InDesign’s text wrap options, these two bounding boxes allow you to define the spacing that you want around your image.
Depending on your workspace, the Text Wrap icons may be visible in the options panel across the top of the main document window (see below).

Use the Selection Tool to drag your image into place within your paragraph, and select one of the text wrap options: Wrap around bounding box, Wrap around object shape, or Jump object. You can disable text wrap by selecting No text wrap.
You can also open a dedicated Text Wrap panel by opening the Window menu and clicking Text Wrap. This panel contains more advanced wrap and contour options if you need them.
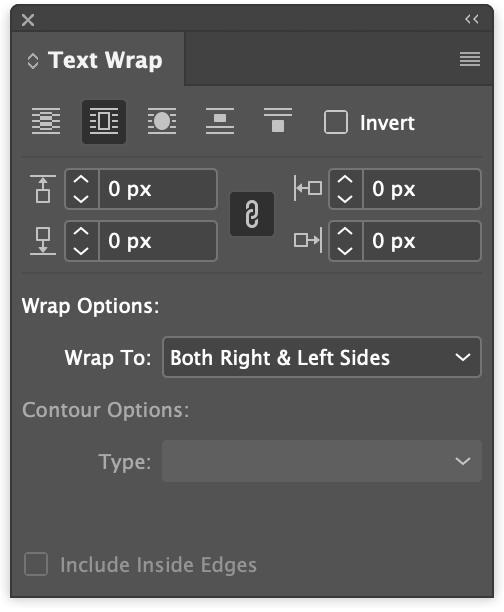
Now when your image overlaps a text area, the text will wrap around your inserted image according to the text wrap options you set.
A Final Word
Congratulations, you’ve learned two new methods to insert an image in InDesign, and you’ve also got a few bonus text wrapping tips! Working with InDesign’s frame and object boundaries can be a bit confusing at first, but you’ll quickly get more comfortable with the system as you use it – so get back to InDesign and start designing =)
