Microsoft Paint is a handy image editing software that comes pre-installed on your Windows computer. Even so, it offers some rather powerful techniques, such as inverting the colors in an image to make it look like a negative.
Hey there! I’m Cara and I love any editing program that makes it easy for me to achieve the effect I want in an image. Once I show you how to invert colors in Microsoft Paint, I hope you have fun with the effects you can create!
Table of Contents
Step 1: Open an Image in Microsoft Paint
Open Microsoft Paint on your computer. If you’re running Windows 10, be sure you choose Paint and not Paint 3D as this program doesn’t have the capability to invert colors.
Click File and choose Open.
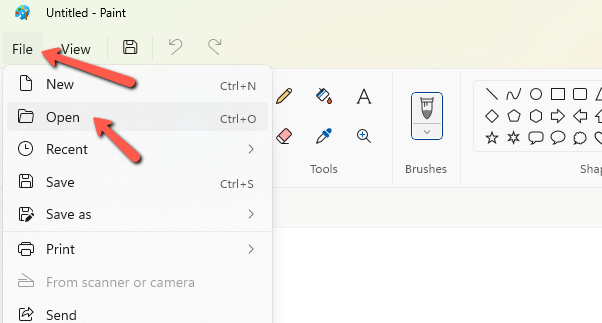
Navigate to the image you want and click Open.
Step 2: Make a Selection
Now you need to tell the program what portion of the image to affect. If you want to invert the colors of the entire image, simply press Ctrl + A or click the arrow under the Select tool in the Image tab and choose Select all from the menu.
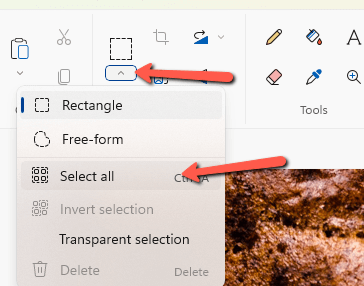
Either of these methods will create a selection around the entire image.
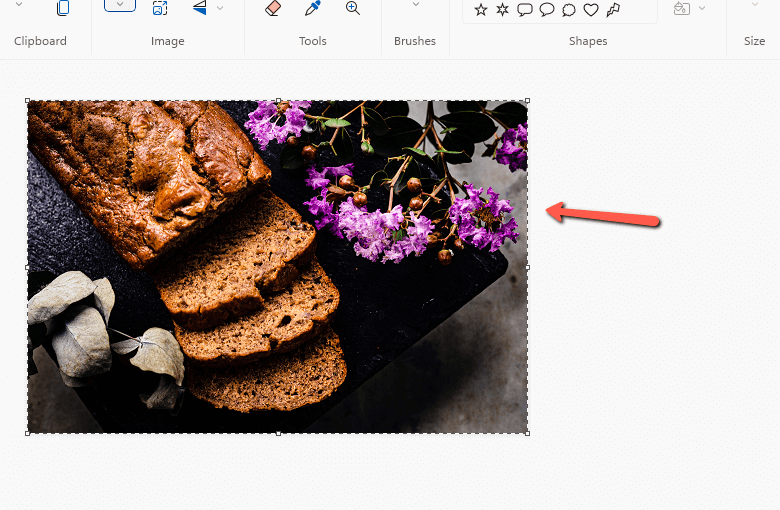
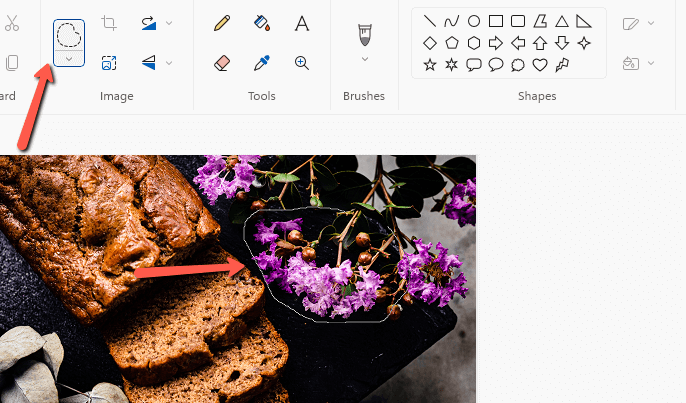
What if you don’t want to select the whole image? You can use the Free-form select tool to limit the change to certain areas.
Click the little arrow under the Select tool and choose Free-form from the menu.
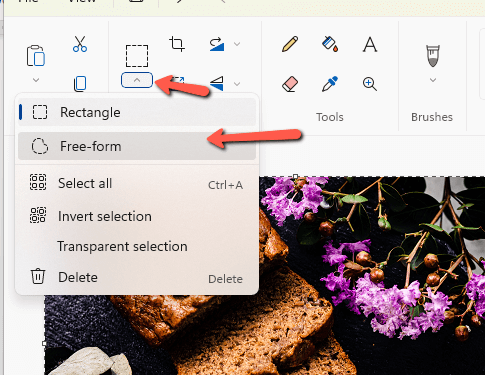
With the Select tool active, draw around a specific area of the image. Keep in mind that once you complete your selection, the visual will jump to a rectangular shape. But don’t worry, when you apply the effect it will only affect the actual selected area.
Step 3: Invert the Colors
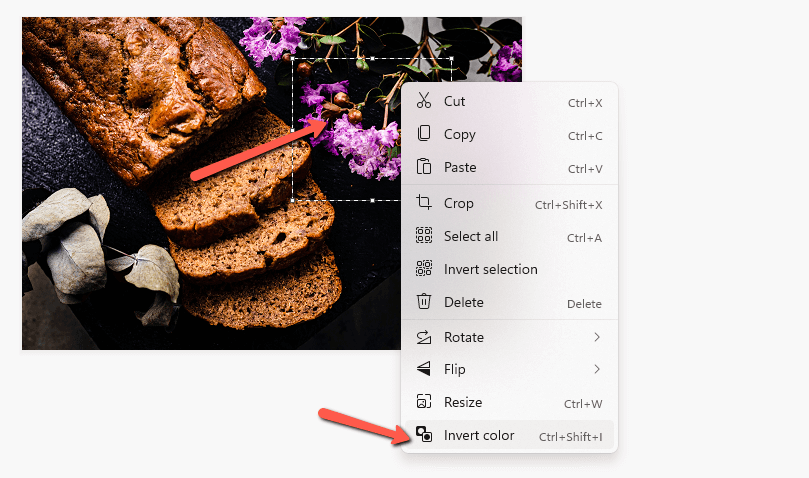
With the selection made, all that’s left is to invert the colors. Right-click inside your selection. Choose Invert Colors from the bottom of the menu that appears.
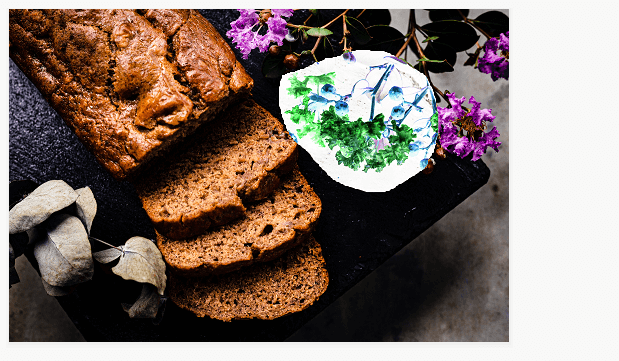
Boom, bam, shazam! The colors are inverted!
Have fun playing around with this feature! And if you want to learn more about Microsoft Paint, be sure to check out our tutorial on how to rotate text here!
