Even if you’re working on a two-page document in Adobe InDesign, linking your text boxes together can make your life much easier.
Text boxes are more properly called text frames in InDesign, and they’re quite easy to link together if you know where to look.
Once you get used to having your text automatically reflow between your linked text boxes, you’ll wonder how you ever designed anything without it.
Table of Contents
Key Takeaways
- Text frames are linked using input and output ports located on the frame’s bounding box.
- Text frames that have been linked are known as threaded text frames.
- Individual text frames can be added and removed at any point in the thread.
- A red + icon at the bottom right corner of a text frame indicates overset (hidden) text.
Creating Linked Text Frames in InDesign
Once you’ve created multiple text frames using the Type Tool, linking them together is a very simple process. Follow the easy steps below to link text boxes in InDesign.
Step 1: Switch to the Selection Tool using the Tools panel or the keyboard shortcut V. Alternatively, you can hold down the Command key (use the Ctrl key if you’re using InDesign on a PC) to temporarily switch to the Selection Tool.

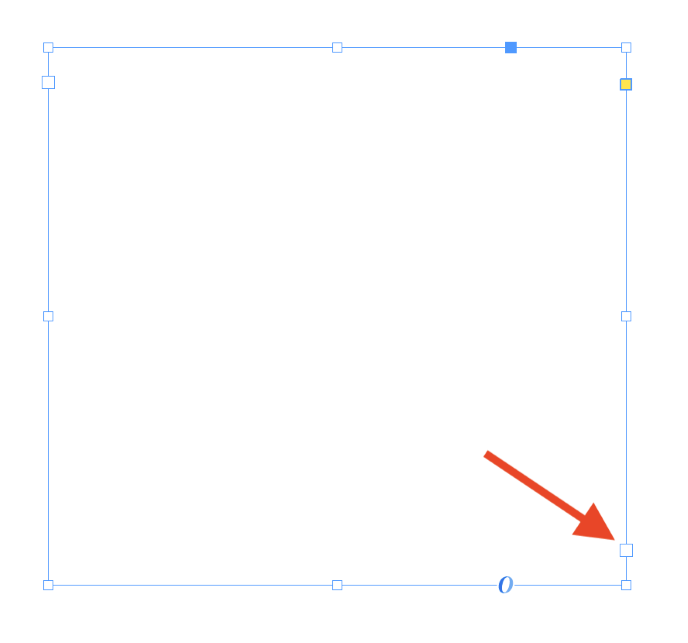
Step 2: Click on your first text frame to select it, and look at the bottom right corner of the bounding box to locate the text frame’s output port (shown above). Click on the port to activate it, and InDesign will ‘load’ your cursor with the thread from that text frame.
Step 3: Move your cursor over your second text frame, and the cursor will change to a chain link icon, indicating that the text frame can be linked. You can repeat this process to link multiple text boxes.
Once your text frames have been linked, they’re known as threaded text frames. The thread flows through each text frame that you’ve linked, tying them all together.
It’s a nice little piece of naming from Adobe, especially when you consider some of the other terminology used by InDesign.
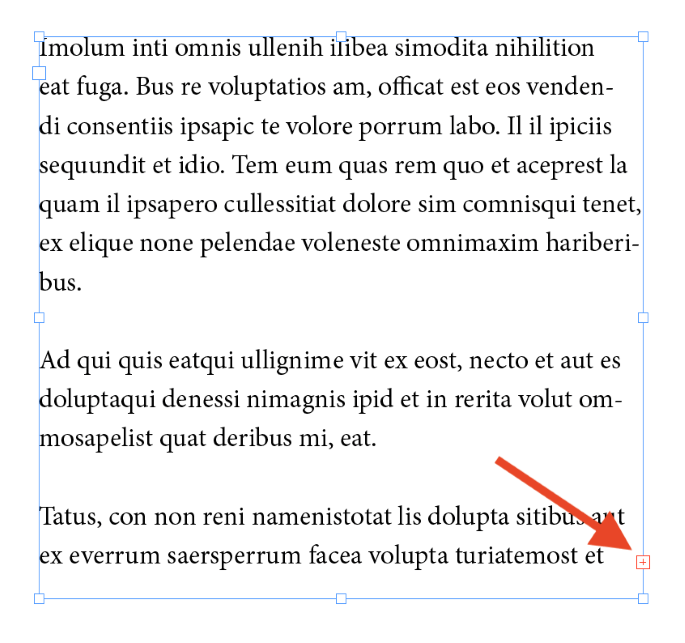
If you’ve added so much text that there isn’t enough space in your text frames to display it, you’ll see a small red + icon appear over the output port on the final text frame in your thread, which indicates that there is overset text (as shown above).
Overset text refers to text which is hidden due to a lack of space in the current text frame or text thread but which is still present within the document.

InDesign has a number of systems designed to alert you about any overset text in your document, so you’ll be sure to be alerted by one of them.
If you create a new text frame and add it to the text thread, the overset text will be threaded through to display in the new frame, and the red + icon warning will disappear, as well as any warnings in the Preflight panel.
Visualizing Text Threading in InDesign
When you’re just getting used to linking text boxes in InDesign, it can be helpful to have a visual representation of the text thread. This is especially true in complex layouts that might not follow an obvious standard threading pattern.

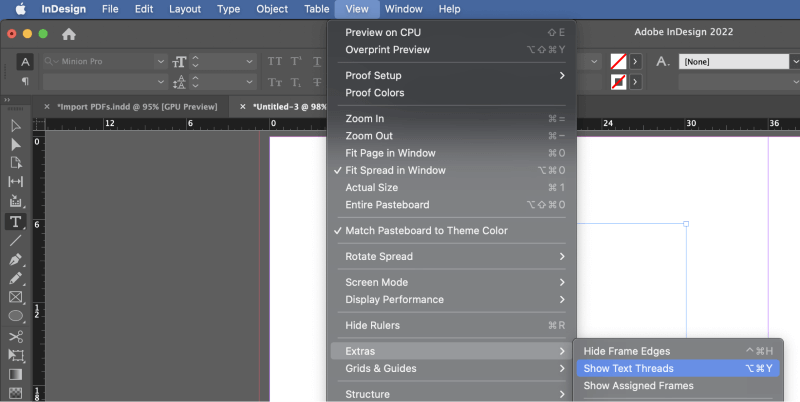
To show a display of your document’s text threading, open the View menu, select the Extras submenu, and click Show Text Threads.
You can also use the keyboard shortcut Command + Option + Y (use Ctrl + Alt + Y if you’re on a PC) to quickly show and hide the text threading indicators.

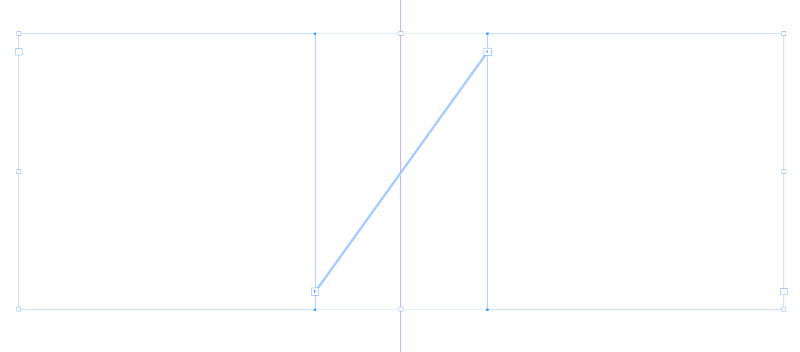
As you can see above, a thick line will connect the output and input ports of each threaded text frame. The thread is blue in this example, but if you’re using different layers in InDesign, the color of the guides and visual extras will change to match the layer color.
Unlinking Text Frames
Last but not least, it’s sometimes necessary to unlink text frames and remove them from the text thread – for example, if you accidentally link the wrong text frames together. Fortunately, removing the link between text frames is just as simple as creating one in the first place.
To unlink a text frame in InDesign, click one of the output or input ports connected to the frame you want to remove, and your cursor will change to a broken chain link icon. Click the frame you want to remove to unlink it.
If you just want to completely remove a linked frame, you can select it using the Selection Tool and hit the Delete or Backspace key to delete the frame. The text within the frame will not be deleted but instead gets reflowed through the rest of your linked text frames.
Why Use Linked Text Frames?
Imagine that you have prepared a long multipage document using linked text frames and proper text threading, and then suddenly, the client needs you to remove or add an image to your layout or some other element that shifts the text around.
You won’t have to reset the text through your entire document because it will automatically reflow through the linked frames.
This obviously won’t cover every situation, but it can be a huge timesaver, especially when working on a document that is still a work in process from an editorial standpoint.
It’s also useful when you’re inserting a long passage of text for the first time, and you haven’t decided on a particular typeface or style.
Point size and leading adjustments alone can cause large changes in the page count of a document, and having your text automatically reflow itself during these changes is an extremely helpful feature of a digital layout workflow.
A Final Word
Congratulations, you have now learned how to link text boxes in InDesign! It seems like a small thing at first, but you’ll quickly grow to appreciate just how useful the technique can be.
Once you’re an expert at linking text boxes, it will be time to start learning how to use primary text frames for long-format documents. There’s always something new!
Happy linking!
