Luminar Neo
Summary
Luminar Neo is the latest image editor from Skylum, billing itself as a user-friendly editor packed with a wide range of AI-powered tools. It also offers image cataloging and manual editing tools, as well as a range of preset adjustments and other image assets that you can use to enhance your images.
Luminar has been through several versions by now, and this latest edition finally delivers on the promise that was visible from the start. There are still a few minor issues, but the same can be said of any complex app. If you’re a casual or enthusiast photographer who wants a powerful all-in-one image editor without joining the Adobe-verse, Luminar Neo is definitely worth a look.
What I Like: Catalog management tools. Excellent photo development tools. Plenty of AI-powered editing tools. Simple and responsive UI. Regular updates for subscription users.
What I Don’t Like: No lens correction profiles. Layer-based masking needs work. A few minor UI quirks. Subscription system.
Is Luminar Neo better than Lightroom?
This is a hard question to answer because a lot of it will come down to personal and needs preferences. Both apps offer cataloging options and RAW development, but Lightroom has far better cataloging, while Luminar provides more editing options within a single app. That being said, if you use Lightroom, then you probably also have access to Photoshop, and that dual-app workflow has some additional advantages for serious photographers when compared to Luminar Neo. Read our detailed comparison of Luminar vs Lightroom for more.
Do professional photographers use Luminar Neo?
There are some professionals who use Luminar Neo, but the app is designed more for casual and enthusiast photographers who want an easy-to-use, streamlined editing experience. In terms of general market share, Adobe’s Creative Cloud system still holds a commanding lead among professional photographers.
Is Luminar Neo better than Photoshop?
Luminar Neo isn’t a direct competitor for Photoshop, so it’s not really a fair comparison. When it comes to image creation and layer-based editing, Photoshop is definitely the better app, but Luminar offers some features that aren’t available in Photoshop, such as image cataloging.
Table of Contents
Why Trust Me for This Review
If this is your first review with us here, I should introduce myself: I’m Thomas Boldt, and I’m a designer and photographer with decades of experience in the world of digital imagery. In my personal and professional work, I’ve used almost every digital image editor available today, and that experience helps me sort good editing apps from bad ones.
I’ve actually reviewed several different versions of Luminar over the course of its development, and while I could see that Luminar had a lot of potential, I chose not to recommend it because it still had a lot of ‘growing up’ to do. The same principle holds true today – if I think it still needs more development work to be ready for real-world use, I will be sure to tell you.
Detailed Review of Luminar Neo
Luminar Neo has a huge range of features, and we don’t have space to review every single one of them, so I’m going to break down this review into more general sections based on the design of the Luminar user interface: image cataloging, preset adjustments, and editing options. The Edit section deserves a closer look, so I’ll test Luminar’s AI-powered tools and discuss them separately, as well as the standard photo development tools and layer-based editing.
Cataloging Tools
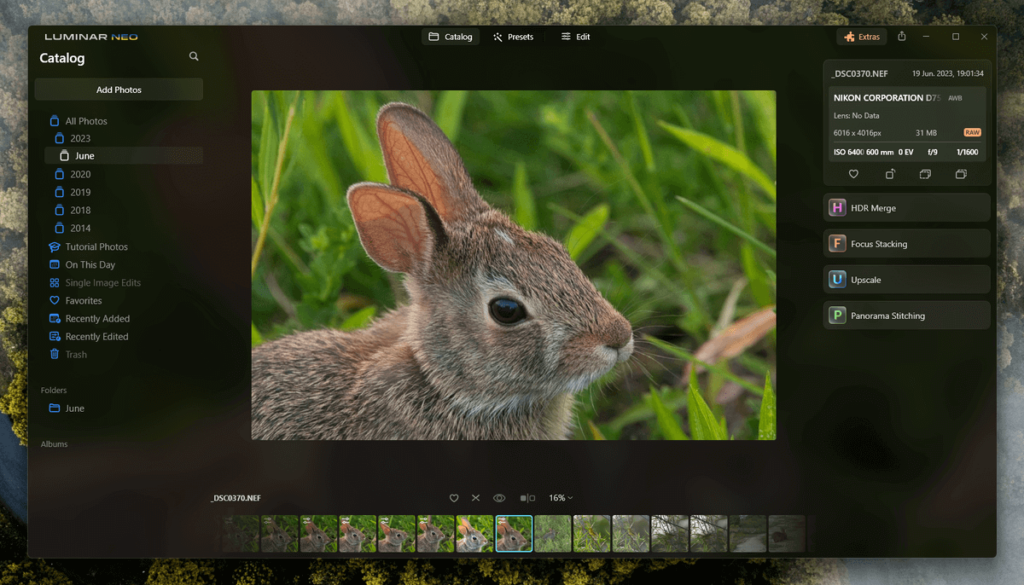
The Luminar Neo workflow begins with the Catalog section, which offers some simple tools for staying on top of a growing photo collection. The Catalog section is nicely responsive, even when working with thousands of photos, which is a refreshing change compared to dealing with Adobe Lightroom, although I wish it was possible to force Luminar to generate thumbnails in the background.
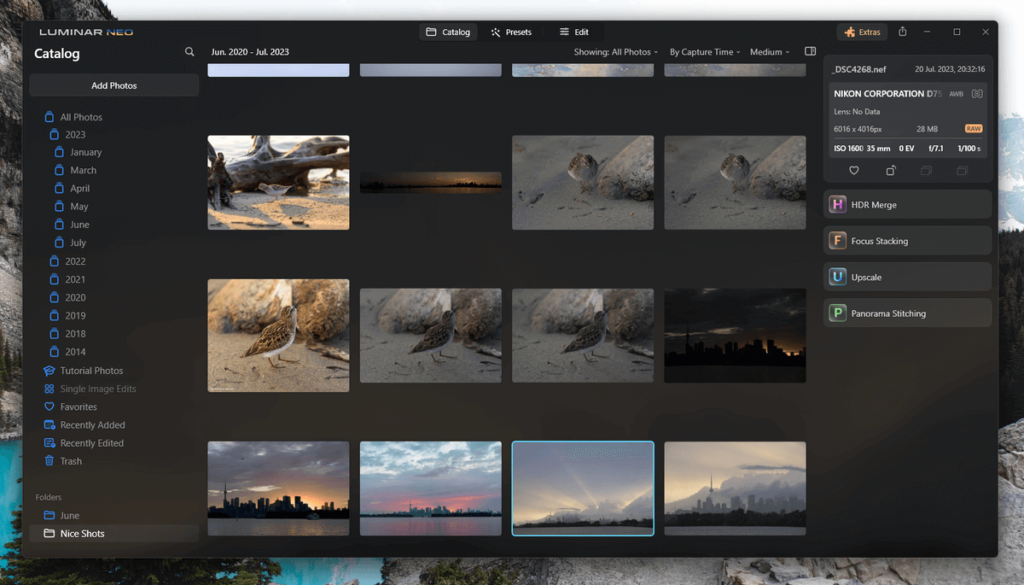
Luminar’s organizational tools are on the basic side, giving you the ability to mark your images with a Favorite or Rejected flag, but there are no options for star ratings, colors, or any other level of fine-sorting. You can filter your catalog based on a few basic metadata points such as favorite flags, capture time, or edit time, but there’s no way to filter based on more advanced metadata like lens type or ISO speed.
For most casual users, this won’t be a big deal, but professional photographers and anyone else with an extremely large image collection will probably find the tools too basic for any serious organizational work.
This section also contains the options for merging bracketed exposures into HDR images, automatically creating focus stacks, AI-powered image upscaling, and panorama stitching. These tools all need to be installed individually from the Extras panel, but they’re included by default at the Pro level subscription. If you purchase the cheaper Explore plan, you’ll have to purchase these modules individually.
The add-on tools all work reasonably well, although I found that the upscaling tool was significantly slower than several others that I’ve tried. This isn’t a deal-breaker, but hopefully, it will get optimized as the technology matures a little.
My personal take: I love the responsiveness of browsing with Luminar, but I find the inability to filter my collection based on metadata to be a huge drawback. If you’re editing your holiday snapshots to create some fun images to share online, this probably won’t matter, but it will be a problem for more serious photographers.
Preset Adjustments
Once you’ve selected an image to work on using the Catalog section, you can move on to either the Edit or the Preset sections, depending on what you want to do. Presets will never be able to replace your own creative style (or at least, they shouldn’t), but they can be a handy shortcut for quick projects, and Luminar Neo has more than enough presets to complete any collection.
Luminar will attempt to detect the subject of your photo and provide some helpful guidance about which preset options may be useful on this photo. In my testing, it correctly matched various urban, landscape, and wildlife photos to appropriate preset packs, although not all of the options it suggested were useful.
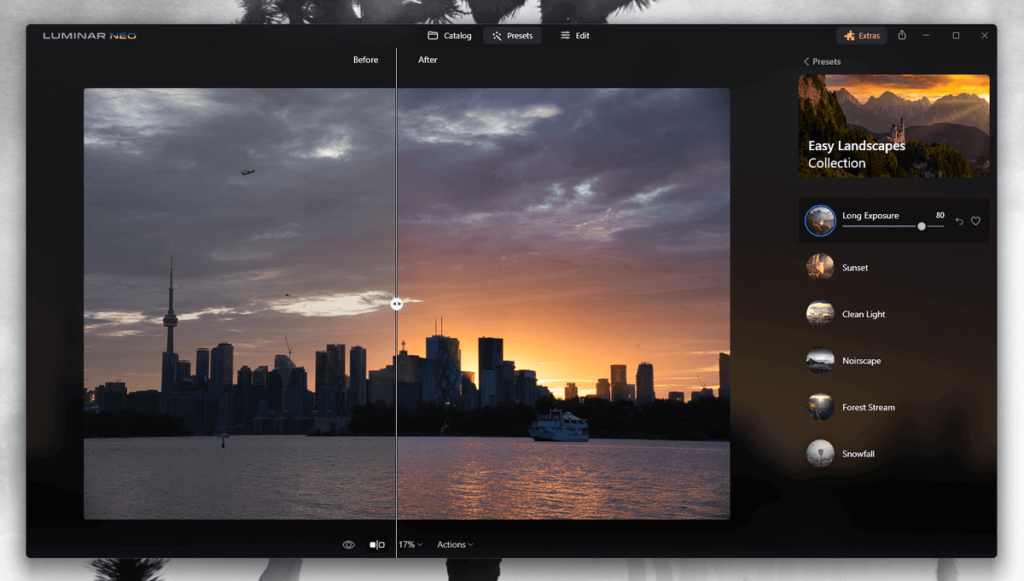
In addition to the preset packs that come pre-installed, Skylum has an online marketplace that is loaded with preset packs, including skies, LUTs, and overlays such as new backgrounds, light effects, and more. Unfortunately, these seem to be extremely high-priced for their value, especially since you can recreate most of the effects yourself, with the exception of any included sky replacements or overlay effects.

The first release of Luminar Neo didn’t allow you to save your own presets, but Skylum recently added the feature through a free update, though they tucked it away in the Actions menu in the Edit section. Make sure that you’ve updated to the latest version of LN if you can’t find it!
Once you’ve created your first preset, a new list titled ‘My Presets’ will appear in the Presets section, although it seems like Sklyum is a bit more focused on you purchasing them than creating your own. That being said, there are new presets available for free each month to users with a subscription plan, which is a nice touch.
My personal take: Judging by the content in the marketplace, there will soon be enough presets to cover every possible image adjustment combination you can apply. These tools work well for what they are, but I’m not sure how much regular use you’ll get out of them – I suspect that they’re more useful as a way to create a constant revenue stream from your users.
Photo Development
When it comes to basic photo development tools such as exposure, white balance, and color adjustments, Luminar’s tools are reliable and responsive. The interface is simple and streamlined, with layers listed on the left, a big section to display your image front and center, and all your editing options listed on the right in the Tools section.
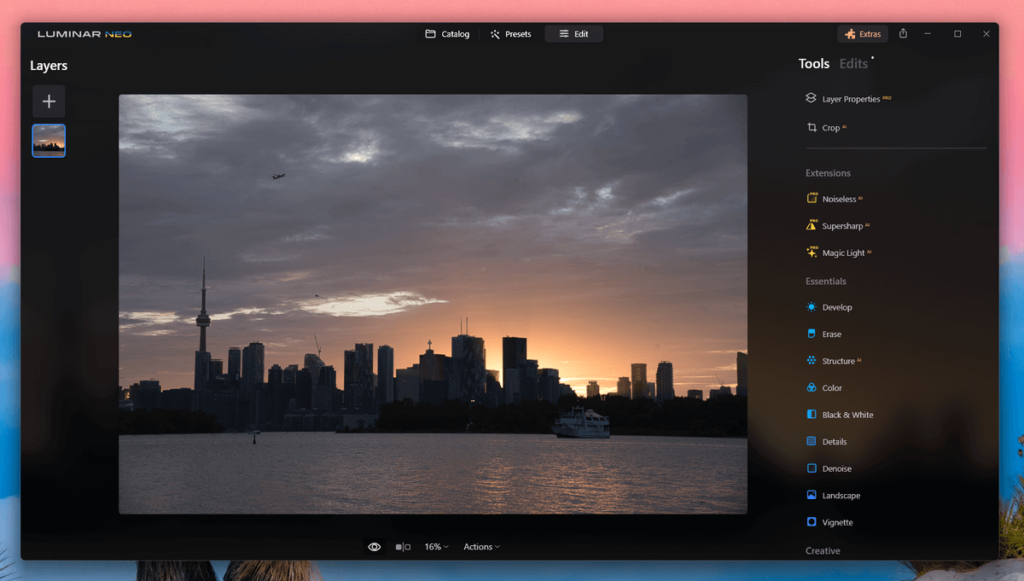
It’s rather a long list, and it might be hard to decide where to start, but Skylum has helpfully organized the list into a rough workflow, starting with the Develop tool at the top of the Essentials category. You can also tag your favorite tools to create an easily accessible workflow right at the top in the Favorites category, although that’s the only customization you can make to the interface.
They’ve also included an in-app explanation of each tool that contains a direct link to the relevant page of the Luminar Neo user manual on Skylum’s website, which is a big help while you’re still getting used to the program.
One important thing to note when working with RAW files is that certain tools will cause Luminar to create a non-RAW copy of your image to continue working, so it’s best to finish all your RAW edits before moving on to the rest of your process. You’ll be able to identify the affected tools thanks to a small blue ‘RAW’ in a tiny superscript next to the tool name, but keep a close eye on this marker because these tools also work on non-RAW images. Make sure you’re using the Develop tool in RAW mode, at least to start with!
As you work your way through your edit, Luminar tracks your adjustments in the Edits section, and you can go back and adjust them as needed since the entire editing process is non-destructive. This might feel confusing at first if you’re used to a more linear editing process, but you’ll adapt to it quickly once you see how useful it can be.
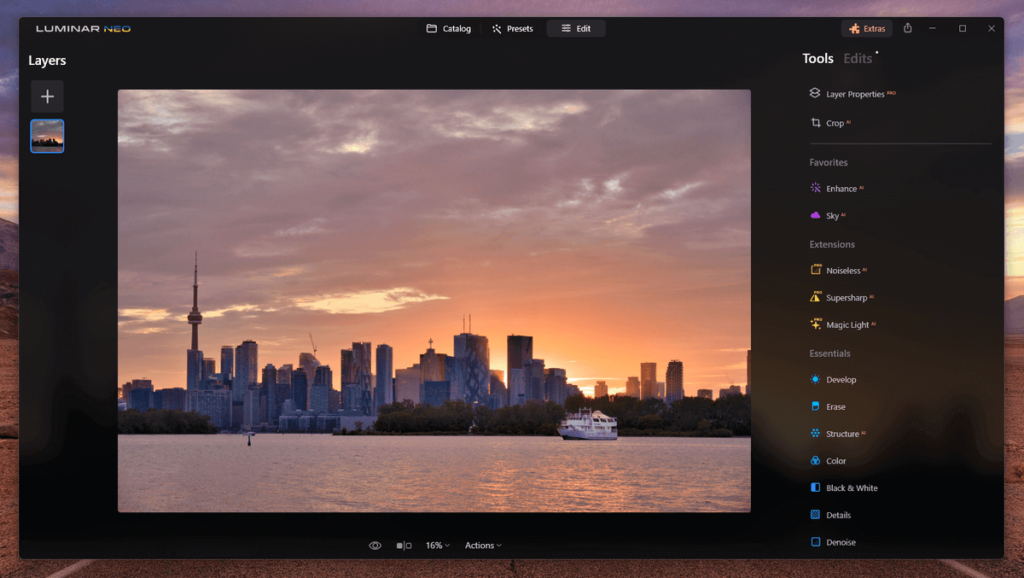
You may want to be careful when using the non-linear editing feature, though. During my testing, I accidentally made Luminar ‘forget’ two Erase commands that were still listed in the Edits section, and I had to re-apply them in order to properly remove the objects from the sky.
Arguably the biggest gap in Luminar’s basic photo editing toolkit is the lack of lens correction profiles to automatically correct distortion. There is an ‘Auto Distortion Corrections’ option, but it doesn’t seem to go quite far enough to really be automatic. I guess it’s probably difficult for smaller developers like Skylum to maintain their own database of these profiles, but they’re such a useful feature that it seems worth it.
My personal take: As long as you’re careful about how you use the Edits history section, you’ll have a nice non-destructive workflow. I also wish that Luminar had the option to show a histogram since I find it such a useful way to display exposure information, but that’s a minor issue because the editing tools are excellent.
A.I. Editing Tools
Luminar Neo’s biggest selling point is that it’s AI-powered and easy to use, and it delivers a huge suite of tools that use machine learning in some way. Each one is identified in the Tools list with a little ‘AI’ in superscript, although some of them are more successful than others, and some will only work properly on certain images.
First and foremost among Luminar’s AI tools is the Enhance tool, which contains two options: Accent and Sky Enhancement. Accent is effectively a single-slider automatic adjustment that tweaks many different elements, “including shadows, highlights, contrast, tone, saturation, exposure, and details,” according to the Skylum website. It does a decent job most of the time, as does Sky Enhancement, although I still prefer to get more hands-on with my edits.
The most important tools for image quality are the latest series of AI-powered noise removal, sharpening, and upscaling tools, although it’s worth pointing out that these tools are only included in a Pro subscription. For those with a single-purchase Lifetime license, they can be purchased as an add-on package, but the package costs almost twice as much as Luminar Neo itself.
These tools all work quite well, although I did notice that the Upscale tool located in the Catalog section was significantly slower than similar upscale processes from other apps.
The Noiseless AI tool does an excellent job at noise control, far better than the standard noise removal methods and roughly comparable to other recent AI-powered denoising tools from Adobe, Topaz Labs, and On1.
The Supersharp tool is capable of doing an excellent job of controlling motion blur as well as general sharpness, although, like all of these AI tools, you may find that it works better on some images than others.
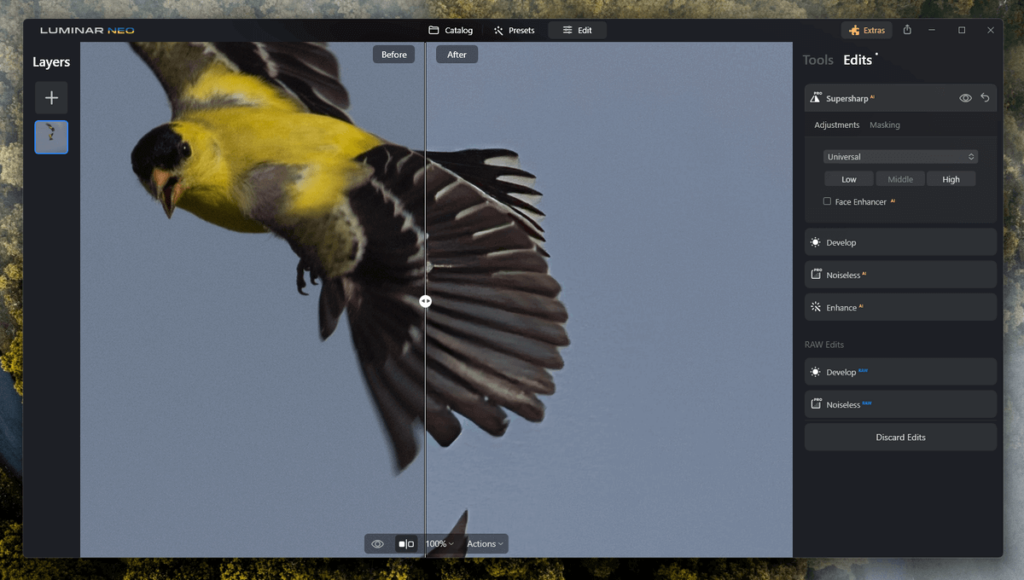
Depending on your image, you may notice a bit of additional texturing in the corrected pixels, but you may also be able to correct that manually with the Erase tool. Overall, it’s capable of providing dramatic improvements with only a couple of clicks.
There are some more fun AI tools such as Sky AI, for sky enhancement/replacement, and Magic Light, which lets you adjust your light sources. Sky replacement doesn’t work very well in any app, although in very simple scenes with a clearly defined horizon, the AI can do a decent job, so Luminar doesn’t really lose or gain any points here. Magic Light sounds grandiose, but it really just detects potential light sources in your image and lets you customize flares around them.
My personal take: Luminar delivers on its easy-to-use AI-powered promises, although some of the more ambitious features (looking at you, Sky AI) are closer to toys than tools. Fun toys, I admit, but I wouldn’t expect to get actually usable results from them yet, and they may never reach a point where you’ll be comfortable using them for a serious project. But hey, sometimes you just wanna have fun!
Layer-based Editing
Last but not least, we come to Luminar’s layer-based editing tools. For the most part, the system is fine, although a bit basic. Skylum isn’t expecting you to be creating complex photorealistic composites here, but instead, they see another opportunity to sell you overlay images in the marketplace.
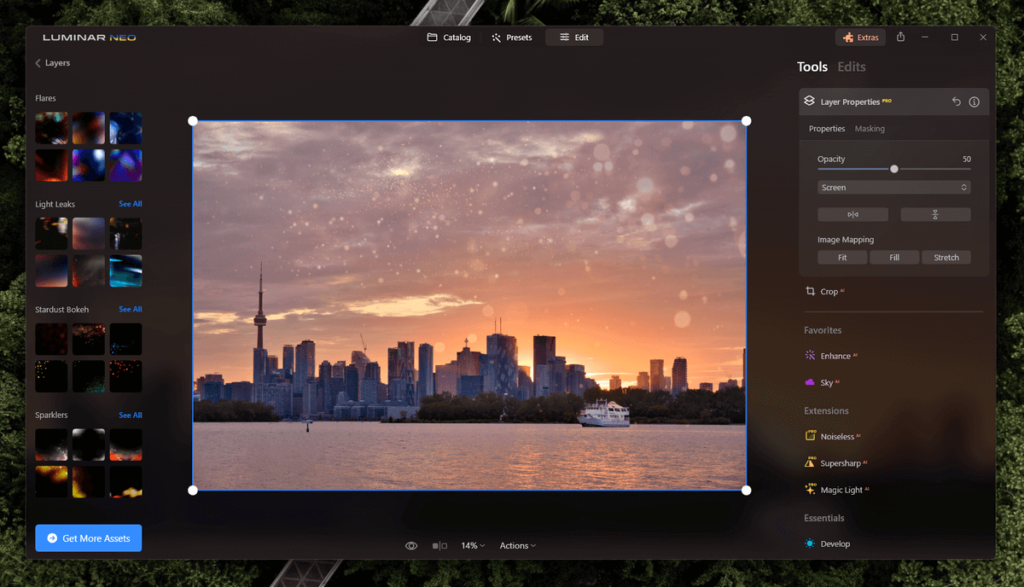
The preset effects they include are nice enough, although fairly limited. There are various flares, light leak effects, and other visual flourishes you can add, and of course, you can always purchase additional elements from the marketplace. But since these are pre-made effects that can’t be tweaked or adjusted, you’re probably going to get bored with seeing the same exact effects over and over again, and the purchasable add-ons are quite expensive.
I did run into a strange issue with the layer masking system during my testing, though. When adding a new image layer, you can mask various parts of the layer to show or hide them, and the masking tools are responsive and capable, which is all well and good.
But when you start painting your mask, your first click completely hides the new layer, so you’re left creating your mask without being able to see the actual image you’re masking. This issue probably won’t affect most Luminar users, but keep it in mind if you like working with photo composites.
My personal take: Layers have always been the weakest part of Luminar’s editing workflow, and that’s still true in the latest version – but layers are also a lot less necessary for general editing than they used to be. As long as you don’t expect it to work like Photoshop, the layer editing system delivers what Skylum promises: fun add-ons to your photos.
Reasons Behind My Ratings
Features: 4/5
Luminar has matured a lot in this version, and for the most part, the editing tools are responsive and capable. The AI-powered tools do a good job as long as you don’t expect miracles from them, although there is still some room for improvement in layer-based masking.
The biggest feature drawback is the lack of more advanced cataloging tools, such as the ability to filter your photo collection based on metadata, although it’s a close tie with the lack of profile-based lens correction.
Pricing: 4/5
Luminar is available in two different subscription plans: the basic Explore level, which offers you the barebones Luminar app, and the full Pro level, which contains all the extensions and other addons available. The price point for the Pro level is priced around the same point as the competition, although there are some other editors that provide better value.
Their pricing scheme for the one-time purchase option is almost laughably high, which makes me suspect that they don’t actually want anyone to purchase it this way. Instead, it functions as a pricing anchor point to make the monthly subscription costs seem more appealing.
Ease of Use: 5/5
This is the area where Luminar truly excels: it is extremely easy to use. A streamlined interface, easy-to-use AI-powered tools with slider controls, and plenty of in-app guidance make Luminar Neo one of the most user-friendly editing apps available today while still offering a respectable degree of editing ability.
Support: 4/5
Skylum provides a solid support structure for all its users, including a full online knowledge base that covers every aspect of the app, as well as an easy-to-use ticket system for contacting their support team for more technical issues.
The only reason Luminar Neo doesn’t get a full 5 out of 5 is that there is still a fairly limited amount of third-party tutorial support available, although that’s not really Skylum’s fault – it’s simply a reflection of the fact that Luminar doesn’t have as many users as some other editing apps.
Luminar Neo Alternatives
Affinity Photo: A slightly more affordable and mature RAW photo editor, Affinity Photo’s toolset is a bit more expansive than Luminar’s. The RAW processing is arguably not quite as good, but Affinity also includes some additional editing tools such as Liquify, and better handling of layer-based editing.
Adobe Photoshop Elements: If you want the power of Photoshop but you’re not sure you need the full professional version, Photoshop Elements might be the right fit for you. It features a lot of guided instruction for new users, but once you get comfortable you can dig into the Expert modes for more power. RAW handling is not as refined as Luminar, but organization tools and output options are much more advanced.
Adobe Lightroom: Lightroom is currently one of the most popular RAW photo editors and organizers, with good reason. It has a robust set of tools for RAW development and localized editing, and it has excellent organization tools for handling large photo collections.
Adobe Photoshop: Photoshop is the king of the photo editing world, but its unbelievably huge toolset is quite intimidating for new users. The learning curve is incredibly steep, but nothing is as powerful or as well-optimized as Photoshop. If you want to turn your digital photos into digital art with layer-based editing and powerful pixel-based editing tools, this is the answer.
Final Verdict
Luminar Neo is a great editor for beginners and enthusiast photographers who want access to the latest AI-powered editing tools in a well-designed package. It probably won’t satisfy most professional photographers who want more detailed control over the editing process, but for everyone else, it’s an excellent alternative to some of the more established photo editors.

This is a good review, but I do think it passes a little too quickly over the speed issues with the program. I updated to Luminar Neo solely because, as was the complaint for most others, Luminar AI was so slow as to be unusable.
On my fairly mid-range editing machine I find Neo slightly better, but still a far cry away from a finished product. It feels like more of a proof of concept solely for this.
I would advise people to try out the trial before going straight in for a purchase on this, as although it may work as you’d expect on a £2000 machine, for the average Joe realistically you’re looking at moving a slider and waiting 10 seconds for it to do something.
It IS awesome what it does, though. And would work as an amazing tool alongside your other editing packages. But boy, if only they added GPU acceleration it would be 10x better.
I am a complete beginner thanks for sharing Luminar 4 is the tool to replace the sky. It saves so much time, as no masking is needed. It will also save portrait photographers time as Luminar 4 has a dedicated section to edit images of clients easily. It’s almost like I’m dealing with CPU intensive Photoshop filters. Users also reported that Luminar 4 is crashing at them.
Really thorough review and lots of good insights, Thomas! I’ve used Luminar since the beginning and have been impressed with its evolution. It’s pretty much my go-to editor, though I still manage my photos in LR.
I also think I can answer some questions in this comment section:
@jeffrey Camacho – when you buy Luminar, it comes with a license key suitable for 2 computers. It’s essentially a single-user app.
@ Loreen Swann – exactly right. Luminar’s Catalog mimics your folder/directory set-up on Mac/Win. Any changes reflected either place are instantly reflected in the other (e.g. renaming a file or folder)
@Katherine – Luminar will be extra great for you with all those images. As Thomas mentioned, you can “sync adjustments” between images (edit once, apply to lots of photos). You can also create a Luminar Look (ie. a Preset) and apply those with a batch process – works great using a light touch with the AI Accent tool because that tool will adapt to each photo independently. It should be fun and easy!
@Mike – Luminar can read most popular camera formats, so you don’t have to capture in RAW at all. Perfect for JPGs, TIFFs and others too.
@Hugh Mason – I use Luminar almost every day. It opens and runs fine. That being said, I will acknowledge that *any* software app could have an issue with a particular flavor/combination of PC/graphics card/etc. Sounds like you’ve exhausted the suggestions from Skylum’s support and other web resources… Skylum does offer a free trial, so anyone worried about this could go that route (they also offer a 30-day money-back guarantee).
I find both Luminar 3 & 4 to be cr…p I have a problem that, if the web is to be trusted, endemic in the program is that it will not open. I have tried all the fixes suggested but to no avail. Like I stated I am not the only person to experience this problem. I highly recommend that no one buys these program till they fix ongoing issues.
Thanks for a very thoughtful and useful review. And, I appreciate the review done by a noted expert with consideration for us who are less advanced. This allowed for a very balanced review not often found in the image editing world.
Thanks very much. This was incredibly helpful. The best serious review/comparison I found on the entire internet.
You say RAW editor. Does this mean I have to capture photos in Raw Mode otherwise this software is pointless?
Hi there.
I am a complete beginner. I am also a little technology challenged I have to admit. Have just come back from holiday and have taken at least 8000 photos. I have other trips where I still have haven’t edited those either and am keen to learn more and do something with them.
Is this product the right sort for me please.
Thank you for the review!! I’m still using Picasa. It’s a great workhorse and I’ve found nothing that beats its organization. From reading your review (and others) it seems Luminar might finally be something which works directly on top of folders in Finder/Windows, especially when renaming and moving files. I’ve used Lightroom – but with the number of photos I have – managing the locations and file names inside Lightroom AND inside Finder/Windows is just too much. Thanks again for the review – it seems Luminar might be the solution I’ve been looking for!
Thank you! Clearly explained for photographers thinking to enter the editing world of digital photography.
Thanks for a very useful review, it hacks through the confusion which we amateur photographers experience when we look at the photo editing options.
Hello, this software is multi users or single user?