It can be incredibly frustrating when your MacBook refuses to load web pages, even though your WiFi connection seems solid. What causes this problem, and how can you fix it to get back online?
If your MacBook Pro says it is connected to the internet, but you are not receiving any signal and cannot load any websites, then you are in the right place. As an Apple computer expert, I have seen this problem countless times in my career. The good news is that there is always a fix!
We will start with checking the internet and external hardware first and then move forward into checking settings and options on the MacBook Pro directly.
Table of Contents
Key Takeaways
- Check with your ISP first to ensure that your internet connection is functioning properly.
- Next, make sure your modem and router are working properly.
- You can run built-in diagnostics to check for potential solutions through macOS.
- Keeping your MacBook up to date is key to ensuring you don’t run into software issues.
- Try reconnecting your WiFi network and establish that your Time and Date are set correctly.
- If the simple fixes don’t work, you can try renewing your DHCP lease and updating your DNS.
- Additionally, it may be necessary to disable any VPN or third-party software that accesses the internet.
Ensure the Internet Service Provider is Not Experiencing Outages
This first step may seem a little bit silly, however, we must know for sure that we are receiving an internet signal from the Internet Service Provider (ISP) before working through any troubleshooting.
Unfortunately, all ISPs will have a different way to check for outages, so I cannot show a step-by-step here.
However, I would suggest utilizing a smartphone to check their website for any reported outages, give your ISP a call, or use their messaging service to ensure that there are no outages in your area.
Check your Modem and your Router (or your Modem/Router)
In a short explanation, a modem is a device that takes the signal from your ISP and translates it into a signal that is usable by any wired internet device (via Ethernet).
A router is a device that then takes the wired internet signal and translates it into a Wi-Fi signal. Some devices are a combination device and provide both these services in one.
Once again, unfortunately, everyone may have a different Modem/Router combination, so I cannot show a step-by-step here.
I would suggest utilizing an owner’s manual or the manufacturer’s website to ensure that the modem and the router are in working condition.
Usually, this entails looking at the lights on the front of the device and ensuring they are the correct color and are flashing correctly. Be sure to restart your modem/router. They, similar to all electronics, can benefit from a periodic restart.
On the MacBook Pro
Now that we are sure that the ISP and the external devices are providing signals as expected, we will look into the potential issues in the settings or devices in the MacBook Pro.
Wireless Diagnostics
MacBook Pros have a built-in feature called Wireless Diagnostics. This is a tool that is often able to detect and solve several different problems with Wi-Fi connectivity or network connectivity.
I highly recommend this being the first stop in any Wi-Fi-related problems with your MacBook Pro because it can speed up troubleshooting.
To use Wireless Diagnostics, Press and hold the option key on the keyboard while clicking on the Wi-Fi Symbol. You will see this menu:
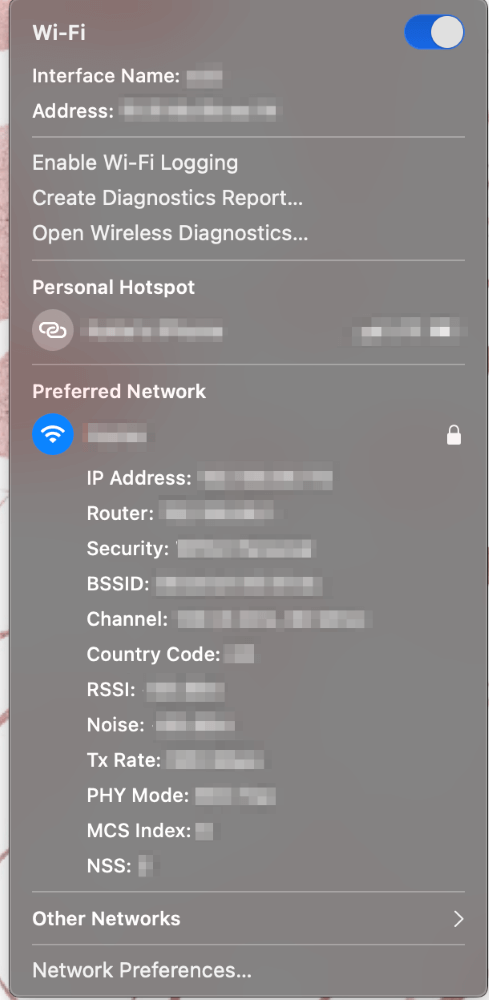
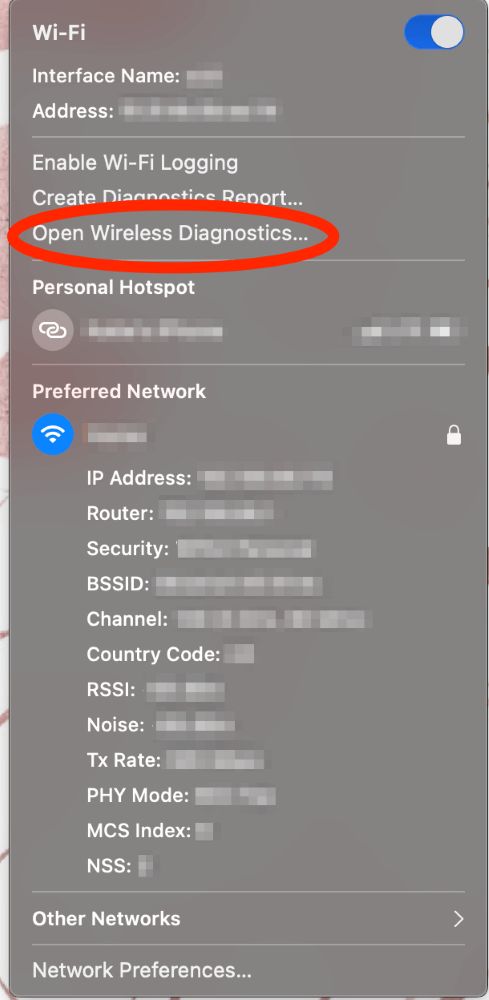
Next, Click on Open Wireless Diagnostics
Click Continue
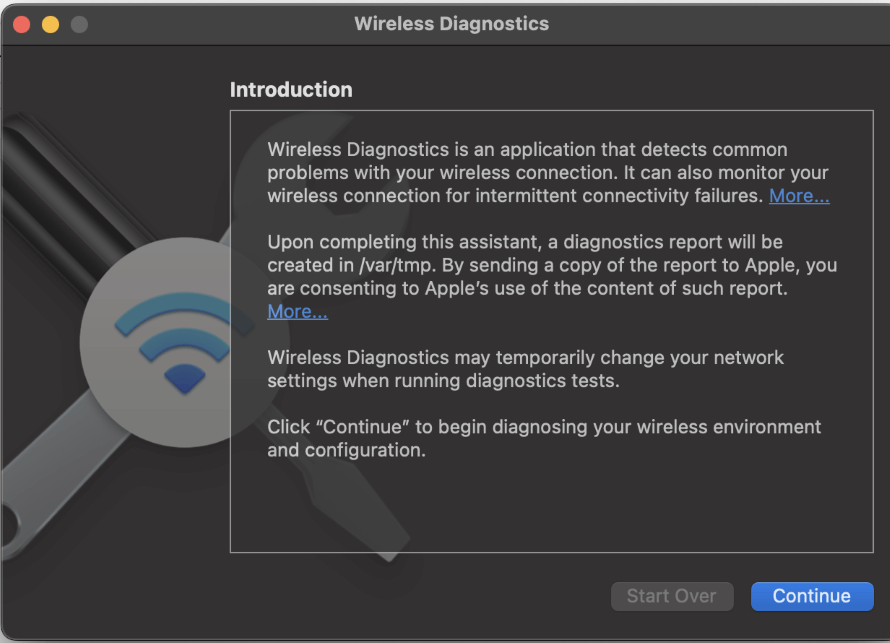
The MacBook Pro will then automatically run and produce a diagnostic report. If an error is found, follow the instructions to resolve the problem.
Restart MacBook Pro
Sometimes, there can be a disconnect in the Internet Protocol Address (IP Address) provided to your computer at startup. To automatically combat this problem, we will restart the MacBook Pro. Restarting the computer allows for a new IP Address to be assigned to the computer.
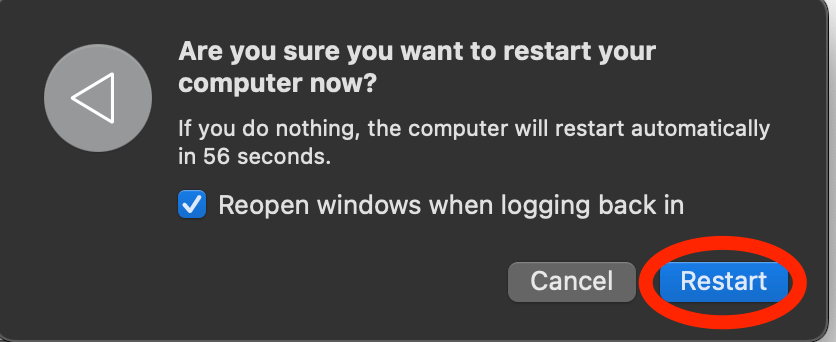
Click on the Apple Icon in the Top Left corner of the screen and click Restart.
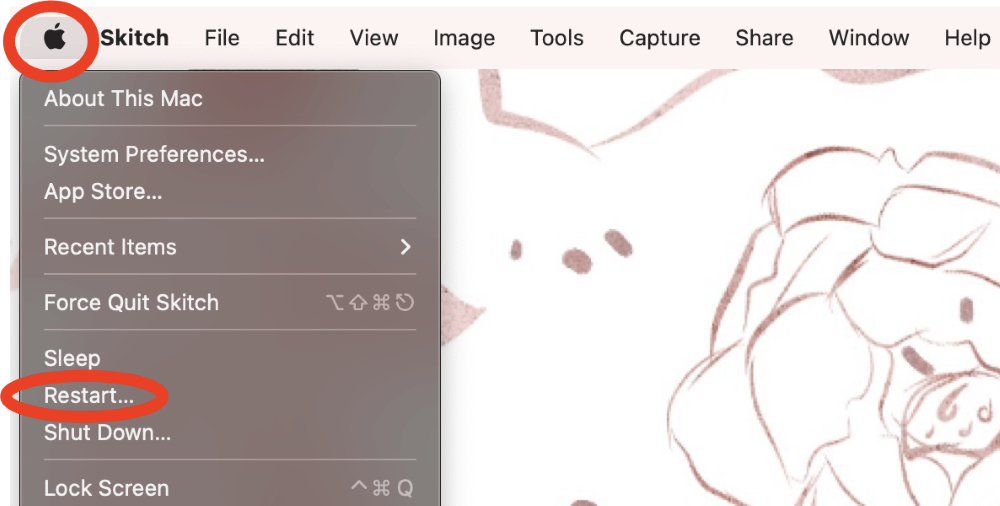
Click Restart to Confirm
If Possible – Update MacBook Pro
If you can connect to a different network, such as a mobile hotspot, a public network, or a wired Ethernet connection, try this step. If you cannot connect to the internet at all, skip this step.
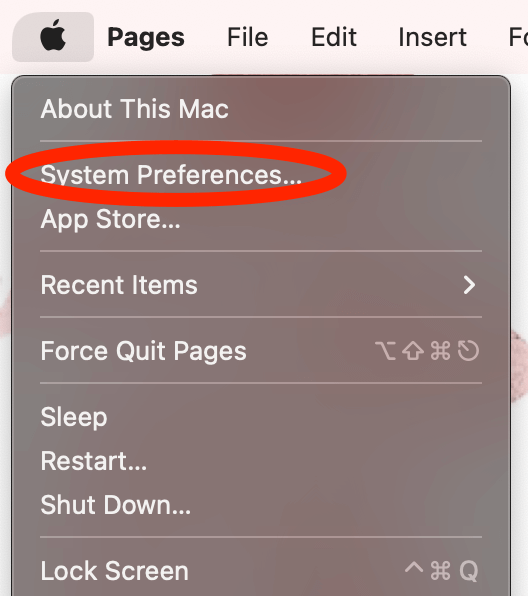
Click the Apple Icon in the top left of the screen. Then, Click System Preferences
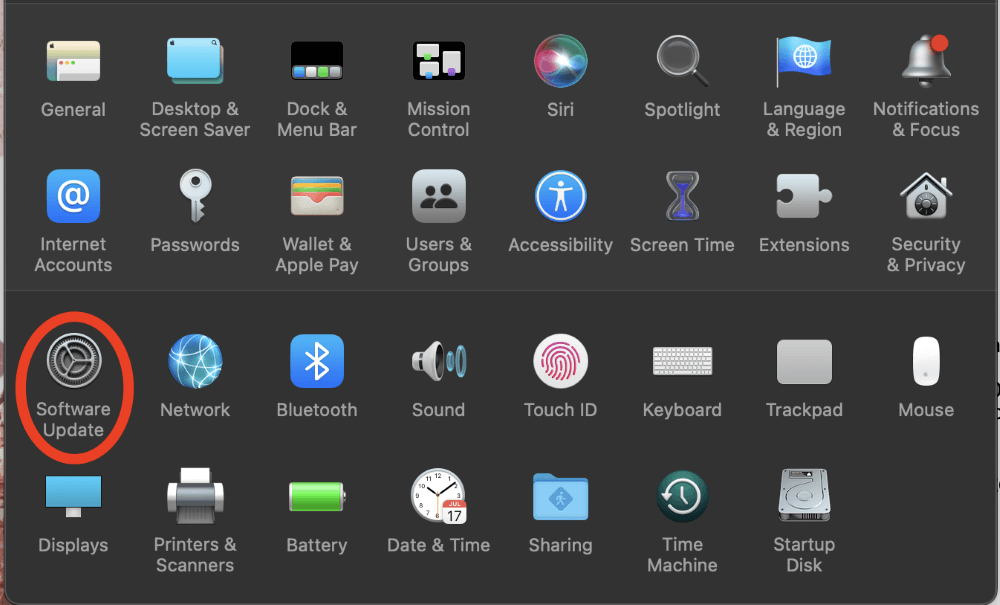
Click Software Update
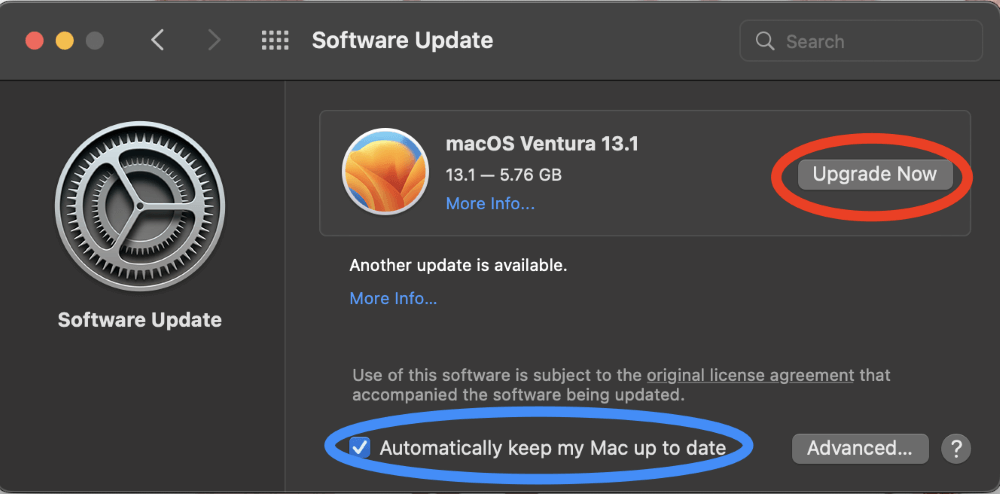
If a Software Update is available, Click Upgrade Now.
Note: I recommend selecting “Automatically keep my Mac Up to Date” as well. This way, when your Mac is on and plugged into a power source, it SHOULD (but doesn’t always – so be sure to still take this opportunity to check!) update for you. This way, you run into less of a risk of an out-of-date MacOS being the reason for any issues you may have.
Reconnect Wi-Fi Network
There is a possibility that simply disconnecting and reconnecting to Wi-Fi could solve the problem by removing any potential misconnections with the IP Addresses, etc.
Click the Apple Icon in the top left of the screen (or click the Wi-Fi Symbol in the top right), then click on Network (or Network Preferences)
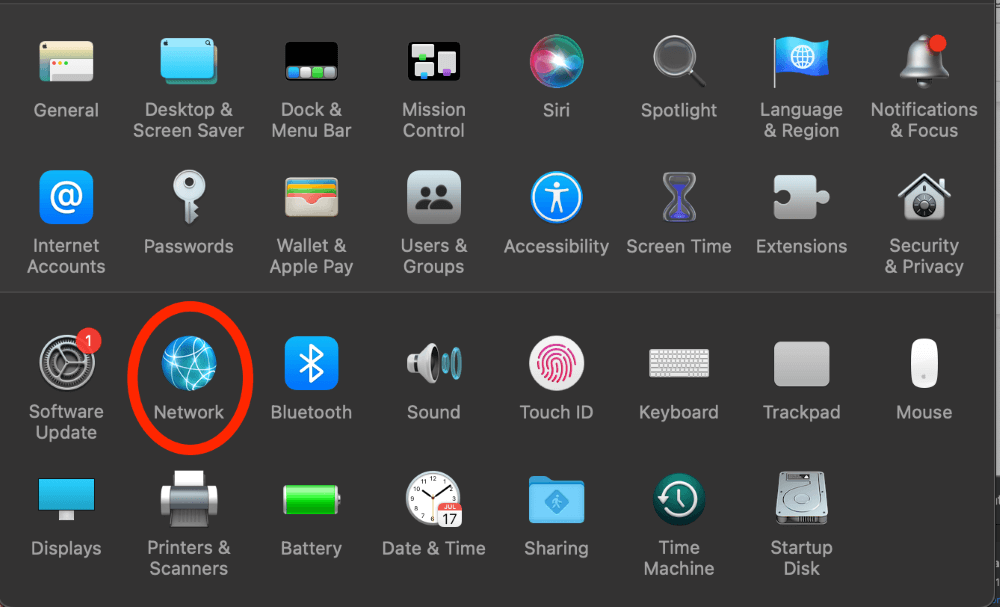
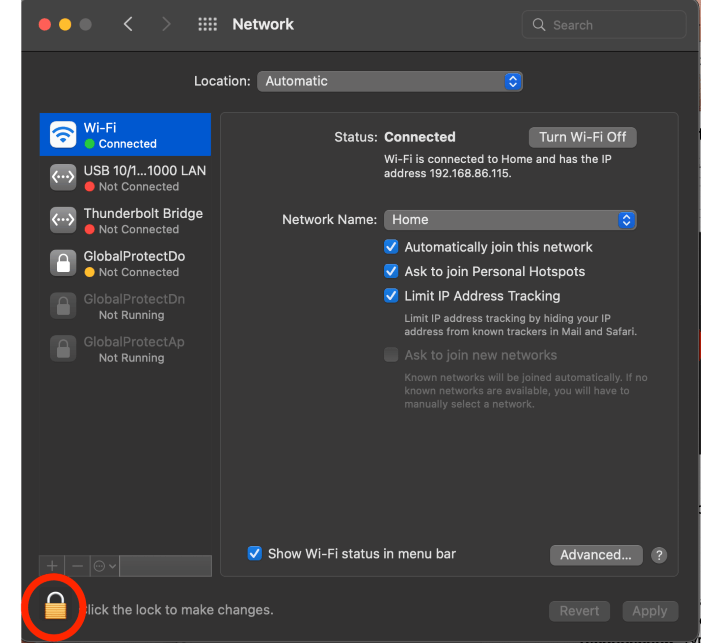
Click the lock and use TouchID or enter your password to enable changes.
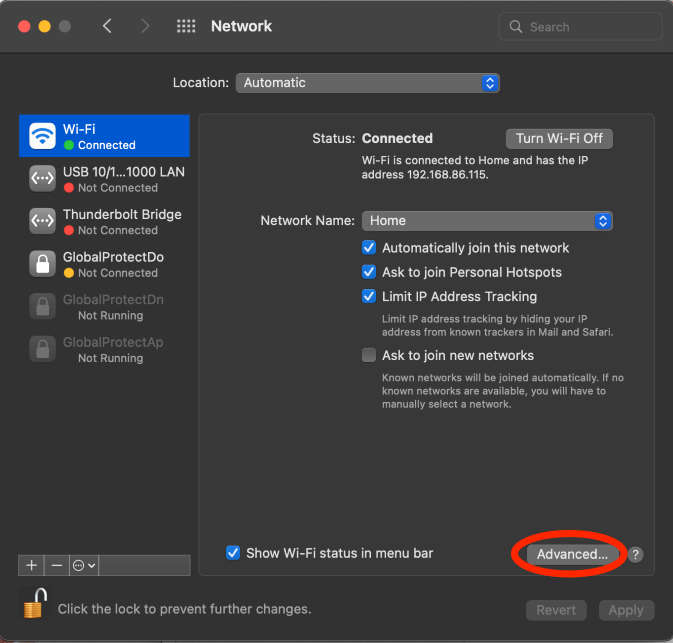
Click Advanced
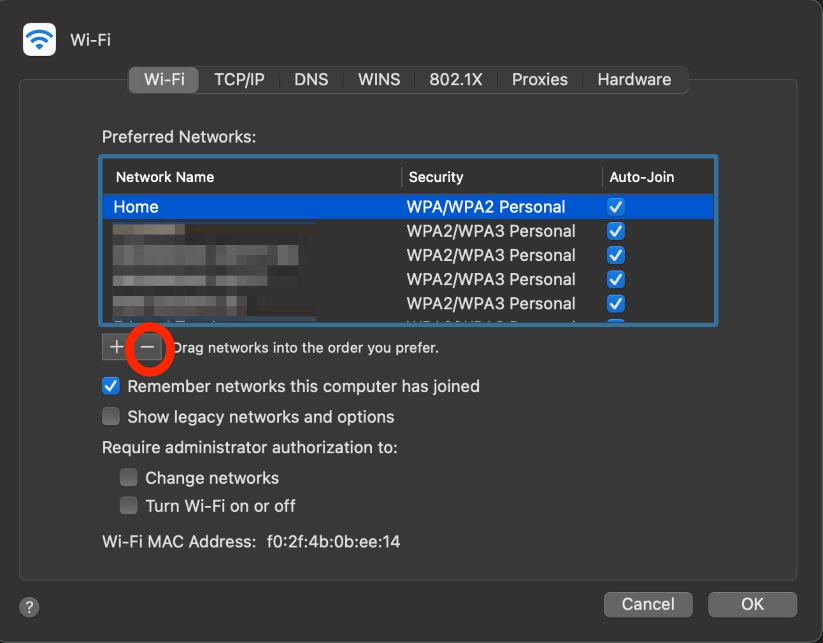
In the Wi-Fi tab, click the desired Wi-Fi network and Click the minus (-) button.
Click Remove to confirm.
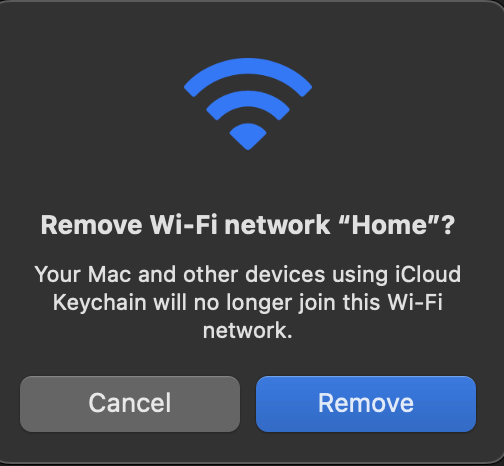
Re-select the network and Re-enter the password.
Verify Date, Time, and Location Settings
Ensuring that the date, time, and location of the computer properly match the expected values can potentially solve internet connectivity problems.
Click the Apple Icon in the top left of the screen and click Date & Time.
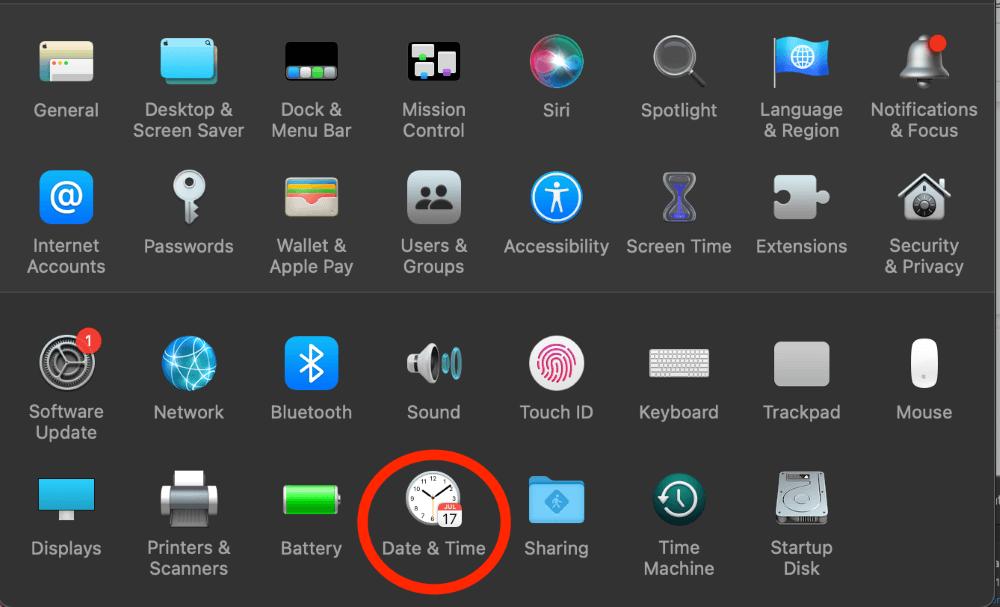
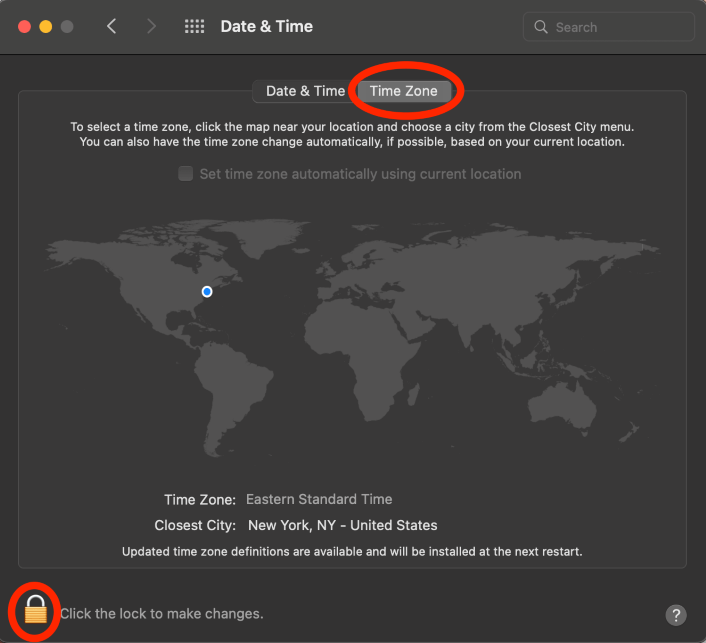
Click Time Zones, then click the Lock on the Bottom Left and use TouchID or Enter Password to Allow Changes.
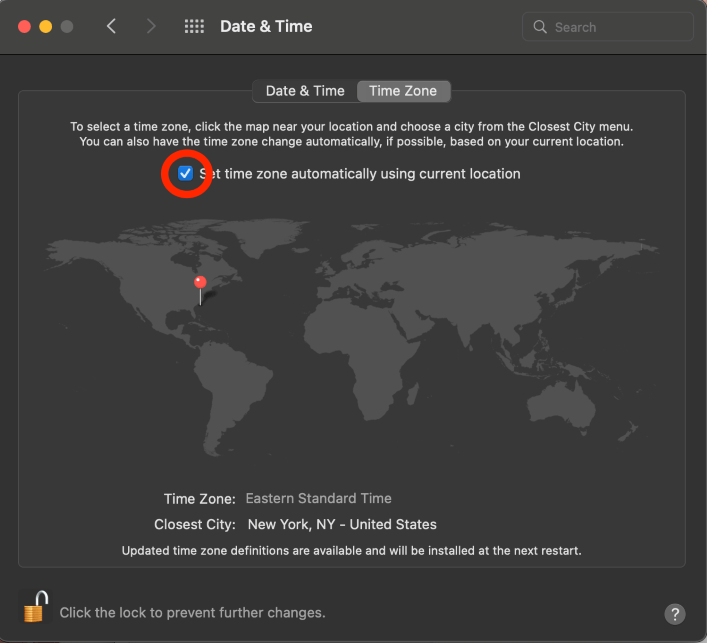
Click the Check Box next to Set time zone automatically using current location.
Disable VPN
If you have a Virtual Private Network (VPN) setup on your MacBook Pro and you are unable to reach websites even though you are connected to the internet, try disabling the VPN.
Typically, a VPN connection will be shown on the top right of the screen, and it will look different depending on which provider you use.
Renew Dynamic Host Configuration Protocol (DHCP) Lease
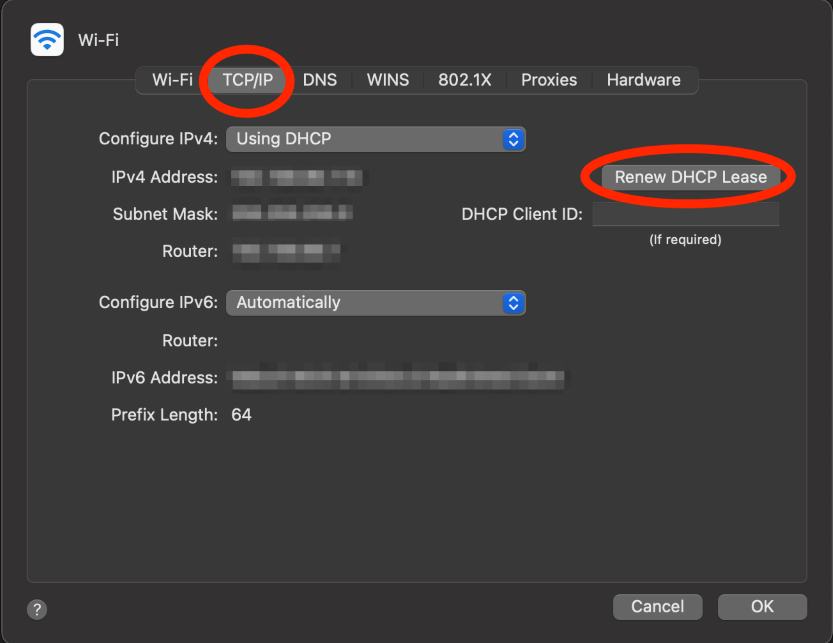
DHCP is an internet protocol that allows devices on a network to have temporary IP Addresses. This also allows for the addresses to be changed.
When we are connected to Wi-Fi but unable to reach internet websites, sometimes this is because there is an error with the device’s IP Address. Renewing the DHCP Lease will fix these potential errors.
Note: Follow the first 3 steps in the “Reconnect Wi-Fi Network” section to reach the Advanced Network Settings.
In the TCP/IP tab, click Renew DHCP Lease
Update Domain Name System (DNS)
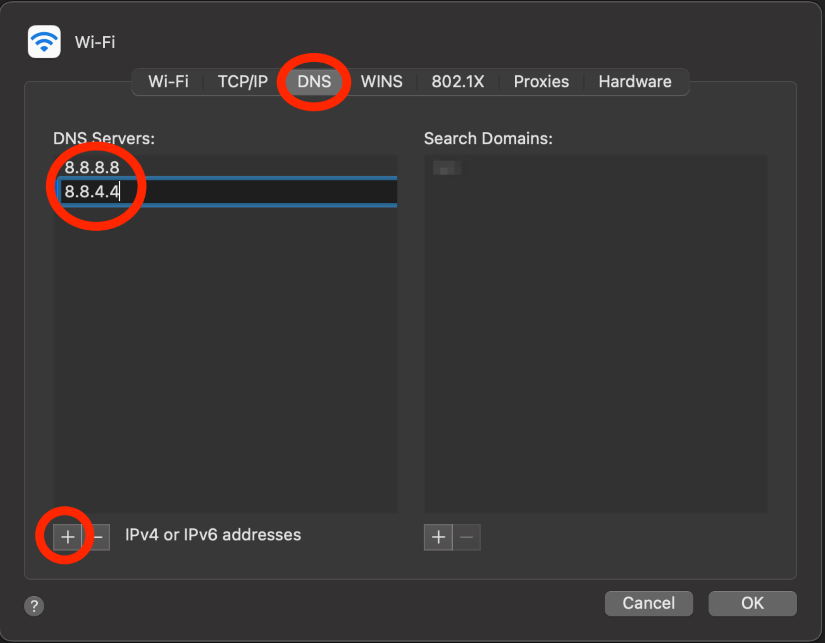
By updating the DNS to a free domain, such as Google, you can help your computer to re-establish an IP Address and therefore reconnect to the internet as well.
Close any open internet browsers
Note: Follow the first 3 steps in the ‘Reconnect Wi-Fi Network’ section to reach the Advanced Network Settings.
In the DNS tab, click the plus button to add an IPv6 DNS Server. If you are unsure what server to use, I would suggest using 8.8.8.8 and 8.8.4.4. Both of these are utilized by Google. Click ok to save.
Quit mDNSResponder
Similar to the explanation above, we are going to try to reset the DNS settings for the device in order to reconnect to the internet.
Open the Launchpad

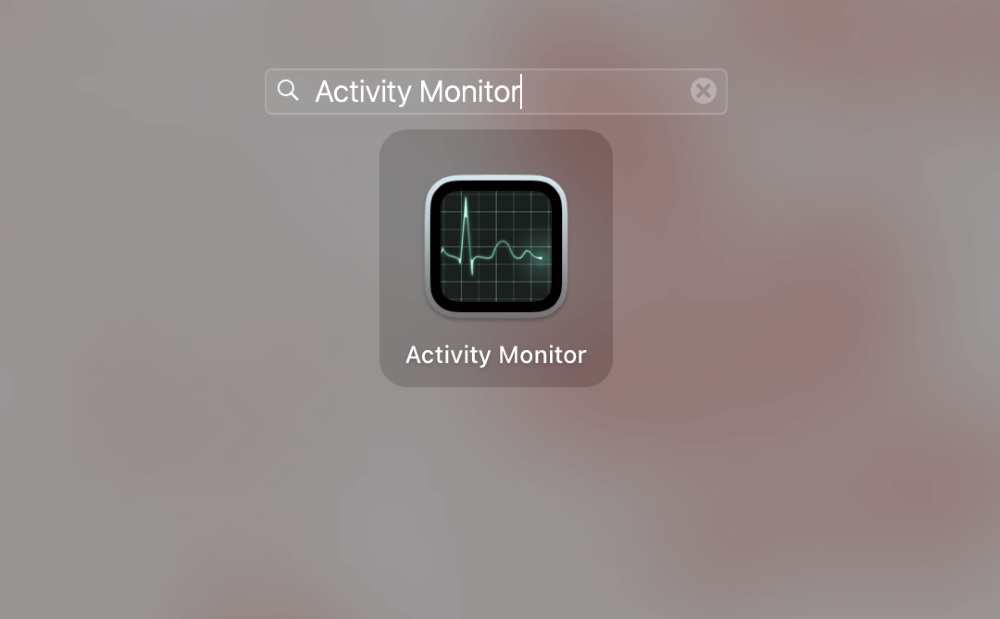
Search for Activity Monitor and Click it to Open
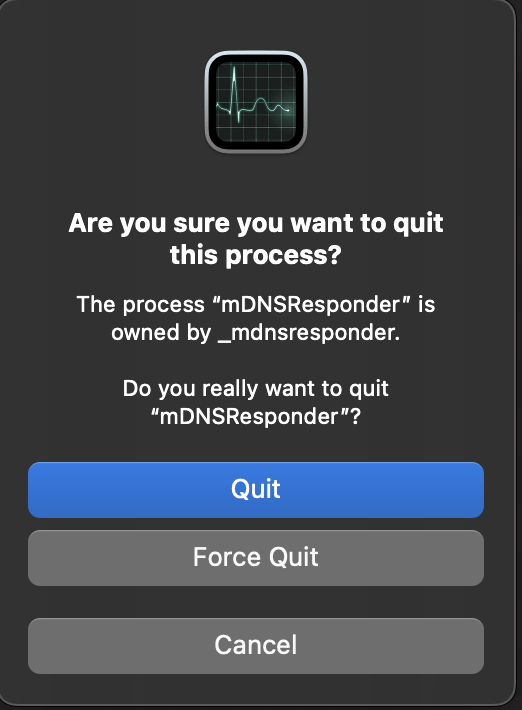
In the Network tab, search for mDNSResponder and Click the x to stop.
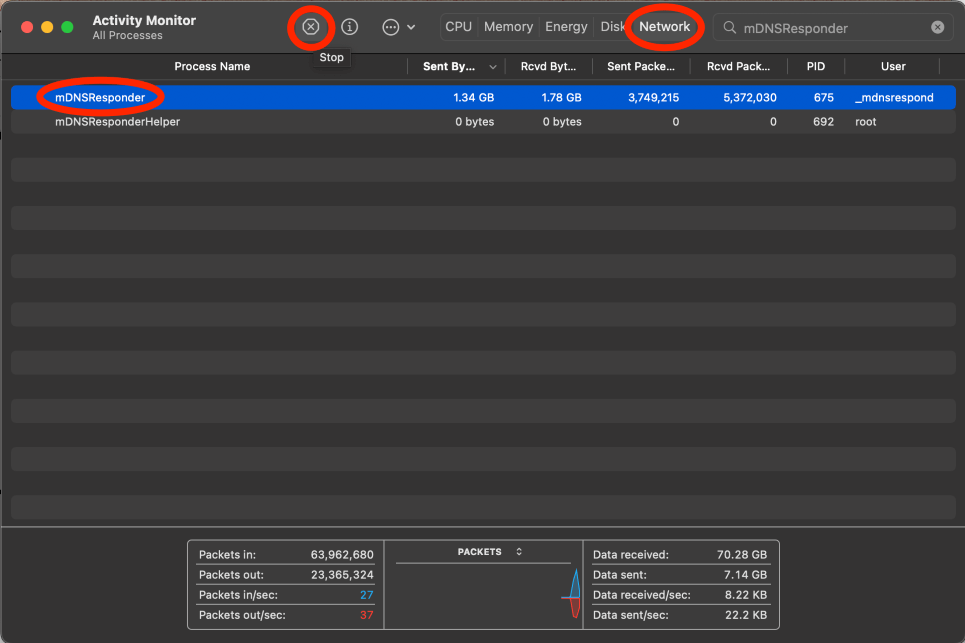
Click Quit to confirm.
Final Thoughts
Network Protocols were developed to protect information exchange on the internet and allow different devices to communicate regardless of the developer or development type (think IoT!).
However, small changes or updates in these protocol-related settings on a device can cause us to lose internet capabilities even when our devices are connected.
