Do you wish there was a faster way to make selections so you can delete, copy, or color parts of your drawing with ease? Fear not. With PaintTool SAI’s Magic Wand creating a selection has never been easier.
My name is Elianna. I have a Bachelor of Fine Arts in Illustration and have been using PaintTool SAI for over seven years. I use the magic wand to speed up the coloring process in all of my drawings. I would be lost without it.
In this article, I will explain how to use the Magic wand in PaintTool SAI to make your design process a breeze.
Let’s get into it!
Table of Contents
Magic Wand Tool in PaintTool SAI
So where is the Magic Wand in PaintTool SAI and how does it work? I’ll explain the different settings so that you can have a better understanding of the tool.
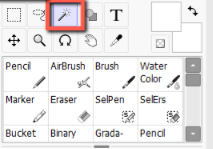
The magic wand is located in the tool panel of PaintTool SAI and includes a variety of settings to optimize its use. It’s important to understand these settings to take advantage of all the magic wand has to offer. Here is a breakdown of its settings:
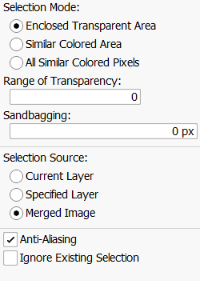
Selection Mode:
Selection mode toggles how the magic wand will search an area to make a selection. There are three selection mode options, each with its own strategic advantages and functions. They include:
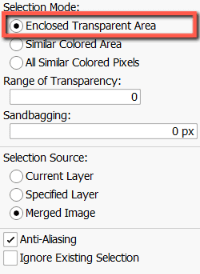
Enclosed Transparent Area: searches a transparent region around a clicked point. This option is best used with closed lineart, or when trying to fill in a closed selection.
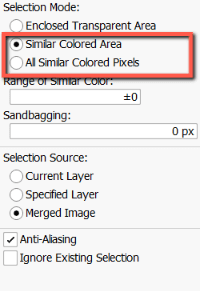
Similar Colored Area: Searches a region in a similar color to a clicked point. This option is best used when trying to copy, edit, or modify a specific color within a piece. It is also useful for deleting the background of an image.
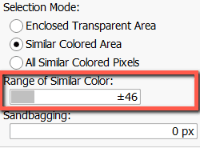
When using the similar colored area selection setting, you can modify the range of similar colors with the slider.
All Similar Colored Pixels: searches all regions with a similar color to the clicked point. This option is best used when trying to change a specific color in a piece. Similar to the similar colored area selection mode, the range of similar colors can be adjusted on the slider.
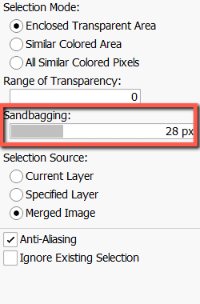
Sandbagging: Sandbagging refers to the area a selection can fill in an area that is not enclosed. In a piece where lineart is not completely connected, it will fill the gaps with a selection to enclose it instead of selecting the whole piece. The larger the px on the sandbagging slider, the bigger the gap it can fill.
Selection Source: The selection source refers to the region that the magic wand tool will search to make a selection. There are several options. They include:
- Current Layer: Searches the region from a current layer.
- Specified Layer: Searches the region of a specified layer that is defined as the selected source.
- Merged Image: Searches the region from the merged image.
- Anti-Aliasing: Enables the anti-aliasing of edges.
- Ignore Existing Selection: Specifies ignoring the existing selection from a specified region.
Furthermore, there are some useful keyboard shortcuts to modify a selection. Here are some common ones for quick reference.
- Ctrl + T: Transform a selection
- Ctrl + I: Invert a selection
- Ctrl + D: Deselect a selection
How to Select an Enclosed Transparent Area in PaintTool SAI
Now that we have gone over the magic wand settings, here is how to select an enclosed transparent area in PaintTool SAI:
An enclosed transparent area can refer to closed sections of lineart or an enclosed selection made with the selection pen.
Here is how we select them:
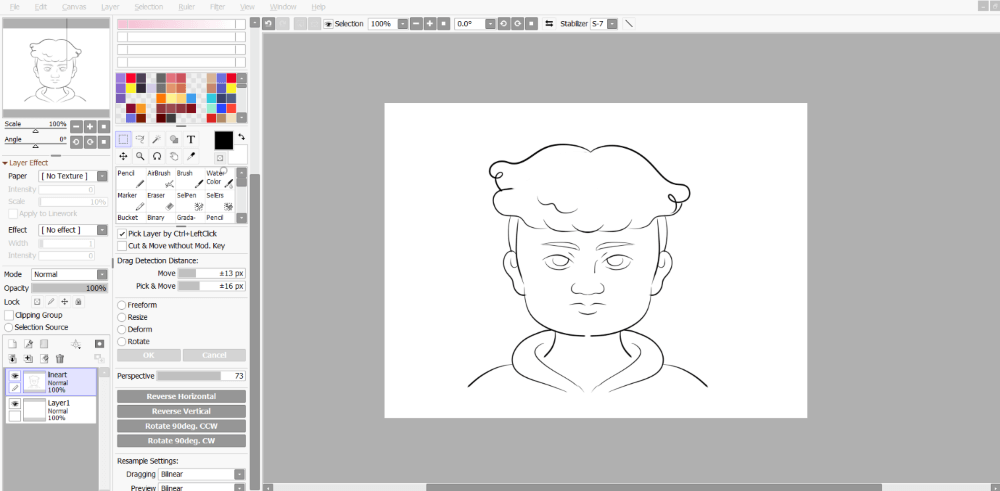
Step 1: Open PaintTool SAI with your document. Click on your Lineart Layer or draw an enclosed selection with the Selection Pen. I will be doing both.
Step 2: Click on the Magic Wand tool.
Step 3: In Selection Mode click Enclosed Transparent Area.
Step 4: Click the area of your lineart that you want to select. Your selection will be highlighted in blue.

Step 5: If you find that the magic wand selects your entire screen, your selection may include gaps. However, you can still try selecting without searching your entire image by increasing the sandbagging value.
That’s it!

How to Select Similar Colored Pixels in PaintTool SAI
If you wish to select a specific color on your canvas with the magic wand tool, follow the steps below.
Step 1: Click on the Magic Wand tool.

Step 2: Select Similar Colored Area or All Similar Colored Pixels.
Step 3: Click on the area of the canvas with the color you would like to select.
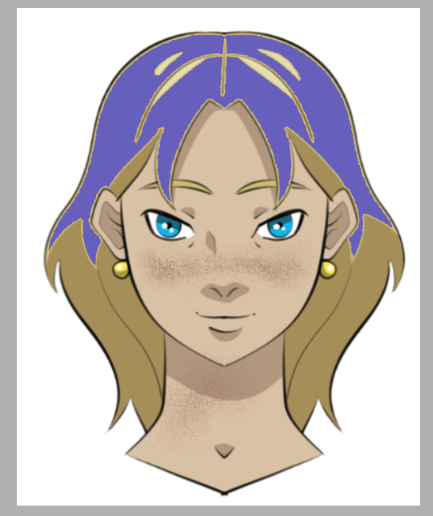
To adjust your selection, increase the Range of Similar Color.
Step 4: Click again in the area you would like to select.

Final Thoughts
Creating selections in PaintTool SAI is easy with the Magic Wand. You can create selections from an enclosed area, a select color, and further modify your selection by increasing the range of color and sandbagging. Knowing how to navigate these settings will help you in a multitude of design scenarios.
Do you make selections with the magic wand in PaintTool SAI? Let me know in the comments below!
