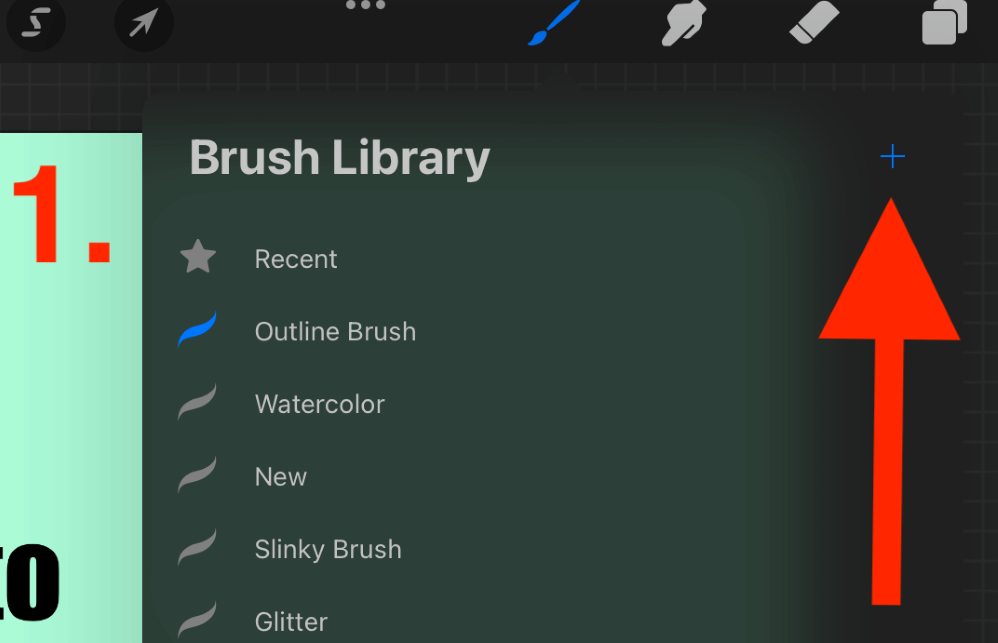
Create a new brush in your Brush Studio by tapping on the + symbol in your Brush Library. You need to create two new brushes with limited stroke paths and then combine them by swiping right on each brush and choosing the Combine option.
I’m Carolyn and I’ve been using Procreate to run my digital illustration business for over three years. As I spend almost every day on the app creating work for different clients, I also have to dedicate a lot of time to creating new tools and unique design ideas, like paintbrushes.
Creating your own brush on Procreate can be simple enough depending on what you’re looking for. However, it can also be an incredibly elaborate and technical process as the Brush Studio offers users a vast array of in-depth design settings for each brush.
Note: Screenshots are taken from Procreate on iPadOS 15.5.
Table of Contents
Key Takeaways
- You have to create two brushes and combine them to create an outline brush.
- Outline brushes can save you a lot of time when creating bubble style or eye-catching lettering.
How to Make an Outline Brush in Procreate – Step by Step
This is a very long process as it involves creating a new brush and duplicating it. There are a lot of finer details to change in each brush so make sure you follow carefully. But once it’s done, it’s done! Here’s how:
Step 1: Open your Brush Studio by tapping on the + symbol at the top right-hand corner of your Brush Library.
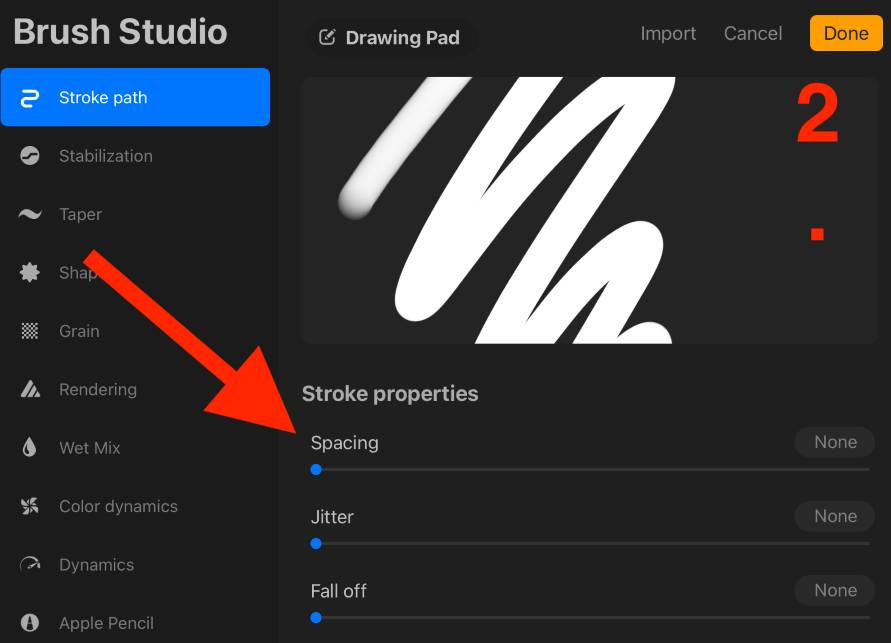
Step 2: In your new brush settings, under Stroke Path, reduce the Spacing all the way down to None.
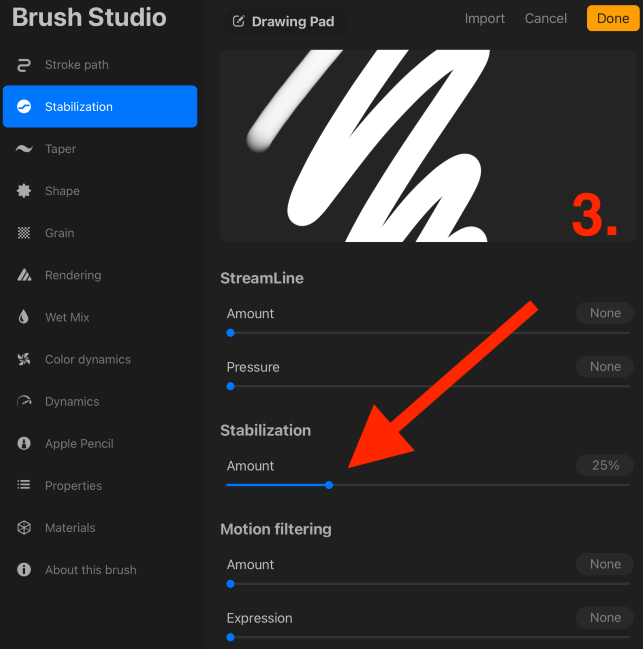
Step 3: Under the Stabilization menu, increase the Amount to 25%.
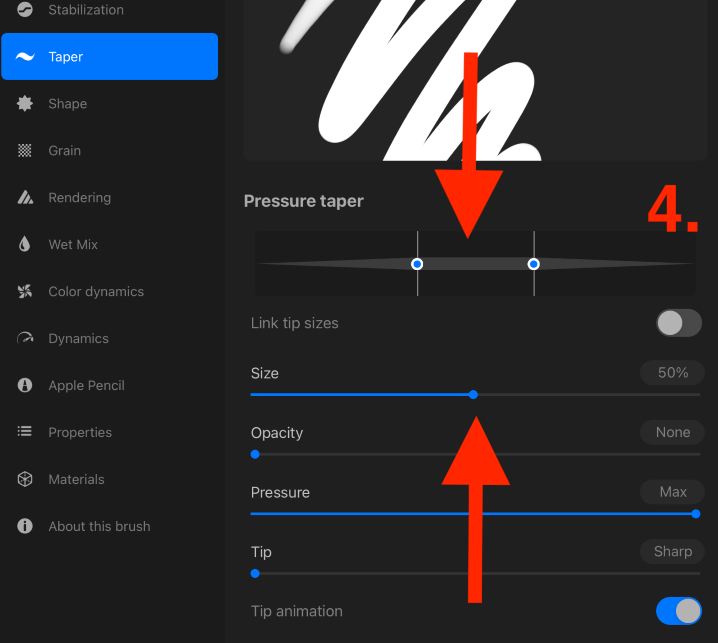
Step 4: Under the Taper menu, drag the nodes on either end to reduce the Taper as fast as it will let you. Then increase the Size to 50%.
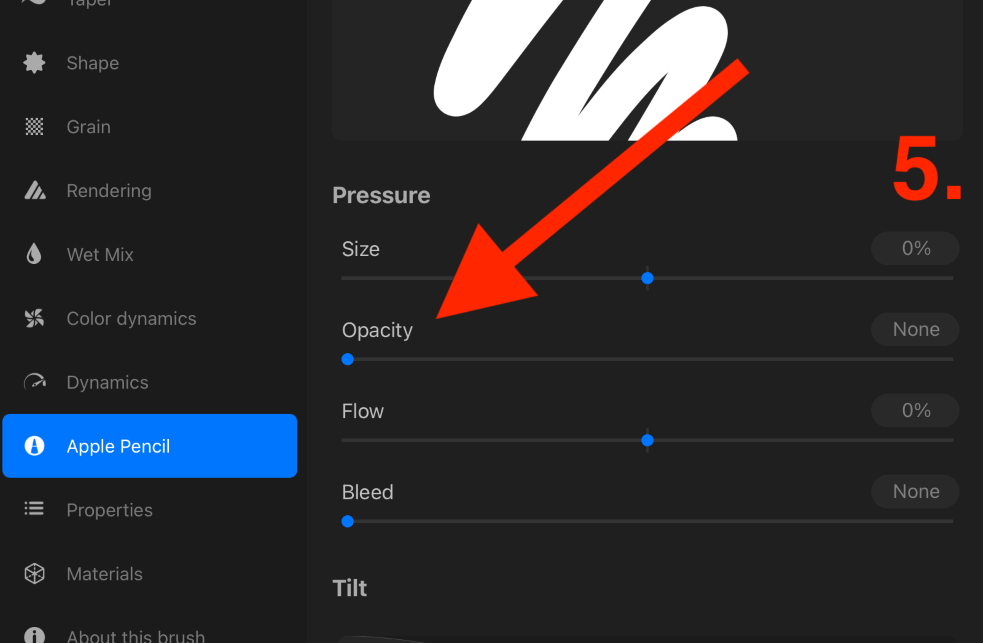
Step 5: Under the Apple Pencil menu, reduce the Opacity all the way down to None. When you are finished doing this, tap on Done to close the Brush Studio and confirm your changes.
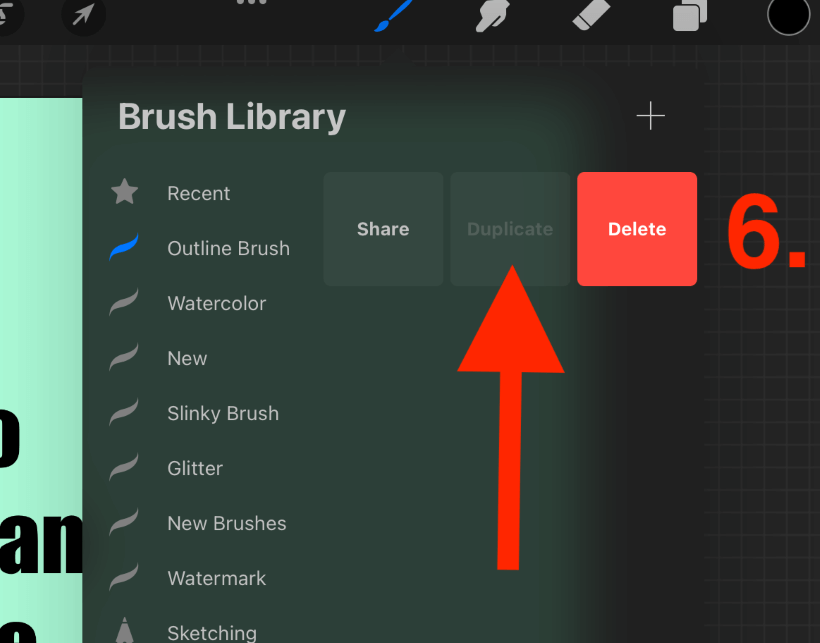
Step 6: Duplicate your new brush by swiping left on it in the Brush Library and selecting the Duplicate option.
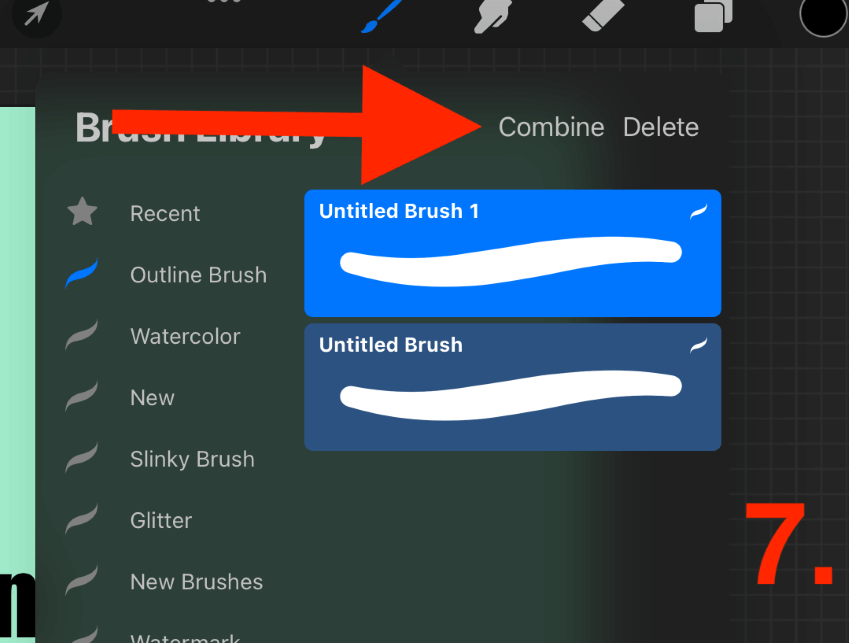
Step 7: Combine the two identical brushes together by swiping right on both of them until they are highlighted in blue, this means they are both selected. Then tap on the Combine setting above the two brushes.
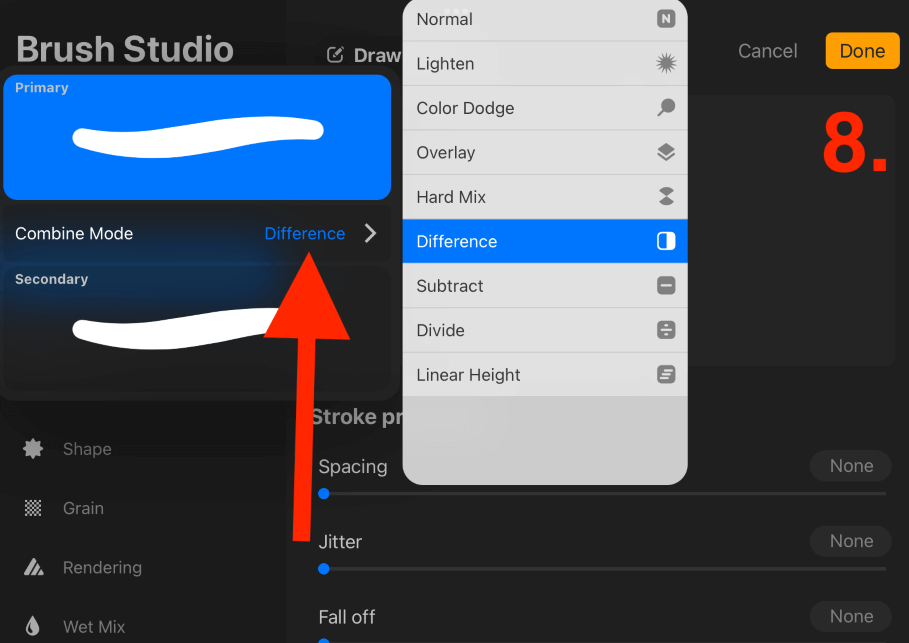
Step 8: Now tap on the thumbnail of the new brush. It will display both the Primary and Secondary layers of your brush. Tap on Normal, this will be in between the two layers. Scroll down and select the Difference setting.
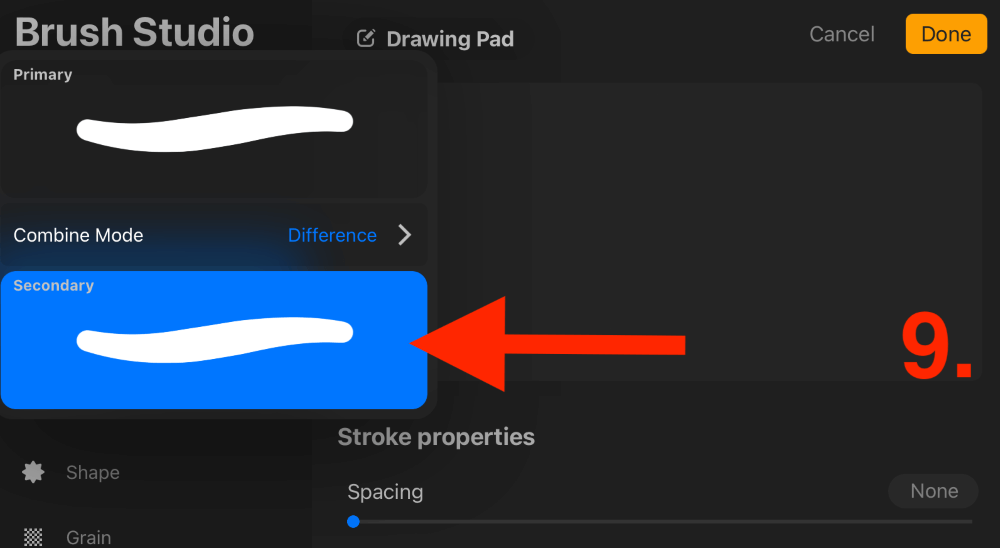
Step 9: Now tap on the Secondary layer, which will be the bottom thumbnail of your new brush.
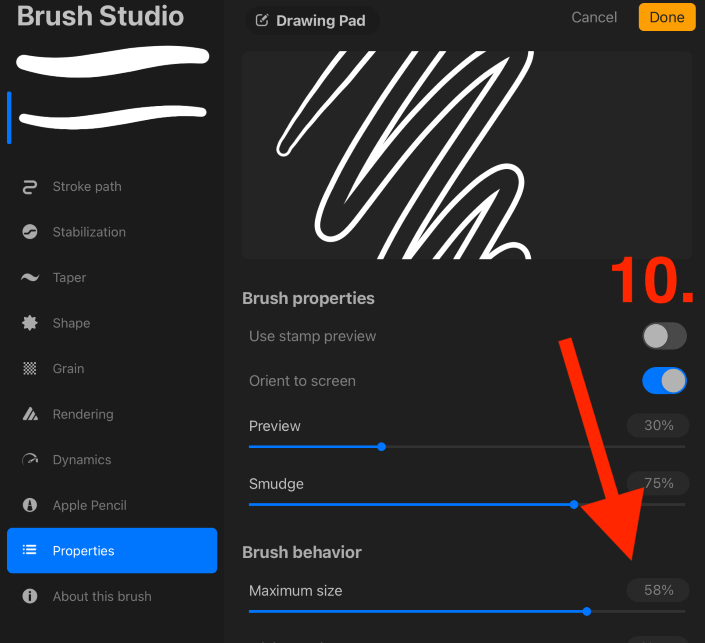
Step 10: Scroll down the Properties menu and adjust the Maximum Size to 58% under the Brush Behavior tab.
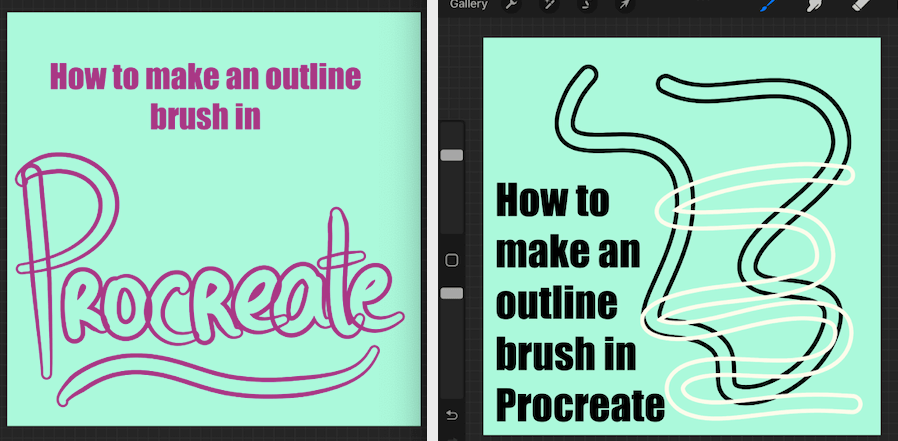
Once you have followed all of these steps, tap on the Done button in the top right-hand corner. Your brush is now ready to use and will be saved to your Brush Library for future use.
Outline Brushes Available to Purchase
Many Procreate artists who have mastered the art of creating personalized brushes in the app, will make their new creations available for purchase online. There are many websites like Etsy where you can search, scroll and find the perfect lettering for your project.
If you can’t seem to be able to make the lettering you need, don’t feel defeated. It’s not an easy task. And lucky for us, there are multiple resources and other amazing digital artists that we can learn from and support by purchasing their own brush kits.
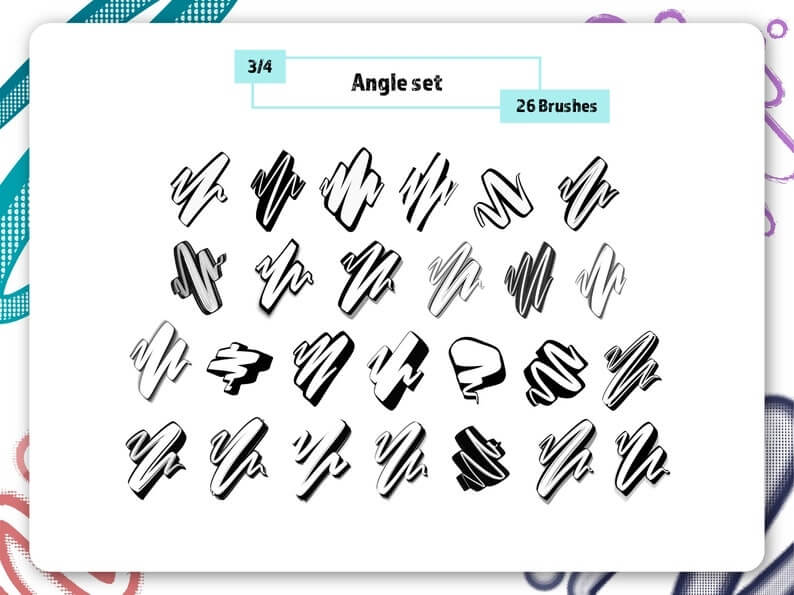
Here are some of my favorite outline brushes from fellow Procreate artists:
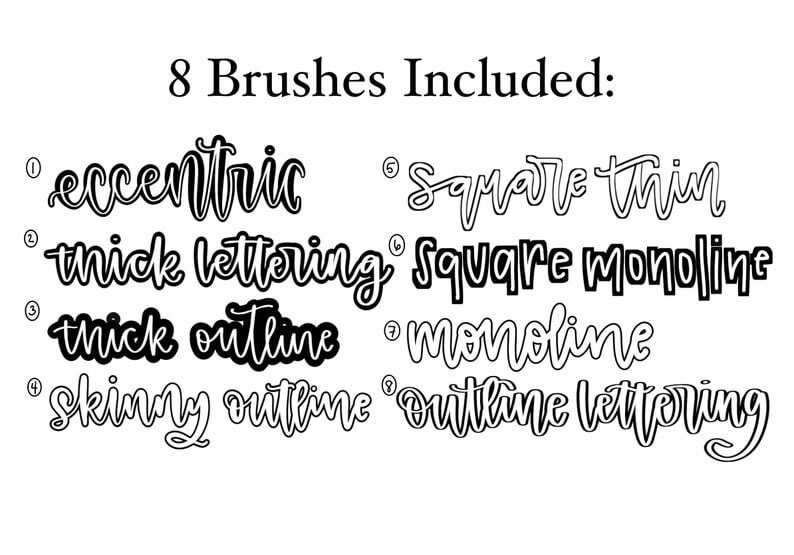
Outline Lettering Brush Set – By BlueStrawberryStudio
I love this brush set as it comes with eight unique brushes that are all different in their own way. All you have to do is purchase, download them and then import them into your Brush Library from your device.
XXL Mega Outline Bundle – By Magnatype
This is a graffiti-style brush set that comes with 110 different outline brushes. I love this set because graffiti is a hard skill to master but this set makes it so easy.
FAQs
Here I have chosen a selection of your frequently asked questions regarding making an outline brush in Procreate.
Can I get Procreate outline brush for free?
You can purchase outline brushes that other artists have made or try to find a free one online. I personally like to create my own as it’s actually quite a quick process and gives you more control over the details of your brush qualities.
How to create a colored outline brush in Procreate?
You can write with our new outline brush in any color of your liking by selecting your color choice in the Color Wheel in the top right-hand corner of your canvas before you start to draw.
Can I fill an outline brush in Procreate?
You can manually fill your outline brush lettering by dragging and dropping your desired color from your Color Wheel and dropping it onto the inner blank areas of the lettering.
How to make an outline Brush Procreate Pocket?
Good news Procreate Pocketers, you can use the exact same method shown above to create your very own outline brush in the iPad-compatible app.
How to make a Procreate outline brush with no overlap?
Overlapping is caused when you lift your finger or stylus off of the canvas while you are still drawing. To avoid this, keep your stylus held down on the canvas until your word is completely finished as if you are writing in cursive.
Conclusion
Creating your own brushes can be a very elaborate and far-fetched area to get into. But trust me, once you create your own brushes once or twice, you will be addicted. This is because Procreate gives users every part of control over every aspect of their brush settings.
This means you can literally create whatever you want, at the touch of a finger. I highly recommend spending some time on this today so you can witness just how easy it can be. And you never know, you could start to make money by selling your own brushes online.
Have you created your own outline brush in Procreate? Did you use the same method as I did? Let me know in the comments section below as I would love to hear your feedback.
