Create the shapes you want to use to make a pattern, combine them onto one layer and duplicate it. Under the Action tool, open your Drawing Guide and select the Symmetry tool. Change the Guide Options to Quadrant and position your duplicates accordingly.
I’m Carolyn and I’ve been running my own digital illustration business for over three years. This means I spend all day every day on the Procreate app and creating unique patterns is one of my favorite things to do for both my clients and my own creative enjoyment.
Different Procreate artists have their own different techniques and chosen methods for creating patterns ranging from simple to elaborate. Today, I’m going to show you the method I use which is simple and easy to learn, so it’s a great option for first-time pattern creators.
Table of Contents
Key Takeaways
- Patterns can be made on Procreate using the Symmetry tool and the Drawing Guide.
- Patterns can be used for printing fabric, posters, and a variety of other design purposes.
- When creating your pattern design, it’s important to ensure no part of your drawing is touching the edges. This will keep your pattern clear and consistent.
How to Make a Pattern in Procreate – Step by Step
In order to follow this method, you should create a series of shapes or designs on your canvas and combine them all into one layer. This layer is what you will use to create your pattern. Here’s how:
Note: Screenshots are taken from Procreate on iPadOS 15.5.
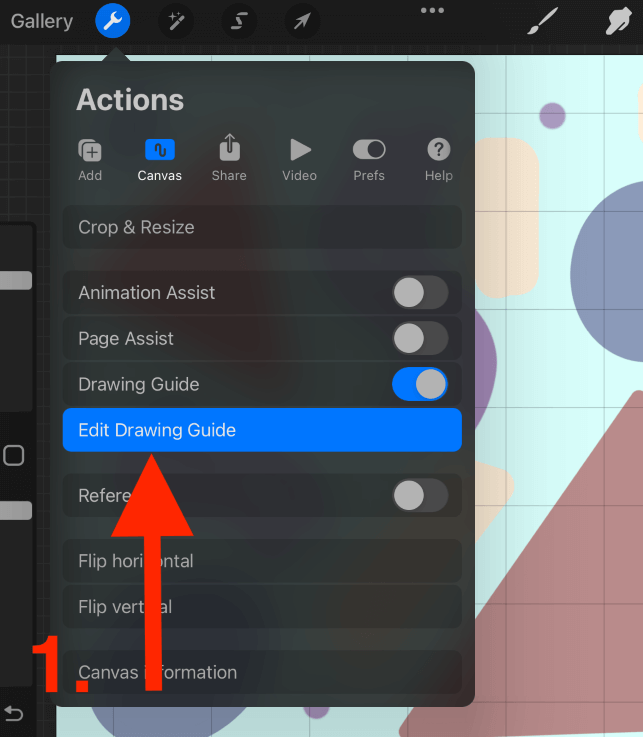
Step 1: Under your Actions tool (wrench icon) select the Canvas menu. Ensure your Drawing Guide toggle is switched on and then select Edit Drawing Guide.
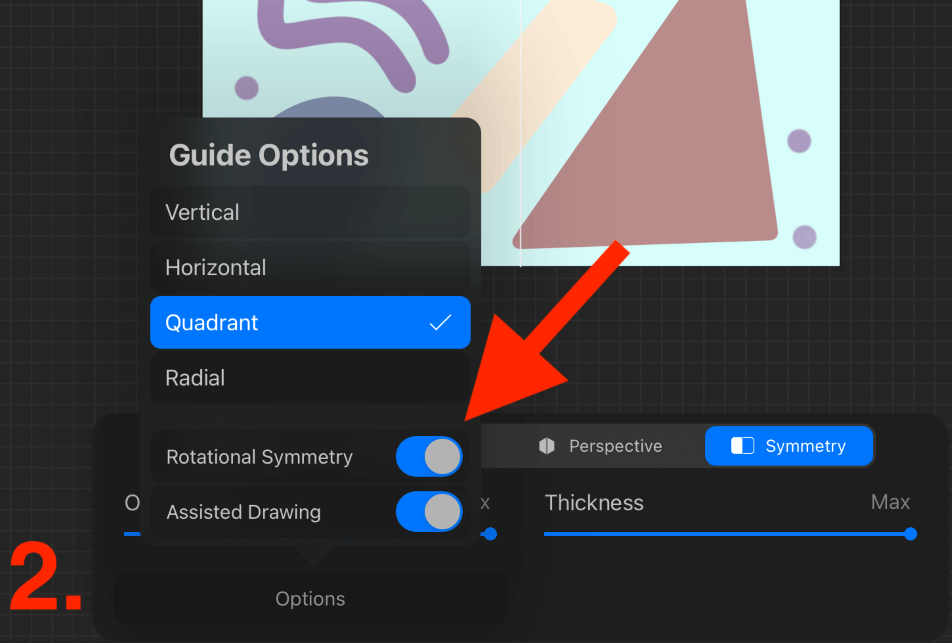
Step 2: Choose the Symmetry tool and tap on Options. Under your Guide Options, you should select the Quadrant option and activate the Rotational Symmetry and the Assisted Drawing. Then tap on Done to close your Drawing Guide.
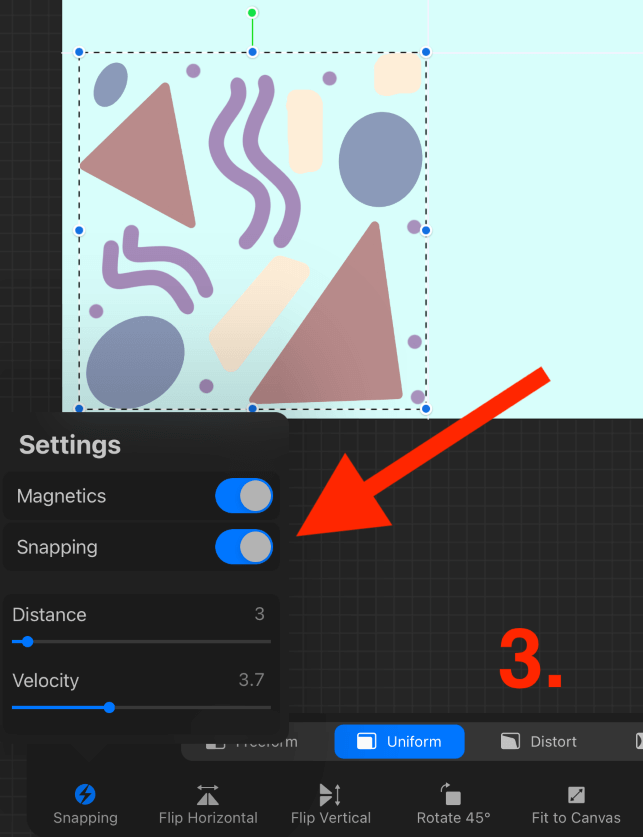
Step 3: Activate your Transform tool by tapping on the cursor icon on the top of your canvas. Select the Uniform option. In the bottom left corner, tap on Snapping and ensure you have activated the Magnetics and Snapping.
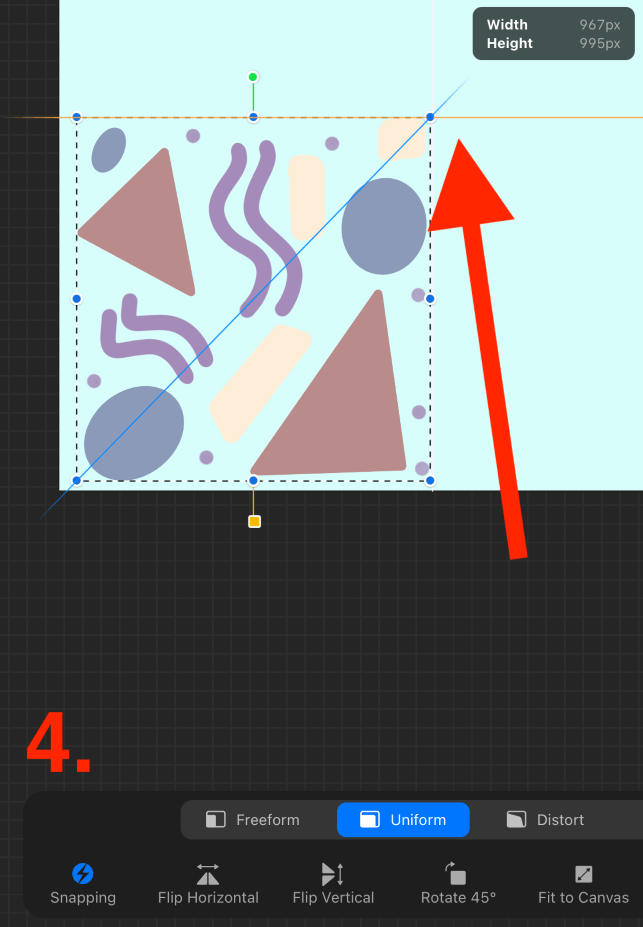
Step 4: Drag your full-size layer down by the corners until it aligns with one of the lower quadrants of the guide. You will know it’s aligned when the yellow line appears.
Step 5: Duplicate the layer you have just aligned by sliding left on it in your Layers library.
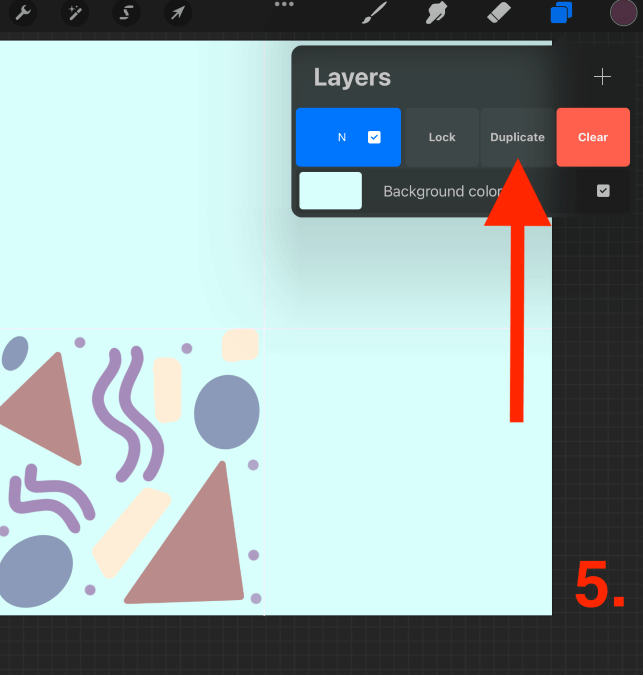
Repeat Steps 4 and 5 until you have filled your canvas with your pattern. Then merge all of your layers together and save it as a file or image to your device if you plan on using it for printing.
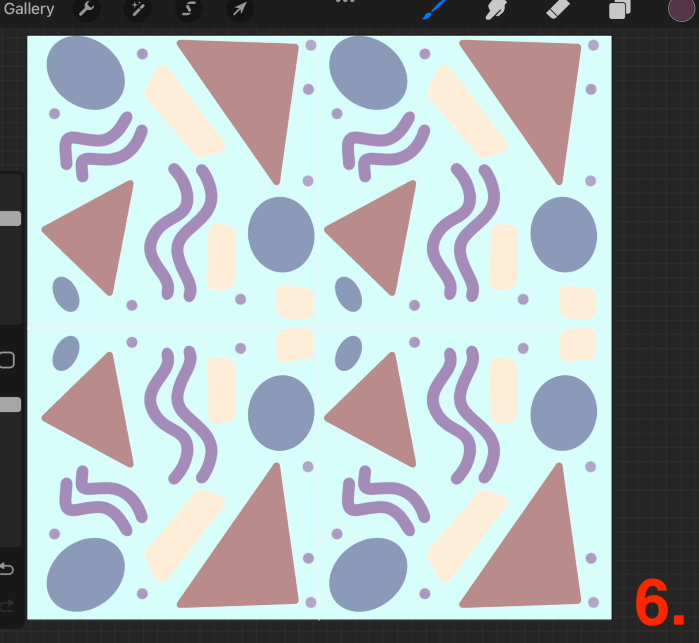
Pro Tip: You can create different patterns by flipping your image vertically or horizontally when you’re placing them in each quadrant. This creates various types of patterns and is something you should consider during the design process.
Things to Note
When creating the design you are going to use for your pattern, there are a few things to keep in mind that will create a more striking visual.
Avoid drawing anything close to the edges of your canvas. If your design is in any way rotated or printed in different sequences, it can look quite messy as the edges won’t line up together.
Ensure there are no large gaps in your design. When you repeat the pattern, large gaps can cause inconsistency with your design and look a bit off.
If you’re attempting a uniform design, making sure all components of your pattern are similar sizes can lead to a more professional, striking image. However, if you want a more organic pattern, varying the size and shapes in your pattern can have a really unique appearance.
If you want to create a variety of your newly made pattern, you can easily invert the colors to create some new options by tapping on the layer icon and choosing the Invert option.
Pattern Examples
Can you tell that all of these patterns below were made using the Procreate app? I gathered some samples of artists’ Procreate patterns online and displayed them below so you can get an idea of the endless opportunities you have to create on the app.
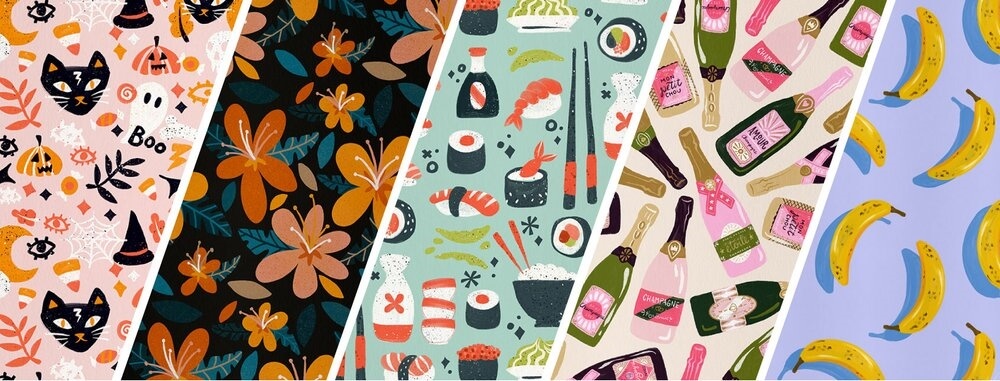
This is a selection of digital patterns created by artist Cat Coq which can be viewed on her website.
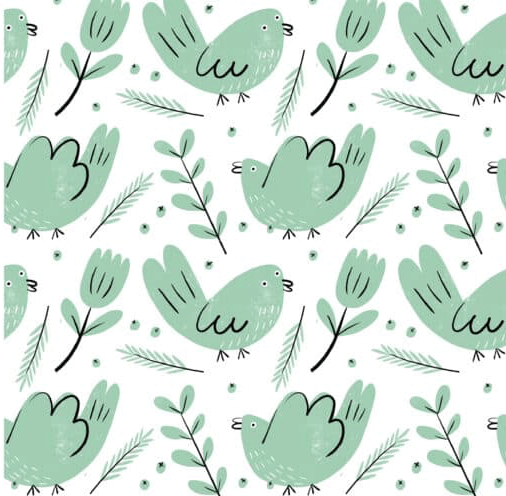
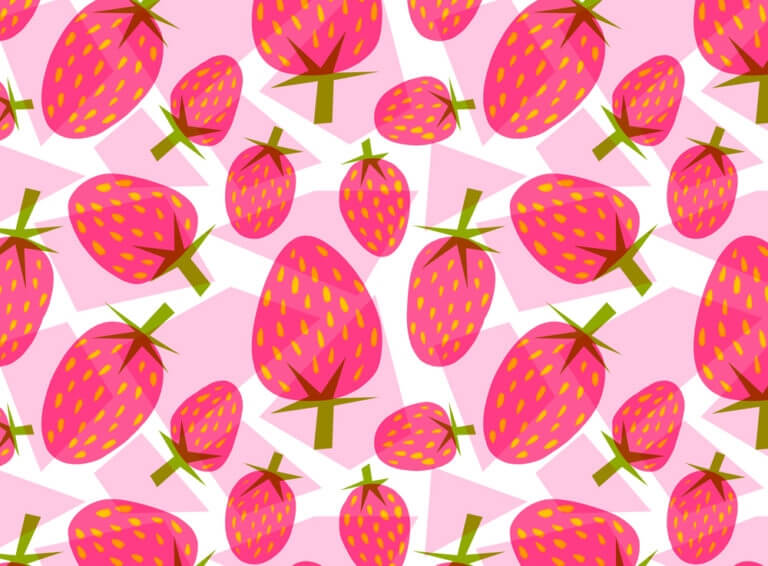
This design is from a tutorial created by Spoonflower which is a website dedicated to fabric design and offers many resources for pattern design.
Bardot Brush offers a wide range of Procreate brushes and resources.
FAQs
Below I have briefly answered some frequently asked questions about making a pattern on Procreate.
How to make a pattern brush in Procreate?
Once you have followed the steps above to create your pattern, save it as an image on your device. Then follow my tutorial on how to add brushes in Procreate. This will show you how to import the image into your brush studio when creating it.
How to make a checkerboard pattern in Procreate?
You can have two options here. You can fill a layer with black and one with white and follow the steps above to create a pattern with the checkerboard. Or you can create a simple 9-box checkerboard pattern and follow the steps above to fill in your quadrants.
How to make a repeat pattern in Procreate?
Follow the steps above and when you are using the Transform tool to move the duplicated layer, don’t flip it and keep the original form. This will create a repeat pattern rather than a seamless pattern.
How to make a pattern in Procreate Pocket?
Great news. You can follow the same steps above and have the same amazing access to pattern creation in the Procreate Pocket app too.
Conclusion
Creating patterns on Procreate can be a really quick and fun way to create striking images. I really enjoy this process as there are so many varieties to create. You never know the true quality of a shape until it’s repeated 100 times, it really can transform into something bold.
This is a great basic skill to learn in Procreate as it can be used for not only fabric printing but also as a time saver when creating backgrounds or designs in your artwork. You can save your pattern in Procreate or to your device and reuse it as many times as you want.
Do you make patterns in Procreate? Share your advice in the comments section below so we can learn from each other.
