If you’re a part of the gaming community in any capacity, you’ve probably seen some otherworldly retro games! It’s amazing how you can create crazy works of art from tiny, bit-sized pixels. If you’ve ever wondered how to begin making your own pixel art, then look no further.
My name is Skyler, and I’ve been using Photoshop personally and professionally for well over a decade. Today I’ll show you how to create your pixel art using the Pencil Tool and canvas grids in Adobe Photoshop.
While pixel art may seem simple, given the style – it’s not exactly the whole truth. While some aspects of creating and drawing your pixel artwork may be simple, you’ll also have to know how to configure your tools, settings, and exports correctly to see positive results.
If this sounds fun and you’d like to learn more, follow along below to begin creating your very own Pixel Art!
Table of Contents
Step 1: Create a Document
When you start creating pixel art, you may be confused and frustrated by the initial configuration. The canvas resolution you’re working with is significantly smaller than the resolution of your monitor, so it’s a big adjustment for most at first.
The best advice I’ve received is to start small, usually around 64 x 64 pixels wide. This is convenient because afterward, all you have to do is change the image resolution to whatever size you require during export.
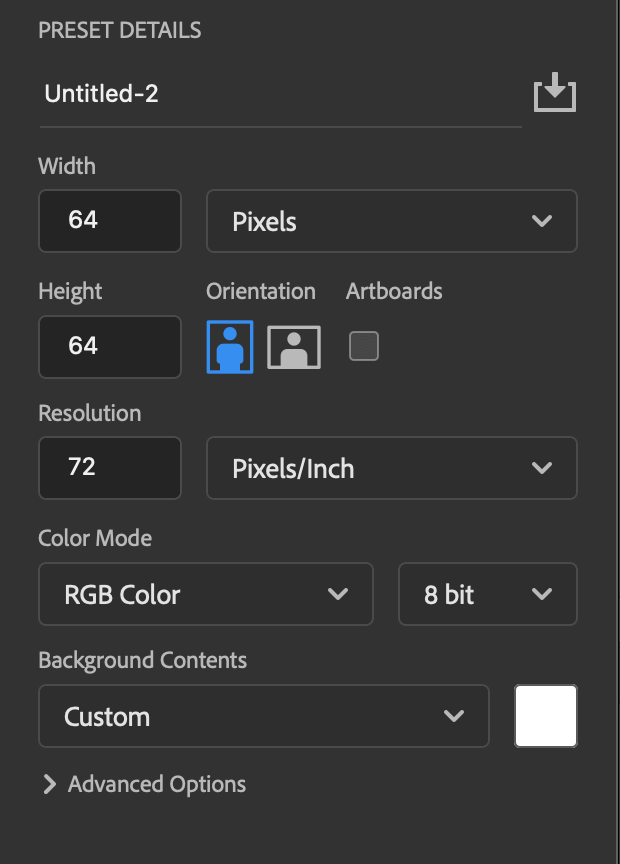
Once you’ve configured your canvas settings, go ahead and create your document.
Step 2: Make Grids
Now we can set up the canvas grid. This will help you better visualize where each pixel should be placed, and where the borders or boundaries are.

To find this, navigate to View > Show > Grid. Once this is enabled, you can activate the grid and edit the preferences to suit your needs.
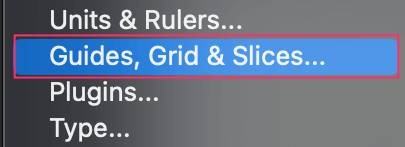
Now you’ll want to navigate to Photoshop > Settings > Guides, Grid & Slices …

This will summon a rather large window with a variety of options to choose from. Don’t worry though, you’ll only need to focus on the Grid section. Here we can change the color of your grid lines, the measurements between each grid line, and the subdivisions.
In this case, you’ll want to set the Gridline Every to 1 and the Subdivisions to 1 as well. When this is done, click OK and your new grid will appear overlaid on your canvas.

Step 3: Draw with the Pencil
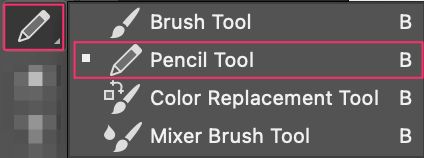
Now it’s finally time to start creating your pixel art. For this, you’ll need the Pencil Tool. It’s the easiest tool to begin creating pixel art with, though there are certainly other options available.
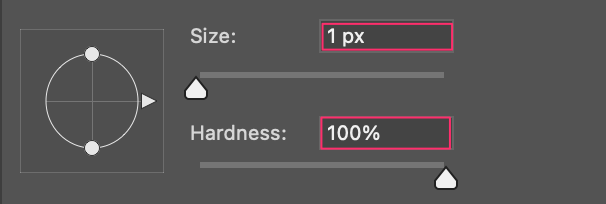
You’re nearly ready to draw, all that’s left to do is make sure your Brush Size is set to 1 so it only paints a single pixel at a time – and that your Hardness is set to 100.
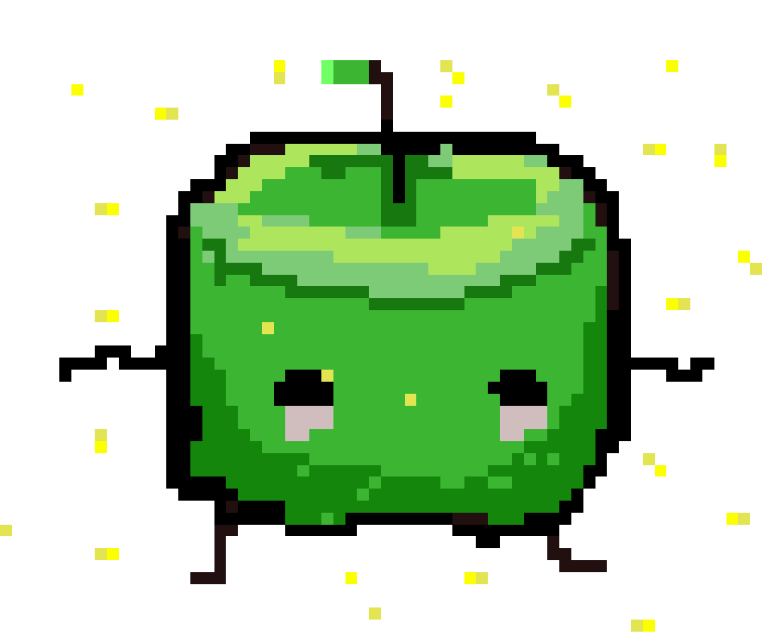
Now you can experiment and draw whatever your heart desires using these new setups and tools! I went ahead and had a bit of fun drawing a Junimo from Stardew Valley.
How to Export Pixel Art in Photoshop
Now you’ve finalized your pixel masterpiece. How do you go about exporting it correctly? Well, you’ll want to find and select File > Export > Export As… for starters!
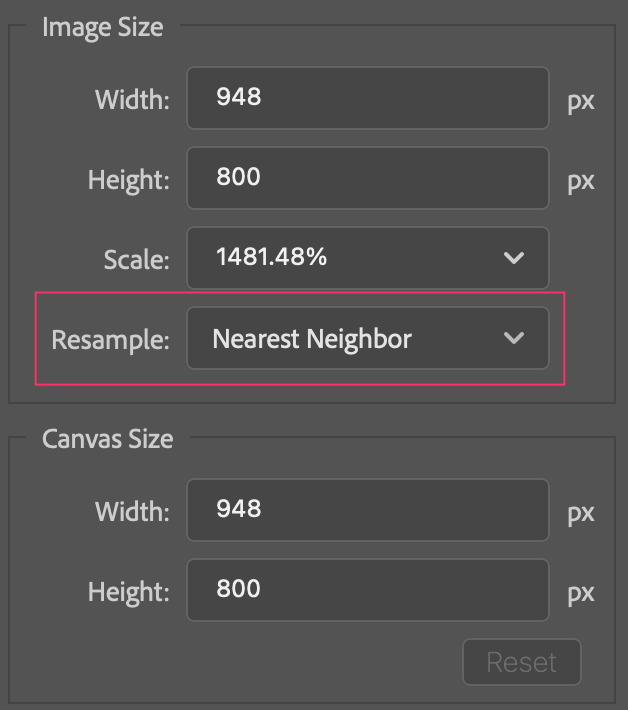
This will bring up the Export Window, where you can choose the file type, image size, and more. We’ll primarily focus on the Resample option. Make sure this is set to Nearest Neighbor before moving on.
Now, if you went ahead with the 64 x 64 image dimensions – this is where you’ll be able to size it up. You’ll want to scale it appropriately, and the easiest way to do this is by using the scale dropdown menu.
I scaled mine nearly 1500% from the original image, but you can choose whatever is appropriate for your file size and exportation needs! Go ahead and hit OK when you’re satisfied and you’ve officially made and exported your first-ever pixel art creation!
Conclusion
It’s amazing how you can create crazy elaborate works of art from tiny, bit-sized pixels! Now you can expand your knowledge even further and potentially create your own pixel masterpieces.
