Opening a file is one of the most basic operations in the computer world, and it’s usually as simple as double-clicking on the file icon. But what happens when your file opens in the wrong program? It can seriously interrupt your workflow and waste your time, and depending on the app, it can even slow your computer to a crawl.
Most computer files have a file name extension that matches their file format, such as PDF, JPEG, or DOCX, and that specific file format is associated with one of the apps that are installed on your computer. This association tells your computer which program to launch when you double-click a file icon to open it.
But when you install multiple apps that can all read the same file format, you’ll have to decide which app you want to make the default. Here’s how to make Preview the default app for any of its supported file types on Mac!
Table of Contents
Change the Default App for Opening Files to Preview
To complete this process, you can use any file that uses the file format you want to update. If you want to make Preview the default image reader for all JPG files, you can apply these steps to any JPG file; if you want to make Preview the default PDF reader for all PDF files, you can use any PDF file, and so on.
Remember that you should only make Preview the default app for a file format that it can actually open.
Step 1: Select the File
Open a new Finder window and browse to the location of your file.
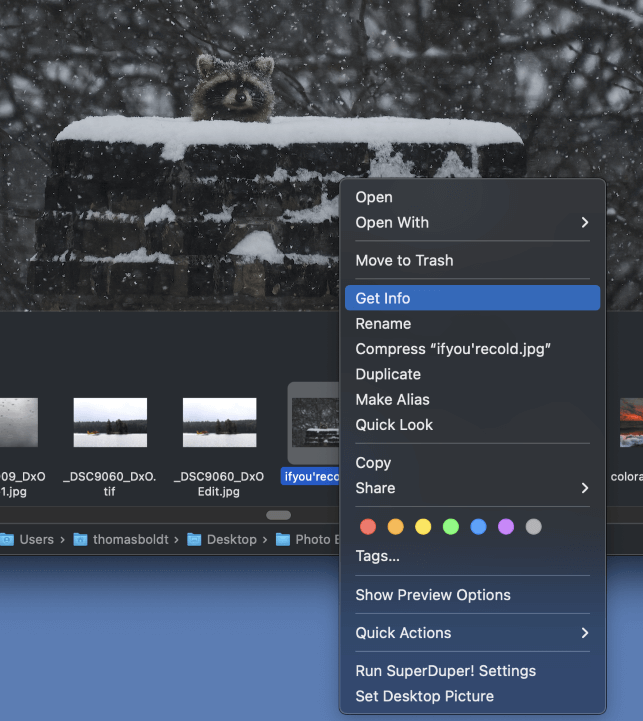
Right-click on the file icon, and then select Get Info from the popup menu.
Alternatively, you can also left-click the file icon once to select the file and then press the keyboard shortcut Command + I (that’s a letter i for the info!) to open the Info panel.
Step 2: The Info Panel
The Info panel will open, displaying all the metadata related to your file and a quick preview of the contents.
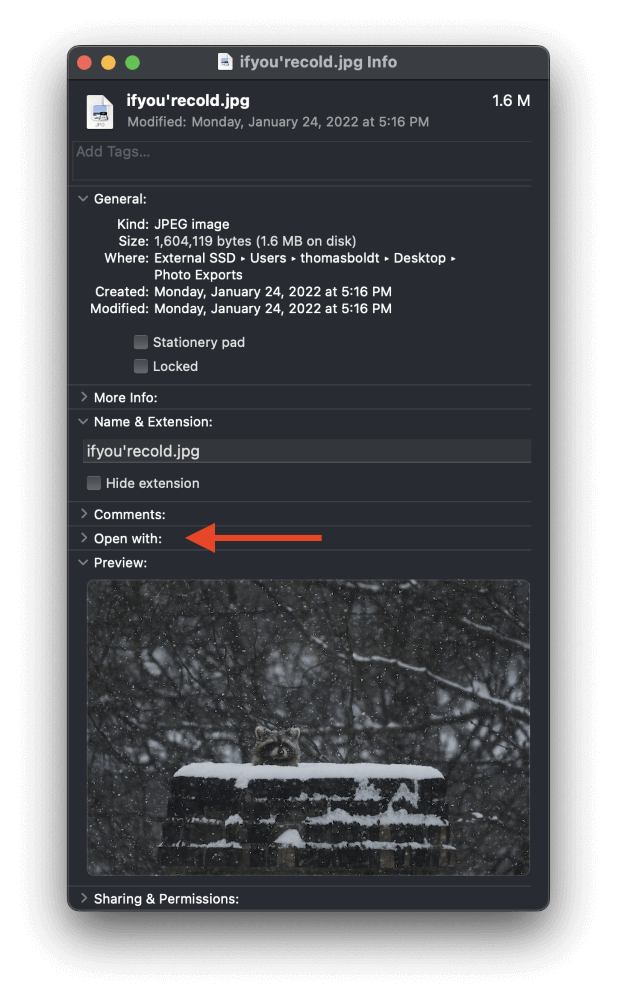
Locate the section labeled Open with and click the small arrow icon to expand the section.
Step 3: Make Preview the Default Application
From the Open With dropdown menu, select the Preview app from the list.

If the Preview app is missing from the list, scroll down to the bottom of the list and click Other. A new window will open, displaying your Applications folder, which lists all the apps currently installed on your Mac.
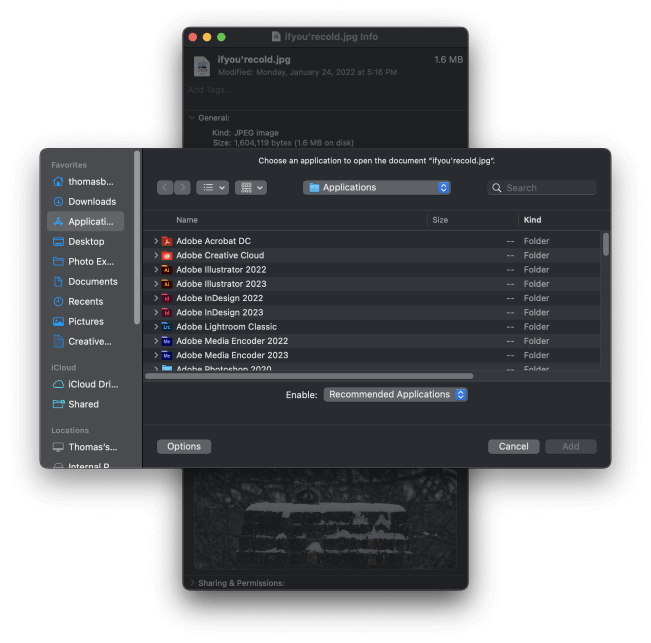
By default, the window will only allow you to select Recommended Apps, but if necessary, you can adjust the dropdown menu to allow you to select All Apps.
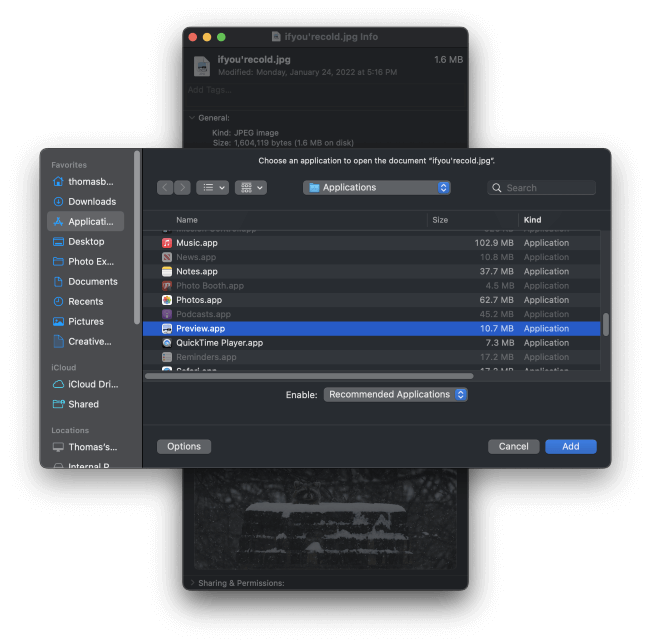
Browse to select the Preview app, then click the Add button.
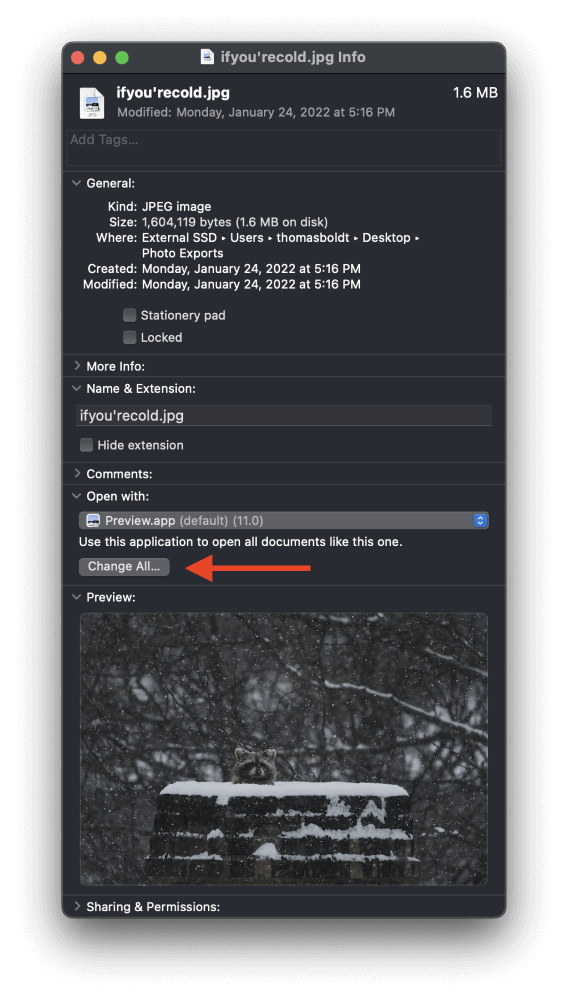
Last but not least, click the Change All button to ensure that every other file that shares the same file format will also open with Preview.
Your Mac will open one final dialog window asking you to confirm the changes.
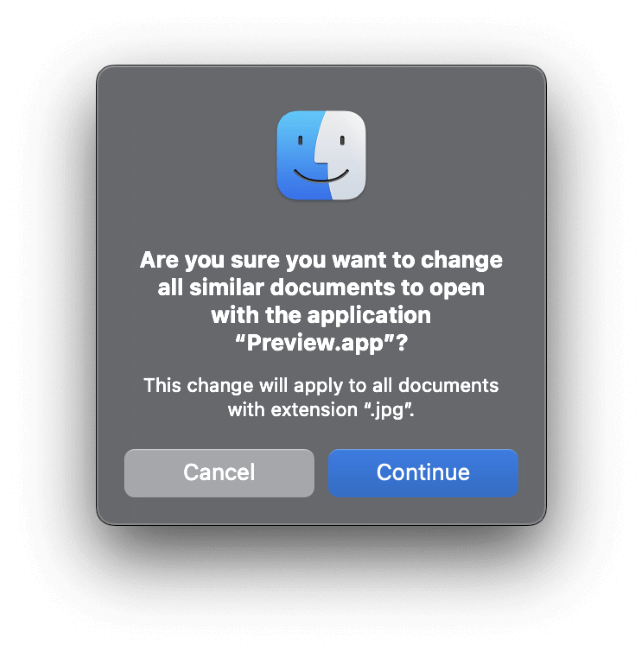
Click the Continue button, and you’re done! You’ve just made Preview the default app for your selected file format, but you can use these same steps to set different default apps for any kind of file format.
How to Use Preview Without Making it the Default App
If you want to open a file with the Preview app without changing the default file association permanently, you can do it very easily!
Open a Finder window and browse to select the file you want to open. Right-click the file icon to open the popup context menu, and then select the Open With submenu, which will expand to show all the recommended apps that can be used to open your selected file.
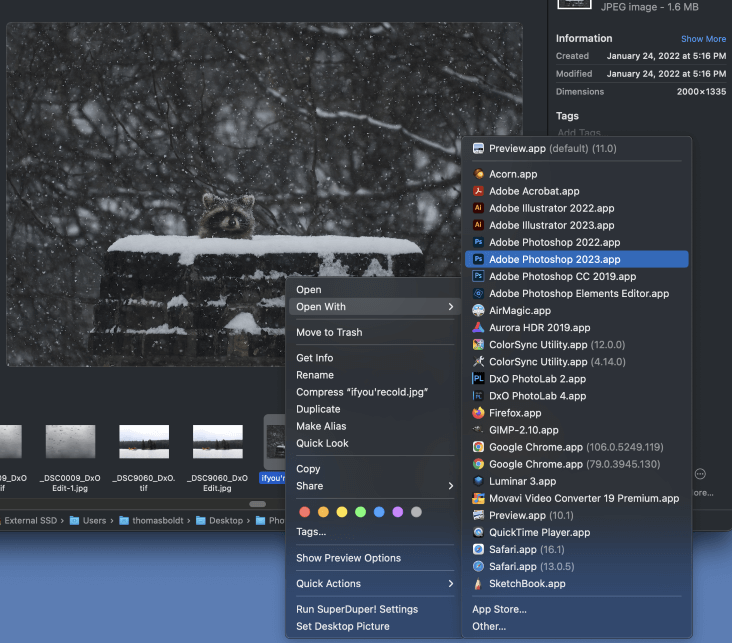
Click to select one of the apps from the list, or select the Other entry from the very bottom of the app you want isn’t listed, and then browse to find your desired app.
Your file will open with the chosen program this one time, but it won’t change the default app that’s already associated with that file type.
A Final Word
Congratulations, you’ve just learned how to make Preview default on Mac for all your file opening needs!
While it might seem like a small thing, these kinds of skills are what separate beginner computer users from advanced computer users. The more comfortable you are working with your Mac, the more productive and creative you can be – and the more fun you can have!
Happy Previewing!
