Understanding how pixels work and how to apply pixelations to your images in Photoshop is a great skill to have, even in a world full of vector art. Not only are you able to apply it in practical situations like the protection of one’s identity, but also artistic mediums like pixel or glitch art.
My name is Skyler. In this tutorial, I will show you how to pixelate entire images and selections easily.
First, we’ll tackle how to pixelate an entire image using only the Filter Menu and adjusting Cell Size. Just two easy steps! After that’s taken care of, we’ll push on to learning how to pixelate a selection, with just a few added steps involved.
By the end of this, you’ll be able to pixelate anything and elevate your artwork or protect one’s identity with no problem!
Alright! Let’s get things started.
Table of Contents
How to Pixelate an Image in Photoshop
You’ll be using the Filter Menu today to bring out the pixels in your chosen image, and then it’s as simple as adjusting the Cell Size until you’re satisfied.
Step 1: Locating the Filter Menu in Photoshop is as simple as navigating to Filter > Pixelation > Mosaic.

This will prompt the Mosaic Menu to appear, where we can adjust the Cell Size.
Step 2: Adjust the cell size. We’re presented with a preview window, a manual input, and a slider option to change the cell size.
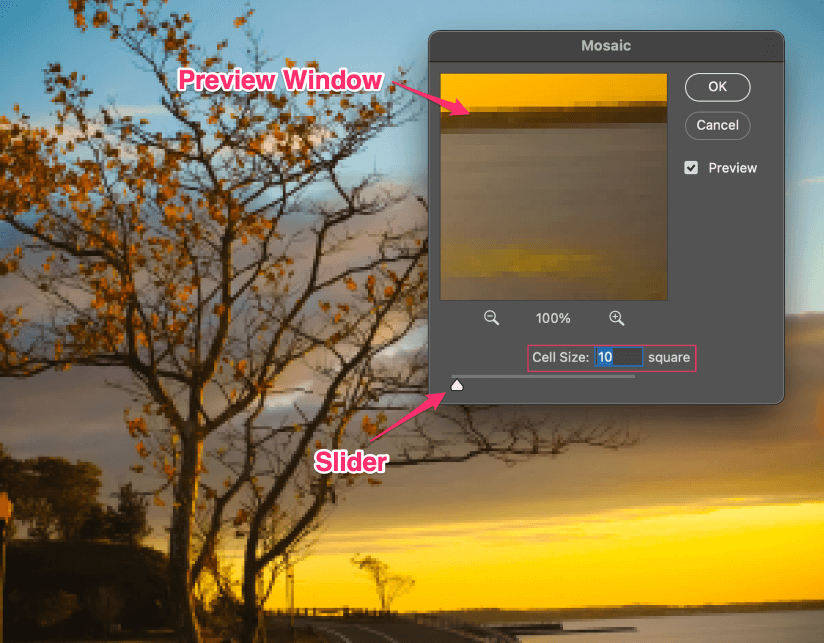
This is an example of our image at ten cells. It appears blurry, but not quite pixelated enough.
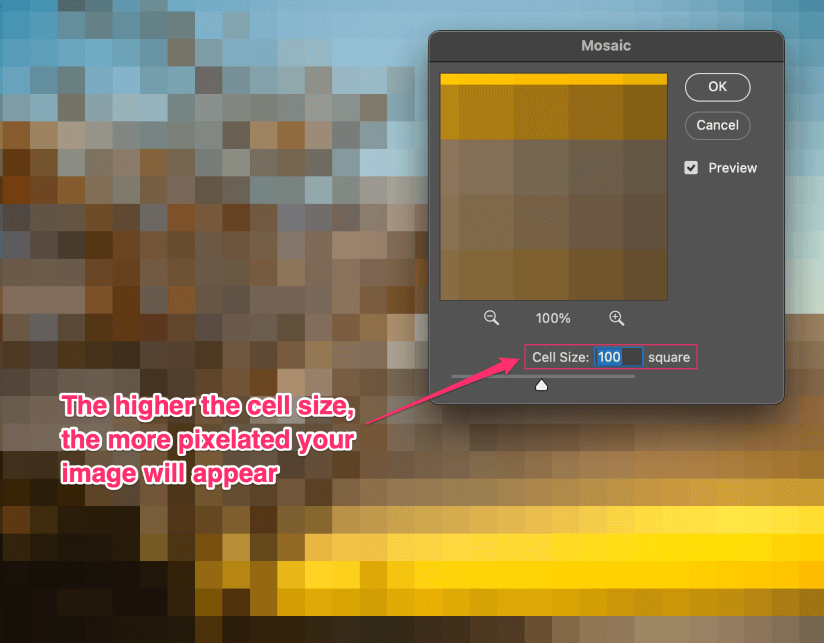
Now I’ve adjusted the cell size to one hundred, which is much better! The higher the cell size, the more pixelated your image will appear. Adjust this setting until you’re satisfied, then hit OK and you’re done! Easy as that.
How to Pixelate a Selection in Photoshop
Great! Now that you’ve got a good understanding of how to pixelate your image, we can add to this process by making a selection first.
Step 1: Duplicate your Layer
The first step in this process is duplicating your layer. This can be done by right-clicking your image and choosing Duplicate Layer from the menu.
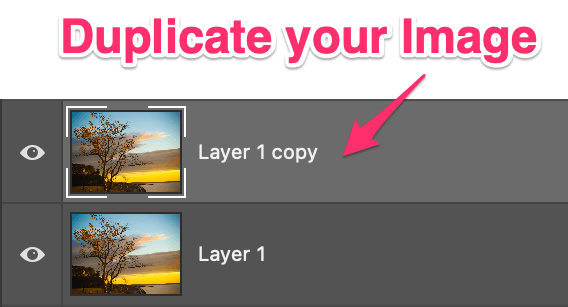
Once you see your layer copy appear in your layers panel, you’re good to go.
Step 2: Make a Selection
Now, for this step, you can use virtually any of Photoshop’s selection tools! From the Marquee Tools, Lasso, or even Object and Quick Selection. To save some time, I’ll be using the Quick Selection Tool myself.

Once you’ve chosen your selection tool, you can begin selecting your subject.
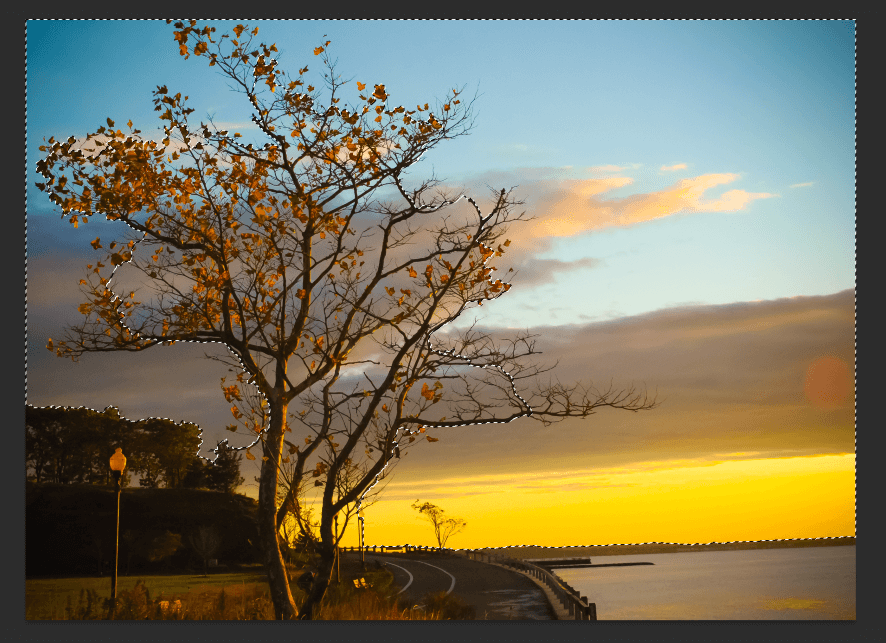
I wanted to pixelate the background of my image, so I roughly selected the area behind and around the tree in the foreground.
Step 3: Choose a Filter
Now you can repeat the steps we learned earlier when you pixelated your entire image!

Go ahead and find Filter > Pixelate > Mosaic again. This will have prompted the Mosaic Window to appear once more.
Step 4: Change the Cell Size
Last but not least, all you have to do now is select your desired Cell Size and hit OK when you’re satisfied.
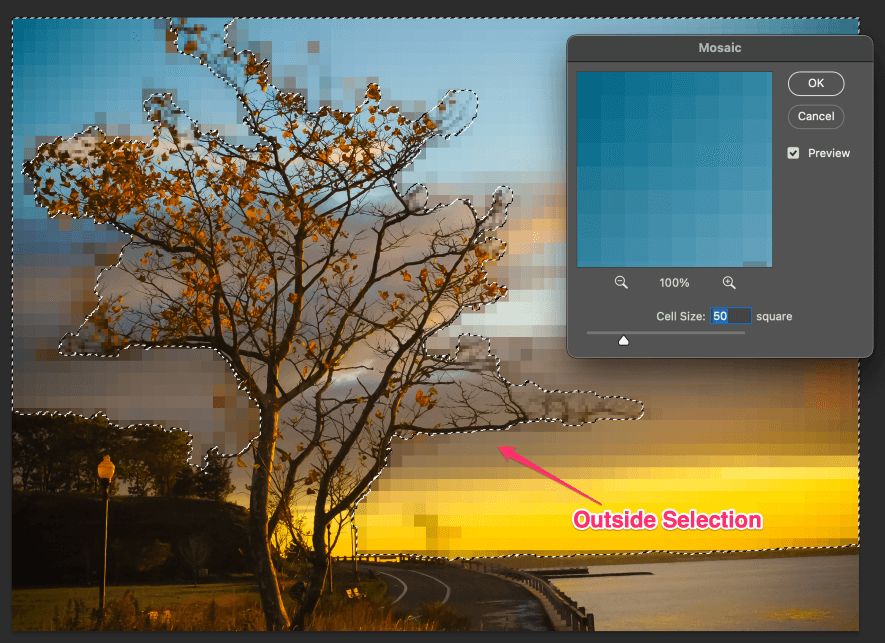
Anything outside your selection will not be affected by your pixelation. Pretty cool, right? In just a few simple steps we’ve learned not only how to pixelate entire images, but individual parts and selections as well!
Conclusion
Pixels are the foundation of every digital image! Each pixel contains information on hue, saturation, brightness, and more. They can be used to create virtually anything you can think of from artwork to photography and even video games.
So what will you do now that you can pixelate your images like a pro?
