Prosoft Data Rescue
Summary
If you’ve lost some important files due to drive failure or human error, the last thing you want is a lecture on the importance of backups. You need help recovering your files. That’s the promise of Data Rescue, and in my tests, it was able to recover files even after a drive format.
Data Rescue isn’t the type of app you spend money on and keep in your drawer just in case. You need it when you need it. If you’ve lost files you haven’t backed up, the trial version of the program will show you whether it’s possible to recover them. If so, then it’s up to you whether it’s worth the cost of purchase. Very often it will be.
What I Like: It uses a variety of techniques to find and recover as many files as possible. The FileIQ feature can teach the program to identify additional file types. Two modes are available: one easy to use, and the other more advanced. The Clone feature can duplicate a failing drive before it dies.
What I Don’t Like: Scanning for lost files can be very time consuming. Some of my files weren’t found because of the default settings. It’s a little expensive.
What is Data Rescue used for?
It can recover files on a drive that’s been accidentally deleted or formatted. It can help restore files from a corrupt drive. It can clone a dying drive onto a working drive. Data Rescue rescues your data.
Is Data Rescue free?
No, it’s not free, though there’s a demonstration version available that lets you see which files can be restored before you pay for the app. The demo version can’t actually recover the files, but it will show you exactly which lost files the full version can find. That gives you email and live chat support and a limit of five drives that can be recovered.
Is Data Rescue safe?
Yes, it is safe to use. I ran and installed Data Rescue on my MacBook Air. A scan using Bitdefender found no viruses or malicious code.
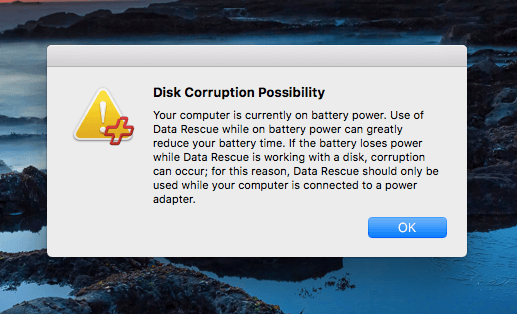
Interrupting Data Rescue when it is working on a disk can cause corruption. This may happen if a laptop’s battery goes flat during a scan. When Data Rescue detects that you are running on battery power, it displays a message warning you of this.
How to use Data Rescue?
You can run Data Rescue from your computer like any other app. You can also run it from a bootable USB drive, or create it yourself using the app’s Create Recovery Drive option.
Note: this feature is only available for professional licensed versions; If you purchase the software for a personal license you won’t see it. This is especially useful when your main drive is failing and can no longer boot.
Just install the program and enter your serial number. You’ll need some external storage when scanning your computer’s internal drive. When attempting to rescue data, it is best not to write to the drive you are restoring from, or you may inadvertently overwrite the data you are trying to restore. For that reason, when you need to recover files from your Mac’s hard drive, Data Rescue will have you choose another drive for its working files.
Scan the drive using either the Quick Scan or Deep Scan, then preview and recover the files you need.
Data Rescue Windows vs. Data Rescue Mac
Data Rescue is available for both PC and Mac. Besides supporting different operating systems, the Mac and Windows versions have a few other differences, for example, the Mac version has a FileIQ feature which allows the app to learn new Mac file types that aren’t currently supported.
Table of Contents
Why Trust Me for This Review
My name is Adrian Try. I’ve been using computers since 1988, and Macs full time since 2009. Over the decades I’ve provided tech support professionally and maintained training rooms full of PCs. From time to time I’ll hear from someone who can’t open a crucial file, or who formatted the wrong drive, or whose computer just died and lost all of their files. They’re desperate to get them back.
Data Rescue offers exactly that sort of help. Over the last week or so I’ve been testing a licensed pre-release copy of the newly released version 5 of the program. I used a variety of drives, including the internal SSD of my MacBook Air, an external spinning hard drive, and a USB flash drive. Users have the right to know what is and isn’t working about a product, so I’ve run every scan and thoroughly tested every feature.
In this Data Rescue review, I’ll share what I like and dislike about this data recovery software. The content in the quick summary box above serves as a short version of my findings and conclusions. Read on for the details!
Data Rescue Review: Test Results
Data Rescue is all about recovering lost files. In the following three sections, I’ll explore what the app offers and share my personal take. I tested the Standard Mode of the Mac version, and the screenshots will reflect that. The PC version is similar, and a Professional Mode is available with more technical options.
1. Quick Scan
Recover Files When Your Operating System Fails to Boot or an External Drive Fails to Mount
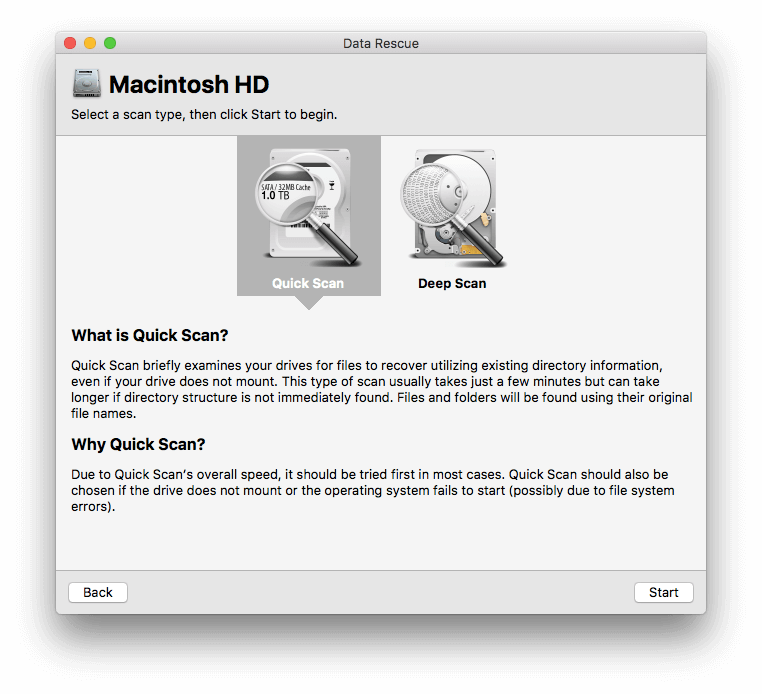
If you turn on your computer and it doesn’t boot, or you insert an external drive and it’s not recognized, then a Quick Scan will normally help. As it’s the fastest way to recover files, it will normally be your first point of call.
The scan utilizes existing directory information, and often just takes a few minutes, though some of my scans took longer. Because it’s accessing directory information the scan will be able to recover the file names and which folders they were stored in. Run the Deep Scan when the Quick Scan can’t locate your lost files.
I don’t have any faulty drives on hand — my wife convinced me to throw them all out years ago. So I ran the scan on my MacBook Air’s 128 GB internal SSD.
From the Welcome screen, click Start Recovering Files, select the volume to scan, then Quick Scan.
Data Rescue won’t use the drive it is scanning for its working files, otherwise the files you are trying to rescue may be written over and lost forever. So when scanning your computer’s main drive, you’ll be asked to use a different drive as a temporary storage location.
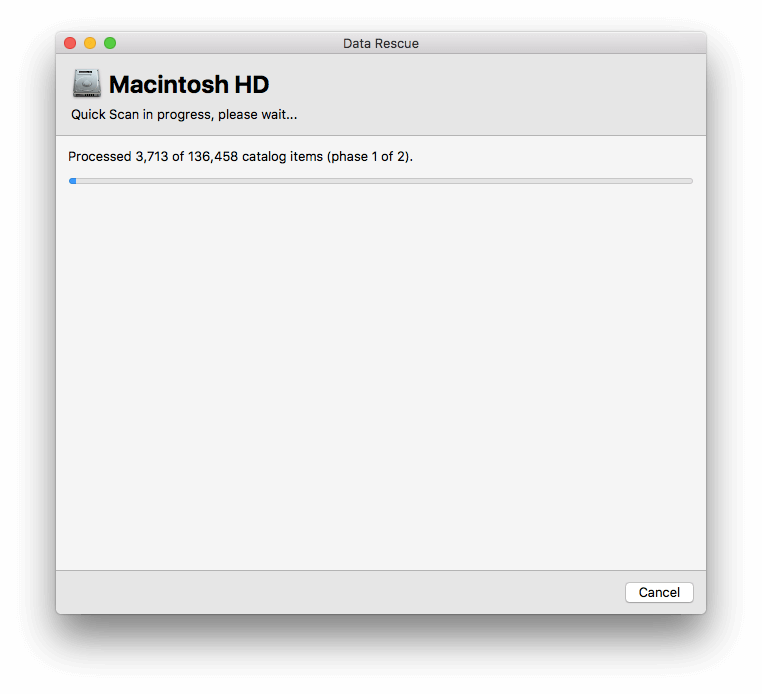
My scan times were a little longer than expected: about half an hour on my MacBook Air’s 128 GB SSD drive and 10 minutes on an external 750 GB spinning drive. When scanning my SSD I used a USB stick for Data Rescue’s working files, which may have slowed things down a little.
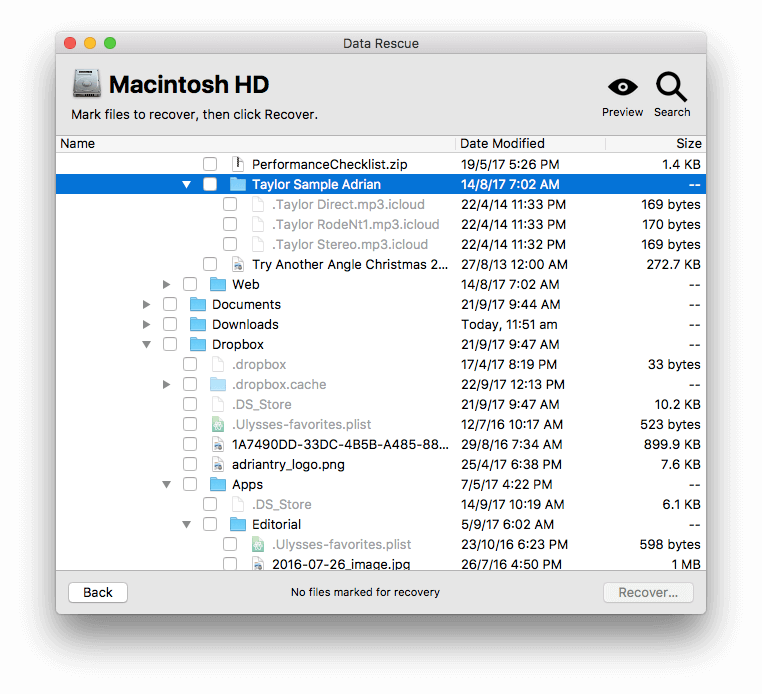
Find the files you need to restore, check the boxes, then click Recover… You’ll be asked where you want to store the files.
My personal take: A Quick Scan will recover many lost files quite quickly, while retaining the original filenames and folder organization. If the files you are trying to recover weren’t found, try a Deep Scan.
2. Deep Scan
Recover Files When a Drive is Formatted, No Volumes are Recognized, or a Quick Scan Didn’t Help
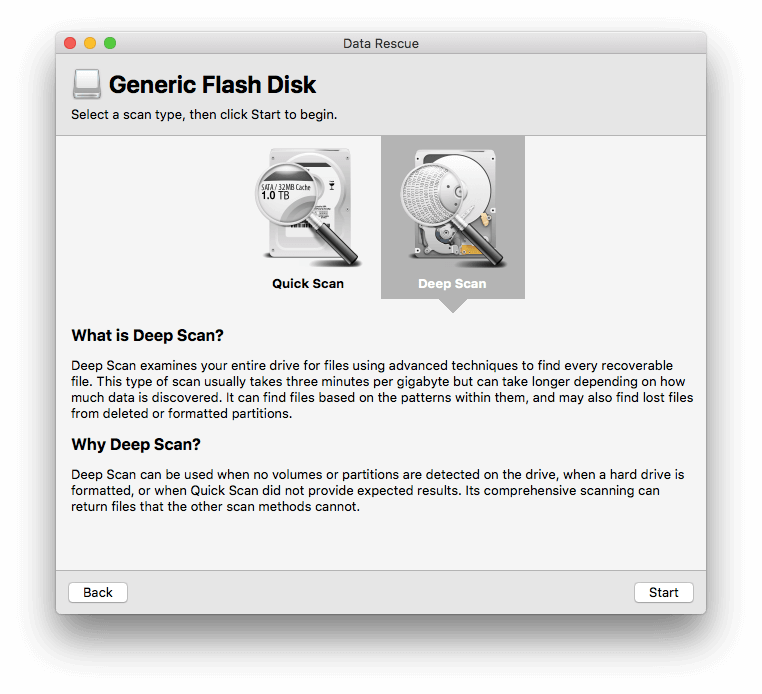
If a Quick Scan can’t find the information you need to recover, or if you formatted the wrong drive or permanently deleted the wrong file (so it’s no longer in the Mac Trash, or Recycle Bin if you are using Data Rescue PC on a Windows computer), or if your operating system can’t find any partitions or volumes on the drive, run a Deep Scan. It uses additional techniques to find files that a Quick Scan can’t, so it takes significantly longer.
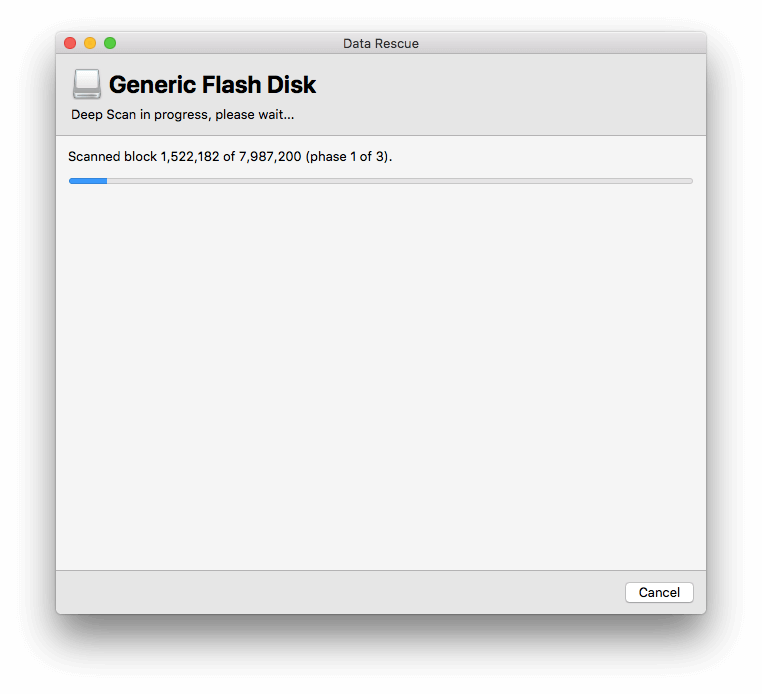
Prosoft estimates that a Deep Scan will take at least three minutes per gigabyte. In my tests, scans on my 128 GB SSD took around three hours, and scans on a 4 GB USB drive took around 20 minutes.
To test this feature, I copied a number of files (JPG and GIF images, and PDF documents) to a 4 GB USB drive, then formatted it.
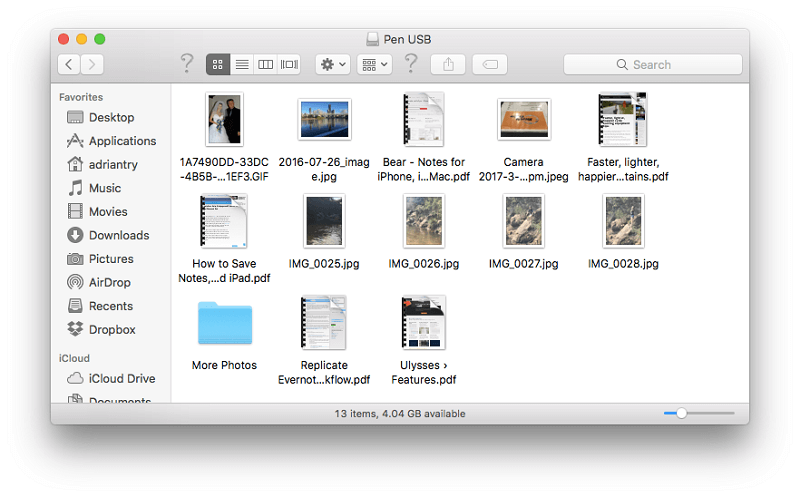
I ran a Deep Scan on the drive. The scan took 20 minutes. From the Welcome screen, click Start Recovering Files, select the volume to scan, then Deep Scan.
The results page has two sections: Found Files, which lists the files that are currently on the drive (in my case just some system-related files created when the drive was formatted), and Reconstructed Files, which are files no longer on the drive, but found and identified during the scan.
All of the images (both JPG and GIF) were found, but none of the PDF files.
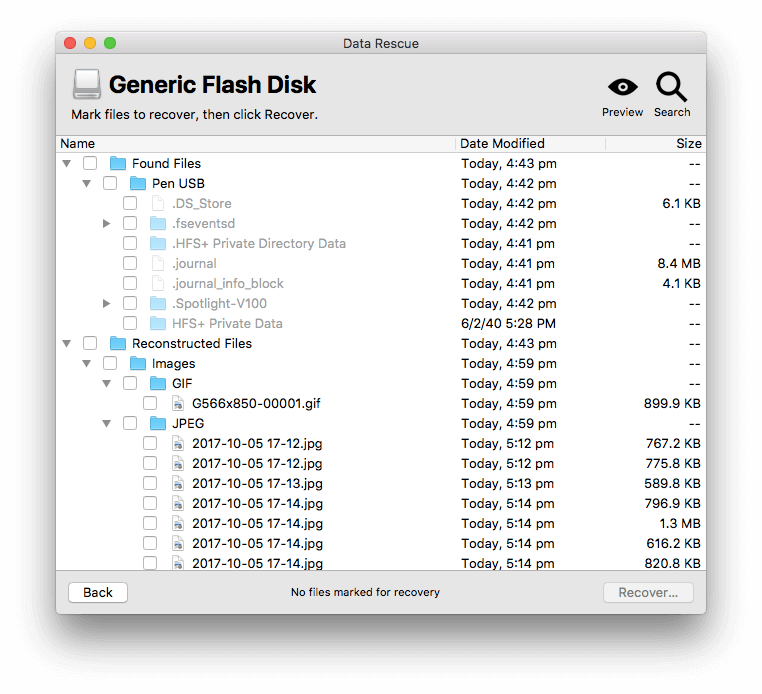
Notice that the images no longer have their original names. They have been lost. A deep scan doesn’t look at directory information, so it doesn’t know what your files were called or how they were organized. It uses pattern-matching techniques to find the remnants of the data left by the files.
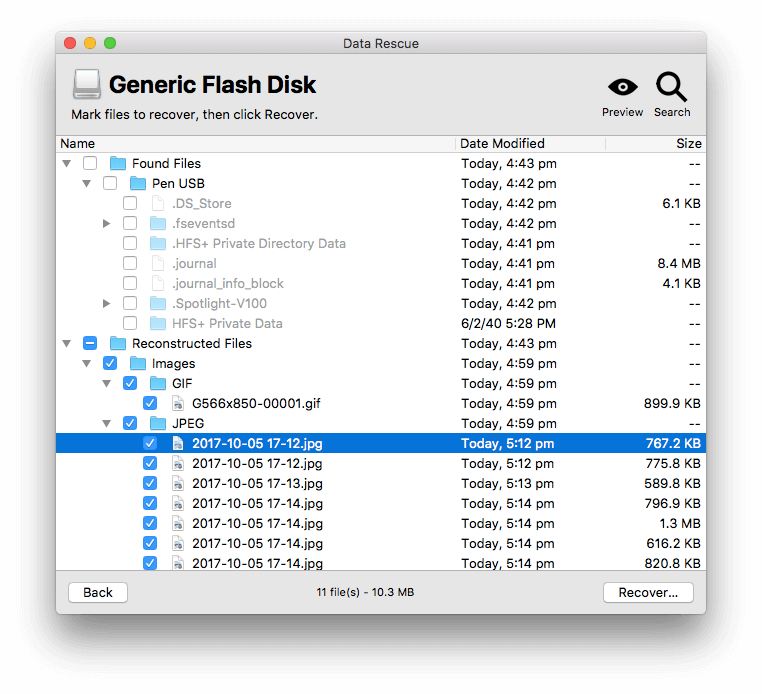
I selected the images and restored them.
Why weren’t the PDF files found? I went in search of information.
A Deep Scan tries to identify certain types of files by specific patterns within the files that are still left on the drive. These patterns are identified by File Modules which are listed in the Scan Engine preferences.
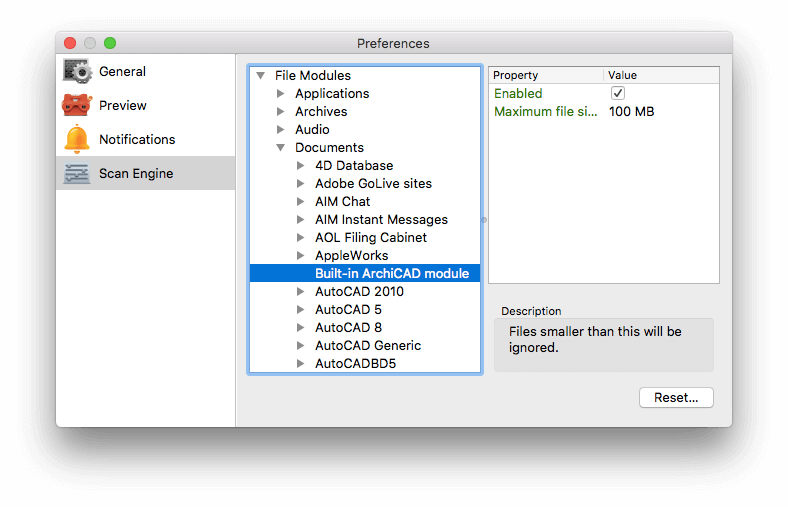
To find a certain file type (say Word, JPG or PDF), Data Rescue needs a module that helps identify that file type. Although PDF files were supported in version 4 of the app, the module is missing in the pre-release version of version 5. I’ve tried to contact support to confirm that it will be added back in.
I also had trouble restoring a text file. In one test, I created a very small text file, deleted it, and then scanned for it. Data Rescue failed to find it even though a text file module is present in the app. I discovered that in the settings there’s a parameter for the minimum file size to look for. The default value is 512 bytes, and my text file was much smaller than that.
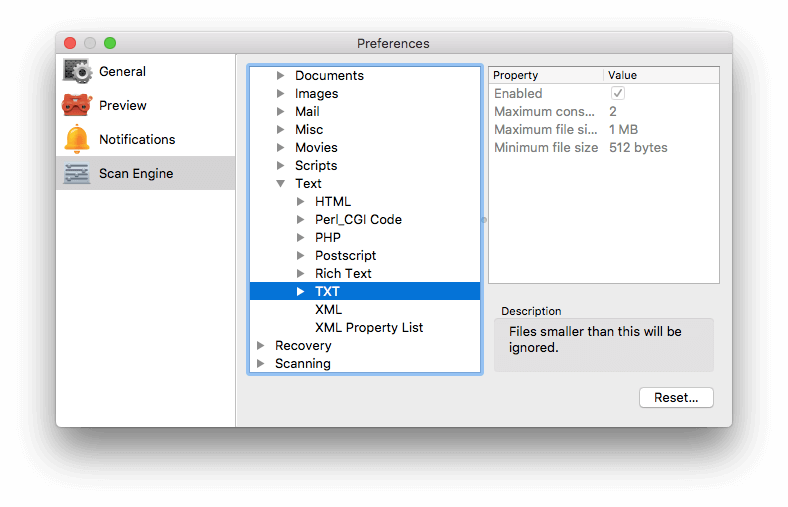
So if you’re aware of specific files that you need to restore, it’s worth checking that a module is available in the preferences and that the settings are not set to values that will ignore the files.
If Data Rescue doesn’t have a module for a file type you are trying to restore, the Mac version has a feature called FileIQ that will learn new file types. It does this by analyzing sample files. I didn’t experiment with this feature, but it’s definitely worth checking out if you’ve lost important files that normally wouldn’t be recognized by the app.
My personal take: A Deep Scan is very thorough and will identify a wide variety of file types, however, the file names and location of the files will be lost.
3. Clone a Drive With Hardware Problems Before It Dies
Scans can be quite intensive, so the act of scanning a dying drive may put it out of its misery before you recover your files. In that case, it’s best to create an exact duplicate of your drive and run the scans on it. Depending on how damaged the drive is, a 100% duplicate may not be possible, but Data Rescue will copy as much data as possible.
The clone isn’t just copying the data found in files, but also the “available” space that contains data left by files that have been lost or deleted, so a deep scan on the new drive will still be able to recover them. And if all goes well, you can use the new drive in place of the old one moving forward.
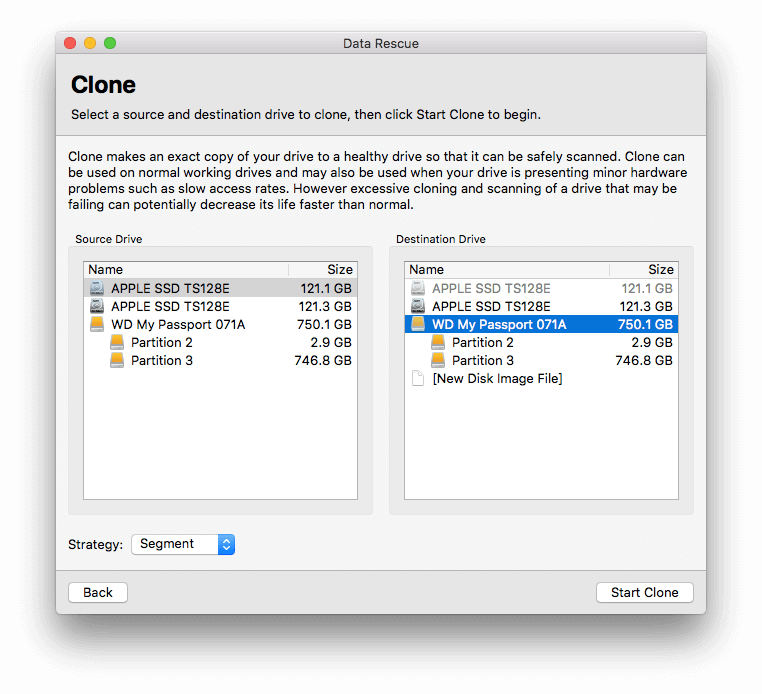
My personal take: Cloning a drive that is failing will allow you to run scans on a new drive, prolonging the life of the old drive.
Reasons Behind My Ratings
Effectiveness: 4.5/5
Data Rescue uses several techniques to find and recover as much of your data as possible, even after your files have been deleted or your drive formatted. It can recognize a wide variety of file types and can learn even more.
Price: 4/5
Data Rescue has a similar price point to many of its competitors. Although it is not cheap, you may find it worth every cent if it can recover your valuable files, and the trial version of the software will show you what it can recover before you lay out any money.
Ease of Use: 4.5/5
The Standard Mode of the program offers an easy-to-use point-and-click interface with clear instructions, though you may need to tweak the preferences to make sure the files you have lost won’t be overlooked. A more advanced Professional Mode is available to those who want additional options.
Support: 4.5/5
The Prosoft website’s support area contains helpful reference materials, including a PDF user manual, FAQ, and video tutorials. Technical support can be contacted via live chat and email. Live chat support was not available when I tested the service from Australia. I did submit a support ticket via email, and Prosoft replied in just over a day and a half.
Conclusion
Today we live in a digital world. Our photos are digital, our music and movies are digital, our documents are digital, and so is our communication. It’s amazing how much information you can store on a hard drive, whether it’s a collection of spinning magnetic platters or a solid-state SSD.
That’s very convenient, but nothing’s perfect. Hard drives fail, and data can become lost or corrupted. Files can also be lost through human errors when the wrong file is deleted or the wrong drive is formatted. Hopefully, you back up your data regularly. That’s why backups are so important, but unfortunately, they are all too frequently forgotten.
But what if you lose an important file that you haven’t backed up? That’s where Prosoft Data Rescue comes in. The software boasts a new consistent cross-platform user experience for both Mac and Windows users while the new guided click recovery will greatly reduce confusion and intimidation allowing the users to achieve their goal of getting their data back.
If you have lost important files, the trial version of Data Rescue will let you know if they can be recovered. Doing so will cost you time and money. It will often be worth it.

i cannot find my serial number. i have bought this software.
thank you, alyson
Hi Alyson, please contact the Prosoft support team here: https://www.prosofteng.com/support-all
So, I thought that I was being a genius when I ran out of storage on my android and so I plugged in our already formatted external hard drive that we use for our mac. When I plugged it in, the phone said it needed to be formatted so I did it and all of the files from my phone transferred to my external drive. Success! Or so I thought… When I plugged the hard drive back into the mac, it said it could no longer be read. It prompted me to initialize, which I thought just meant that it would format back. I pressed it and nothing. I am completely computer illiterate so I shouldn’t have done any of this without first googling for information. Shirt story long, I do believe that it means that I’ve lost the information from both my mac and my phone. Does this sound like a situation where this software may work?
Thank you for any information!!
I’m sorry to hear that, Karen. We recommend some Android programs here. You have two choices: Use the trial version of one of those apps to see if it can get your information back, then purchase the software (usually around $50) if it looks hopeful. Or take your phone to a professional to see if they can help. Both options cost money, and only you know how valuable the lost data is. Best of luck. 🙂
Hi Adrian,
Nice review. I do think you should point out though, that running data recovery software like this on an unstable drive that maybe has head issues, might kill it forever. If SMART errors indicate caution, I always recommend hardware-based recovery from professionals.
Regards,
Keith
Great advice, Keith. Or if the job doesn’t justify paying a professional, make a disk image of the drive, and attempt recovery on it instead. Thanks for your comment.