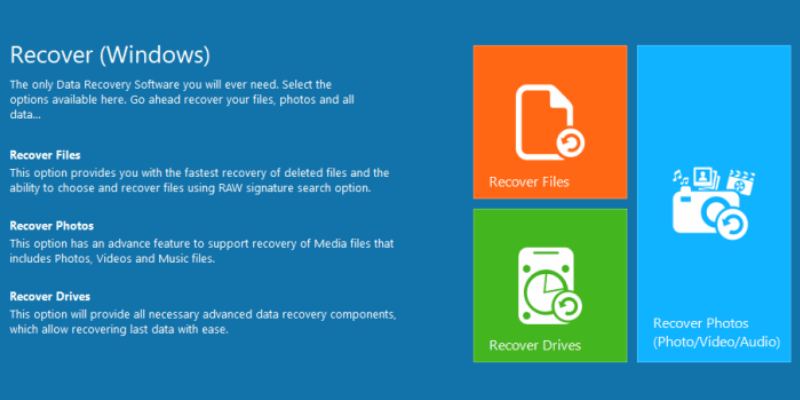
Remo Recover
Summary
Remo Recover is a data recovery program for Windows, Mac, and Android. We tried out all three versions, but for the sake of the length, this review will focus on the Windows version. Most of us still live in the PC world and use the Windows operating system.
For Windows, there’s a Basic, Media, and Pro versions available. The Basic version simply does a quick scan of the storage device and tries to recover files. Sadly, it wasn’t able to find the specific files I deleted for the test.
The Media and Pro versions did a much better job. The Media version was able to find around 30 GBs of photos with about 85% of the files deleted still usable. The Pro version took a long time to scan a 1TB hard drive and found over 200,000 files. Most of the files lost their file names and were renamed by file number. This made it almost impossible to find the specific files I was looking for.
However, we found that Remo Recover did a fantastic job of recovering files from an SD card. Thus we believe the program is better at retrieving data from a smaller-volume drive. Also, we recommend you skip the Basic version and go for Media or Pro version directly.
What I Like: Lots of easy-to-follow instructions from start to finish. Varying software versions depending on your recovery needs. Fast customer support. Was able to retrieve a lot of deleted files to a usable state. You can save recovery sessions to load on another date.
What I Don’t Like: Very long scanning times. Android version didn’t work for me. Difficult to locate specific files amongst thousands of deleted files found after scan.
Is Remo Recover safe to use?
I scanned Remo Recover using Avast Antivirus and Malwarebytes Anti-malware, which classified Remo Recover as safe to use. There were no viruses or malware found in the program. The installation was also devoid of any spam or hidden installations.
Remo Recover also doesn’t need to connect to the internet, which removes the possibility of your files being sent to the internet. There are no ads on the program except for a “Buy Now” window that pops up if it isn’t registered yet.
Remo Recover only accesses your deleted files. Thus, files that are still on the drive will stay intact and unmodified. To avoid any problems that might occur, however, do make backups of your files.
Is Remo Recover free?
No, it isn’t. Remo Recover only offers a trial version which gives you the results of a scan. To recover any data, you’ll need to purchase the program.
How much is Remo Recover?
Remo Recover offers a bunch of versions you can choose from at different price points. Here’s a list of available versions and prices as of the time of this writing:
Remo Recover for Windows:
- Basic: $39.97
- Media: $49.97
- Pro: $79.97
Remo Recover for Mac:
- Basic: $59.97
- Pro: $94.97
Remo Recover for Android:
- Lifetime License: $29.97
Do note that the Android version of Remo Recover is only available for Windows. These prices are supposedly discounted prices for a limited time. However, it’s been the same price for quite a while and it doesn’t say when the discounted price will last.
Table of Contents
Why Trust Me for This Review
My name is Victor Corda. I’m the type of guy who likes to tinker with technology. My curiosity for hardware and software brings me to the very core of the products. There are times when my curiosity gets the best of me and I end up making things worse than before I started. I’ve corrupted hard drives and lost tons of files.
The great thing is that I was able to try out many data recovery tools and have ample knowledge of what I want from them. I’ve tried out Remo Recover for Windows, Mac, and Android for a couple of days to share what I learned from the program and if it works as it is advertised.
I’m here to share what works, what doesn’t, and what could be improved based on my experience with other similar products. I will guide you through how to recover the important files using Remo Recover, that have been accidentally deleted. I even tested their support team by sending them an email about the problems I had during the review.
Disclaimer: Remo Recover has offered us NFR codes to test the different versions of their software. Rest assured that even our review remains unbiased. They had no editorial input in the content of this review whatsoever. If the program worked terribly, it’d be part of the review.
Putting Remo Recover in Testing
Remo Recover Windows Review
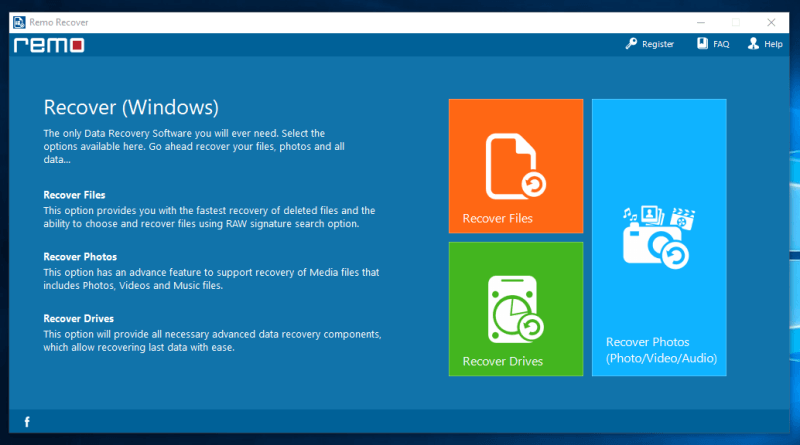
For this test, we’ll try out each feature of Remo Recover and see how well it works. There are 3 recovery options to choose from: recover files, recover photos, and recover drives. We’ll tackle each of these with their specific scenarios.
To have the program activated, simply click Register at the top right and either enter a license key or access your RemoONE account. We were given license keys for the Basic, Media, and Pro versions.
The Basic version gives you full access to the Recover Files option, which does a quick scan of your drive and restores whatever files are found. The Media version is best for recovering photos, videos, and audio. While the Pro version gives you access to do a deep scan of your drives. Each version also has the features of the version before it.
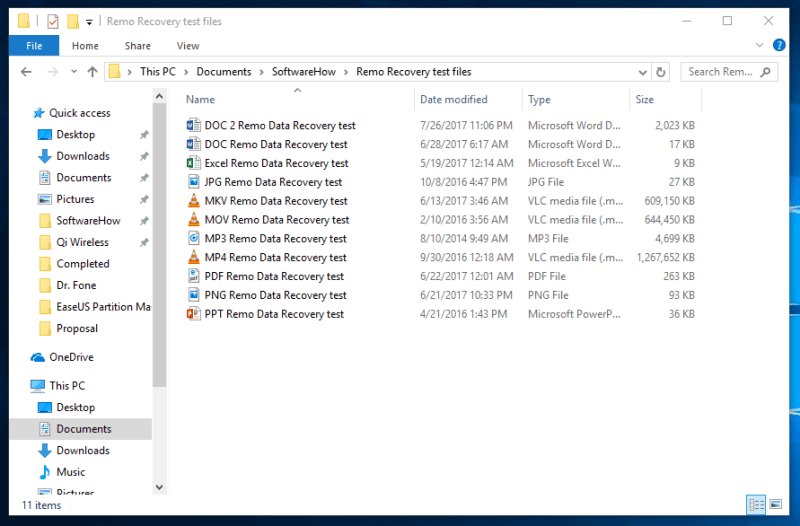
I selected some different files that I will then delete. These files will be used for the first and last feature. For the Media version, I’ll be using a Sandisk 32GB SD card with over 1000+ photos and about 10GBs worth of .mov video files. Let’s see if Remo Recover will pass our tests.
Test 1: Recover data from hard drive (using Recover Files)
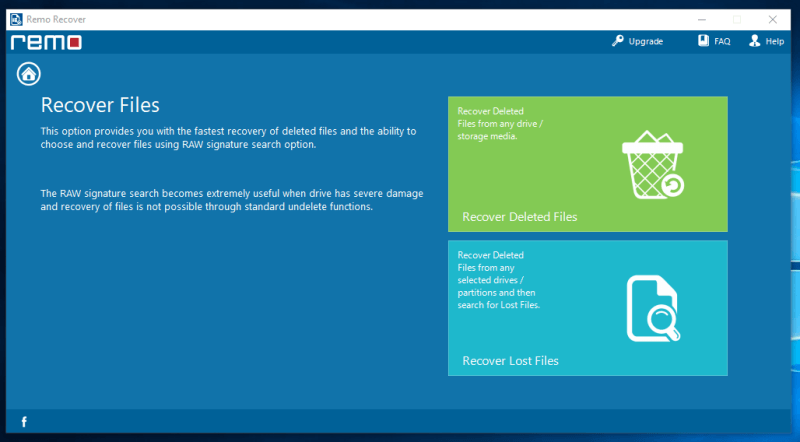
The Recover Files option is similar to quick scans on other data recovery programs. Remo Recover offers two ways to recover data using the “Recover Files” option. The first one lets you recover deleted files from any drive or storage device. The second one does the same, but you can also scan partitions that may not have been detected or are corrupted. For this test, we tried both to look for the same files and figure out the difference between the two.
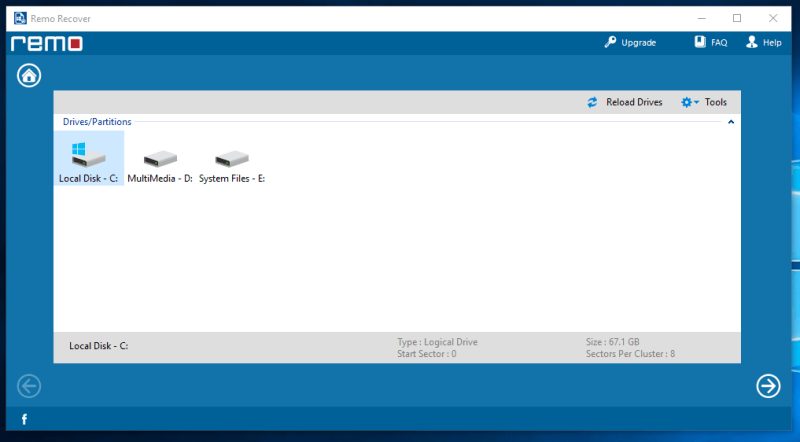
The next window will show you a list of connected storage media devices. For this test, I chose Disk C: and then clicked the arrow at the bottom-right.
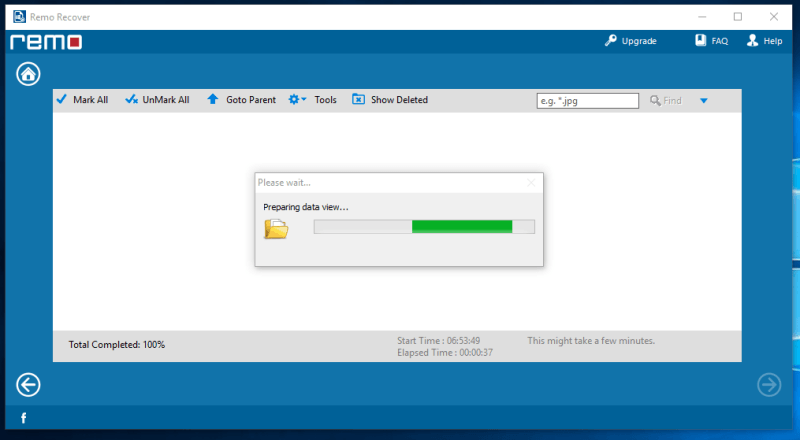
The scan started automatically. Amazingly, the scan didn’t take up much time. It only took about five minutes to finish.
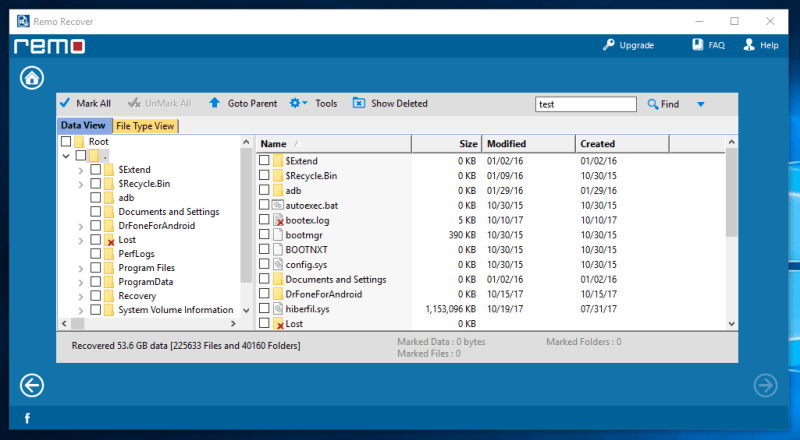
Remo then showed a list of folders and files it found. With our scan, it found a total of 53.6GB of files. There are two ways to search through the list of files manually: The data view, which is the normal way of seeing folders, and the file type view, which organizes the files by type.
With over 200,000 files, I cannot just skim through the folders for our test files. I instead used the search feature at the top-right and looked for the word “test”, which is in all of the test files’ names.
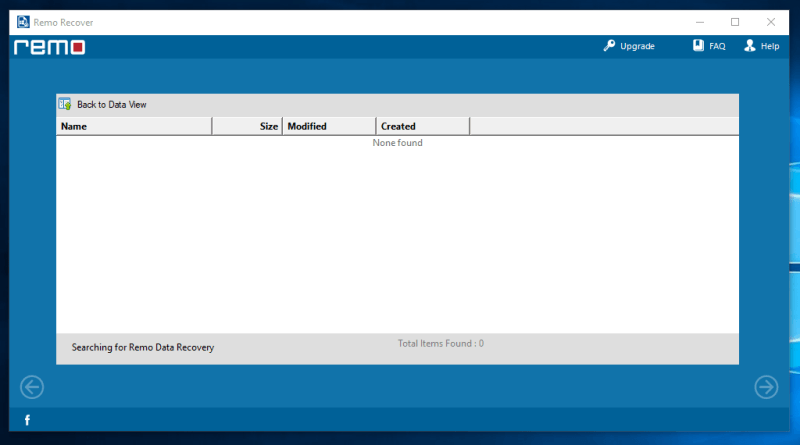
This search took a bit longer, but not long enough to make a fuss about. I simply waited for around 10 minutes and the search was complete. Sadly, Remo Recover wasn’t able to find our test files using the Basic features. Hopefully, the Media and Pro features will do better.
Test 2: Recover data from a digital camera (memory card)
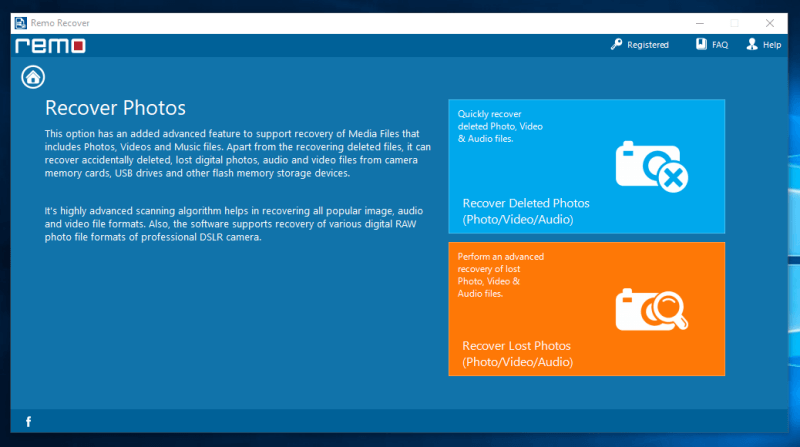
The Media features have a similar layout and also very similar features. The Recover Deleted Photos feature quickly scans your storage device for photo, video, and audio files. Although, this doesn’t recover RAW files which are usually made from professional cameras.
The Recover Lost Photos option does a more precise and advanced scan of your storage device which also supports RAW file formats. For this test, we’re using a 32GB SanDisk SD card with over 1,000 photos and 10GBs worth of videos. This took up about 25GB of space on the SD card.
I deleted every file on the SD card and went ahead with the advanced scan.
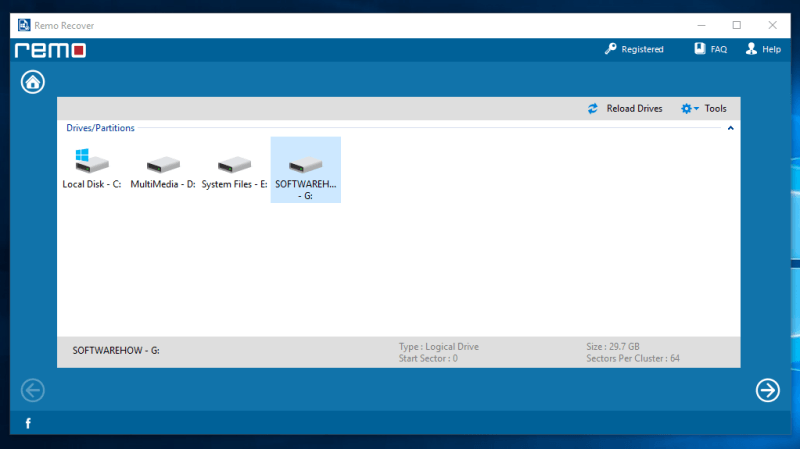
After clicking the “Recover Lost Photos” option, you’ll need to choose which drive you want to scan. Simply click the drive and then click the arrow in the bottom-right corner.
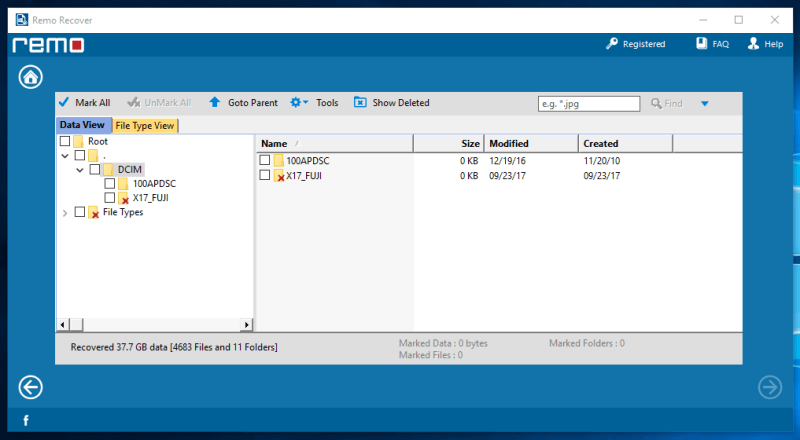
The scan took about an hour and a half to finish. To my amazement, Remo Recover found 37.7 GB of data, which is more than the storage size of my SD card. This looks quite promising so far.
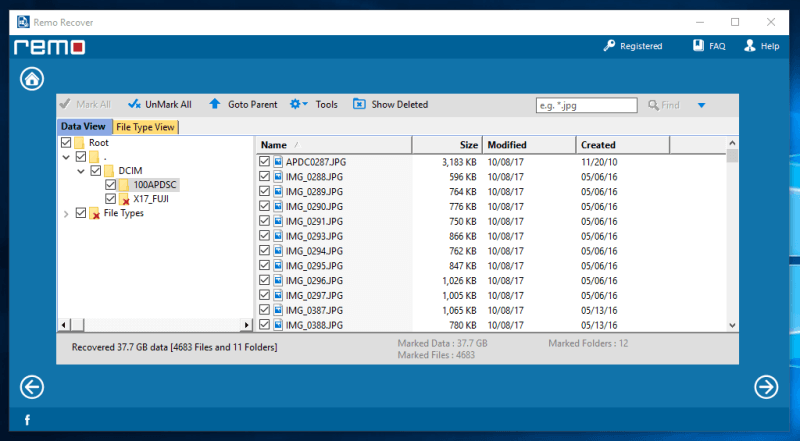
I decided to recover all of the files Remo Recover found. I just marked each folder with a check mark to select all the files and then clicked the next arrow. Do check at the bottom of the list of files if you’ve marked all the files you want. Restoration of files usually takes hours to finish and you don’t want to end up missing a file after waiting for a long time.
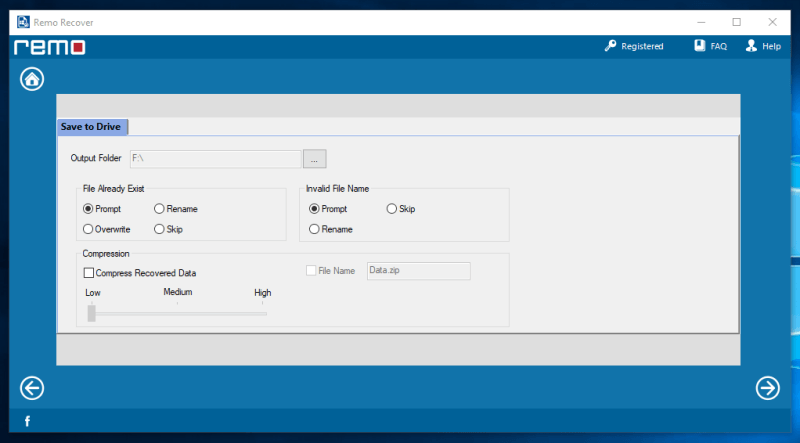
After you’ve chosen the files you want to recover, you need to choose where those files will go. Do note that you CANNOT recover your files to the same drive it came from. You’re also given options on how to respond to files that already exist on the same drive or if they have an invalid name.
Having the option to compress the recovered files is a great feature to have. Although it takes longer, it will save a couple of GBs on your hard drive.
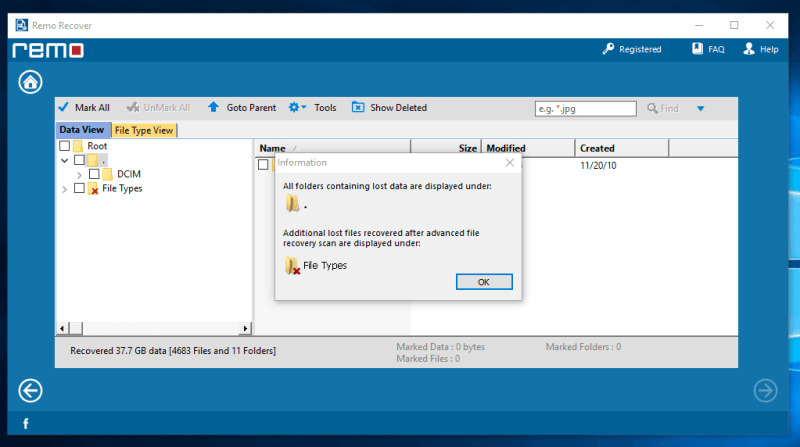
The recovery took around 2 hours for 37.7GB of media files. A prompt will then pop up to show you how the recovered files have been organized.
Remo Recover did a great job with the media files. Most, if not all, photos could be opened properly. Some video files had a few problems, but I suspected that would happen due to their large file sizes. The recovered audio files also worked well with minimal hiccups. I’d estimate that around 85% – 90% of the recovered files were still usable. I recommend Remo Recover if you need to specifically recover media files.
Test 3: Recover data from PC hard drive
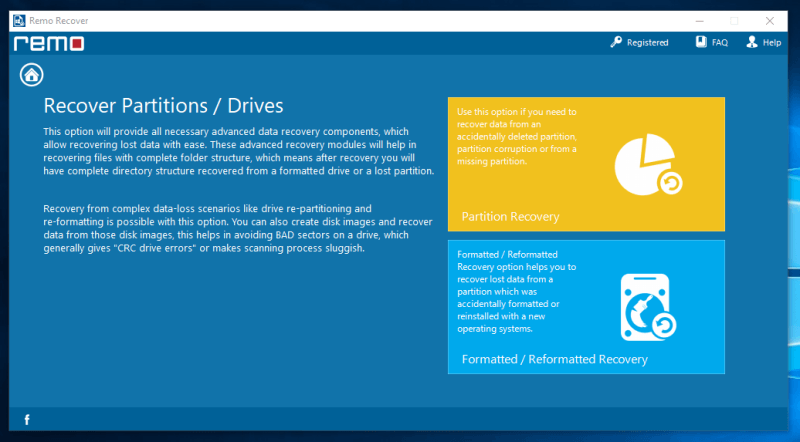
The Pro version of Remo Recover is similar. You can choose between recovering deleted files or recovering files lost due to being reformatted or corrupted. Remo Recover also suggests making disk images for drives that may have bad sectors. This will lessen the probability of errors and avoids further damage to the drive itself.
For this test, we’ll be using the second option since the drive has been reformatted.
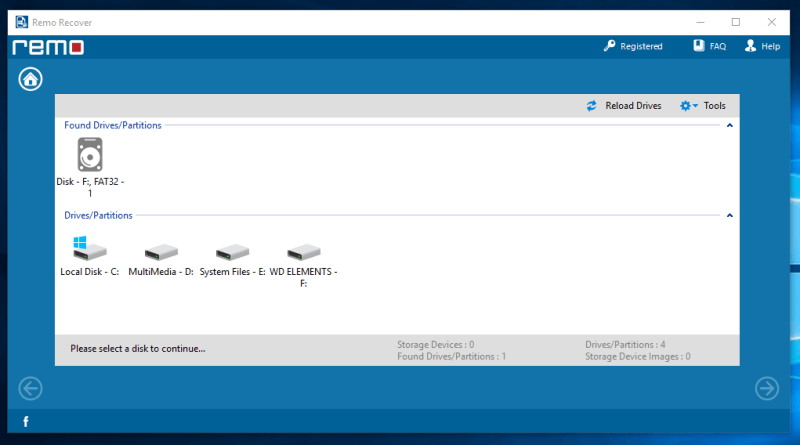
I decided to scan my 1TB WD Elements external hard drive which had the test files on it. Just like the other tests, I simply clicked the drive and then clicked “Next.”
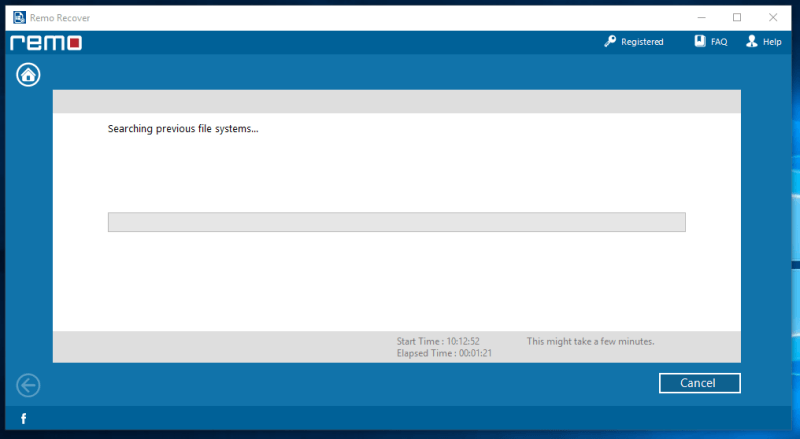
With such a large drive to scan, it is advisable to do this overnight. It could take a couple of hours to finish, and it’s highly advisable to avoid using the computer during the scan. This would give the program a higher probability of recovering the needed files since less data is being moved around.
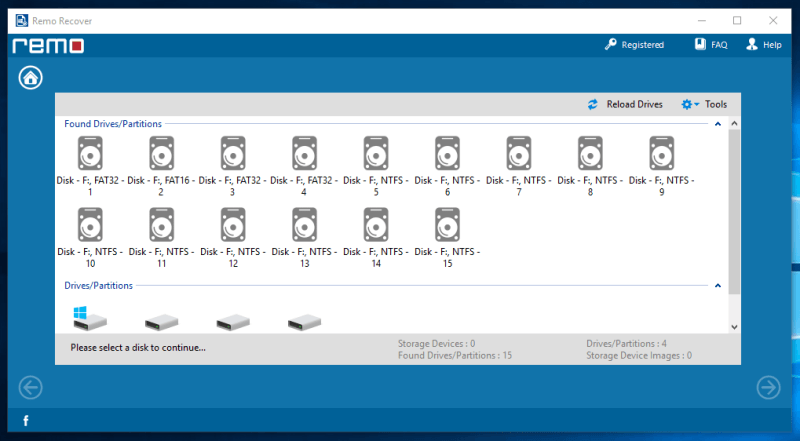
The scan took approximately 10 hours to finish. After the scan, it showed a bunch of partitions it found on the hard drive. I wasn’t exactly sure which partition my files were saved in. I ended up choosing the largest partition, which I thought my files would be in.
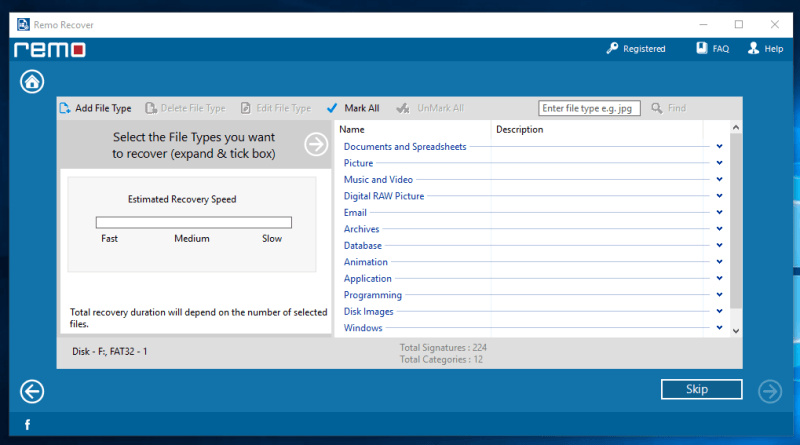
The next window gives you the option to scan for specific file types, such as documents, videos, and other file types. This should help you shorten scan times by disregarding file types that you aren’t looking for. There are a huge number of file types to choose from.
During my test, scanning through the file types made the program lag to the point of crashing. This meant that I had to do the scan again, which was quite troublesome. I’m not so sure if the problem occurred due to my computer or the program itself. The second time around, though, the problem seemed to have disappeared.
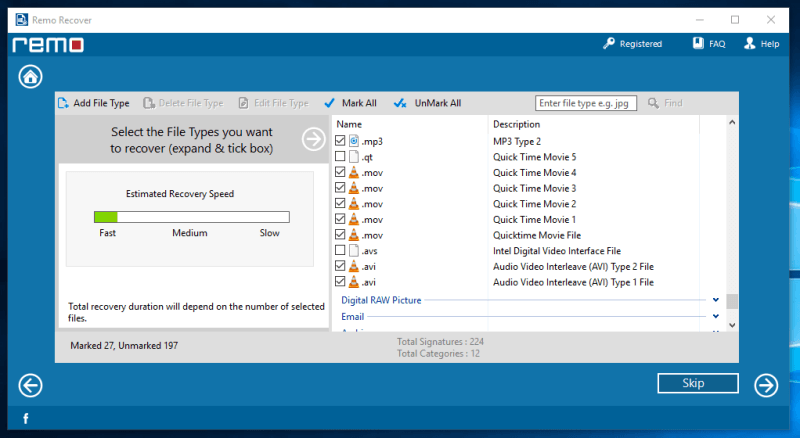
I chose 27 file types to cover all the test files. Some file types are repeated since they have different descriptions. I wasn’t sure which one applied to the test files so I ended up choosing all of them.
There is an estimate of how long the recovery will take on the left side. The more file types you choose, the longer it’ll take.
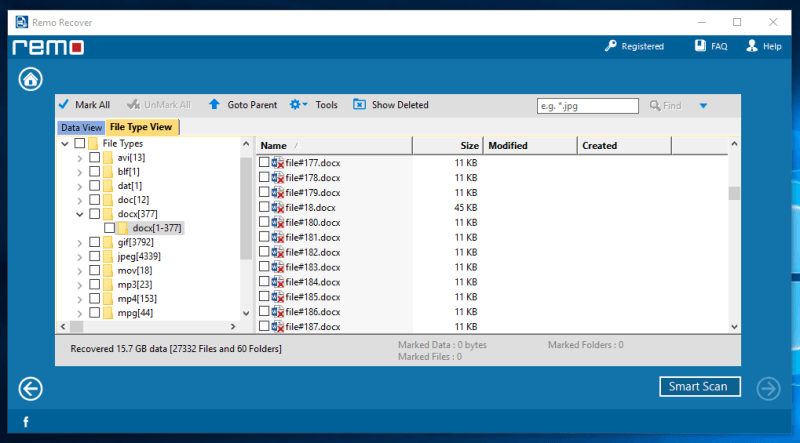
After approximately 3 hours, Remo Recover was able to find 15.7 GB of data. This sounds like great news, but sadly it isn’t for this test.
Despite being able to find 15.7 GB of data, it’s almost impossible to find the test files we’re looking for. There were over 270,000 files and almost all of them had lost their names. Because of this, the search function is almost useless. Remo Recover simply numbers these files. I’d have to open each file to figure out what it is.
This doesn’t apply to some .jpeg and .gif files, where you can easily scan through the list of thumbnails to see the pictures. But with over 8,000 files to run through, it’s still quite tasking.
I wouldn’t say that Remo Recover failed this test since there are a lot of variables in data recovery that the program isn’t in control of. It was able to recover tons of files — we’re just not sure if the specific files we’re looking for had been recovered or not.
Remo Recover Mac Review
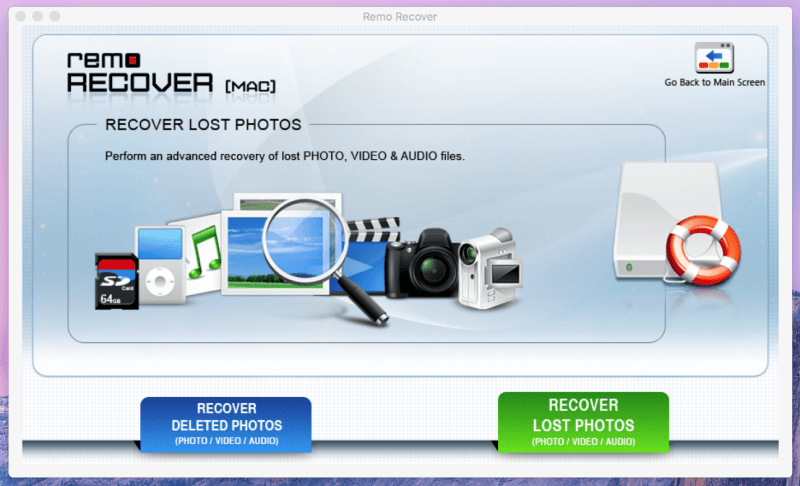
The starting page of Remo Recover for the Mac is quite different compared to the tiled look of the Windows version. They’re quite outdated. Design aside, its functionality seems to be just the same. There are the options to recover deleted and lost photos which work the same way as the Windows version.
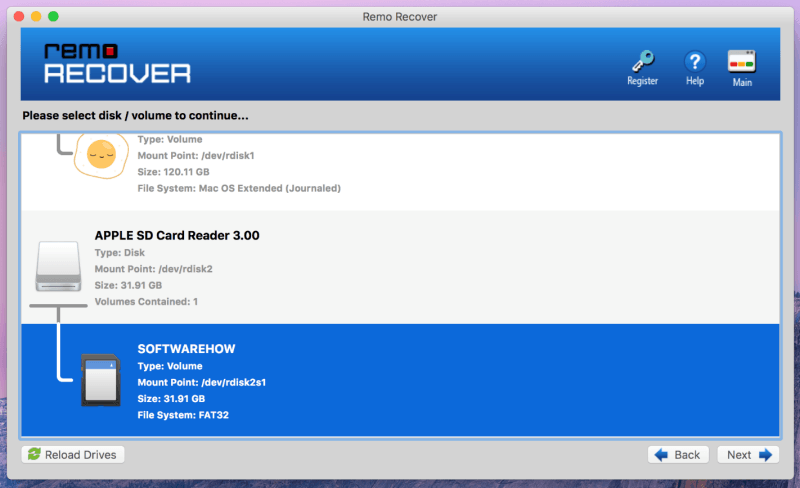
After that, a window will show you the disks currently connected to the computer. For this test, we’ll be using a 32GB SD card with the same contents as the test we did for Windows.
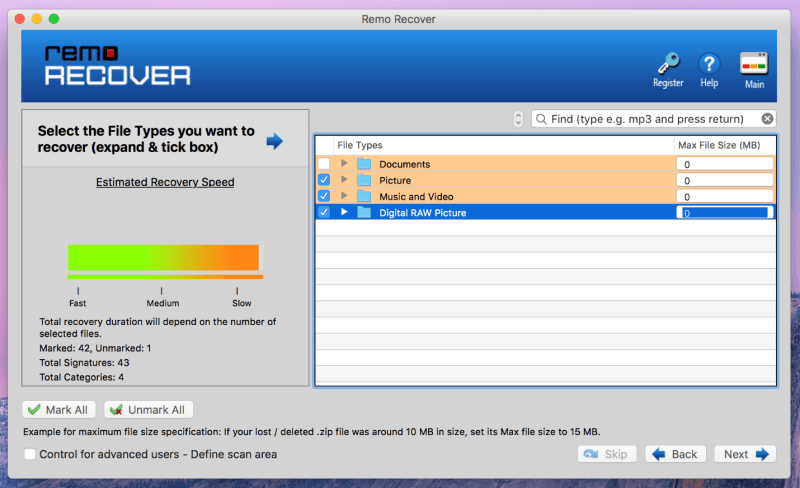
The next window will give you the option to choose what file types Remo will look for in the chosen storage device. If you click the little arrow next to the folder, it’ll show individual file types you can choose from. You can also limit the size of the files the program will scan at the right side. The smaller the file and the fewer file types chosen, the faster the scan will be.
For this test, I simply chose all types–from Pictures, Music, Video, and Digital RAW Picture folders–and then clicked “Next.”
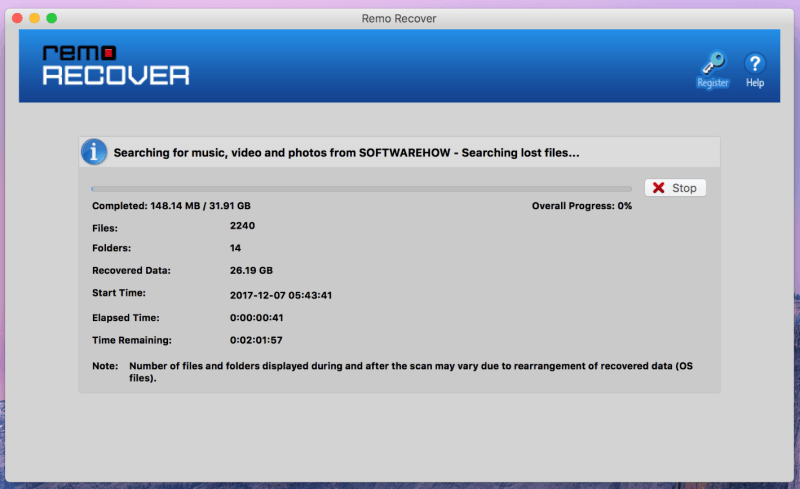
The scan will then start and show you some details such as the number of files and folders, amount of data, and elapsed time. You also have the option to stop the scan at the right side of the progress bar.
The estimate of the remaining time was approximately 2 hours, although the actual scan took about 3 hours to finish.
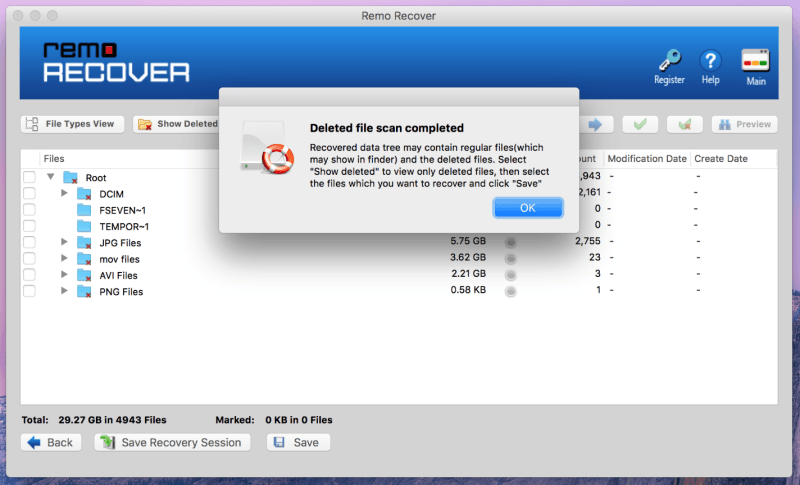
The result mixes files and folders that aren’t deleted with the deleted ones. To show only the deleted files that have been found, just click the “Show Deleted” button. To further refine the search, you can also search for the specific names of the files. With about 29 GBs of files found, I decided to just restore all the files that were found.
This is where the free version stops. To be able to recover the files you’ve found, you’ll need to purchase the program. To skip the scanning time that’s already done, the recovery session can be saved and then reloaded once you’ve bought the software.
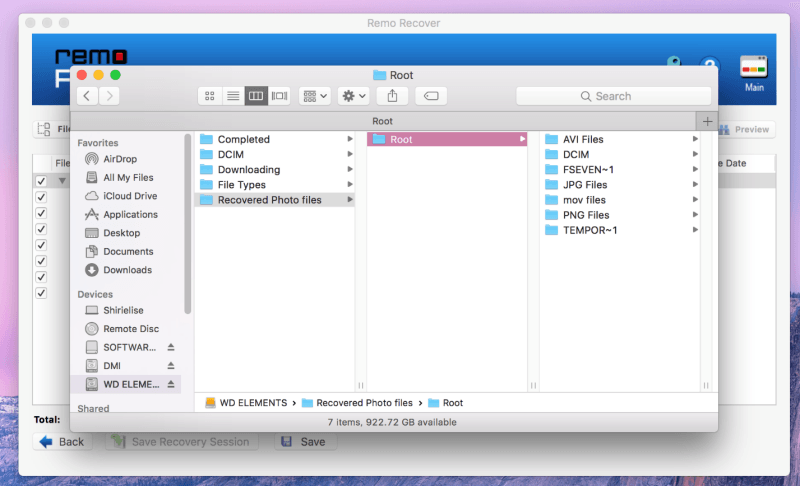
Recovering the files took about two hours, and the files were either organized by their location on the storage device or by their file type. Most of the files recovered were close to perfect. The quality and size were exactly the same as how they were before deletion. There were some files that were too corrupted to be recovered. Others only had the thumbnail of the original picture left.

The photos recovered ranged from pictures taken a few weeks ago up to a couple of months ago. Even photos from various cameras that used the same SD card were also recovered. Despite the nonrecoverable photos, the fact that it was able to restore most of them means Remo Recover was able to do its job pretty well.
Remo Recover for Android Review
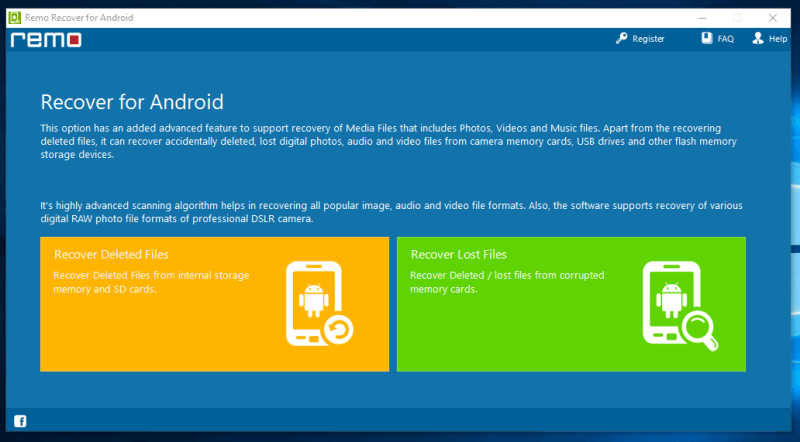
Remo Recover also has a version for Android devices. You can recover deleted and lost/corrupted files from your Android smartphone. The design of the homepage follows the footsteps of the Windows version. It’s very simple to navigate and understand.
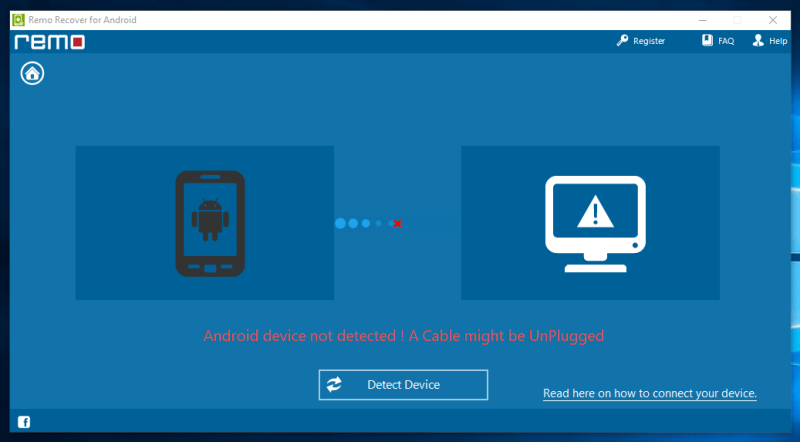
I used a Samsung Galaxy S3, which is said to be compatible according to Remo Recover’s Android compatibility list. I also tried the Xiaomi Mi3 – to no avail. I cannot pinpoint exactly where the problem is because there are a lot of variables. It could be the phone, cable, computer, drivers, or the program itself. At the moment, I can’t blame the program alone, so I cannot fully judge if the program works or not.
Reasons Behind My Ratings
Effectiveness: 4/5
I reviewed three versions of Remo Recover, with varying effectiveness. I wasn’t able to thoroughly test the Android version, although the Windows and Mac versions worked the way they should. I was able to recover tons of files although it was a bit difficult to find the specific files needed. Despite that, the fact that the majority of the recovered files were usable shows that the program works.
Price: 4/5
If you’re buying Remo Recover, I recommend getting only the Pro or Media version. It has all the features of the Basic version along with a deep scan feature, which is what you’ll need to find deleted files. The Pro prices are $80 and $95 for Windows and Mac respectively while the Android version is available for $30.
Ease of Use: 4.5/5
Remo Recover has very clear, step-by-step instructions on which options to choose and what you should do. It gives prompts on what they recommend and keeps you away from further damaging your storage devices.
Support: 5/5
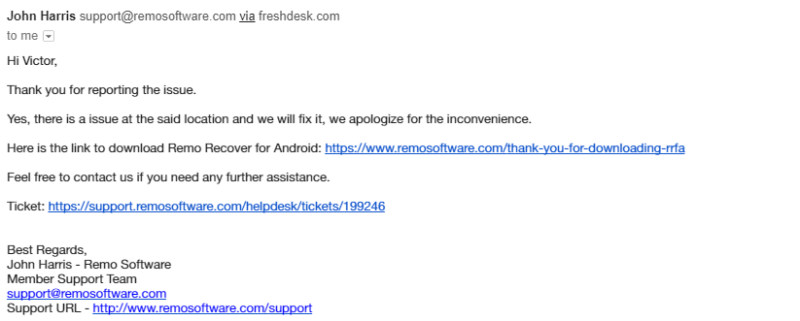
The Remo Recover support team was great. I sent them an email asking about their download link for the Android version of Remo Recover, which wasn’t working. I sent them an email at 5 pm and I got a personal email at 7:40 pm. They were able to respond in less than 3 hours, compared to others which would usually take a day or even more!
Conclusion
Overall, Remo Recover did its job of recovering deleted files. It’s quite difficult to go through thousands of recovered files, and it’s almost impossible to find the few files you need from there. However, for storage devices such as SD cards and flash drives less than 50 GBs, Remo Recover does great. Most of the deleted photos from the SD card were recovered without a problem.
I’d recommend Remo Recover for recovering files from small storage devices. It did a great job recovering pictures from the SD card and I believe it will also work well on flash drives. I’d skip their Basic version and go straight to either their Media or Pro versions of Remo Recover. It’s up to you as to which version you choose.

I trusted dropbox but my videos that have MOV as their label will not play so dropbox says they were corrupt when i uploaded them. The ones labeled mp4 play just fine. My 7 yr old litle girl just passed away and her first steps and so many other videos are on there. I would pay someone to try to retreive them for me.
I’m sorry to hear that. I’m not sure if Remo Recover would help in this case. I would consult a data recovery service first since your files are so precious.