When working with multiple elements in Microsoft Paint, you need to know how to remove the white background. A block of white around your composite elements just isn’t a good look.
Hello, I’m Cara! You would think it would be easy to remove the white background in Microsoft Paint – and it is. However, it isn’t overtly obvious, which makes it a pain to figure it out on your own.
So let me show you how!
Table of Contents
Step 1: Open Your Image
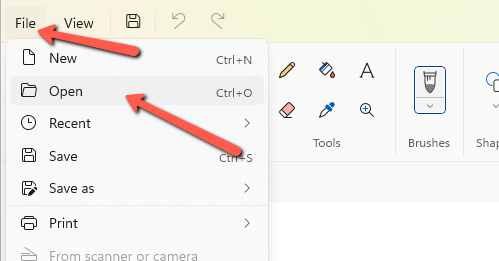
Open Microsoft Paint and open the image from which you want to remove the white background. Choose File and click Open. Navigate to your image and press Open again.

Step 2: Set Transparent Selection
You’ll need to make a selection of the image, but if you do it the normal way, you’ll get the white background along with it. You need to set the tool to make a transparent selection first.
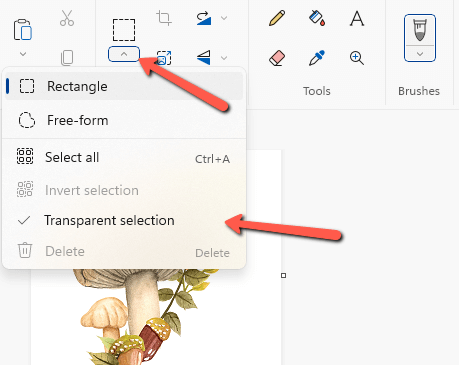
Click the arrow just below the Select tool in the image panel. Click Transparent Selection in the dropdown menu. Make sure the checkmark appears next to Transparent Selection to indicate the feature is active.

Click and drag around your image to select it. That’s it!
Understanding Backgrounds in Microsoft Paint
If you’re working on something with a single element like I have here, it won’t be immediately obvious that you’ve removed the white background.
If your image has multiple elements, you’ll see as you drag it over the top of something else that the element has been cut out of the white background.
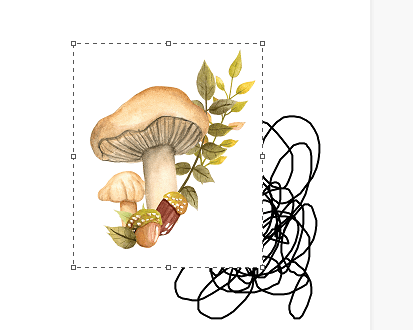
Let me show you what I mean with this squiggly black line. If I make a selection without the transparent selection active, when I pick up the element and move it around, there is still a white background connected to it.

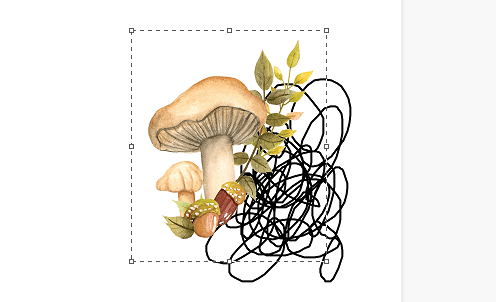
But with the transparent selection active, there is no white behind the element.

It’s important to note that you can only remove the background within Paint. You can’t save the image with a transparent background as you could with Photoshop or another more advanced program.
However, this technique is helpful when you want to move elements around in the same project or if you want to put one picture on top of another image. Check it out.
