You can resize a layer by selecting it in the layers panel and using the shortcut Ctrl/Command + T to activate the Free Transform tool. In this mode, a box with corners will appear over your layer, making it easy to resize.
You can also go to Edit > Transform > Scale. Hold Shift as you click and drag to squash or distort your layer.
Hello! I’m Jayde. In this tutorial, I’ll show you different ways to resize a layer in Photoshop, so that you may make your creative designs a reality.
Table of Contents
Key Takeaways
- Make sure your layer is unlocked because you can’t resize a locked layer.
- The keyboard shortcut for Free Transform is Ctrl/Command + T.
- You can also resize a layer by going to Edit > Transform > Scale.
- Use the shortcut Ctrl/Command + Z to Undo any mistakes.
- Press the Escape key to cancel Free Transform or Scale.
- To resize a layer and change its shape or angle it, you can use Distort or Warp.
Note: The screenshots from this tutorial are taken from the Adobe Photoshop Windows version. Mac or other versions can look different.
Now let’s take a look at the first method.
Method 1: Free Transform
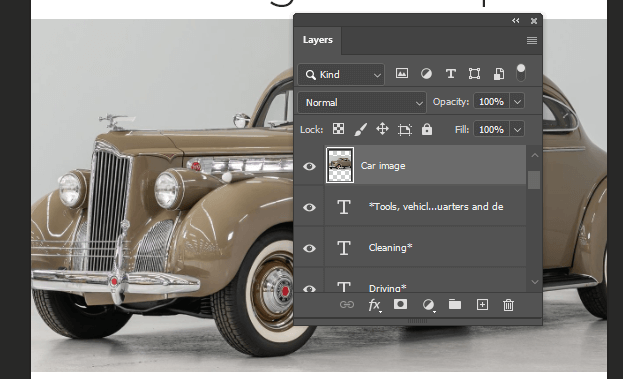
Step 1: Select the layer you want to resize. Here I have this image of a classic car on its layer, and I’m going to size it down.
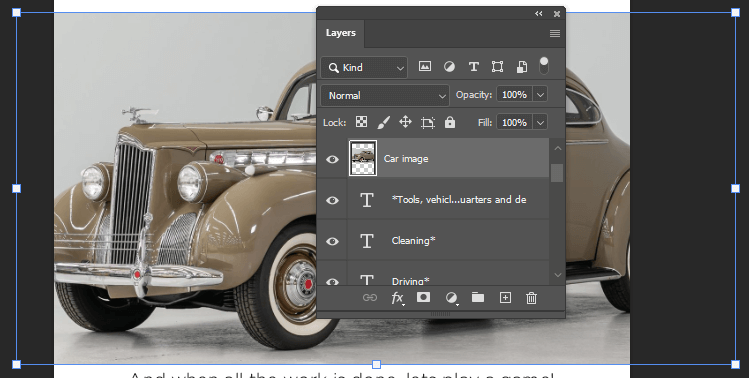
Step 2: Use the keyboard shortcut Ctrl/Command + T to activate Free Transform.
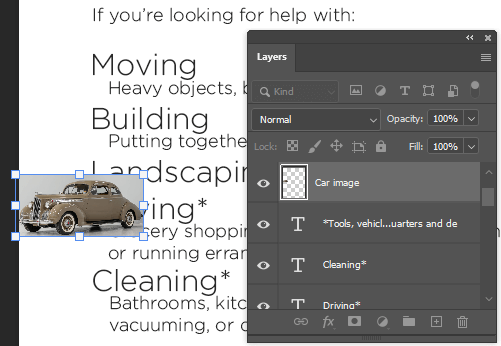
Step 3: Click and drag the corner of the box to resize your layer. To squash or distort the ratio of your layer, hold the Shift key.
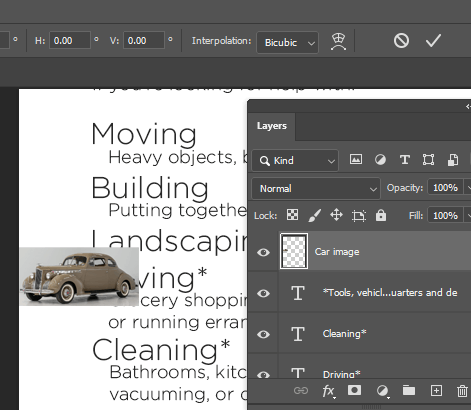
Step 4: Press the Enter key to confirm your adjustment, or click the checkmark at the top of the page.
Now let’s do the same thing using scale.
Method 2: Scale Tool
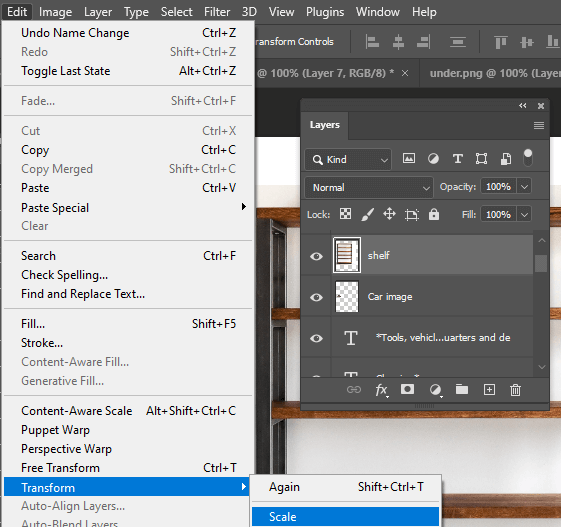
With your target layer selected, go to Edit > Transform > Scale.
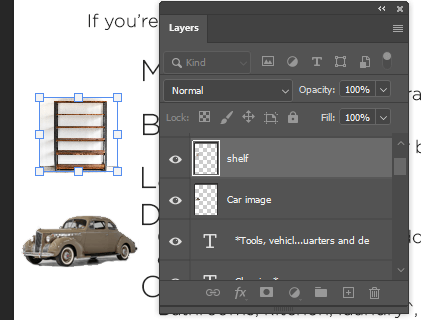
Click and drag a corner to resize the layer. Press the Enter key to confirm the change.
How to Distort a Layer
Sometimes you want to resize a layer while also changing the shape of it slightly. Follow the steps below to see how to do that.
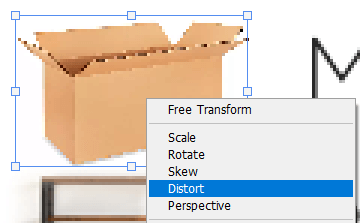
Step 1: With the target layer selected, use the shortcut Ctrl/Command + T to activate Free Transform. Right-click inside the box and go to Distort.
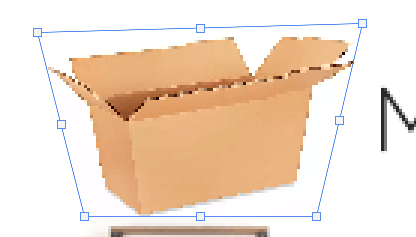
Step 2: Click and drag the corner(s) of the box to see how it changes the shape and overall look of your layer. In my case, I want the top of the box to appear wider than the bottom.
Press the Enter key to confirm adjustments.
Let’s see how we would resize a layer by warping it.
How to Warp a Layer in Photoshop
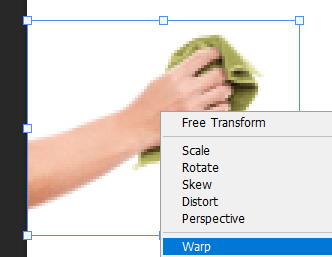
Step 1: Use the shortcut Ctrl/Command + T to activate Free Transform. Right-click inside the box and go to Warp.
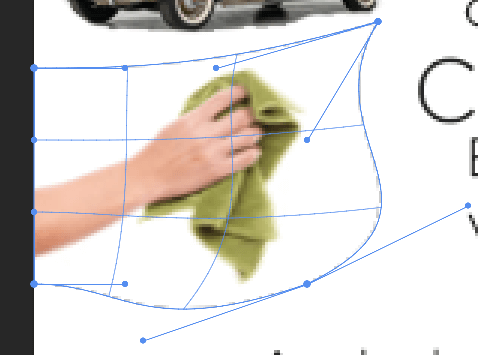
Step 2: Click and drag the points that appear to change the shape and size of your layer.
Final Thoughts
Thus concludes this Photoshop tutorial, covering several ways by which you can resize an individual layer. Although Photoshop may be a little overwhelming at first, it is very user-friendly and with a little time and patience, it can be mastered.
Have you started building your own Photoshop portfolio? What is your favorite Photoshop feature so far? Let me know in the comments below.
