Reversing a clip is an important stylistic editing technique that many professional and amateur editors use in narrative films and creative commercial work. Knowing how to reverse a clip is an essential skill to have, and it happens to be easy to do and takes only seconds in DaVinci Resolve.
My name is Nathan Menser. I am a writer, filmmaker, and stage actor. Over the last 6 years that I have been video editing, I have found myself utilizing the reverse tool many times, and so I am excited to get the opportunity to share this skill with you.
In this article, I will explain three different methods for reversing a clip, achieved in three or fewer steps.
Table of Contents
Method 1
Step 1: Navigate to the “Edit” page in DaVinci Resolve. You can find this by going to the horizontal menu bar at the bottom of the screen and selecting the option that says “Edit.”
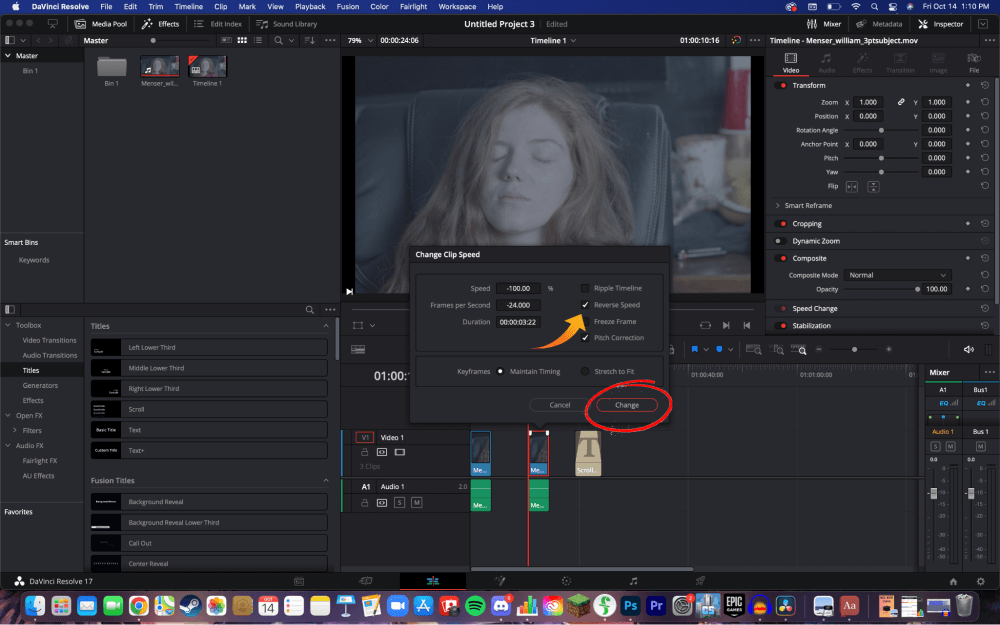
Step 2: Right-click, or for Mac users “Ctrl-Click”, on the clip you need to reverse. This will open a vertical pop-up menu. Select “Change Clip Speed.”
Step 3: Now you will have access to several advanced editing options. To reverse the clip, check the box for “Reverse Speed.” Then, in the bottom right corner of the pop-up window, click “Change.”

Method 2
For method 2, we’re going to follow the same instructions.
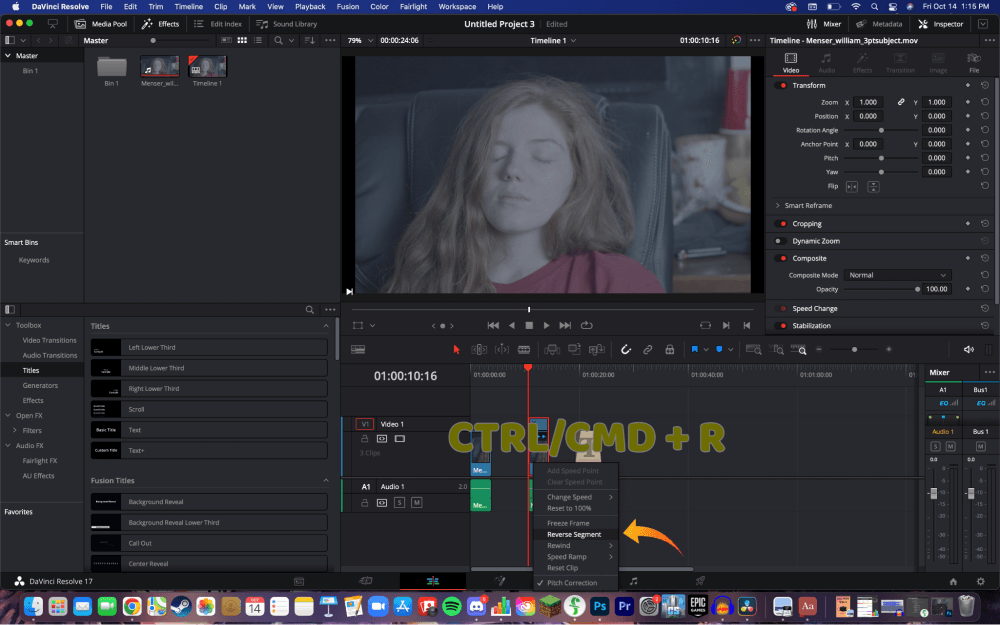
Step 1: From the “Edit” page, right-click on the clip you’re reversing. The same vertical menu will open as before. This time, click “Retime Controls,” or “Ctrl+R.”
Step 2: Now you should see a blue line of triangles appear on the clip from the timeline. The bottom of the clip should say 100%. Next to it, there will be a down-pointing arrow. Click on it, and a pop-up menu will open. Select “Reverse Segment.”

Method 3
Sometimes it’s good to have alternative options in your back pocket. Having various choices makes you a more well-rounded editor and can make your life a lot simpler. For a third method of reversing a clip, we’re gonna use the Inspector tool.
Step 1: From the “Edit” page, go to the horizontal menu bar in the top right corner of the screen. Select the“Inspector” tool.
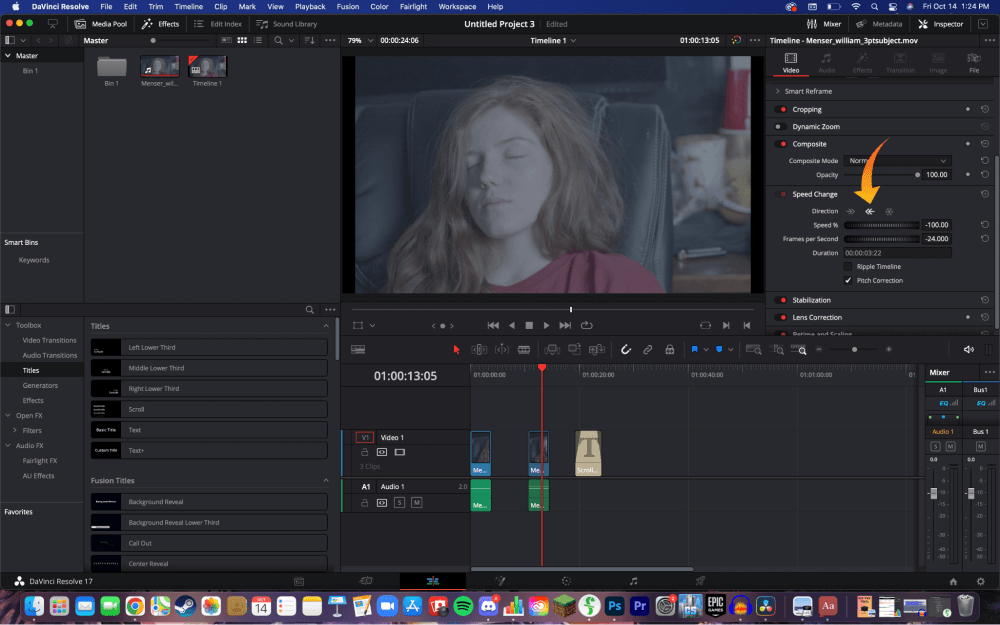
Step 2: This will open a menu to the right of the video playback window. Make sure you’re on the option titled “Video” since you’ll be reversing a video clip. Click on “Speed Change.” This will make a few hidden options appear below.
Step 3: There will be 2 arrows. One is to play the video backward and the other forward. Select the arrow pointing to the left.

Conclusion
It really is as simple as right-clicking on a clip, choosing change speed, and then choosing the reverse option.
Pro Tip: If you are looking to make the reversed clip faster or slower, change the value percentage on the speed. The lower the number, the fast it will reverse, and vice versa. Example: –150% is fast reverse, -50% is slow reverse.
Thank you for reading this article. If this has helped you learn how to reverse a clip, or if you have learned a new method, let me know by leaving a comment. If you have any critiques or ideas on what you would like me to write about next let me know!
