There are many ways to transfer data between Macs. Target disk mode is one of the less commonly known methods. Even so, it makes file transfer much easier. But how do you get started with it?
In this post, you’ll learn what target disk mode is and how you can start using it. We’ll explain what target disk mode does and two common ways to use it.
Table of Contents
Key Takeaways
- You may want to transfer your old files if you just bought a new Mac.
- Target Disk Mode is a handy utility for connecting your old Mac as a storage device.
- Once enabled, you can use Target Disk Mode to view, copy, and even format drives on your old Mac from your new one.
- There are two basic ways to get started with Target Disk Mode.
- If Target Disk Mode is not working, you should try using a different set of cables or running Software Update.
What is Target Disk Mode on Mac
Target Disk Mode is a feature unique to Macs. Connecting two Macs together via Thunderbolt allows you to use your old Mac as a storage device and easily view its files. You need to put your old Mac in Target Disk Mode to unlock this power.
It is possible to format and partition hard drives within the target Mac, just like any other external drive. The host computer can also access CD/DVD drives and other internal and external peripheral hardware on some Macs.
While older Macs can use Target Disk Mode via USB and FireWire, Macs running macOS 11 (Big Sur) or later can only use Thunderbolt. This is important to remember if you are transferring data from a much older Mac to a newer Mac.
How to Use Target Disk Mode on Mac
Target Disk Mode is a very simple utility. There are generally only two ways to use it, both of which are extremely similar. Let’s discuss both methods here.
Method 1: If the Computer is Off
Connect your old Mac to your new Mac with the appropriate cable to get started. In this case, we’ll use a Thunderbolt cable.
Ensure that the host computer is turned ON and the target computer is turned OFF. Once the cables are connected between both Macs, turn the target Mac on while pressing and holding the T key.
When the computer starts up, a disk icon will appear on the host computer’s desktop. From here, you can transfer files by drag-and-drop, just like any other storage medium.
Method 2: If the Computer is On
If your computer is already on, follow these instructions:
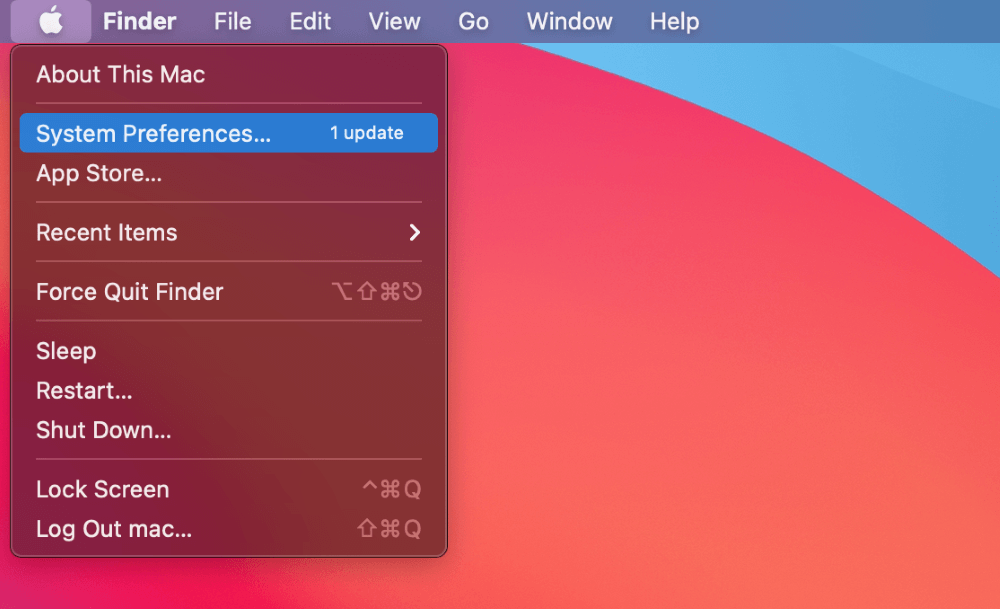
Locate the Apple icon in the upper left corner of the screen and select System Preferences.

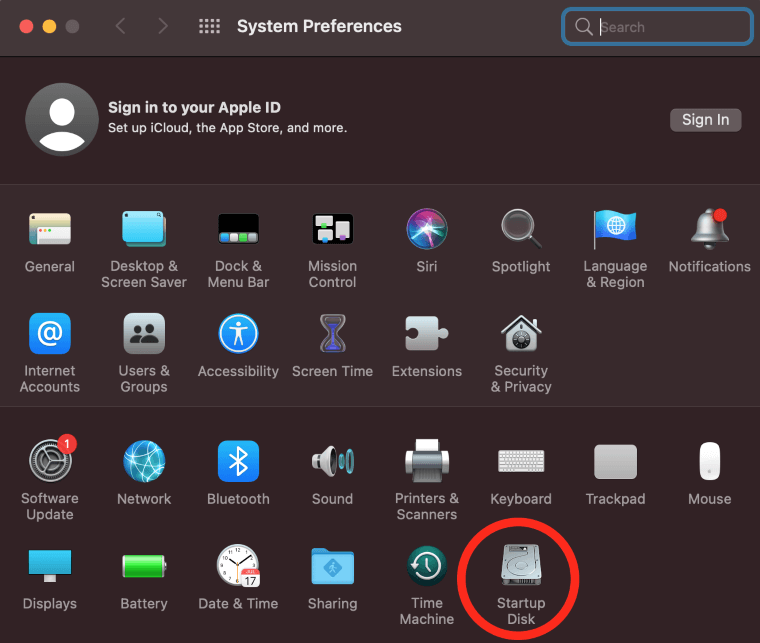
From the System Preferences menu, select Startup Disk.

From here, you’ll be able to click the Target Disk Mode button to restart your Mac. Make sure the appropriate cables are plugged in. Once restarted, you’ll see a hard drive icon on the desktop. At this point, you can easily drag and drop your files.
What if Target Disk Mode is Not Working?
If Target Disk Mode gives you any trouble. You can do a few things to verify that it should work correctly. The simplest explanation for the target disk mode not working is faulty cables. You should attempt to use a different set of cables, if available.
If your cables are fine, another simple explanation is an out-of-date Mac. You can ensure your system is up to date by following these steps:
Click on the Apple icon in the upper left corner of the screen and select System Preferences.

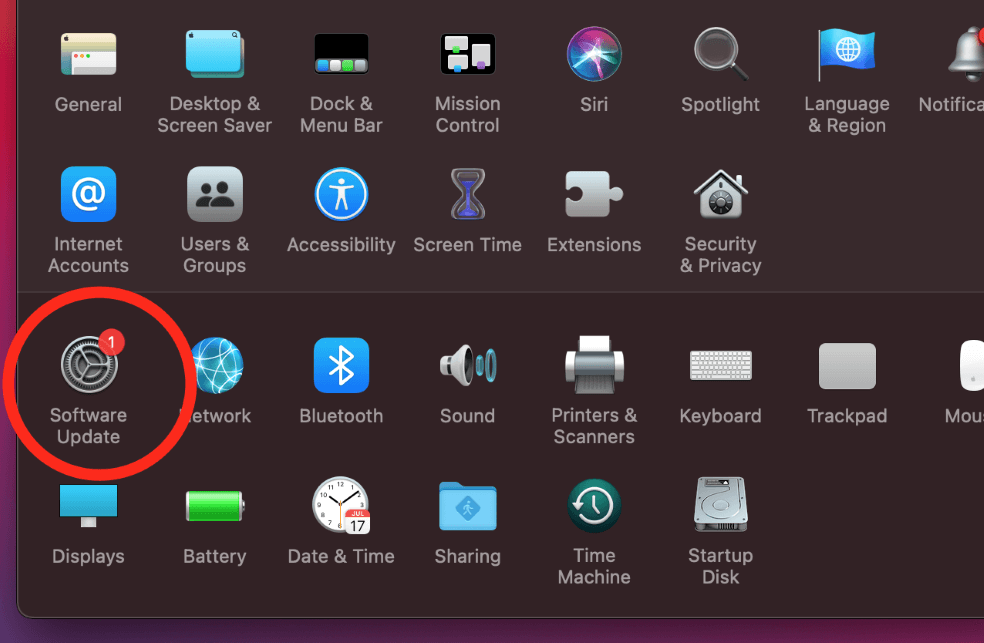
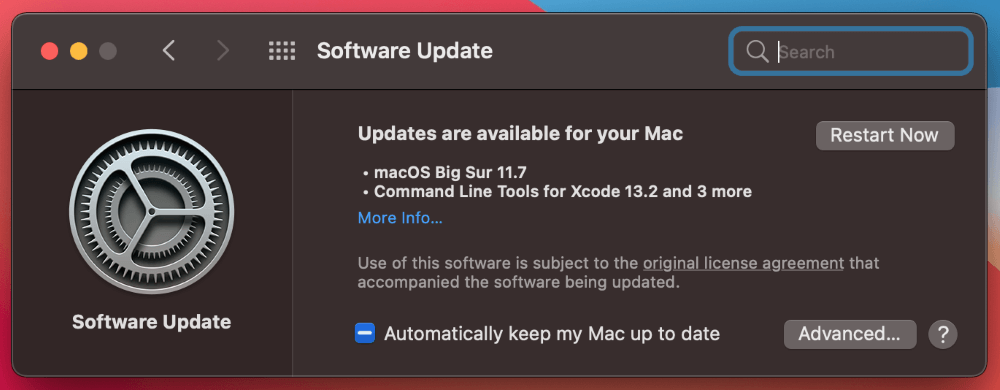
Once you do that, you’ll be greeted with the System Preferences menu. Locate Software Update from the list of icons. Click on this, and your Mac will check for updates.

After installing updates, you’ll want to restart your computer to ensure everything is functioning.
If Target Disk Mode doesn’t allow you to disconnect from the other Mac, simply hold the power button down on the Target Mac. This will allow you to disconnect the system and reboot.
Final Thoughts
Target Disk Mode is a helpful utility for transferring data from your old Mac to the new one. Using it is straightforward enough for even a beginner.
Hopefully, you can now effectively use Target Disk Mode for transferring your files. If you have any questions or run into difficulties, feel free to drop a comment below.
