Do you want to autotune vocals in Audacity? The software does not contain the feature by default. Therefore, you must install a third-party plugin effect to use autotune in Audacity. I recommend Graillon 2, but other effects can also auto-adjust your vocals’ pitch.
Hi, I’m Andrew Gilmore, a long-time user of the free and open-source audio editing software called Audacity. In this article, I’ll show you step-by-step how to install and use Graillon 2 to autotune your vocals.
I’ll also discuss alternatives like GSnap and answer frequently asked questions about autotuning in Audacity.
We’ve got a lot to cover, so let’s dive right in.
Table of Contents
How to Download and Install Graillon 2
Graillon 2 is a freemium VST3 pitch modulation plugin made by Auburn Sounds. The free version of the effect gives you plenty of options to play around with–including autotune. If you like the effect and want more options, upgrade to the full version for $29.
You’ll need to download, install, and enable the Graillon 2 plugin in Audacity to get started. Here’s how:
- Open a web browser and navigate to https://www.auburnsounds.com/products/Graillon.html.
- Click the Free Edition button.

- Extract the contents of the .zip file and locate the folder corresponding to your operating system: Windows, Mac, or Linux.
- On Windows, open the Windows folder and double-click the .exe file.
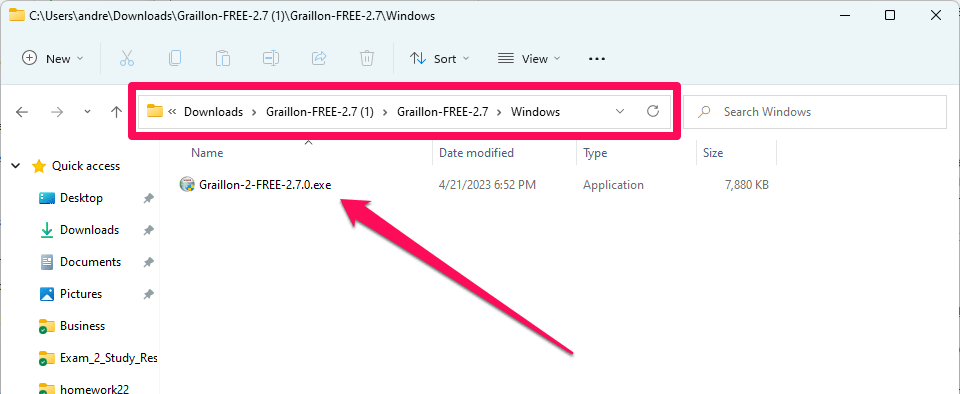
- Click Yes if prompted by User Account Control to run the file.
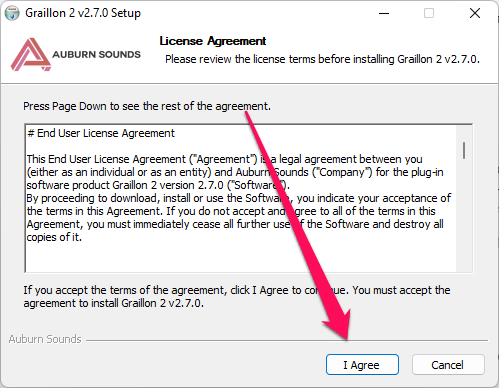
- Click the I Agree button.
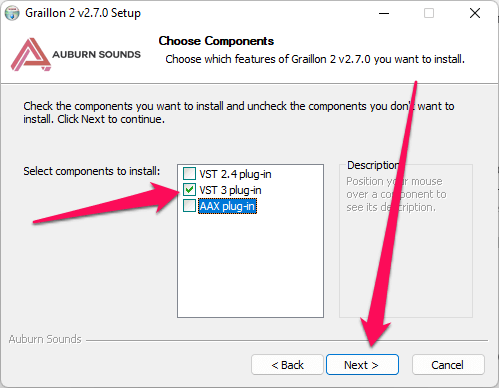
- Deselect VST 2.4 plugin and AAX plugin. For Audacity, all you need is the VST 3 option.
- Click Next.
- Click Close.
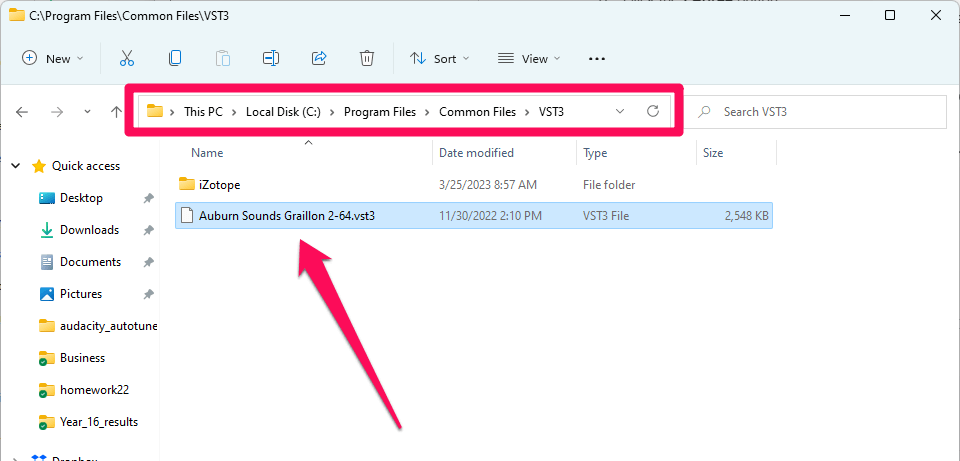
- Open a File Explorer window, navigate to C:\Program Files\Common Files\VST3, and copy the Auburn Sounds Graillon 2-64.vst3 file.
- Navigate to your Audacity plugins folder. On a typical Windows installation, the folder is C:\Program Files\Audacity\Plug-Ins.
- Paste the VST3 file in the Audacity plugins folder.
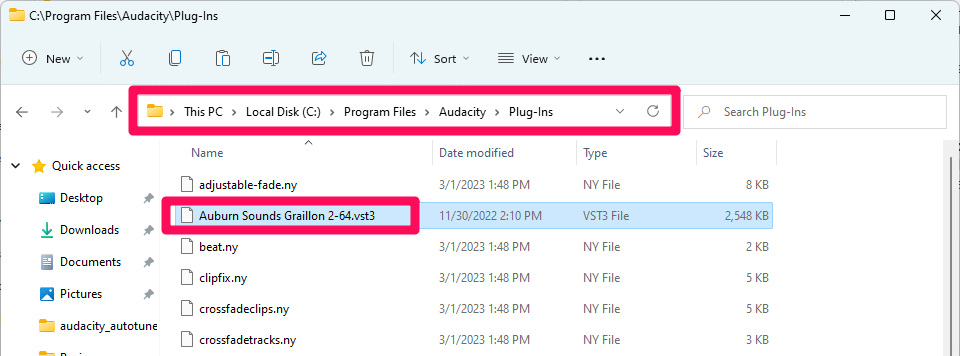
With the plugin file in place, now you must enable the effect in Audacity.
- Open Audacity.
- Click Effect from the menu bar and choose Plugin Manager.
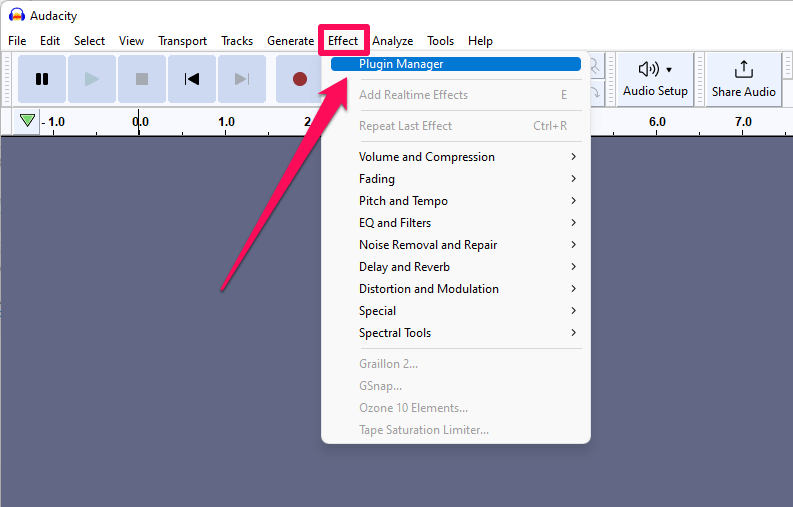
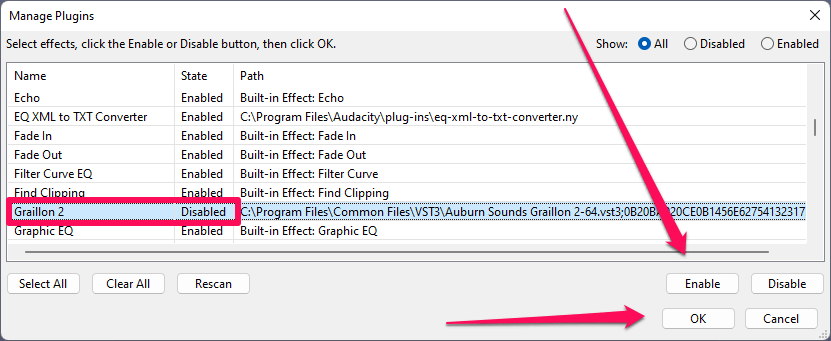
- Scroll down the list of effects until you get to Graillon 2, and then click on it.
- Click the Enable button.
- Click OK.
How to Autotune in Audacity with Graillon 2
Once you have installed and enabled Graillon 2, you can begin autotuning your vocals. Here’s how to get started:
- Record or import your vocal track.
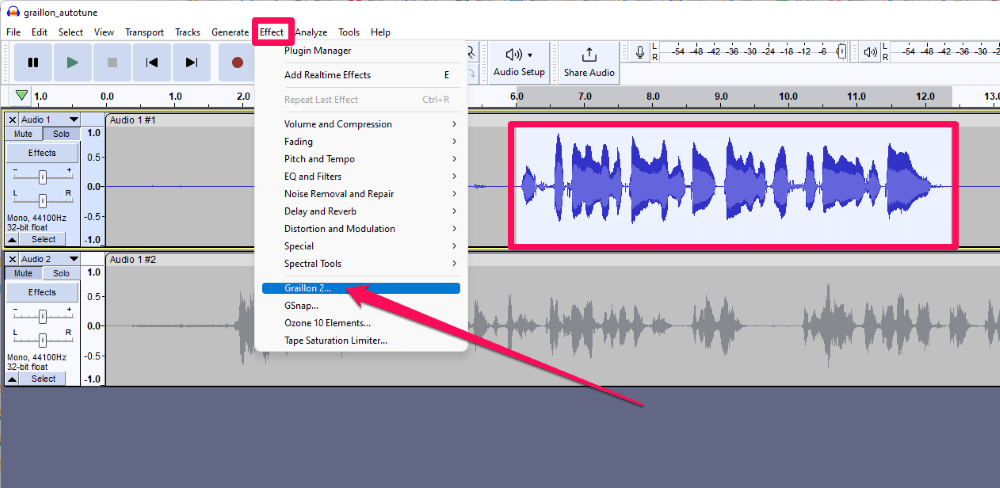
- Select the section of audio you want to autotune. You can double-click the waveform to select the entire track.
- Click on Effect from the menu bar and choose Graillon 2…
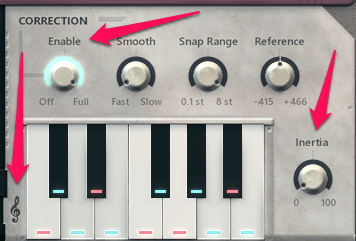
- In the Correction panel, turn the Enable and Inertia knobs all the way up to Full and 100, respectively. To adjust any of the dials in Graillon 2, click and drag straight up or down with your mouse.
Enable determines the amount of pitch correction, and Inertia “reduces pitch correction jumps by making chosen notes ‘stick.’”
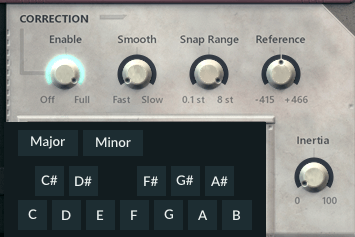
- If you know the key of your song, click on the treble clef to the left of the keyboard and select your key. Otherwise, you can manually click on the piano keys to select or deselect the notes you want to use. (Click anywhere outside the vital selection pane to return to the keyboard.)
- Click the Preview button to hear your audio with the current autotune settings.
- Click Apply when you’re satisfied with the result.
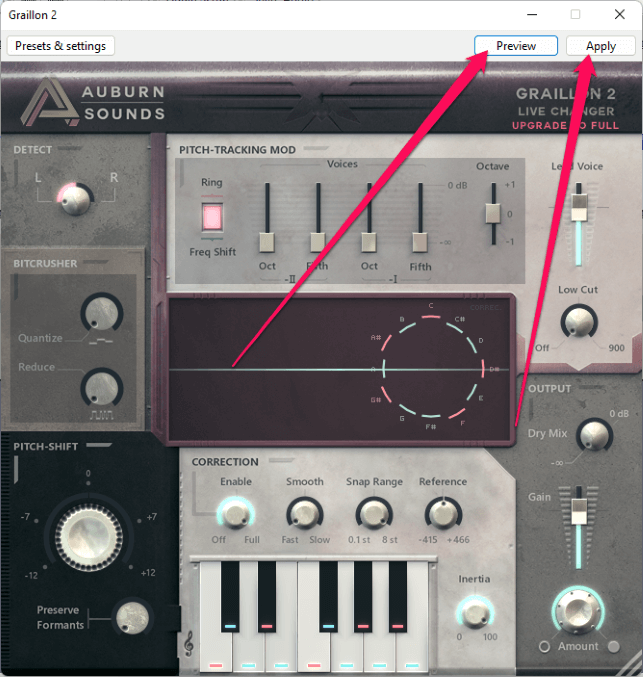
I like Graillon 2 because it is easy to use and offers the desired effect even without shelling out money for the upgraded version of the plugin.
Besides Enable and Inertia, Graillon 2 features many other settings for getting your autotune sound just the way you want, including Snap Range which can place limits on how far the pitch will adjust, and Smooth to adjust how quickly the pitch will shift from one note to the next.
Your best friend is the Preview button, so you can listen to Graillon 2’s effect on the audio before applying it. Since the application of the effect is destructive, I recommend duplicating and muting your original track in case you need it for reference.
Additionally, you can use Audacity’s newer Realtime Effects feature to modify your audio while playing back. Press the E key on the keyboard to call up the Realtime Effects panel and then click Add Effect. Select Graillon 2.
Alternative Ways to Autotune in Audacity
Antares Tech released the first version of pitch-correcting software called Auto-Tune in 1997. This software is still widely used today, but there is no Antares plugin compatible with Audacity.
Nevertheless, other alternatives for Audacity do exist. GSnap is a popular autotune plugin alternative to Graillon 2. You can download it for free here from gvst.co.uk. Although the GSnap is free, the plugin has not been updated since early 2021.
Yet another option is MAutoPitch from Melda Production. The plugin comes packaged with others from Melda in the MFreeFXBundle.
FAQs
Here are some commonly asked questions regarding autotune in Audacity.
Does Audacity have autotune?
Audacity does not have autotune capabilities out of the box. You’ll need to install an autotune plugin like Graillon 2 or GSnap to enable the functionality.
How do I turn on autotune in Audacity?
Copy your plugin to Audacity’s Plug-Ins folder, then launch Audacity. Click Effect > Plugin Manager from the menu. Find and click on your autotune effect, then click Enable and OK.
How do I use GSnap in Audacity?
The GSnap plugin is similar to Graillon 2 but with its own quirks. Check out the manual for detailed instructions.
Autotune in Audacity: T-Pain Would Be So Proud
If you’re looking to use autotune in Audacity, Graillon 2 is one of the best options available.
This guide gives you a quick intro to using the effect, but I recommend you play around with the various settings to see which configuration best suits the sound you are going for. Graillon 2 can yield subtle pitch corrections or robotic, T-Pain-esque sounds, or anything in between.
After mastering the basics, you’ll be autotuning your audio with ease.
Do you have a favorite autotune plugin or tip? Let us know in the comments!
