
Keyframes are the cornerstone of animation in After Effects, allowing you to create movement, change properties over time, and bring your projects to life. To create a Keyframe in After Effects, simply click the stopwatch icon next to a property.
Hi there, I’m Zoe, a graphic designer and illustrator. When I first started with animation, I was amazed by how it worked. Learning that animation in After Effects essentially relies on marking the animation of an object at one point and then again at another to make it move, demystified the process. Animation seemed a lot less daunting once broken into keyframes.
In this article, I’ll show you how to add and modify keyframes in After Effects, along with some tips for making your animations smoother and more dynamic.
Let’s dive in!
Table of Contents
Key Takeaways
- Keyframes are used to set parameters like motion, audio, and other properties, changing them over time.
- To add or change a keyframe, make sure the stopwatch for the property is active.
- After Effects automates keyframe creation when you change a property with the stopwatch active.
- Use Keyframe Interpolation and Easy Ease to create more natural-looking animations.
Note: All screenshots from this tutorial are taken from the After Effects Mac version.
What Are Keyframes in After Effects
Keyframes in After Effects are markers on your timeline where you set values for a layer’s properties, like position, scale, rotation, or opacity, at specific times.
When you create a keyframe, you’re noting a property’s value at that moment. Adding another keyframe with a different value later in the timeline creates a transition, making things like movement, size changes, rotation, or fading possible.
These keyframes are flexible and can be used to control almost any property of a layer. You can animate color changes, adjust the volume of sound, or alter the strength of an effect.
They also let you control the speed and timing of your animation, from slow and smooth transitions to quick and sharp changes, to suit the style and pace of your project.
Step-by-Step Guide to Adding Keyframes
Adding keyframes in After Effects is a straightforward process. Here’s how you can do it:
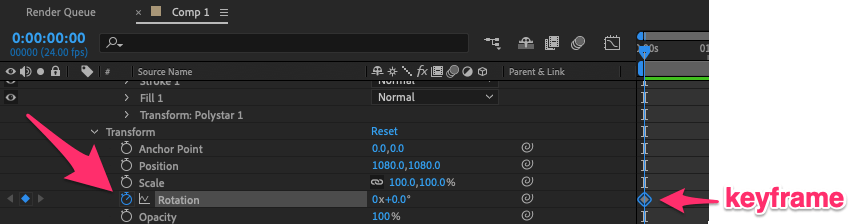
Step 1: Decide which property of the layer you want to animate. This could be anything from position, scale, rotation, opacity, audio, or even effect parameters.
Step 2: Move the playhead to the point in the timeline where you want your animation to start.
Step 3: Click the stopwatch icon next to the property in the layer panel. This action activates keyframing and creates an initial keyframe.
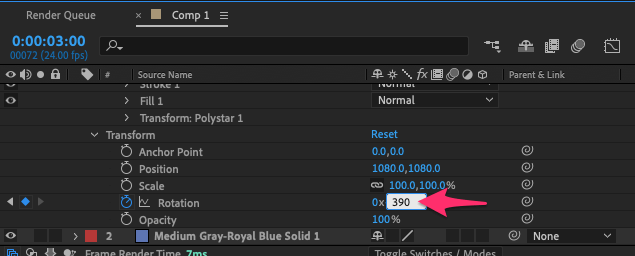
Step 4: Move the current time indicator to a different time on the timeline.
Step 5: Change the property’s value (like moving the position, adjusting the scale, etc.). After Effects will automatically create a new keyframe at this point.
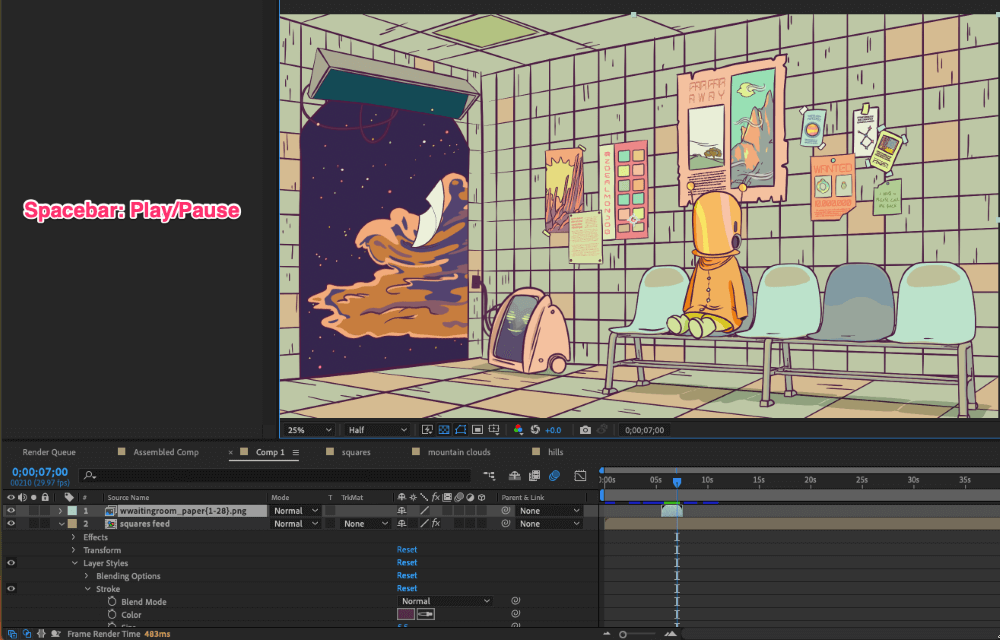
Step 6: Use the RAM Preview to play back your animation and see how it looks.
Step 7: If a keyframe is no longer needed, simply select it and press the Delete key.
To copy keyframe values, select a keyframe and use the keyboard shortcut Ctrl + C (Windows) or Command + C (Mac). To paste, use Ctrl + V (Windows) or Command + V (Mac).
By following these simple steps, you can bring motion and life to your graphics and videos.
How to Modify a Keyframe in After Effects
Editing keyframes is just as important as adding them. Here’s how you can make adjustments:
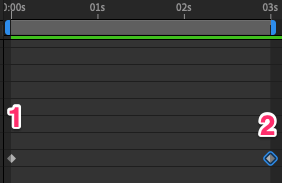
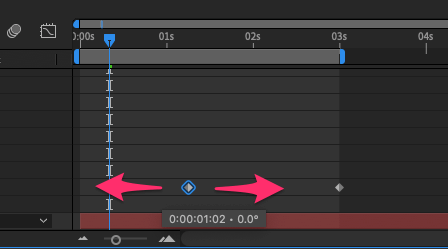
Step 1: Find the keyframe you want to adjust on the timeline, represented by a small diamond shape.
Step 2: To change when an effect or change takes place, click and drag the keyframe left or right along the timeline.
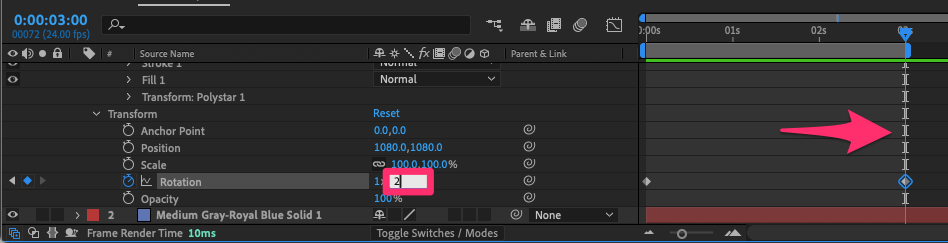
To modify a keyframe’s value, adjust the property while the current time indicator is over the keyframe.
Whether adjusting the timing or the value of a keyframe, these steps give you the control to fine-tune your animations until they’re just right.
Pro Tip: How to Create Smoother Animations in After Effects
Creating animations that feel smooth and professional in Adobe After Effects often comes down to understanding Keyframe Interpolation and the use of Easy Ease. These techniques refine your animation’s flow, transforming mechanical movements into fluid, engaging sequences.
Using Keyframe Interpolation
Keyframe Interpolation defines how After Effects calculates the values between keyframes, dictating motion paths and rate changes.
Let’s delve into how you can effectively use keyframe interpolation to enhance your animations:
Step 1: Choose the keyframes you want to apply interpolation to. These are typically the starting and ending points of your animation.
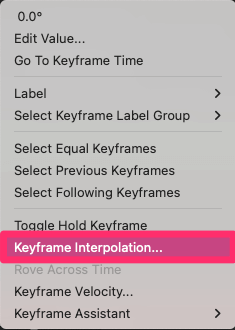
Step 2: Right-click on a keyframe and navigate to Keyframe Interpolation.
Step 3: Now, you can select the type of interpolation that best suits your animation. Here’s an explanation for each of the interpolations shown in the Keyframe Interpolation dialog box:
Temporal Interpolation:
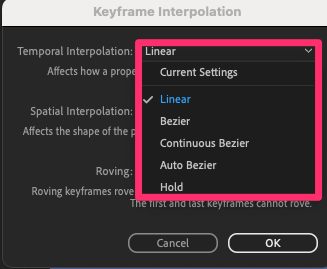
- Linear creates a uniform rate of change between keyframes. If you have two keyframes, the value changes at a constant speed from one to the other.
- Bezier allows for a more customized speed change between keyframes, which is not necessarily uniform. You can adjust the speed curve using the handles in the graph editor to fine-tune how the animation progresses over time.
- Continuous Bezier: A smoother version of Bezier interpolation where the speed of the change is automatically adjusted to create a smooth rate of change, which is continuous across multiple keyframes.
- Auto Bezier is similar to Continuous Bezier, but After Effects calculates the best smooth motion path for you. It adjusts the speed of the interpolation automatically to create a smooth motion.
- Hold will hold the property value until it hits the next keyframe, at which point it will jump to the new value. There’s no gradual change – it’s an instant transition.
Spatial Interpolation:
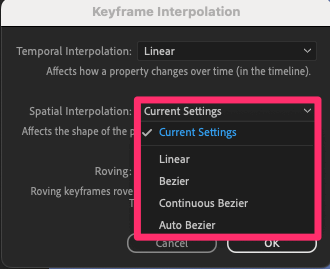
- Linear: The path of movement (spatial path) is a straight line from one keyframe to the next.
- Bezier gives you control over the shape of the path of movement. By adjusting Bezier handles, you can create curves and more complex motion paths.
- Continuous Bezier creates a smooth path that is automatically adjusted to be continuous at all keyframes, making for smoother transitions and turns.
- Auto Bezier: As with temporal interpolation, After Effects calculates the smoothest path of motion for you, which can be good for natural-looking motion paths without manual adjustments.
Roving:
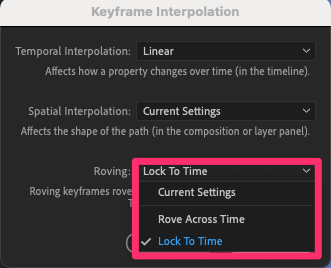
- Rove Across Time: This option makes a keyframe’s timing flexible, allowing After Effects to automatically adjust its position for even spacing and smooth motion along a path.
- Lock to Time: This fixes a keyframe to a specific time on your timeline, ensuring that it doesn’t move even when you adjust other keyframes.
Each type of interpolation allows for different levels of control over how your animation behaves. Temporal interpolation is about the “when” – how the timing of your animation progresses, while spatial interpolation is about the “where” – the path your animation takes through space.
Roving keyframes helps in distributing keyframes along a path to create the illusion of consistent motion, especially helpful in complex motion paths where speed consistency is required.
Using Easy Ease
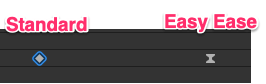
Easy Ease in After Effects makes animations smoother by gradually speeding up and then slowing down the motion at keyframes, giving a more natural and professional look to your animations.
Here’s how you can apply Easy Ease to your Keyframes:
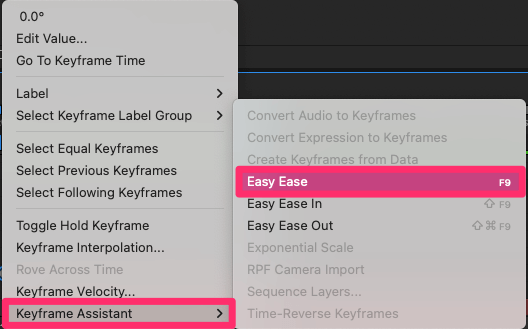
Step 1: Choose the keyframes you want to modify.
Step 2: Right-click on a keyframe and select Keyframe Assistant followed by Easy Ease (or use the F9 shortcut). This automatically adjusts the keyframe’s speed, creating a smoother start and end to the motion.
Easy Ease provides a quick way to smooth out the motion in animations, making transitions more natural without manual adjustments.
Final Thoughts
Adding keyframes in After Effects is a fundamental skill for creating animations. It’s the first step in turning static elements into engaging, dynamic stories. Whether you’re animating text, and graphics, or integrating visual effects, understanding keyframes is crucial.
I’d love to hear about your experiences with keyframing! Share your stories and questions in the comments below.