
Want to speed up your work in Lightroom significantly? Using presets is a great way to do it! Plus, it’s easier to maintain a consistent look when you edit.
Hey there! I’m Cara and in my work as a professional photographer, I’ve found presets to be invaluable. With one click, I can add any number of settings to my image to apply an instant edit.
Lightroom comes with a few basic presets, but they quickly become limiting as you develop your style as a photographer. Here’s how to add or install presets to Lightroom so you can customize your editing experience!
Note: the screenshots below are taken from the Windows version of Lightroom Classic. If you are using the Mac version, they will look slightly different.
How to Add/Import Presets to Lightroom Classic
The first step is to download and unzip the preset file, and then you can import the preset to Lightroom.
Whether you’re buying presets or downloading a free pack from the Internet, you’ll get a zip file with your new presets. Navigate to your downloads folder to unzip the downloaded file.
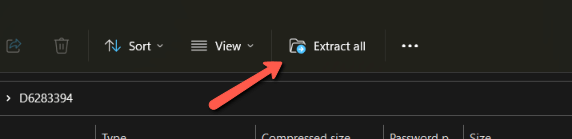
I am using Windows 11 and I just double-click the zip file to open it. At the top, I click on the option to Extract All. A window opens asking me where I would like to save the extracted files. Navigate to where you would like to save your files and press Extract.
Once you’ve extracted all the files, follow the steps below to add/install the preset into Lightroom.
Step 1: Open Lightroom Classic (the desktop version). Press D to go to the Develop module or click on Develop in the menu bar at the top right.
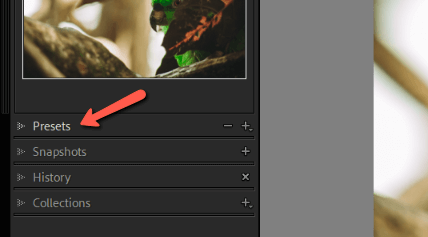
On the left, under the navigator, you’ll see a presets panel. If it is closed, click the little arrow to the left of the word Presets to open the drop-down menu.
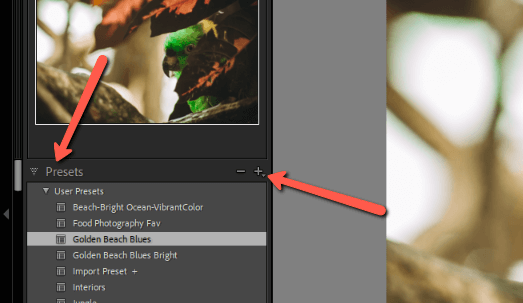
To add a new preset, click the plus sign on the right side of the presets panel.
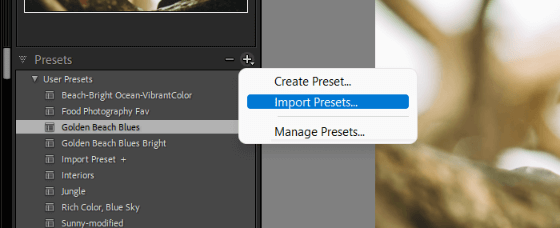
Step 2: Choose the option to Import Presets.
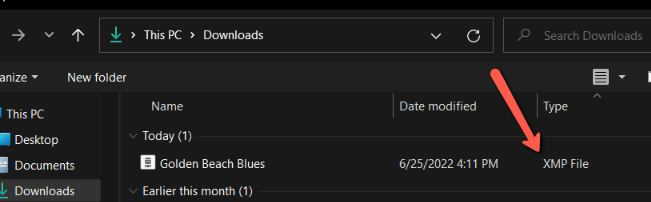
A dialog box will open so that you can select the preset files. Navigate to wherever you saved your presets. You should see them marked as an XMP file.
Step 3: Select the preset or select multiple by holding Shift while clicking on the first and last file in line. Then press Import.
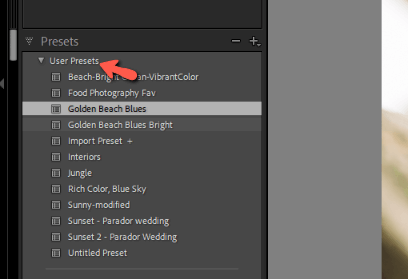
Then you should see the new preset under User Presets in the Presets panel.
Piece of cake!
How to Download/Install Presets in Lightroom Mobile App
Downloading presets in Lightroom mobile app is also pretty simple. Follow the steps below to install presets in Lightroom Mobile.
Step 1: Download the presets folder to your device. Unzip and save the unzipped files in a handy location.
Step 2: Open the Lightroom app on your phone and choose a photo in your library.
Step 3: Tap the Presets button that appears at the bottom of the screen.
Step 4: Tap the three dots that appear on the top right of your screen and choose Import Presets.
From there, navigate to wherever you saved your presets.
Step 5: Choose the files you want and import them into the app. They will appear in a new group in the Presets tab and you can use the Manage Presets option to organize them how you please.
Easy peasy!
Curious to learn more about Lightroom Presets? Check out this article on creating your own presets here.