
You can add shadows in Photoshop using layer masks, paint, and opacity adjustments. You can greatly reduce or even remove shadows by copying them onto their own layers, changing the blending mode, adding a layer mask and a Curve adjustment.
Hello! I’m Jayde, and I started using Photoshop to make fantastical horse photos for players to display on their virtual horses. I became a fake-money billionaire with my graphic design skills, and now I teach Photoshop to others!
In this article, I’ll show you how to add and remove shadows in Photoshop to perfect any portrait or landscape. Without further delay, let’s get started on this tutorial.
Note: All screenshots from this tutorial are taken from the Adobe Photoshop CC Windows version. Other versions can look different.
Table of Contents
Adding a Shadow to an Image in Photoshop
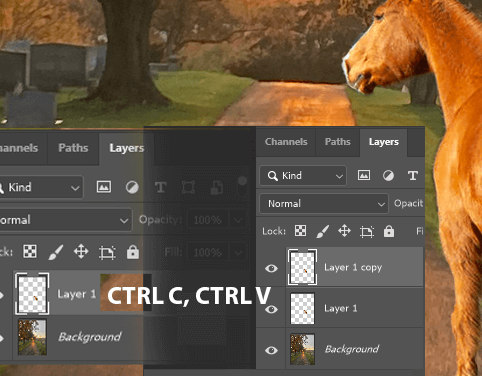
Step 1: With your subject layer selected, copy it using the shortcut Ctrl/Command + C, and paste it using the shortcut Ctrl/Command + V.
In cases where you have a face or subject on the same layer as the rest of the photo, trace their shape with the Polygonal Lasso and then copy and paste it.

Step 2: Use the Rectangular Marquee to select your subject, then use the shortcut V to select the Move tool, and use the arrow keys to nudge your selection. This will make it cling to the shape of your layer.
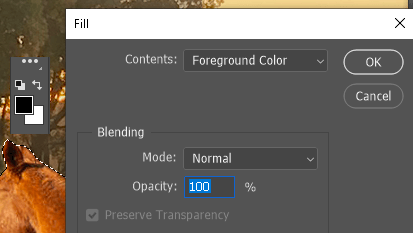
Step 3: Go to Edit > Fill and choose Foreground in the drop box to fill it with black.
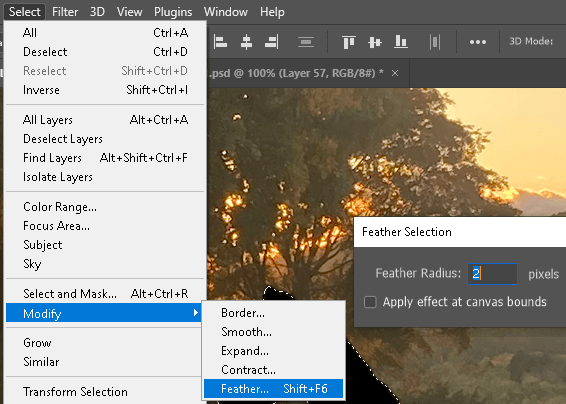
Step 4: With your selection, go to Select > Modify > Feather and choose about 2 px.
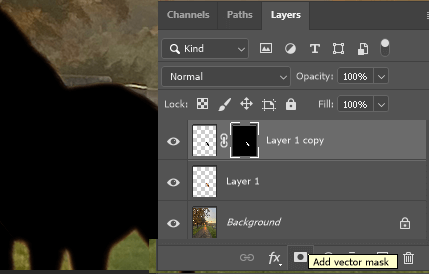
Step 5: Click on the Layer Mask icon to create a layer mask of the same shape as your subject.
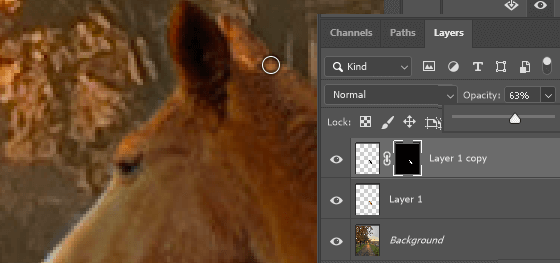
Step 6: Now note where the light source is coming from to determine where light would hit your subject. Lower the Opacity to match the shadow the the rest of the photo. Use the Brush tool to paint with black on the layer mask to erase the shadow.
Lower the flow of the brush so you can have better control over your strokes. The brush hardness should be reduced by at least 20%.
Step 7: When you’ve highlighted your areas, copy and paste the selected subject layer by using the shortcuts Ctrl/Command + C and Ctrl/Command + V.
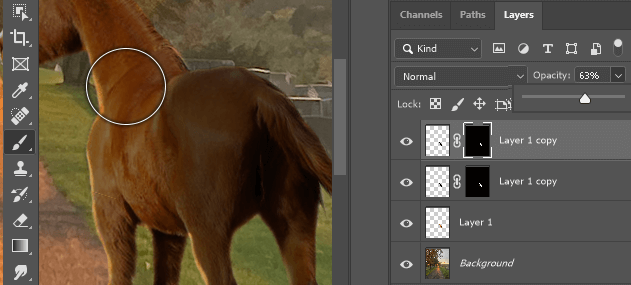
Step 8: On the layer mask, use a large, feathered Brush with black to narrow down the shadow to where it should be darker. You can also adjust the opacity of these layers at any time.
Adding a Drop Shadow in Photoshop
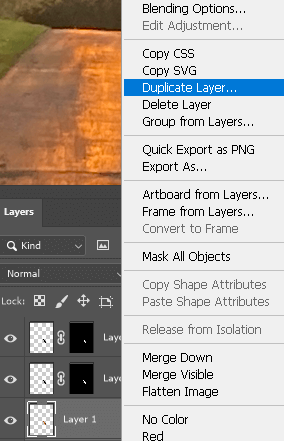
Step 1: Select your subject layer and right-click on it to go to Duplicate Layer.
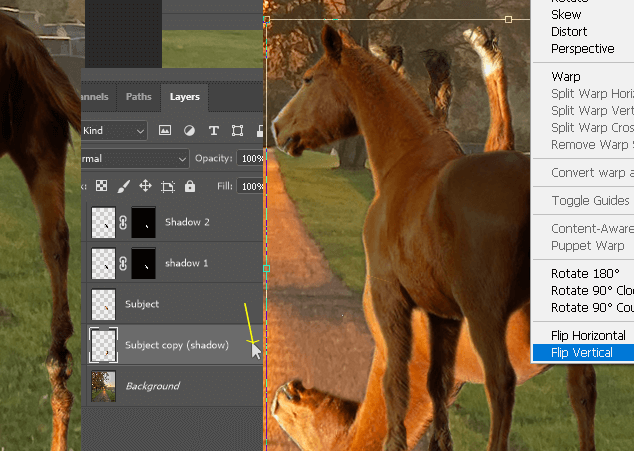
Step 2: Click and drag the new copy below the subject layer. Use the shortcut Ctrl/Command + T and right-click in the box to go to Flip Vertically. Line up the shadow as best you can.
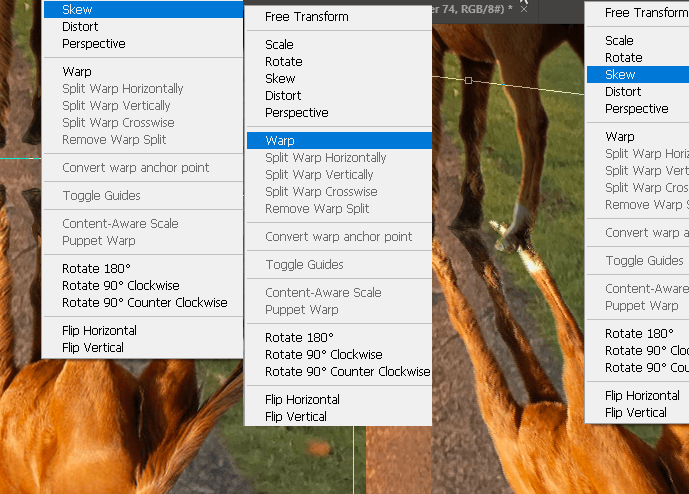
Step 3: Right-click again to go to Skew > Warp. These help to shape the shadow in the way it should go.
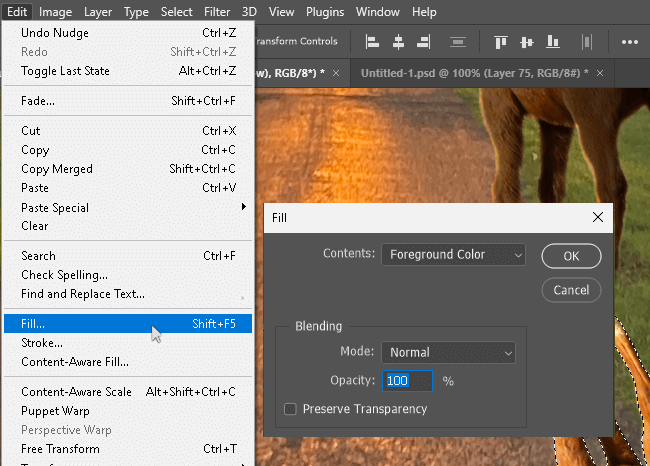
Step 4: Select the layer and go to Edit > Fill… use the Foreground color (black).
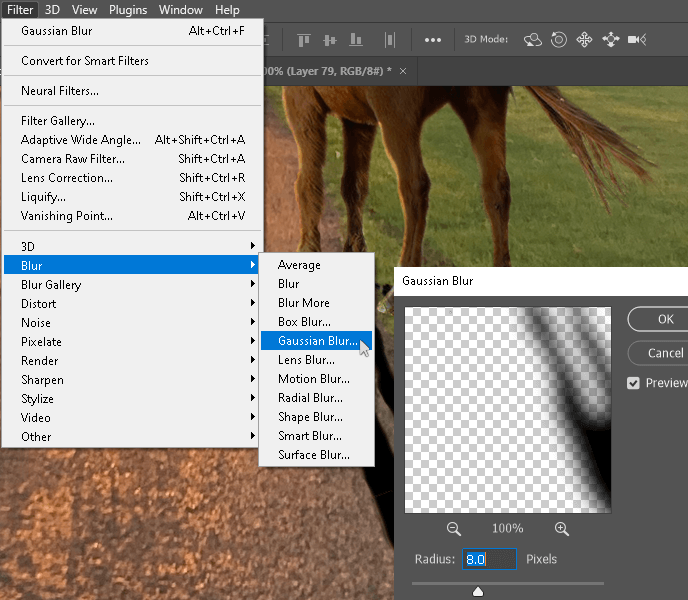
Step 5: Use the shortcut Ctrl/Command + D to deselect. Go to Filter > Blur > Gaussian Blur… use whatever pixel count suits your photo. Reduce the opacity of this layer if you so desire.
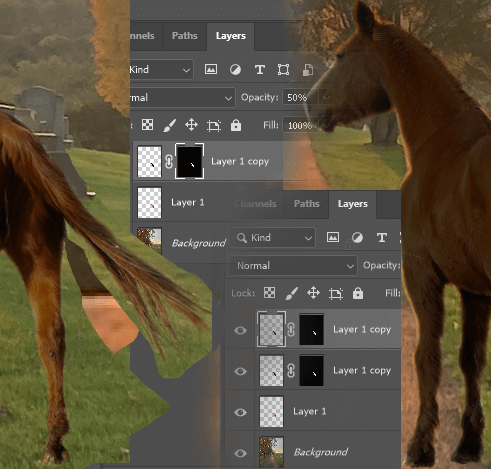
That concludes the first half of our tutorial. Here’s our photo comparison:
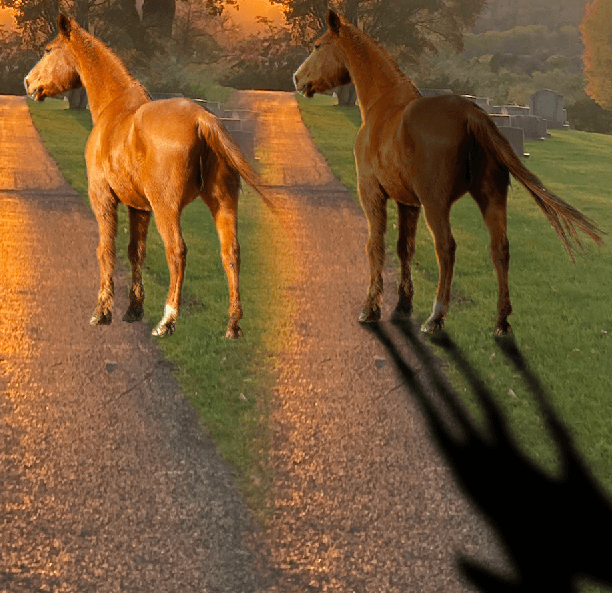
Now let’s take a look at how to remove a shadow.
How to Remove a Shadow in Photoshop
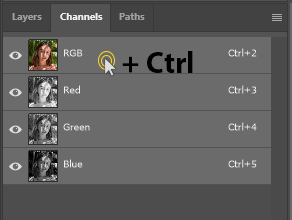
Step 1: Go to the Channels panel (Window > Channels), hold Ctrl/Command, and click on the RGB channel. This will select the most luminous parts of the image.
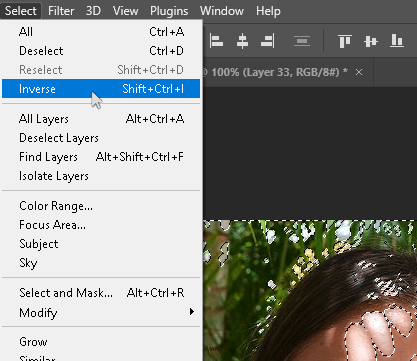
Step 2: Use the shortcut Ctrl/Command + Shift + I to Invert (Select > Inverse) your selection. Now we have the darkest parts of the image selected.
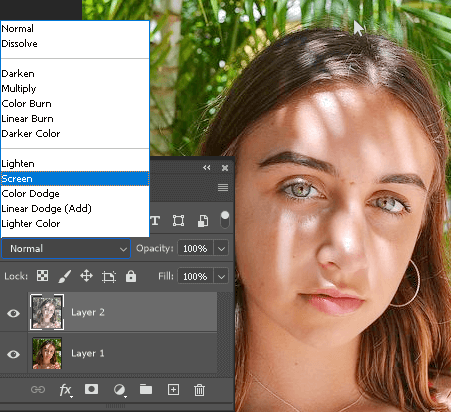
Step 3: Use the shortcut Ctrl/Command + J to put your selection onto its layer. Change the Blending Mode to Screen.
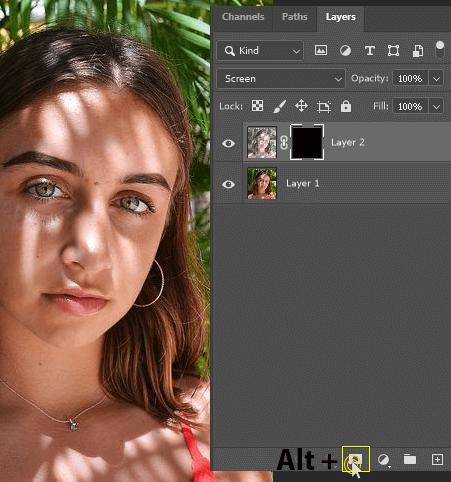
Step 4: The shadow is reduced, but the brightness we just added affects the whole picture, as opposed to just her face. Let’s fix that by adding a layer mask. Hold Alt/Option and click on the layer mask symbol.
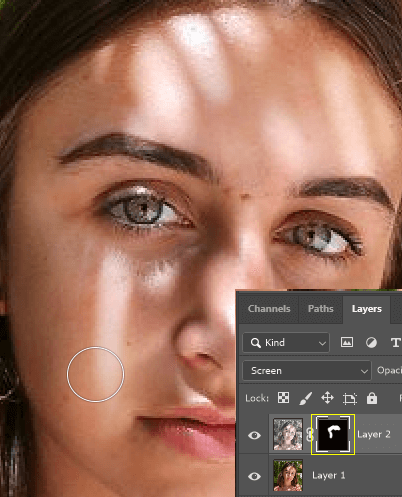
Step 5: Use the Brush tool to paint just her face.
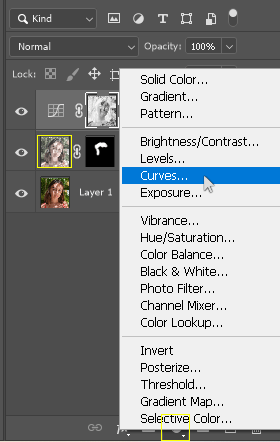
Step 6: With the layer in the yellow box selected, create a Curves adjustment layer. Don’t make changes to it yet.
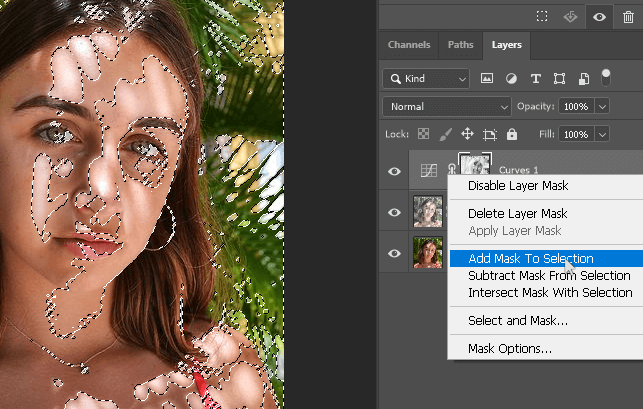
Step 7: Right-click on the Curves thumbnail and click on Add Mask to Selection.
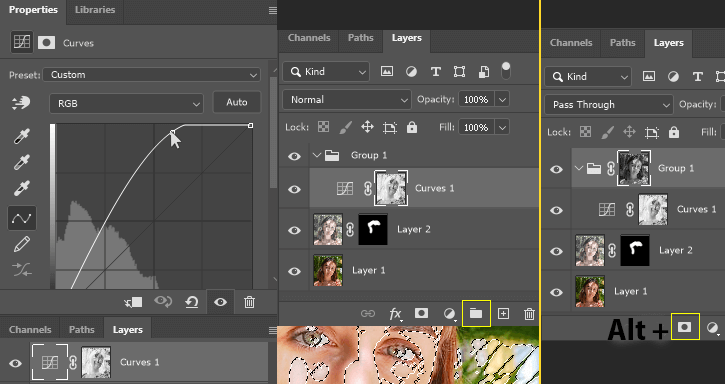
Step 8: Go to the Properties panel and adjust the Curves level. Then create a group (folder symbol) and click and drag your curves layer into it. Select the Group, hold Alt/Option, and click on the layer mask symbol to add a filled mask to the group.
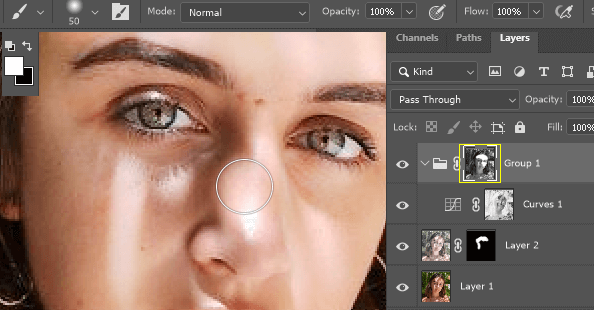
Step 9: When it comes to layer masks, black conceals and white reveals. So we’re going to paint with white on this layer mask wherever we want to reveal our brightened curves adjustment layer.
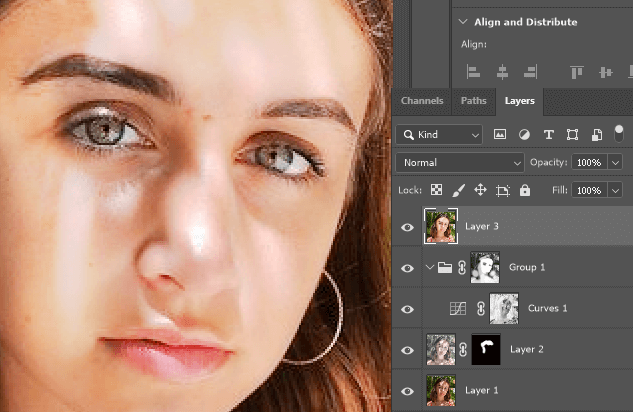
Step 10: Use the shortcut Alt + Ctrl/Command + Shift + E to make a layer image copy of the editing we’ve done so far.
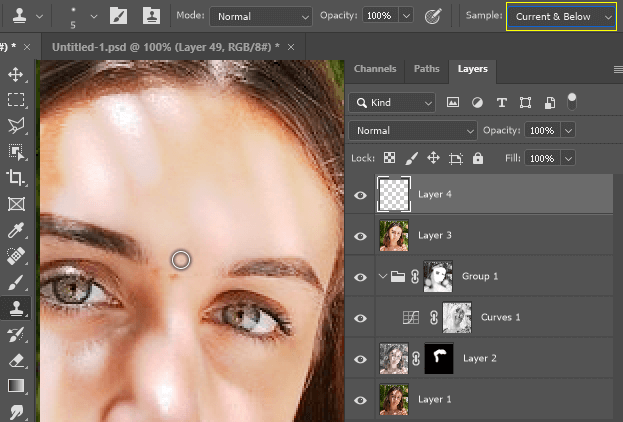
Bonus Tip: Create a new layer and select the Clone Stamp Tool. Change the dropdown to Current and Below. Hold Alt/Option and click on an area you want to source. Then, click on a blemish or unwanted shadow.
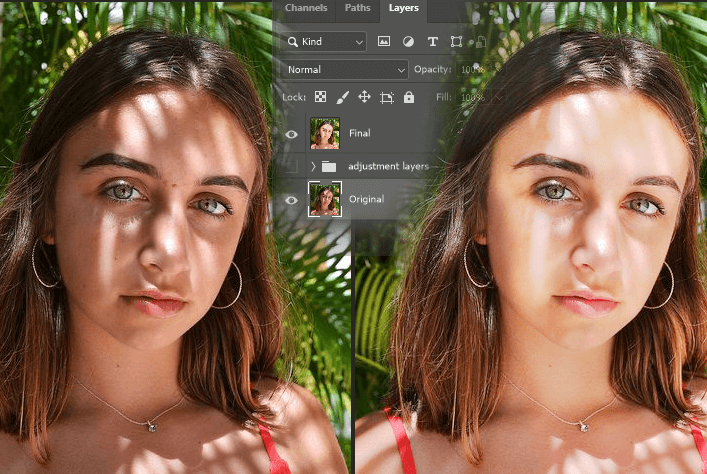
Here is our final comparison.
Final Thoughts
Now that you’ve completed the tutorial, you know how to add and remove shadows in Photoshop. With more control over shadows in our artwork, we can recreate reality.
Thank you so much for joining me in these projects. I’ll continue to help you learn all there is to know about Photoshop’s possibilities.
What year was it when you opened Photoshop for the first time? Let me know in the comments below.