
You can use the captioning feature to add subtitles in Adobe Premiere Pro. Create a new caption by going to “File” > “New” > “Captions.” Select the type of caption file you want to create (e.g., CEA-608, CEA-708, or SRT). Drag this caption to your timeline and double-click on it to add a caption.
I’m David, a video editor using Adobe Premiere Pro for decades. Adding subtitles to a video in Adobe Premiere Pro is a simple process that you can do using the captioning feature.
Therefore, in this article, I will explain how to add subtitles to a video, auto-generate captions or subtitles, make subtitles look finer in Adobe Premiere Pro, and show you the differences between subtitles and captions.
Table of Contents
Adding Subtitles to a Video in Premiere Pro
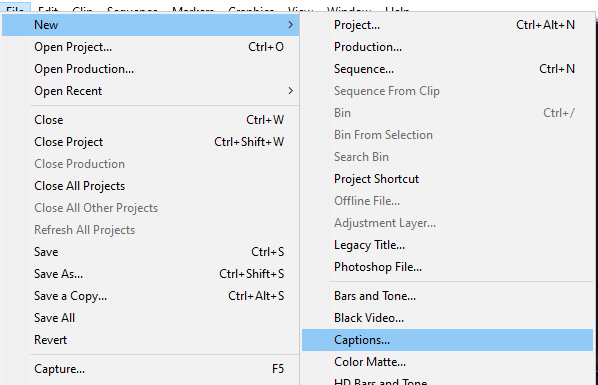
Create a new caption by going to the File menu > New > Captions. Or select the new item menu at the bottom right corner of the project panel, and then choose caption.
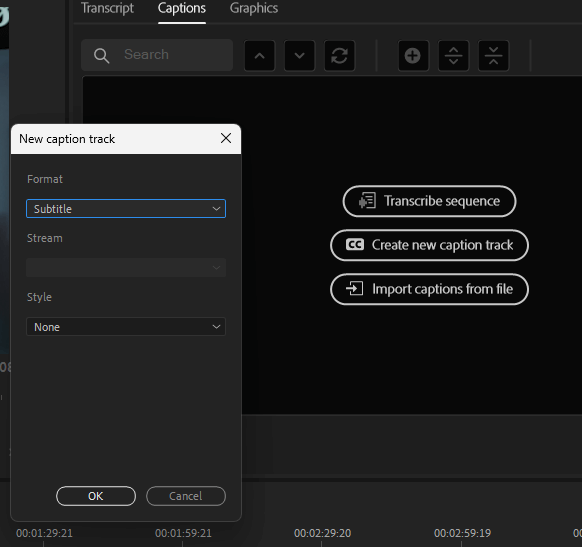
Immediately, a function box will pop up, where you will select the type of caption file you want to create (e.g., CEA-608, CEA-708, or SRT).
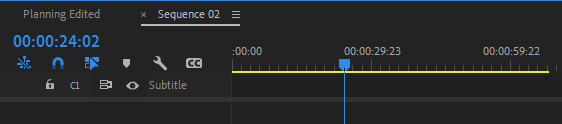
After that, this will show up in your project panel. Then drag it to your sequence timeline and double-click on it to add your subtitles manually.
You can also opt for different options. In the Captions panel, use the formatting options to adjust the appearance of the caption. You can click on the + icon to add more captions where you have your playhead.

The Differences Between Subtitles and Captions
Subtitles are text versions of the dialogue in a video that is typically used when the primary language of the dialogue is not the same as the primary language of the viewer.
Captions include dialogue and sound effects and are used to access viewers who are deaf or hard of hearing.
Subtitles are used to depict any spoken information, such as character dialogue, voice-over, and narrations. Subs are written transcripts of your video that are extremely useful for language translation and accessibility for individuals who do not have audio.
Captions include dialogue, narration, sound effects, and speaker identification. Captions can be in the same language as the spoken audio or translated into another language. Captions usually appear at the bottom of the screen, but they can also appear in other locations on the screen, such as the top.
The captioning feature can add and edit subtitles and captions in Adobe Premiere Pro. The process is generally the same, but the type of file you create and your formatting options will depend on whether you’re creating subtitles or captions.
How to Make The Subtitle Text Look Finer in Premiere Pro
You may modify the font size, type, and position in the Essential Graphics panel or from the text controls in the caption panel. (Note: Subtitles are frequently placed in the bottom center of videos).
Using the Fill tool, change the text color. Add a backdrop by choosing color, opacity, and space around the text. Click “OK” to save your changes. To preview the subtitle text, play the video in the Source Monitor.
How to Generate Caption (as a Subtitle) Automatically
To begin, import your footage into a sequence. Go to Window > Workspaces > Captions and Graphics to access the caption workspace. Go to the left side and look for the captions column under the text column.
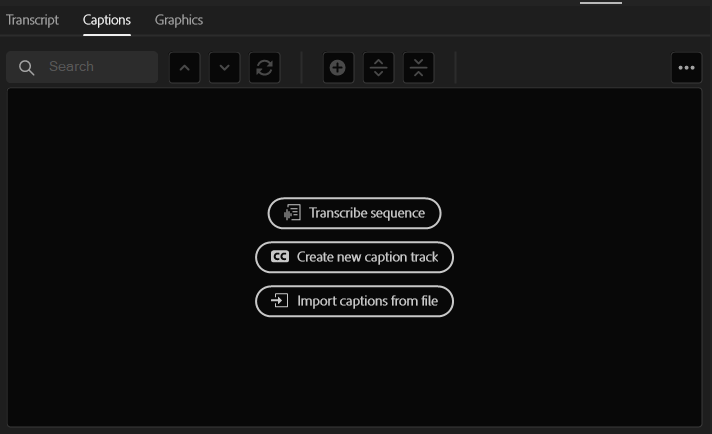
To begin an automatic transcription, go to the bottom of the black box and click on the Transcribe Sequence button.
In the window that appears, navigate to the Audio on Track: section and select whatever audio track you wish to examine.
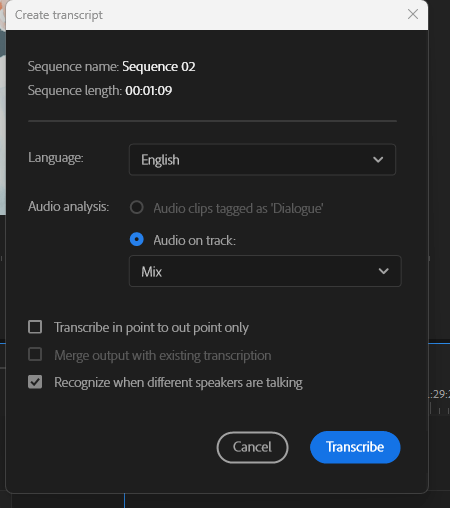
Select the checkbox “Recognize when distinct speakers are speaking” if two people are speaking. To begin the transcription process, click the Transcribe button.

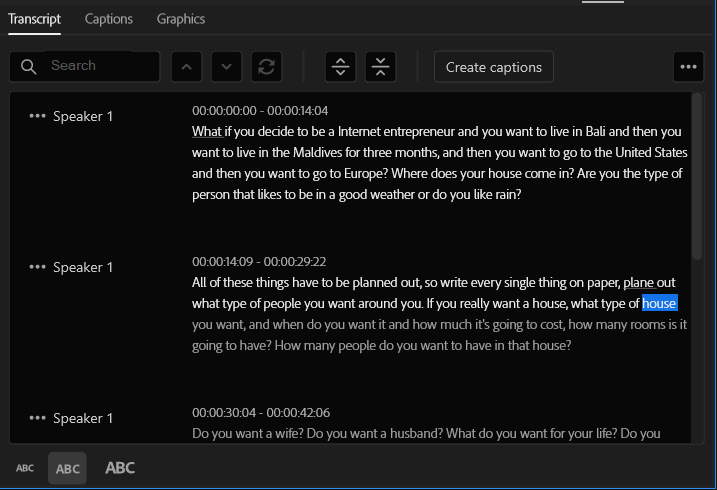
Premiere Pro will do its magic and automatically generate caption texts for your sequence. Note that they might be less than 100% correct; ensure you check through.
Now, to create captions, under the Transcript ta, click on create captions. In the dialogue box, adjust the settings just as it pleases you, then press Create. There you go!

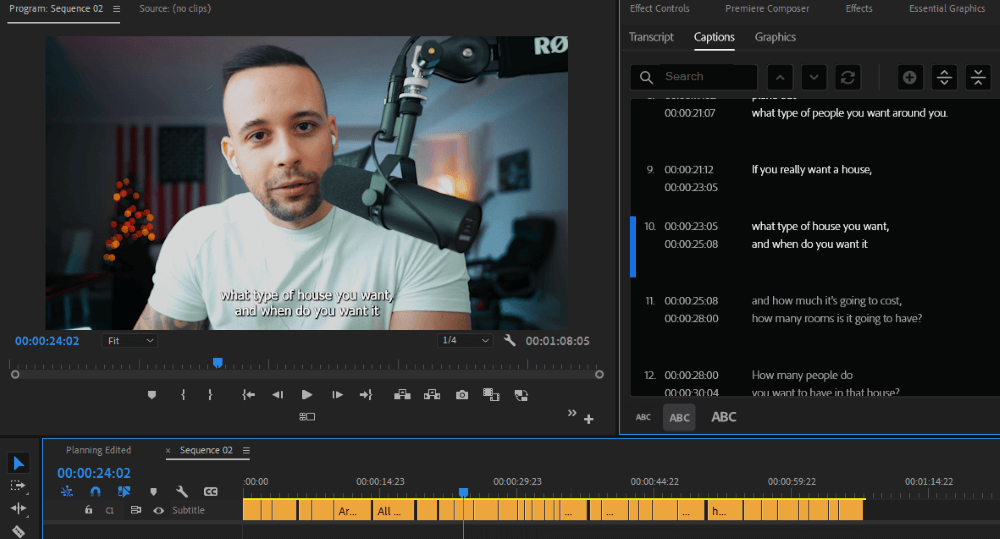
You can finetune and beautify your captions in the essential graphics.
Pro Tip: To beautify all your captions at once, highlight all the captions, then head over to Essential Graphics Panel to customize them to your taste.
Conclusion
Adding subtitles in Adobe Premiere Pro is a straightforward process you can complete using the captioning feature. With this feature, you can create new subtitle files, place them in the timeline, and format them to your liking.
Whether you are working on a video project for work or personal use, adding subtitles can help make your video more accessible to a broader audience.
If you’re having trouble creating the subtitles or captions effectively in Adobe Premiere Pro, please leave your message in the comment section.