
Ever wonder how to stylize your images more professionally? What about crafting a customized texture overlay or background for your shoot? With the Texture tools in Photoshop, we can accomplish just that, and you won’t even have to worry about making anything from scratch.
My name is Skyler, I currently work as a freelance sequential artist. In addition to a background in illustration, I’ve also worked as a director and photographer for local commercial shoots so I’ll be able to show you how to work with texture overlays like a pro.
Photoshop lets us add these textures to virtually any kind of backdrop, so we’ll have lots of creative freedom. The techniques I’ll show you today are quick and easy. You’ll surely admire the fantastic results.
Table of Contents
Step 1: Make Your Selection
The first step to adding that unique stylized texture is selecting an area to mask. The Masking Layer will allow us to alter the background in a way that won’t affect our model in the foreground.
I’ll be using Photoshop’s Quick Selection Tool, but you’re free to use any of the Selection tools the program offers.

The Quick Selection Tool allows you to use the selection feature like a brush, so all you have to do is paint over your subject. Once you have your selection, navigate to and click the Select and Mask button in the overhead panel.

This will open up the properties, where you’ll see a preview of your image. From here you can click on the arrow down next to your preview, and a submenu will appear. If you select Marching Ants from this submenu, then It will allow you to better view the selection you’ve made before committing to masking.

As you can see now, you’re better able to see your selection with this enabled.
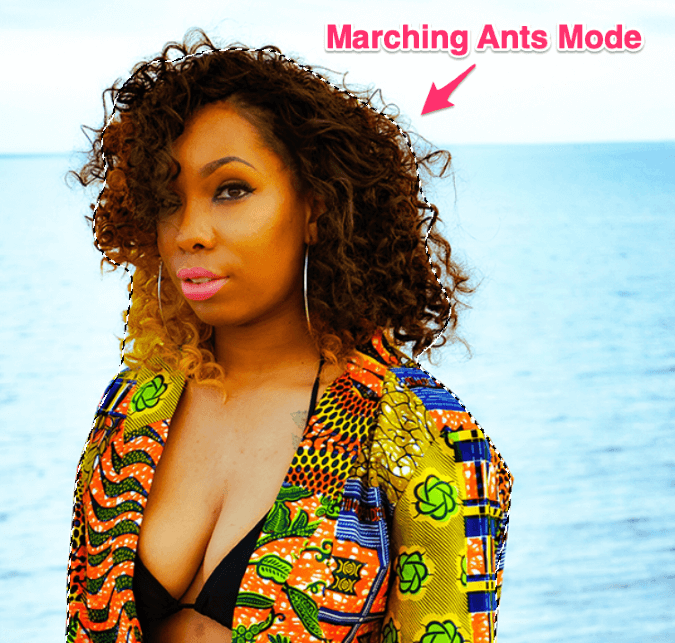
This further allows you to check for any mistakes or misselected areas. Once you’re satisfied with your new selection, we can move forward.
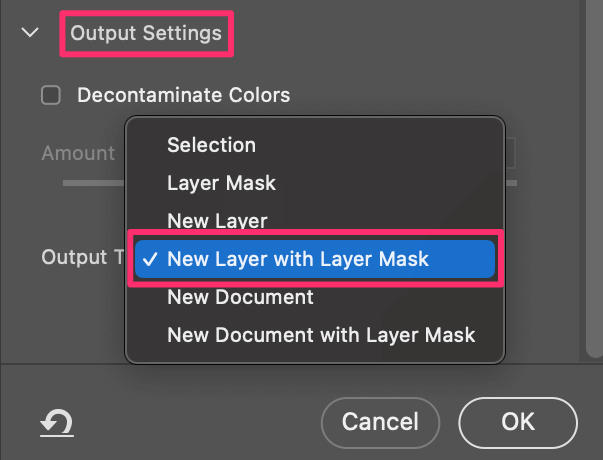
Double-check that your Output Settings are set to New Layer with Layer Mask before clicking OK.
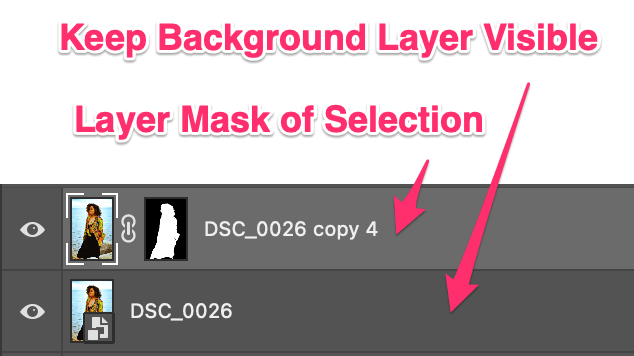
Done! You’ve successfully created your Layer Mask.
Step 2: Texturing & Blending
Great! Now, you can go ahead and import your desired texture. If you’ve got a texture already in mind, then go ahead and drag it into your project. If you don’t, there are plenty of resources online that offer free vector or stock images for textured overlays.
Adobe stock is one of the most obvious choices, so give that a look for inspiration at least before searching elsewhere.
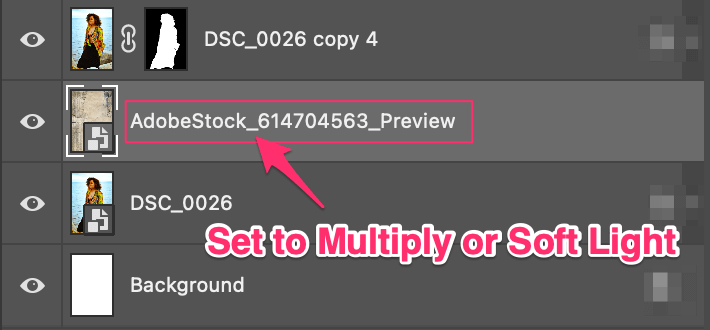
Once you’ve got your choice of textures properly loaded into your project, you’ll want to make sure it’s positioned between your Masking Layer and your original image, as shown below.
Now we get to experiment with blending and overlay modes! Depending on the tone and contrast of your selected texture, you may prefer a different mode.
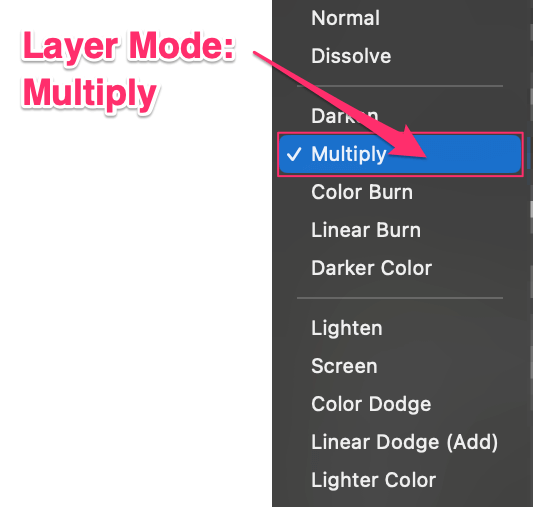
Above is a preview of all the options we have for Layer Modes. My choice of texture called for me to set my layer mode to Multiply, though Soft Light was a very close second! I suggest flipping through each option and experimenting with which overlay is appropriate in your given situation.
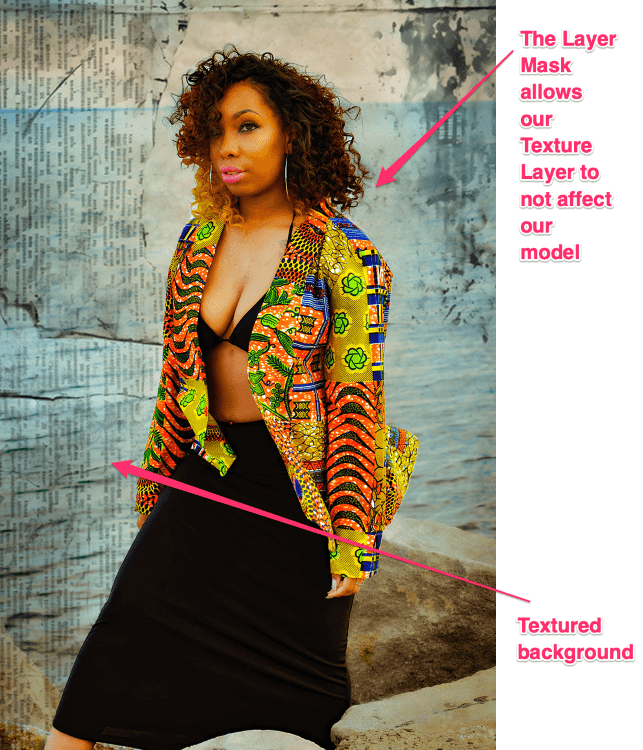
This is how my texture looks in Multiply Mode with the Layer Mask in effect. I think it turned out great, especially given how simple and easy it was to create such a great effect!
Conclusion
There you go! Adding texture to an image in Photoshop is basically blending two images together. Now that you’ve expanded your design options, what will you do next? There are so many amazing effects and illusions you can create with these methods.
I’m sure you’ll have no problem taking your illustrations, photographs, and general creativity to the next level with these techniques in your tool belt. Happy designing!