
Affinity Photo
Summary
Affinity Photo is a powerful and affordable image editor that is directly competing with Photoshop for enthusiasts and professional users. It has a well-designed, customizable interface and performs most editing tasks rapidly, although it may take some time to adapt to the ‘personas’ concept that divides the app into sections. Drawing and painting tools are responsive and quite excellent, as are the vector drawing tools, which are also compatible with Affinity Designer.
Affinity Photo is still fairly new in terms of development, but the team behind it is constantly working on new features and bug fixes. The upgrade from version 1.0 to version 2.0 fixed most of the issues that I experienced in my earlier testing and added a bunch of great new tools. Best of all, Affinity is available as a one-time purchase, no subscription required.
What I Like: Complete RAW workflow. Powerful image editing tools. Excellent drawing & vector tools. Customizable interface. No subscription required.
What I Don’t Like: Lacking photo library management. No AI denoising or upscaling. Mobile app for iPad only.
Is Affinity Photo worth it?
Yes, Affinity Photo is definitely worth the purchase price, especially when you consider that it’s a one-time purchase with no subscription required. It provides excellent value for both enthusiasts and professional users who are looking for a high-quality photo editor, although it lacks a few of the most modern tools available such as AI denoising and upscaling.
Do any professionals use Affinity Photo?
Is Affinity as good as Lightroom?
Affinity Photo is a great app, but it’s not really intended to be a direct competitor to Lightroom. Affinity Photo and Lightroom both handle RAW photo development, but Lightroom does have a few advantages, such as AI-powered denoising and much better masking options. Lightroom also has photo library management, but it is lacking the pixel-based editing tools found in Affinity Photo.
If you’re just looking for a dedicated RAW development app, then Lightroom is a better choice, but Affinity Photo provides a more complete editing workflow in a single app.
Table of Contents
Why Trust Me for This Review
Hi, my name is Thomas Boldt, and I’ve worked with many different image editors in my career as a graphic designer and a professional photographer. My experience ranges from small open-source editors to industry-standard software suites, and that has given me a unique perspective on what a good editor can accomplish – as well as how frustrating a poorly-designed one can be.
During my training as a graphic designer, we spent a fair amount of time both using these software packages and understanding the logic that went into the design of their user interfaces, and that also helps me to separate out the good programs from the bad. I’m always on the lookout for an up-and-coming program that can help improve my workflow, so I treat all my image editor reviews as though I might consider using the program myself.
Disclaimer: Serif has given me no compensation or consideration for the writing of this review, and they have had no editorial input or control over the final results.
The Detailed Review of Affinity Photo
Affinity Photo is a large and complex program with a wide range of features, and we don’t have room to look at them all in this review. We’ll look at the overall interface design, as well as how Affinity handles RAW adjustments, general pixel-based editing, drawing and painting, and HDR imagery.
To get a complete rundown of the features offered in Affinity Photo, you can view the full feature list here.
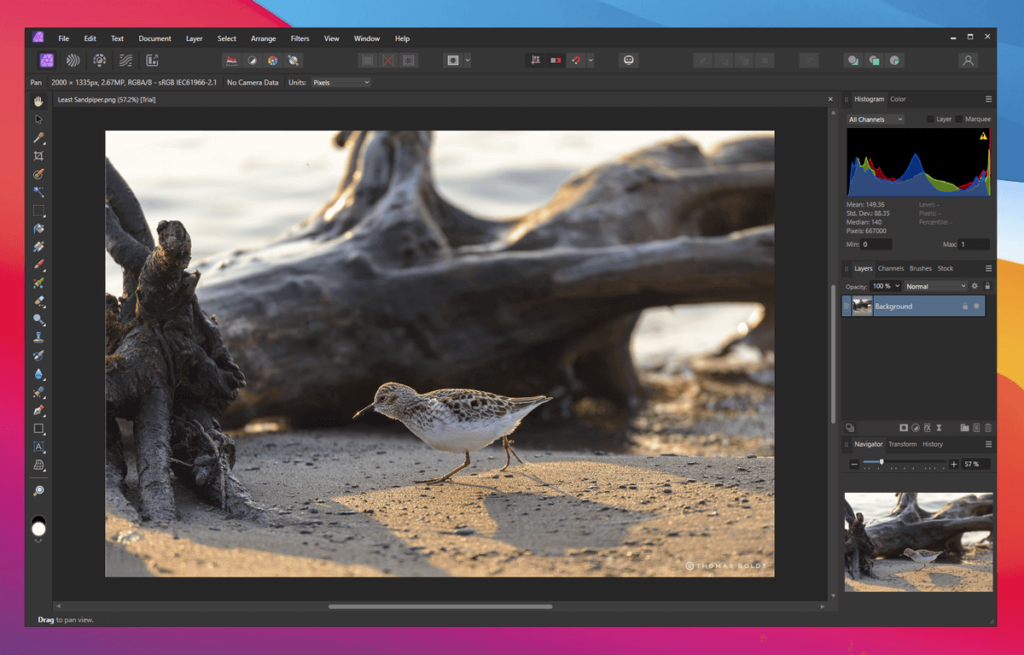
Note: The screenshots in the following review were taken with the Windows version of the software, but the Mac version should be almost the same, with only a few slight interface variations. All photos used in the screenshots are mine!
User Interface
Affinity Photo is broken down into five modules that Serif calls ‘personas,’ which are accessed in the top left and focused on particular tasks: Photo, Liquify, Develop, Tone Mapping, and Export. This makes it possible to keep the interface as minimal as possible while still providing all the tools necessary for a full range of editing tasks.
Most of the time, users will be in the Develop persona for working with RAW images or the Photo persona for general editing, drawing, and painting. The Liquify persona is exclusively dedicated to Affinity’s version of the Liquify/Mesh Warp tool, and Tone Mapping is primarily designed for creating and working with HDR images. The final persona, Export, is fairly self-explanatory since it allows you to export your finished masterpiece in a variety of different formats.
Once you’re used to the different personas, the system works fairly well, although there are a couple of aspects that could be improved. If you have no images open and you want to start an HDR merge, switching to the Tone Mapping persona could ask you which files you want to open – but instead, it simply tells you to select a pixel layer first. You can use the New HDR Merge command in the File menu, but it seems like the Tone Mapping button should do the same thing.
Speaking of buttons, many photo editing apps followed Adobe’s lead and removed all the color from their interface icons, but this can actually have a negative impact on how easily people can distinguish between them. Affinity’s added color doesn’t distract from your main photo and helps new users identify the correct icon more quickly – at least until you learn the keyboard shortcuts!
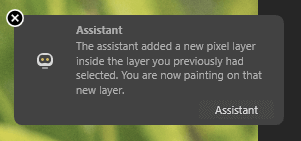
Another unique aspect of Affinity Photo’s user interface/experience is the Assistant tool. This allows you to customize the program’s responses to certain events, as you can see in the screenshot of the Assistant Settings below.
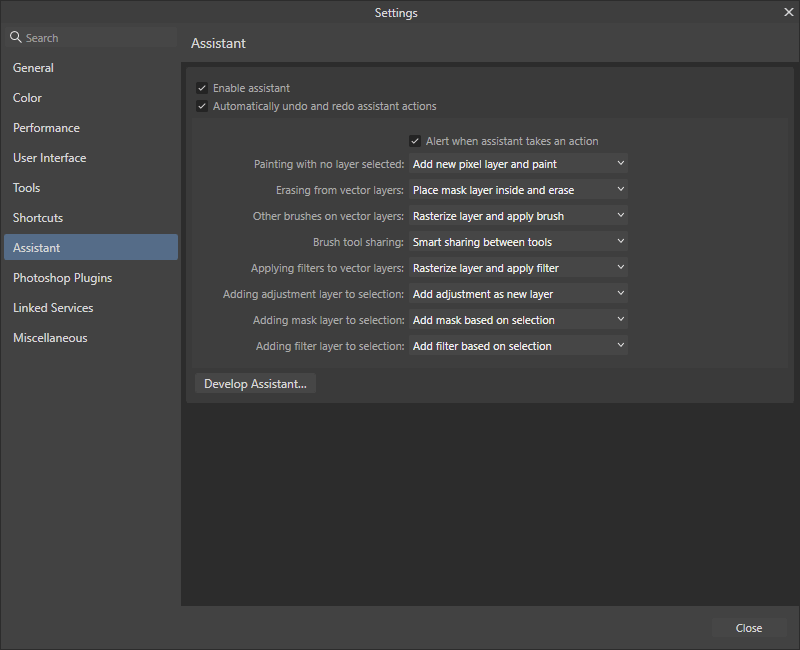
I found most of the default settings to be quite useful, but it’s nice to have the option to customize them if you prefer a different response, or you can simply disable the whole thing if you want to handle everything manually.
All too often, I switch to the paintbrush using keyboard shortcuts but then forget to change the layer I’m working on, so I definitely don’t want the ‘Other brushes on vector layer’ setting to automatically rasterize it – I’d rather it remind me not to work so fast that I lose track of important details!
My personal take: The personas system can take a bit of getting used to, especially when switching between Photo and Develop, but it doesn’t take long. Little touches like the Assistant show that Serif is serious about providing a good user experience that incorporates user feedback, and other developers would be wise to take note.
RAW Editing
For the most part, the RAW editing tools found in Affinity Photo’s Develop persona are excellent, covering all the adjustments and tools you would expect from a professional-grade RAW image editor. The manual tools are simple to use and effective, although if you’re switching from Lightroom, it may take you a bit of time to get used to the way Affinity handles exposure adjustments – including the fact that there is no automatic exposure adjustment option in this section.
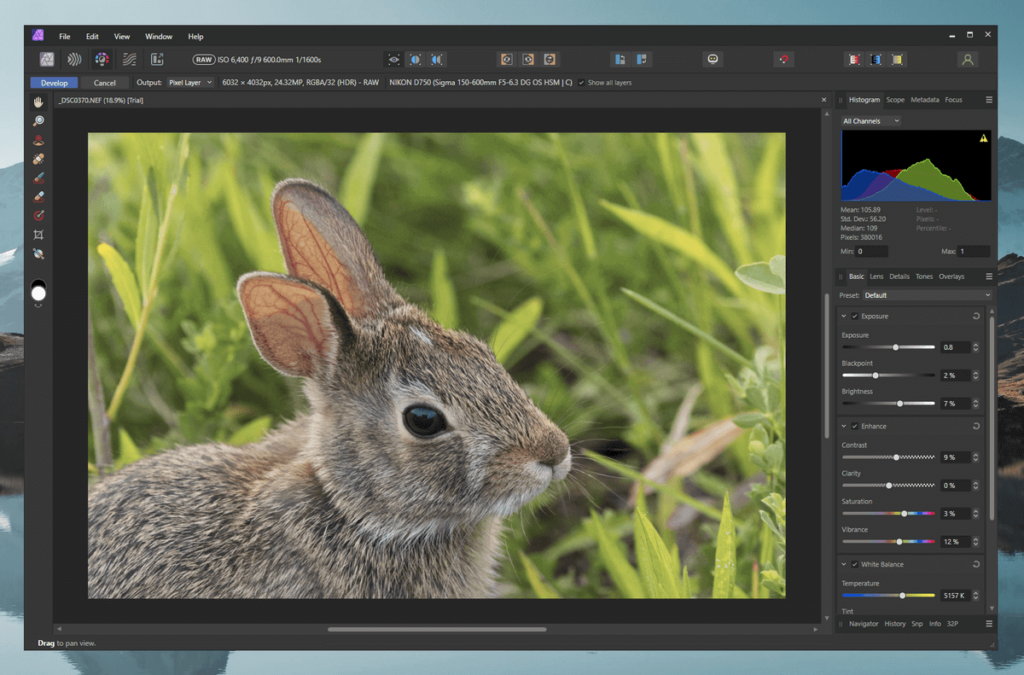
Since Serif seems to like breaking out of the Adobe mold, there’s even an image review option that is not commonly found in other photo editors: a unique set of ‘Scope’ histograms, which are typically used in video editing software. After watching the tutorial instructions about how the various ‘scopes’ work, I’m still not quite sure why you would want to use them, but they’re certainly interesting.
The latest version of Affinity Photo has resolved most of the speed issues that I experienced when working with RAW files in the previous version, even when working on high-resolution images.
The brush-based masking tools – known as ‘overlays’ in the Develop persona – are now perfectly responsive, although you still can’t modify gradient overlays using brushes. I also noticed some slight delays when using the Blemish Removal Tool, but it didn’t make the tool unusable.
The only big thing that’s missing from Affinity Photo’s Develop persona is a modern noise removal algorithm like the ones you find in Adobe Camera Raw, Topaz Denoise, and DxO PhotoLab. This isn’t a dealbreaker, but it does mean that you need to include another app in your workflow if you want to use the latest denoising techniques.
To their credit, the development team at Serif is constantly working on updating the program, having already released one major update to version 2.0, filled with bug fixes and even a brand-new vector tool. AI denoising tools are still relatively new, so I hope/assume that a similar feature will be added soon.
My personal take: It took me a while to get used to the way Affinity Photo handles exposure adjustments in the Develop persona, and I still prefer Lightroom’s system. I never thought I’d miss an automatic exposure adjustment option, but it’s a minor issue when compared to the quality of the rest of the app.
General Image Editing
Pixel-based photo edits and layer-based compositions are handled in the Photo persona, and you can also switch to the Liquify persona if you need the detailed warping tools typically used in fashion photo retouching. Amusingly enough, you’ll even find a full range of automatic adjustments, although they can only be applied to pixel layers.
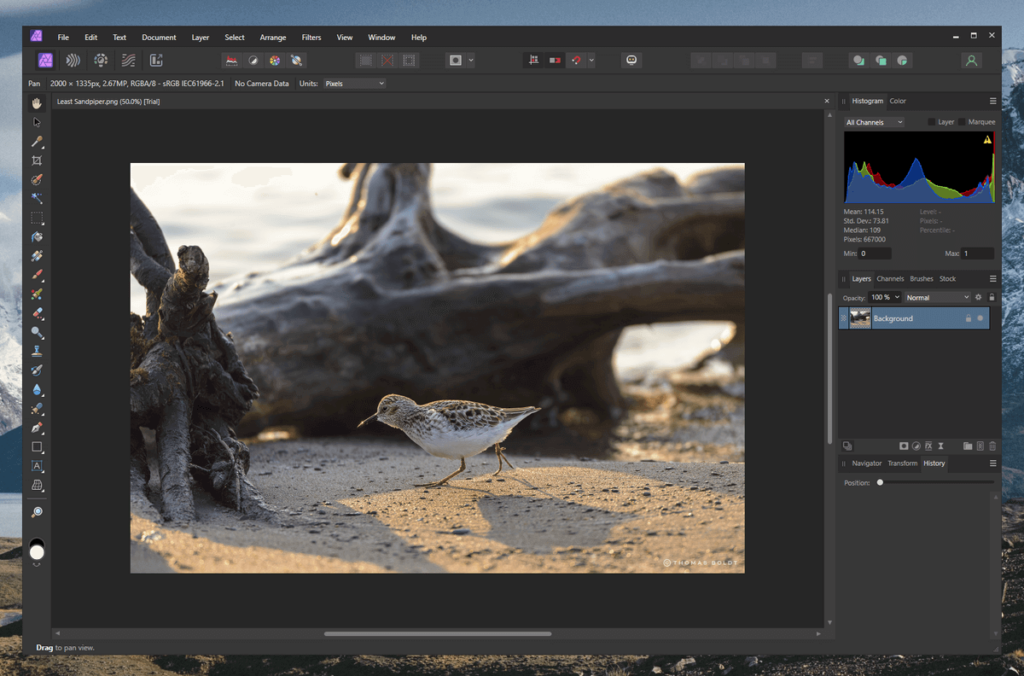
All the tools that I worked with were quite responsive on a 24-megapixel image and didn’t show any delays in applying their effects, even in the demanding Liquify persona, which is a nice improvement over the previous version. I’m still not sure why Serif felt it was necessary to devote an entire persona/module to the Liquify tool, but they seem to have optimized it in the latest version, although older computers may still struggle a bit when making large warps.
There are a number of other handy tools included in Affinity Photo for quickly accomplishing common photography tasks, such as panorama stitching, focus stacking, and HDR merging (more on HDR in the final section).
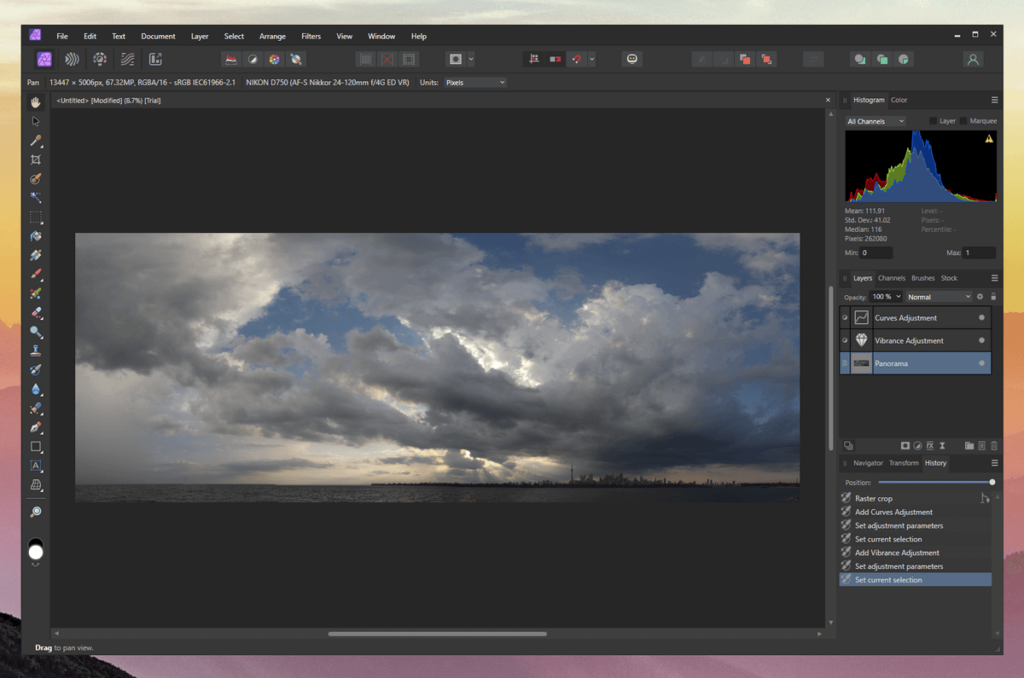
Panorama stitching was simple, easy, and effective, and gave me an opportunity to test how well Affinity Photo handles larger files (answer: without any trouble). Despite my initial misgivings at the preview appearance, it showed during the stitching process the final product was perfectly aligned, and the result was excellent.
My personal take: Affinity Photo has excellent editing tools overall, although Serif seems to be a bit slow to incorporate more automatic tools into Affinity Photo. I hope that’s just because they’re taking the time to perfect them before they launch them and not because they’re falling behind. Automatic object and sky selections would be a nice addition because even though they’re not essential tools, they can really speed up the masking process.
Drawing & Painting
I’m not really much of a freehand artist, but a big part of Affinity Photo is a surprisingly comprehensive array of brushes that can be used for digital painting. Serif originally partnered with digital painting specialists DAUB to include quite a few sets of DAUB-designed brushes, but they have since expanded their brush set even further to cover just about any physical media you can imagine.

Additionally, if you want to use vectors as masks or to create illustrations, the Photo persona includes an excellent set of vector drawing tools. This is at least partly due to one of Serif’s other major apps, Affinity Designer, which is a vector-based illustration and layout program. This gives them some solid working experience with vector drawing, and it shows when using their tools.
My personal take: I don’t know if the brush tools here can stand up to a dedicated drawing and painting app like Krita or Procreate, but they’re more than enough for most users.
Tone Mapping
The Tone Mapping persona is an interesting addition to the program, allowing users to work with true 32-bit HDR (high dynamic range) images combined from several bracketed source images or to create an HDR-like effect from a single image.
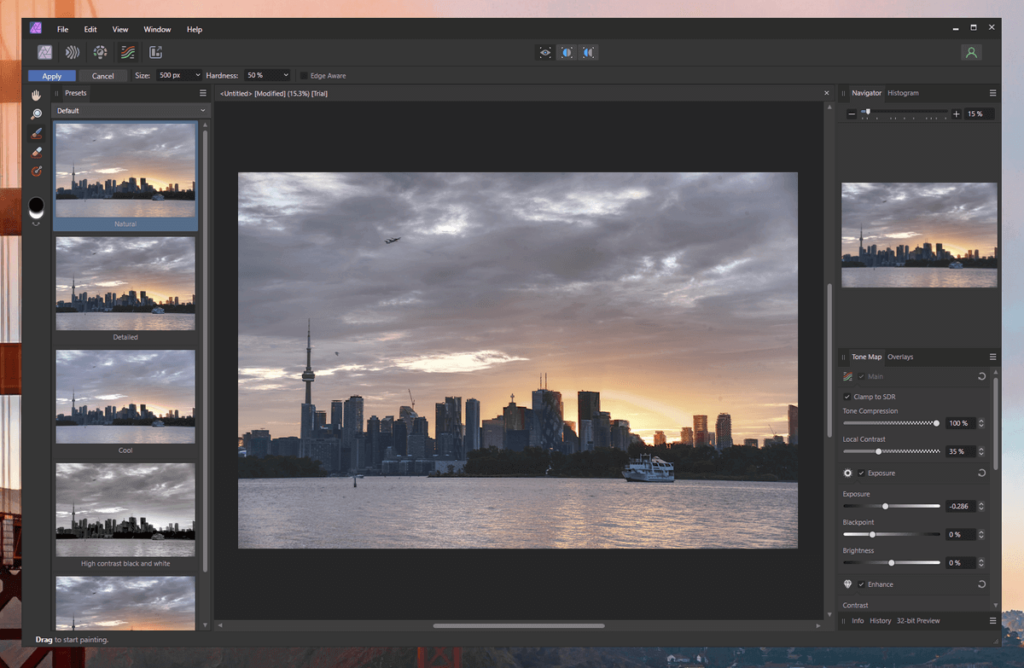
The initial loading of the Tone Mapping persona can take a bit of time, but it can produce some interesting results very quickly, even from a single image. I’m not personally a big fan of the typical HDR look, as they often seem excessively over-processed, as you can see when browsing through the preset options.
(For those of you curious about HDR, you may be interested in reading our reviews on Aurora HDR and Photomatix Pro, two of the most popular HDR software.)
Unfortunately, the Tone Mapping persona suffers from the same masking issues found in the Develop persona. It’s easy enough to work with a brush to mask out specific areas to apply localized effects, and it’s easy enough to apply a gradient to an image to emulate the effect of a graduated filter.
Yet gradient masks and brush masks are treated as separate entities, and you can’t edit a gradient mask with a brush. For example, if you want to correct the sky only to bring out interesting details in clouds, but there is an object in the foreground that intersects with the horizon, the gradient mask will be applied to it, too, because there’s no way to adjust it.
The Tone Mapping persona is also the only place where I noticed lag when using the overlay masking tools, which was a bit disappointing.
My personal take: A full 32-bit workflow is essential for protecting all the color detail in an HDR image, and Affinity Photo handles it almost flawlessly, with the exception of some lag when masking.
Reasons Behind My Ratings
Features: 4.5/5
Overall, Affinity Photo is an excellent image editor with all the tools you’d expect from a professional-grade program. The combination of RAW development, pixel-based editing, drawing and painting, and HDR editing is hard to beat in any other single app, and all the tools work quite well.
There are only a few drawbacks that prevent Affinity Photo from being a perfect 5 out of 5, such as the lack of modern AI denoising and automatic selection tools, but Serif has a habit of releasing new features as free updates for existing customers, so it may only be a matter of time.
Price: 5/5
One of the most appealing aspects of Affinity Photo is how affordable it is. At just $69.99 USD for a standalone one-time purchase, it provides an impressive amount of value for your dollar. Users who purchase version 2.0+ will also get any future updates made to version 2 for free, which provides even better value since Serif is constantly in the process of developing new features.
This price point makes it cheaper than many competitors, and it’s hard to find another single app that offers better value.
Ease of Use: 4/5
In general, Affinity Photo is quite easy to use once you get used to the general interface layout. The interface is clean and uncluttered, which makes editing easy, and it can be customized to meet your particular needs. The customizable Assistant tool also provides an impressive degree of control over how the program responds to your input, and other developers would do well to implement something similar in their programs.
Unfortunately, the latest version of Affinity seems to be moving backward when it comes to helping new users since Serif has removed the helpful introduction and tutorial links that used to display when you first loaded the app. This isn’t a big deal since there’s still plenty of content available in the Help menu, but I think it’s a strange choice.
Support: 4/5
Serif has provided an excellent and extremely comprehensive range of video tutorials about how to use the software, and there is an active forum and social media community of users who seem quite happy to help other users. Perhaps because Affinity is still relatively new, there aren’t many tutorials or other supporting information available from third-party sources.
I never found it necessary to do so, but if you need to get in touch with Serif’s technical support, it appears that the forum is the only option. While I appreciate the value of crowd-sourced help, it would be nice to have a more direct connection to support staff via a ticket system.
Affinity Photo Alternatives
Adobe Photoshop (Windows / Mac)
Photoshop is the undisputed leader of the image editing world, but it’s had a much longer development cycle than Affinity Photo. If you’re looking for a professional-quality image editor that has an even more comprehensive feature set than Affinity Photo, Photoshop is an excellent choice. It has a huge amount of tutorials and support resources to help you learn, although it’s possible that you’ll never learn every secret it has to offer.
Adobe Photoshop Elements (Windows / Mac)
Photoshop Elements is the younger cousin of the full version of Photoshop, aimed at more casual users who still want powerful image editing options. For most typical image editing purposes, Photoshop Elements will do the job. It’s more expensive than Affinity Photo at $99.99 USD for a one-time perpetual license, or you can upgrade from a previous version for $79.99.
Corel PaintShop Pro (Windows)
PaintShop Pro is another competitor for Photoshop’s image editing crown, although geared towards more casual users. It’s not quite as well-developed as Photoshop or Affinity Photo, but it does have some excellent digital painting and image creation options.
For those who are wondering whether Luminar is better than Affinity Photo, you can read our detailed comparison of Luminar vs Affinity Photo here.
Final Verdict
Affinity Photo is a powerful image editing application that provides an excellent balance of professional-level features and affordability. If you’re looking for a serious photo editor and you don’t want to use Photoshop, then Affinity Photo is currently the best option available. Casual beginners to the world of photo editing might be a bit overwhelmed at first, but Affinity Photo is
It’s not quite ready for the title of ‘Photoshop killer’ that some photographers have given it, but it’s a very promising program with a great development team that is dedicated to producing a quality image editing experience.
Thanks for the article. I have been using Photoshop CS5 for many years and have had to upgrade my laptop. Unfortunately, I can’t now access the download. I had been looking for a good alternative as I have some psd files that I need to be able to edit with the layers. This is a big concern for me as there are hours of work on the files and they will be needed again in the future.
With a discount on the price, I will certainly purchase it as I can’t afford the monthly fee for Photoshop.
Hi Angela, glad to hear that you’ve found a good solution! I agree that Photoshop’s monthly cost can be a real sticking point, which is why it’s nice to have Affinity Photo available as a good alternative!
How does Affinity handle (or not) Photoshop files?
Hi Dave, Affinity does a decent job with PSD files, although some of the newer features that get added to Photoshop may produce files that use features that Affinity can’t handle. If you’re just talking about basic image layers, then there should be no issues.
Great review of Affinity Photo. I’m also using Affinity Photo on a daily basis. if you compare Affinity Photo with Photoshop, you will find that it can do approx. 95% of the same things. Affinity Photo is really stable, except when handling very large files, then it gets a bit slow compared to PS. However, I really love the live brush feature in Affinity Photo. It is such a relief to see the result before you do the actual brush strokes.
the interactions with XP-Pen graphic tablets such as Artist Series could be improved. In particular, there’s no way to properly use the brushes properties of pressure and tilt. The brushes customization self, is very complicated and inadequate, so it works bettere with mouse and keyboard instead than a graphic tablet.
Thanks, Kangan! Glad to hear that Affinity is working well for you, with the exception of the graphics tablets. I’m not familiar with that tablet series, but perhaps the newest version of Affinity will correct any issues.
The latest version of Affinity Photo, 1.7 (2019), clams it has become faster with Raw files, but I don’t have Photoshop to do a comparison with. This is achieved by better use of the graphics processor.
Lightroom did the same in 2016, the first release in 2016 had problems and ran slower on some PCs, but by the second release, also in 2016, these problems were solved.
In the case of Mac computers it is by Affinity’s use of Apples ‘Metal’ graphic processor interface, so the change may not benefit users using versions of the operating system earlier than 10.14 (Mojave).
I would be very interested in speed comparisons using Affinity version 1.7 and the latest version of Photoshop on Mac computers running Mojave.
I am also curious about a comparison on PCs.
Hi Bryan, benchmarking this kind of software can be very tricky for most users! There are a lot of variables that make direct comparisons almost impossible between Mac and PC, and things get even more complex when you add in discrete graphics cards that can provide all kinds of acceleration now.
The only reliable Photoshop benchmarking system I know of is created by Puget Systems, a workstation computer builder, but I don’t think they have a similar system for Affinity so the comparison goes out the window.
I typically use DxO for my Raw conversion and then save as a tif and edit in Photoshop Elements – primarily as a tool for plugins – Nik, Topaz, Luminar, Photomatix.
However, I get frustrated that for many functions it will only support 8 bit. Do you recommend Affinity as a replacement for PSE and would it work with my flow? I am not a pro by any means but do want good quality and don’t want to pay monthly fees.
Hi Mark, I think it’s definitely worth considering Affinity for its 16-bit editing support, but you might not get the same level of plugin support from Affinity that you get from Elements. Technically, Affinity can use Photoshop plugins, but you might run into unexpected issues because their plugin support is unofficial.
I’d recommend experimenting with the free trial since you’ll be able to test if the plugins you need will work properly.
I would adopt this software in a flash if it supported FIT file format, a very common format for astrophotography cameras. BUT sadly no!!
I’ve actually never heard of that format before! Why does astrophotography need its own file format?
Hi Thomas, I would like your advice here. I am just a home user trying to create some art work of family photos such as taking a color photo and turning it into a pencil sketch. I also would like to explore other art type modifications but my publishing background is Microsoft Publisher which I handle at an above average level. I definitely do not want to jump to Photoshop because I do not need all that it offers and the learning would be slow for me. I have Windows 7 and would like to know what would be your suggestion for an above “average” photo editing software easy to use and learn and also one that would have a one time payment to it. Thanks
I would definitely suggest Photoshop Elements. It will do everything you want and more and it’s easy to learn (with lots of web help, tutorials and books available if you need it. My wife, who is not a photographer or artist, took to it easily and in no time was coming up with some really nice stuff. For only $100 bucks (cheaper from Adobe when they have occasional specials and from other sources) it’s yours forever without a subscription fee for Photoshop, most of whose features you’ll never use.
Rick, I think Arthur is right – Photoshop Elements sounds like a better fit for what you need than Affinity Photo. It has a lot of different filters and tools similar to the pencil sketch method that you’re looking for, it’s quite simple to use in Guided mode, and it’s available as a one-time purchase. Check out my review of it here: https://www.softwarehow.com/photoshop-elements-review/