
If you’ve heard of Adobe Photoshop actions, then you know how much it can optimize your editing workflow to save time and energy. Imagine you have to edit 15 photos the same way – instead of going through them one by one, you can create a Photoshop action and apply it to the whole batch!
My name is Skyler, and I’ve been using Photoshop personally and professionally for well over a decade. Today I’ll be showing you how to create and apply actions to a batch of images in Adobe Photoshop.
With so many potential applications for this tool, you’ve got the world at your fingertips! You’ll be able to save your custom series of shortcuts and apply them at the click of a button to one or multiple images.
If this sounds like a prospective time saver for you, you’ll want to follow along below to learn how to use this tool for your edits and manipulations in the future!
Table of Contents
How to Create an Action in Photoshop
You’ll have to have a series of commands in mind that you’d like to record and apply to your project to begin this process. For this example, I’ll be creating an action that edits and exports a batch of images according to my preassigned preferences.
First, you’ll have to bring up the Actions Panel. You can do this by navigating to Window > Actions.

Once you’ve summoned this panel, you’ll see a set of premade actions Photoshop provides us with, in addition to the function to make your new actions.

Once you’re ready to begin making your custom action, you’ll press the Create New Action button. This resembles a box with a plus sign in the middle and can be found in the options bar at the bottom of your Actions Panel.
Then Photoshop will begin Recording your Actions. This will be indicated primarily by the recording button turning red to display that you’re live and in progress. Once you’ve finished your series of commands, you can hit the Escape key or select the Stop Recording button.
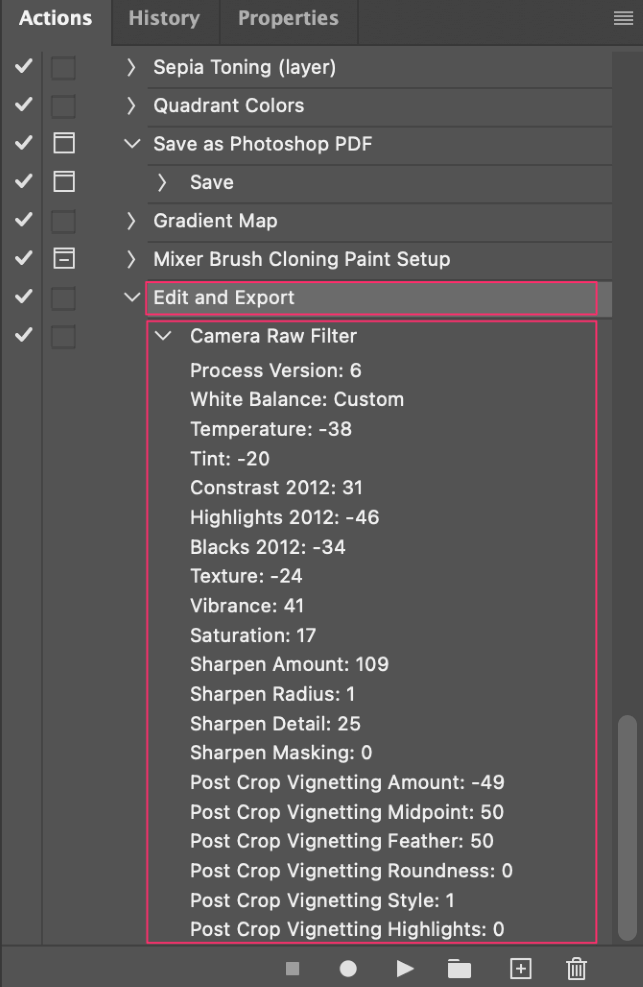
Here’s what the Action I created looks like when fully expanded. You can see every step of the process highlighted thanks to Photoshop’s recording.
Now we’re ready to apply this action to a batch!
Applying the Action to a Batch of Images
The first step to applying this action to a batch of photos is ensuring they’re all in the same folder. Once you’ve done this, we can move on to applying the action to your batch of images.

First, navigate to File > Automate > Batch. Your list of actions will pop up to choose from.
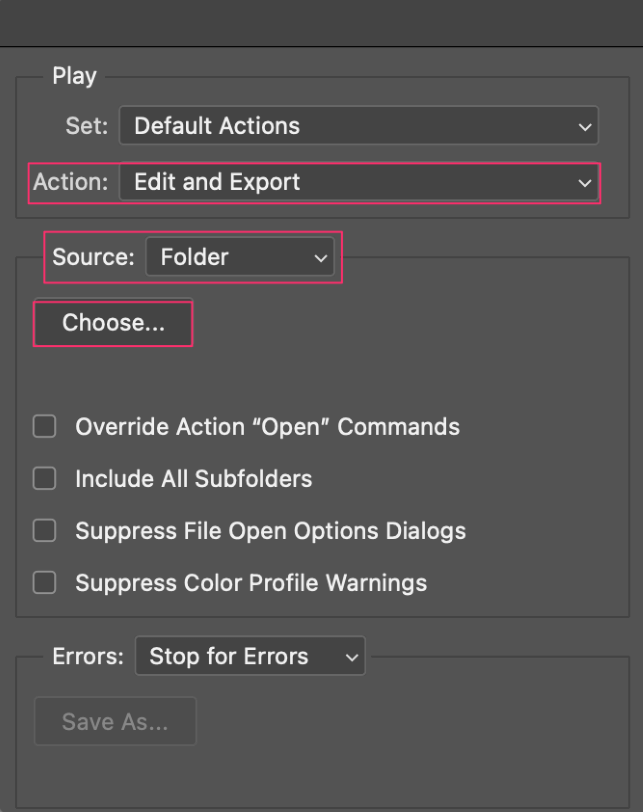
You’ll then want to set your source to “Folder” and press the Choose button to assign the folder you intend to Batch edit.
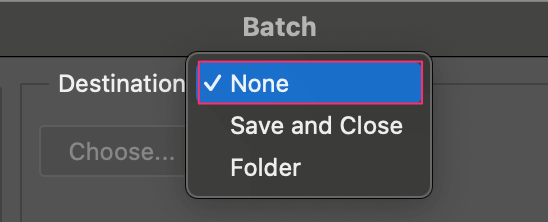
The last step is setting your Destination – this is where your batch of images will be saved. If you choose None, then it will save to the original folder. Otherwise, you can choose from another folder, or simply ask it to save and close each image for later use.
Now you’ve set up your batch and you’re ready to apply your actions to your images. Just press OK and Photoshop will start working its magic!
Final Words
No more tediously editing similar images one by one – now you can create a single action and apply it to the whole batch just like that!
So now that you’ve optimized your editing workflow and saved yourself a tremendous amount of time, what will you do with all that extra creative energy?