
Blending images in Photoshop is an art in and of itself. There are many tools you can use to blend image layers. You can blend layers and target specific areas using layer masks and adjustment layers.
In this article, I’ll show you how to blend images. There are countless ways to do this, but the best methods involve multiple steps.
Table of Contents
Key Takeaways
- Blending images often involves masking your layer(s). Whenever it comes to masks, remember that black conceals and white reveals.
- You can paint with black and white on a layer mask thumbnail, to specifically choose what is concealed and what is revealed.
- You can use the Gradient tool with black and white on a layer mask to fade its visibility.
- Cutting out your image may be one of the most important steps. You can use Select Subject, the Polygonal Lasso tool, the Eraser, Select Color Range, and more.
Let’s dive into this screenshot tutorial for blending images.
How to Overlay Images in Photoshop with Masks and Selections
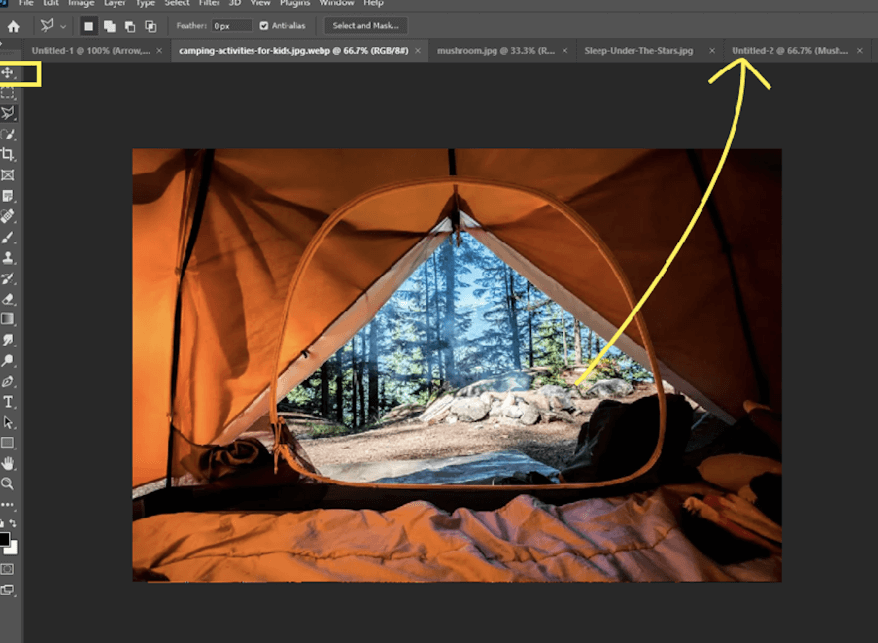
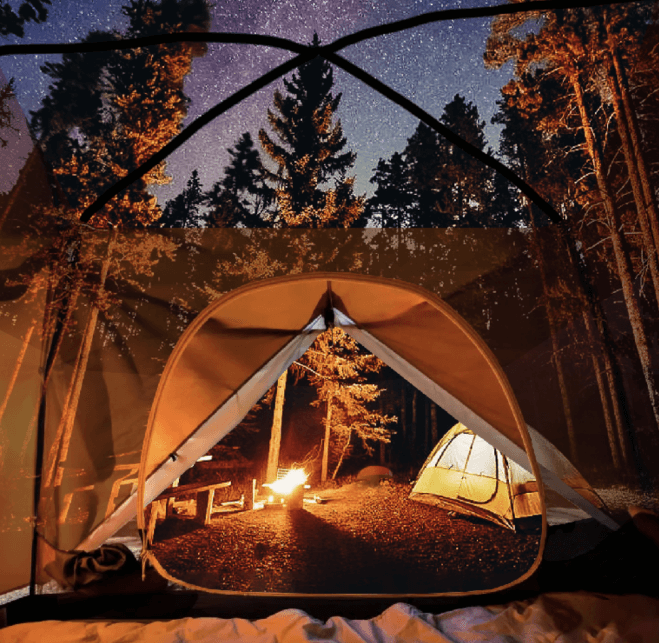
Today I’ll be using a tent photo, a nighttime camping photo, a starry night photo, and my own photo of a mushroom. Remember to check the resolution of each one so that it isn’t necessary to stretch images, only shrink them.
Step 1: Open the images you want to use in Photoshop and click and drag them into a new file. Don’t release the mouse click until you bring it into the center of the new canvas.
Step 2: Use the shortcut Ctrl/Command + T on each layer to resize them. In this mode, you can also right-click in the box for some helpful transforming actions.
With your images scaled and positioned, we’re ready to start blending.
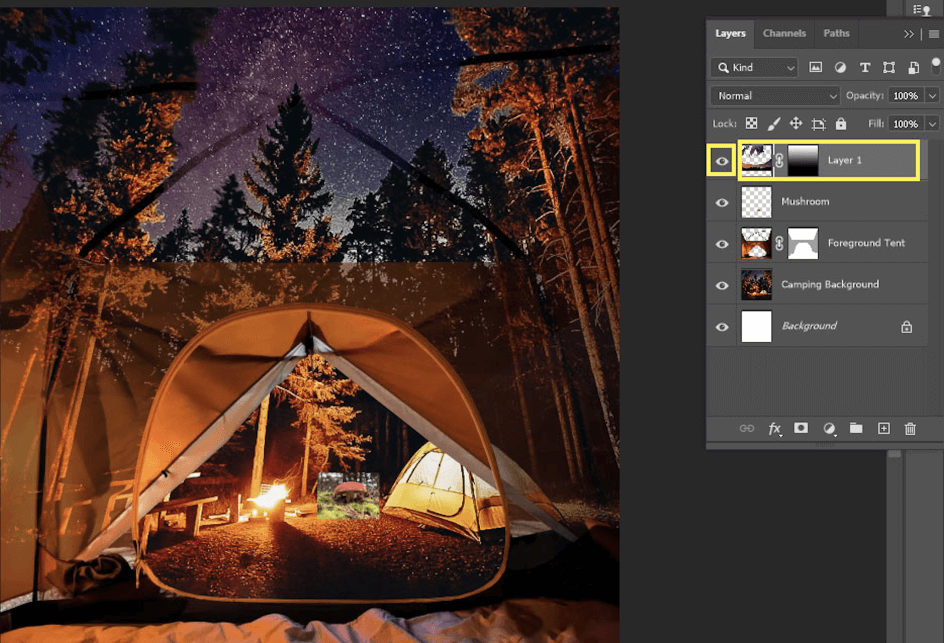
I have three layers at the moment. The background camping photo, the tent in the foreground, and the small mushroom.
I’ve already cut out the open door of the tent using the Polygonal Lasso and created a fake tent-top using the Brush tool and Content-Aware Fill.
With this portion of the foreground tent selected, I’m going to blend it a little better by doing the following steps.
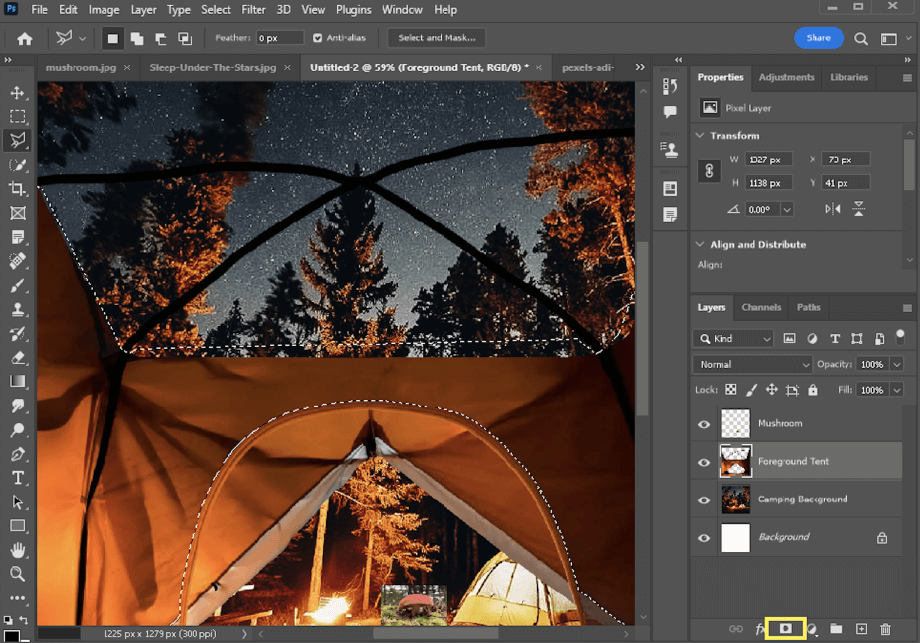
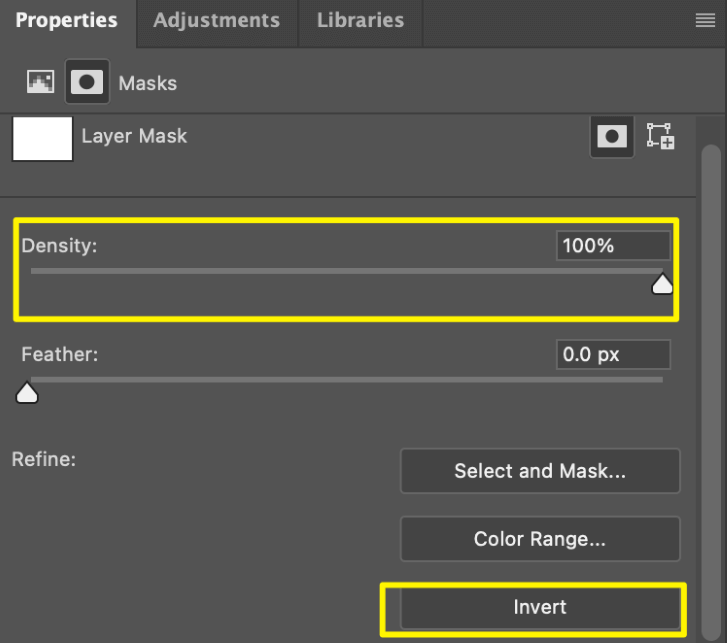
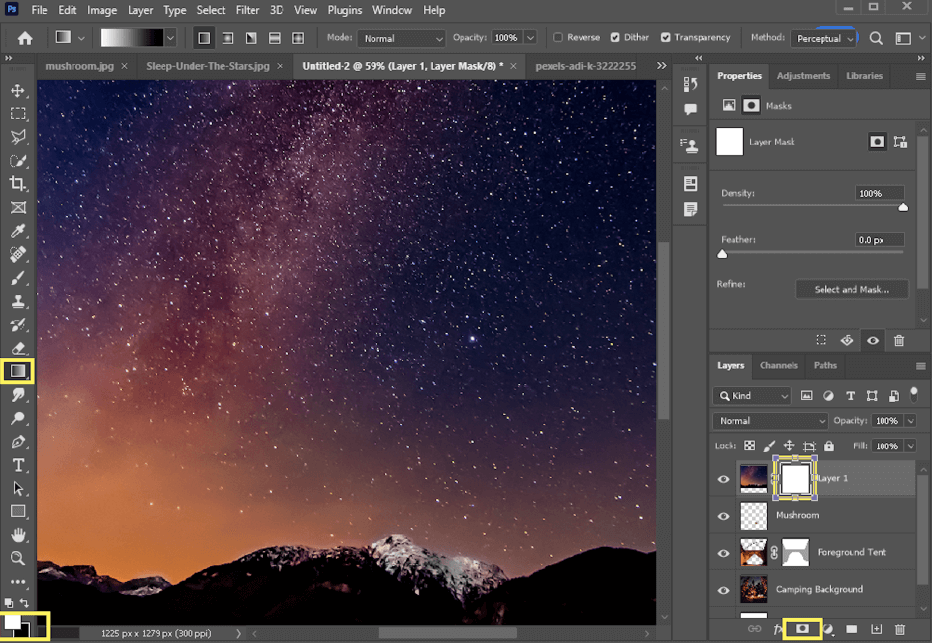
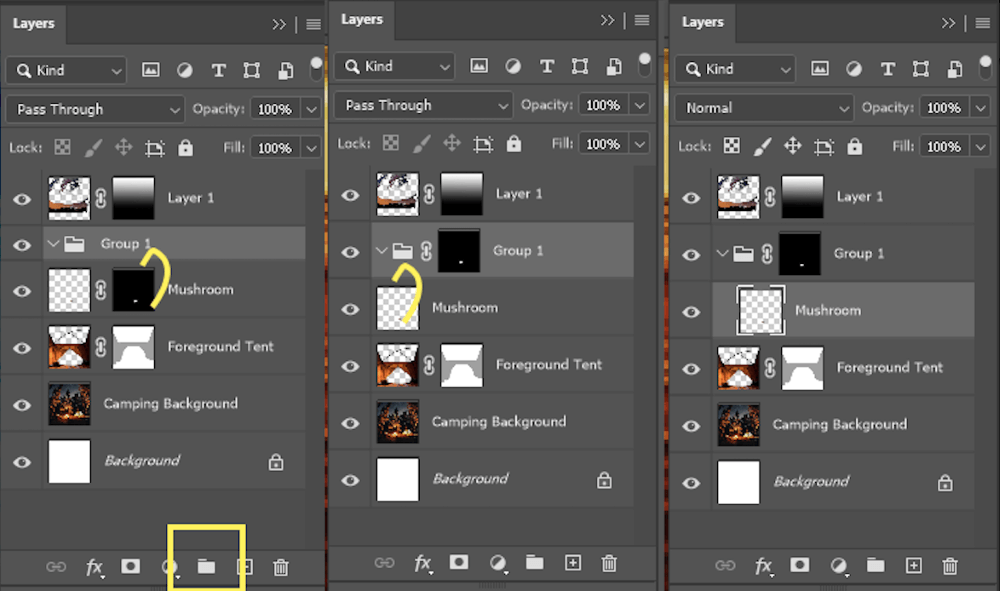
Step 3: Create a layer mask (yellow box in the right corner).
Step 4: I had to click Invert before changing the Density of the mask.
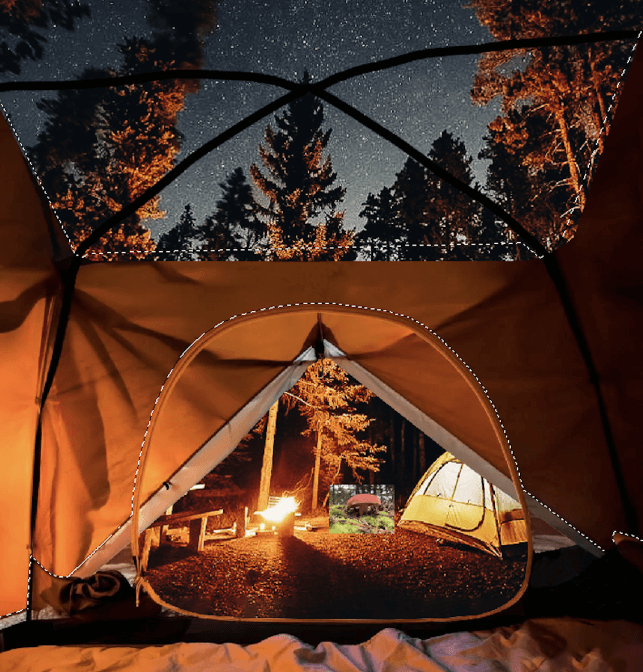
The lighting on the tent is actually pretty accurate because of how it lines up with the firepit. Before we start blending the mushroom, let’s add more stars to this mix.
Step 5: After dragging the stars photo on top of the stack, I clicked on the bottom right box to create a mask. I made the foreground white and the background black.
With this mask selected on the stars layer, use the gradient tool to draw one vertical line in the center of the image.
We are essentially painting with black and white on the layer mask, and whenever it comes to layer masks, black conceals and white reveals.
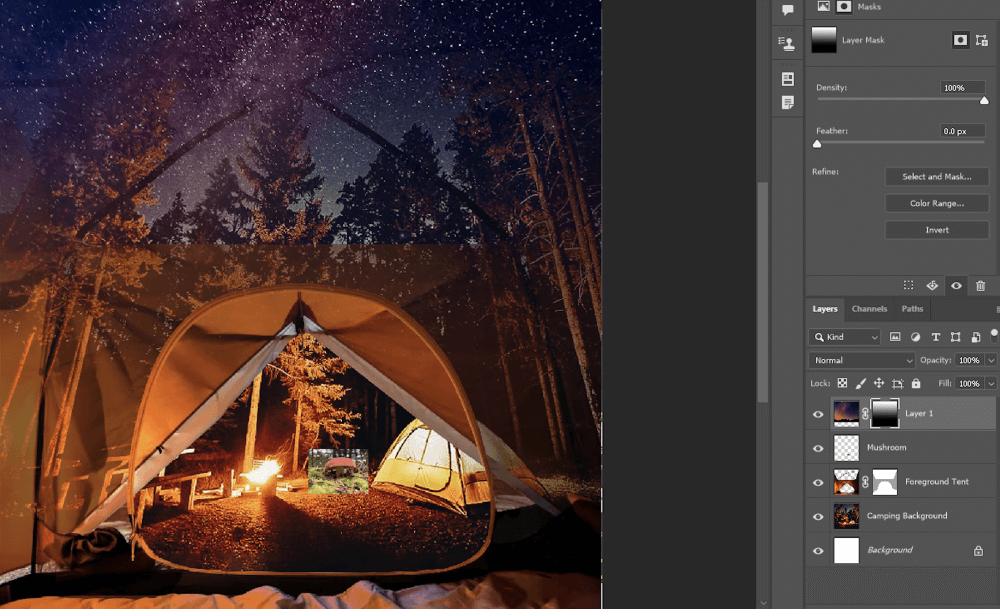
That looks pretty good, but I want the trees to be in front of these stars. Let’s move on.
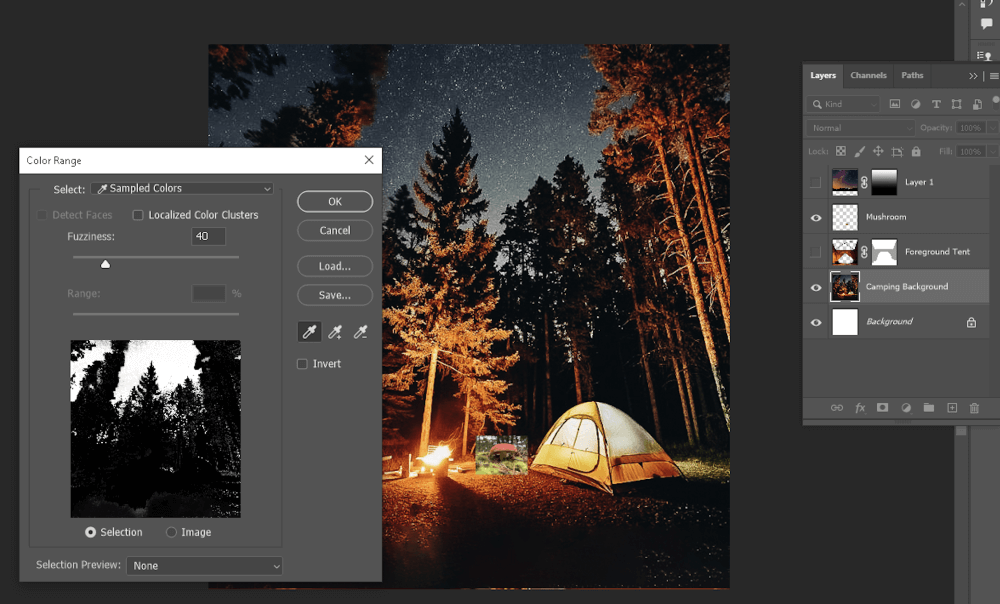
Step 6: I have the foreground tent and top stars layer invisible. With the Camping Background selected, I went to Select > Color Range. This gives you an eyedropper tool to click on the image behind the box. You can hold down Shift to select 2 or more places/colors.
I’m selecting the sky so that I can then invert my selection to the trees.
Step 7: Go to Select > Inverse. Use the Polygonal Lasso while holding Alt to subtract the bottom half of the image from your selection.
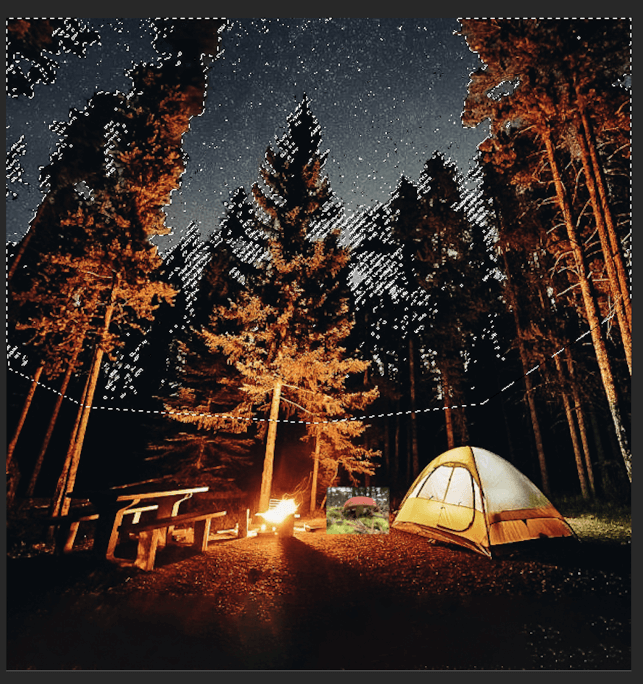
Step 8: Make the stars layer visible and your selection, then press Delete and then Ctrl/Command + D to deselect.
Step 9: Select the stars layer (in the yellow box) and change the Blending Mode (yellow rectangle) to Linear Dodge or whatever looks great in your photo.
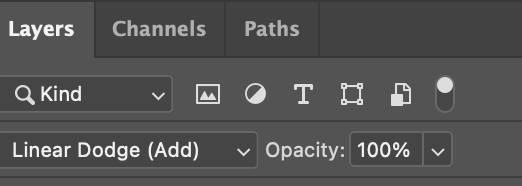
With the Foreground Tent selected, I used the Magic Wand tool to click on the Tent. With that selection, I went back to the stars layer and pressed Delete. That way, the stars don’t cross over it.
Let’s move on to blending the mushroom.
How to Blend Images with Filters, Highlights, and More
You can also use the Eraser Tool to blend images.
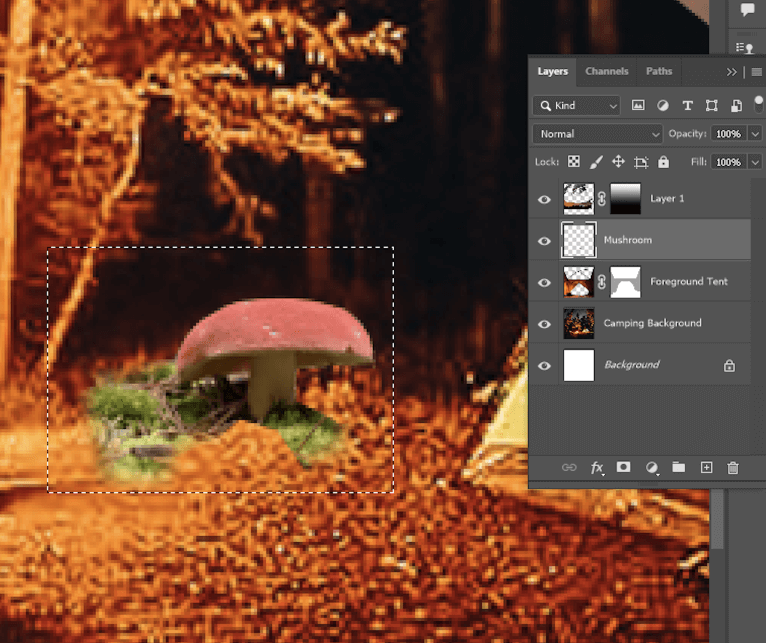
Step 1: Cut out your image if you haven’t already, or use the Eraser tool with a hard or feathered edge to erase the unwanted portions. This is what I’m working with now.
Step 2: Select your layer by putting a Rectangular Marquee around it, using the shortcut V to switch to the Move tool, then press the arrow keys to move it and the rectangle will change to form the specific outline of your layer.
Step 3: With the Mushroom mask (yellow box) selected, I clicked on Invert.
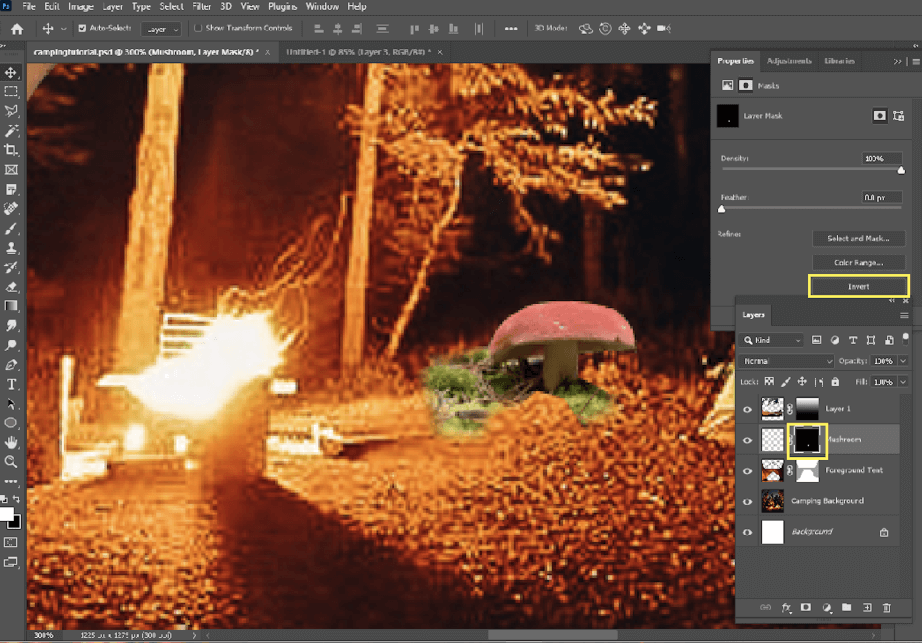
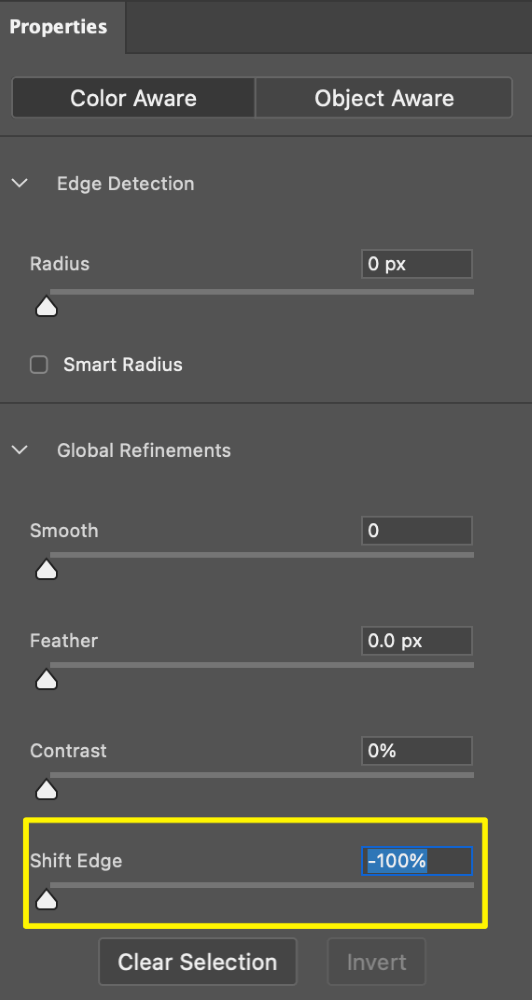
Step 4: Click on Select and Mask (above the Invert button) and shift the edge to -100%.
Step 5: With the mushroom mask selected, click on Invert again so that everything except the mushroom and moss is concealed in black.
Step 6: Create a group and move the mushroom mask to it so that anything in the group is affected by the mask. Slide the mushroom layer into the group.
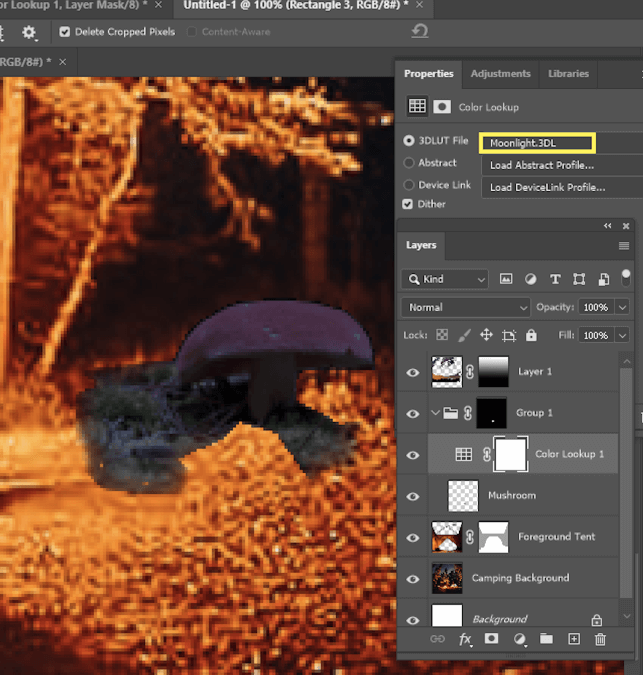
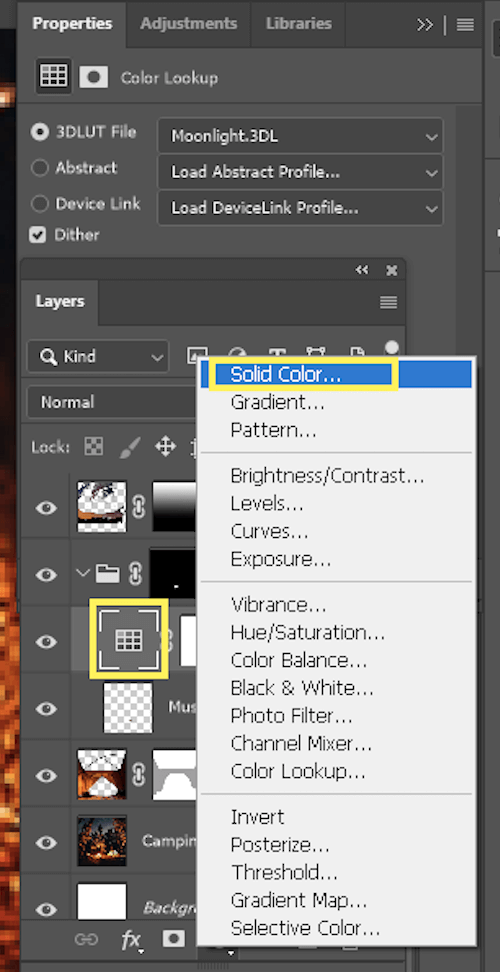
Step 7: Create an adjustment layer for Color Lookup and change the dropdown to Moonlight.
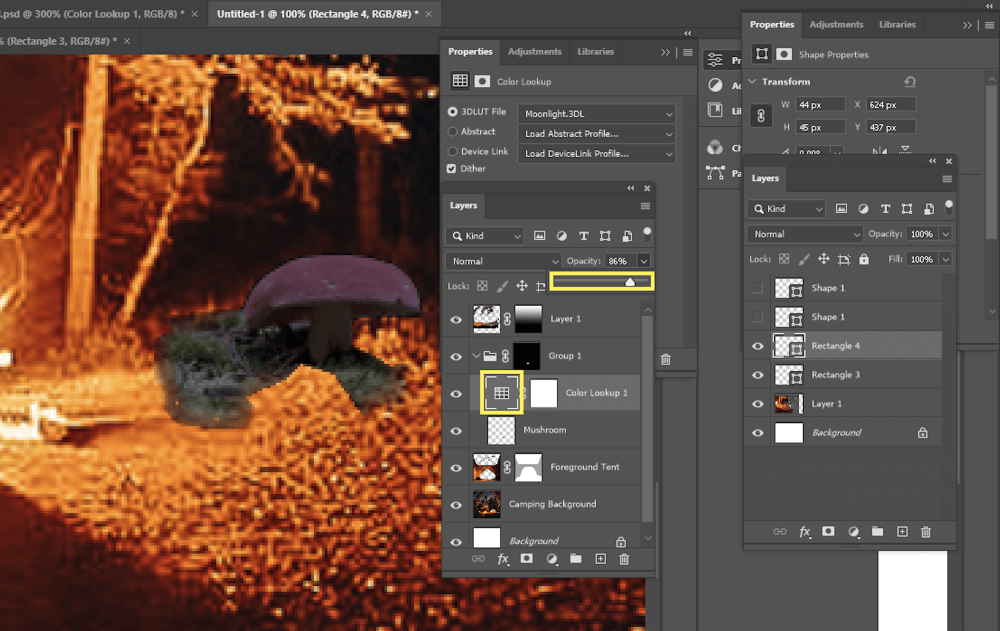
Step 8: Adjust the Opacity of the Color Lookup. I just lowered it a little bit.
Step 9: Add an adjustment layer for Solid Color. This is to create the reflection of the fire pit.
Step 10: Select the Color Fill mask thumbnail and the Gradient tool. Make your foreground color white, and the background black. Draw a diagonal line from the fire to the mushroom. You can do this as many times as necessary to get the right faded look.
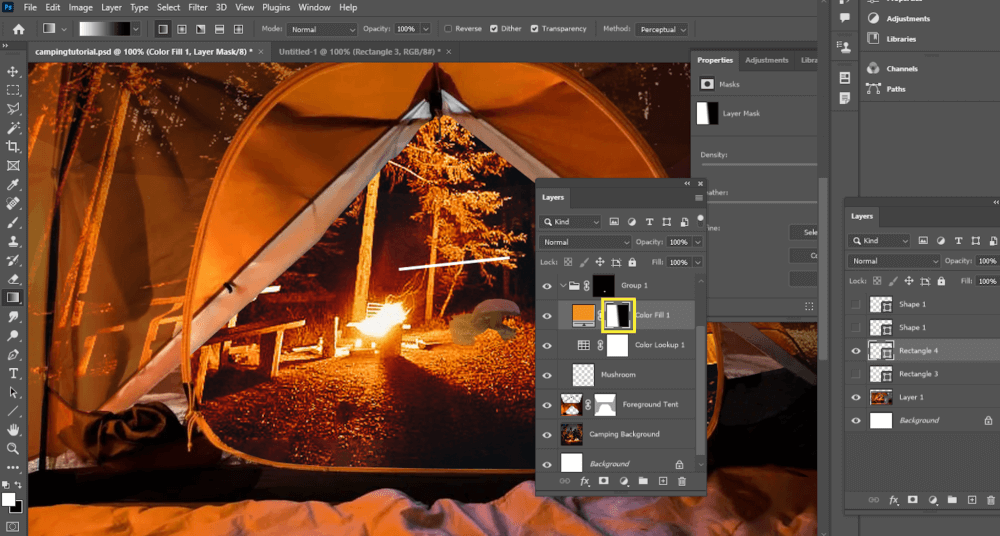
At any time, you can double-click on the color box (next to the yellow box) to adjust the color. I’m going to make the orange color a little brighter, to match the tree and ground beside this mushroom.
That helped, but I went a step further.
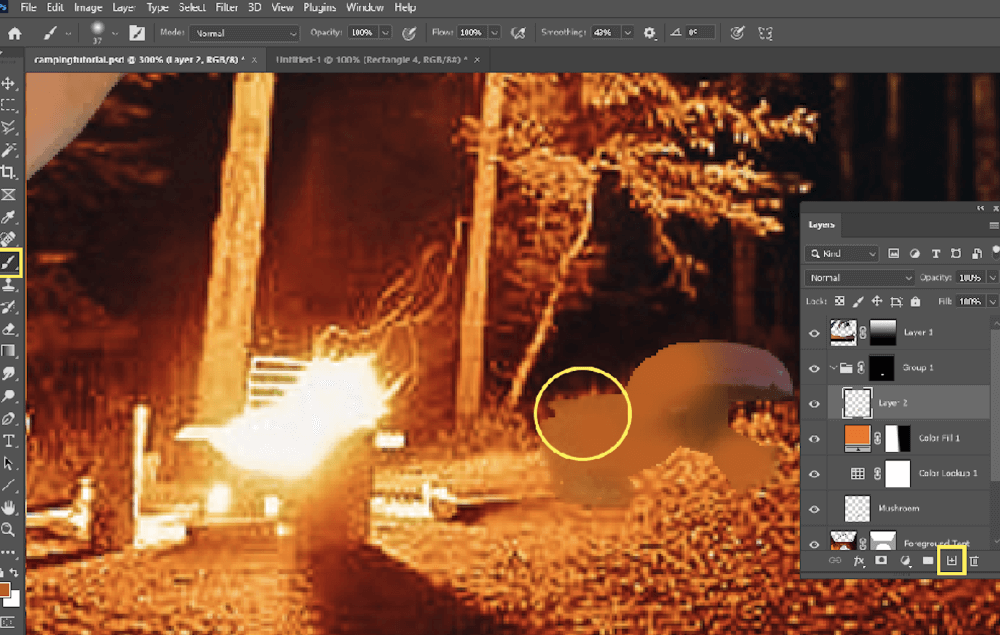
Step 11: I added a layer in the group and grabbed the feathered brush tool to start painting more orange highlights, then I’ll lower the opacity of this layer.
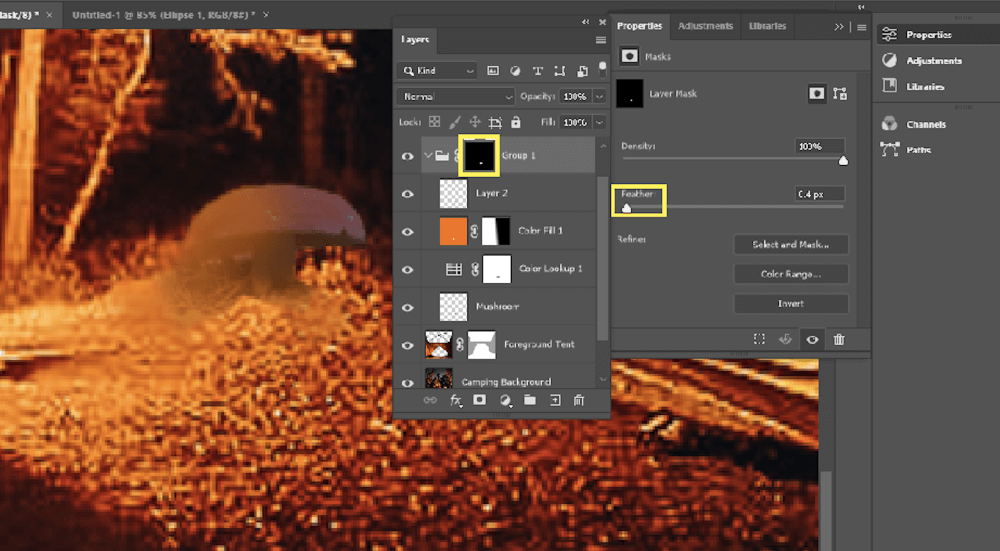
Step 12: Use the feathered Eraser tool to erase the edges of the ground on each layer inside the group. Then, click on the group mask and feather it a bit to soften the top edge of the mushroom.
Step 13: Use a very small Brush tool with black on the group mask to go right under the mushroom cap and around the edges of the mushroom and ground.
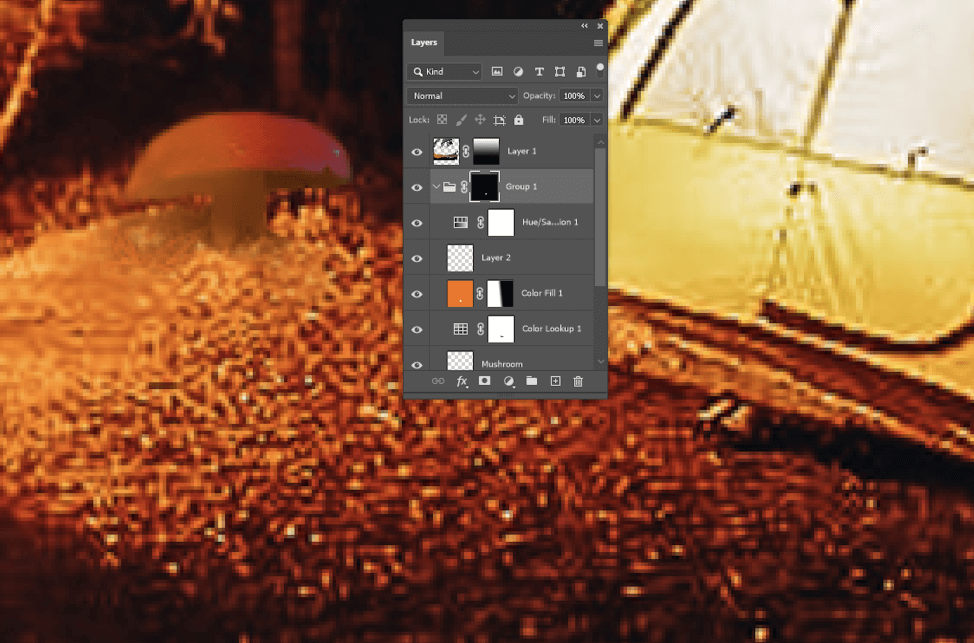
Step 14: I added a Hue/Saturation adjustment layer (yellow box) in the group and increased the saturation.
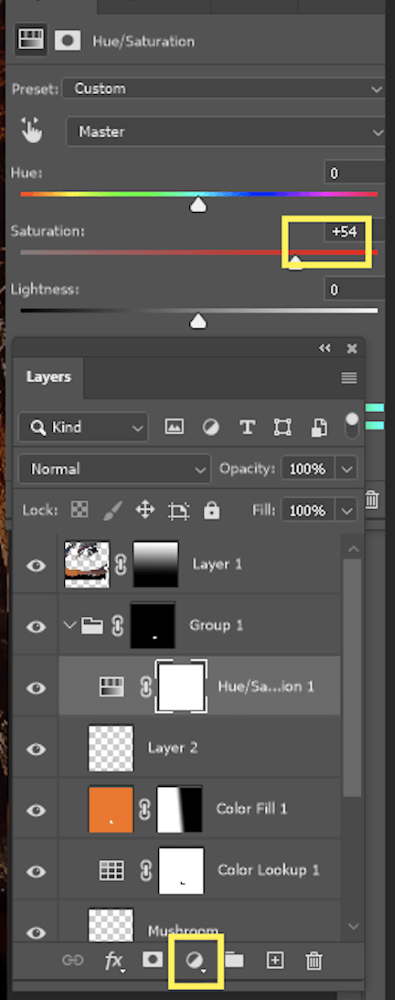
Here’s the result.
How to Match Up and Blend Similar Photos
Let’s perform an exorcism on this horse. (Just patch up his eye with another photo).
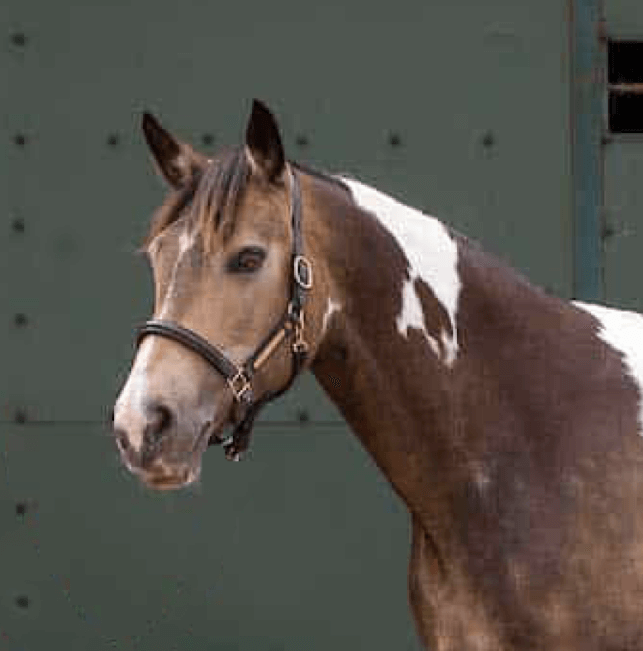
Step 1: Find a different image that seems similar enough to the one you’re working with. I’m going to use this horse’s eye.
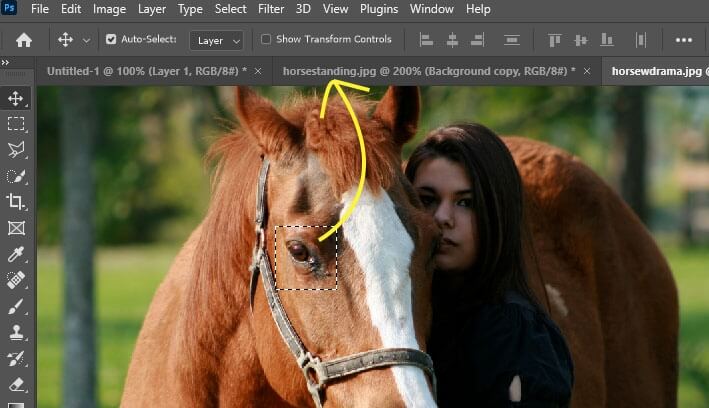
Step 2: Select your selection and use the Move tool to click and drag it into the other file in Photoshop. Remember not to release the mouse until you’re in the center of the working file.
Step 3: Use the shortcut Ctrl/Command + T to free-transform this new image layer. Right-click in the box and go to Flip Horizontally. Resize it or rotate it from the corners.
Here’s what we have now.
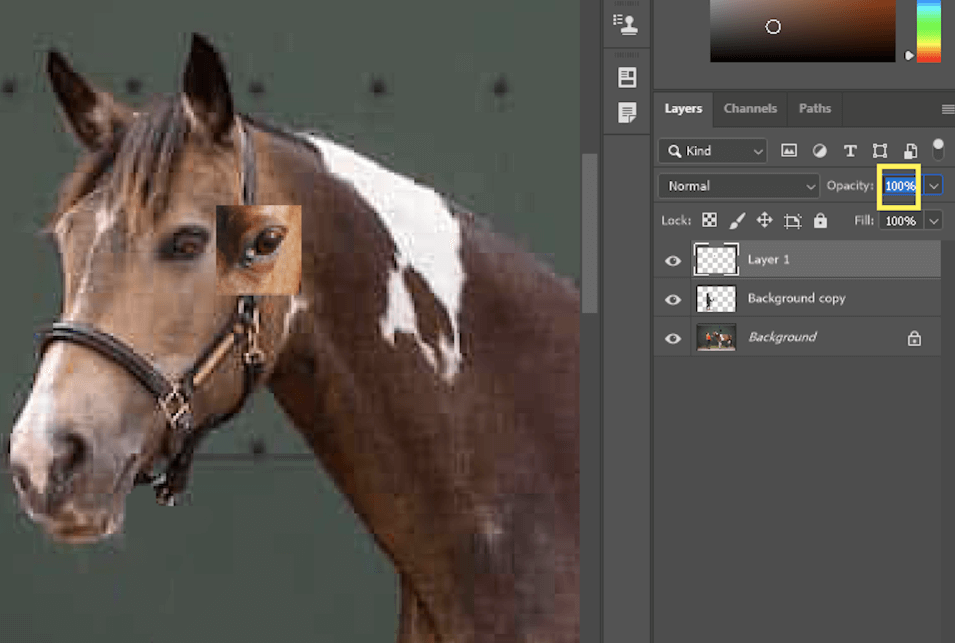
Step 4: Change the Opacity of this layer to 50% so you can see how well it is lining up with the original image.
Once you get it lined up nicely, restore the opacity.
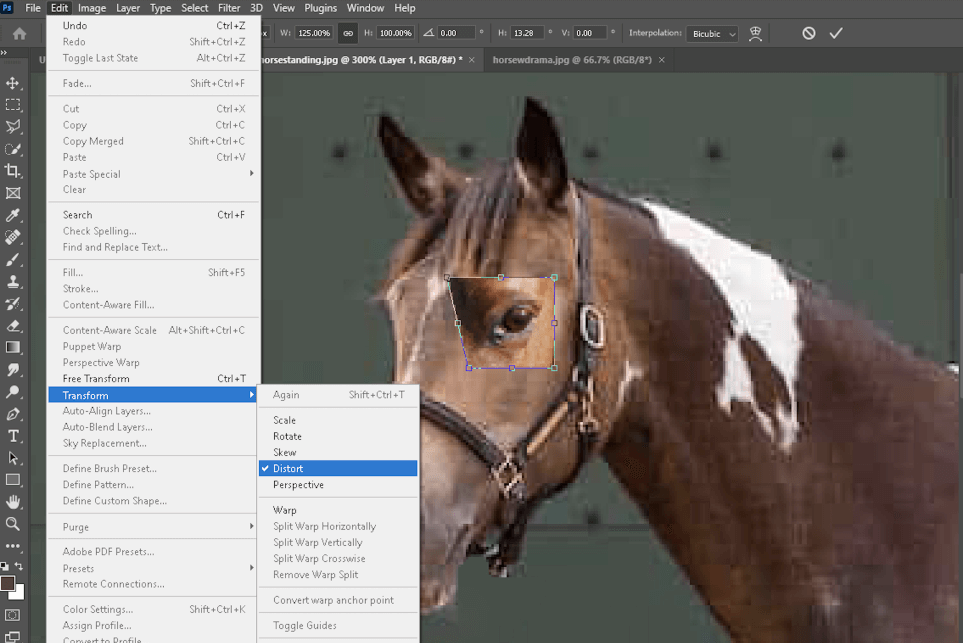
Step 5: Go to Edit > Transform > Distort and move one of the corners to see the effect. I needed to make this eye a little wider, to match the original eye.
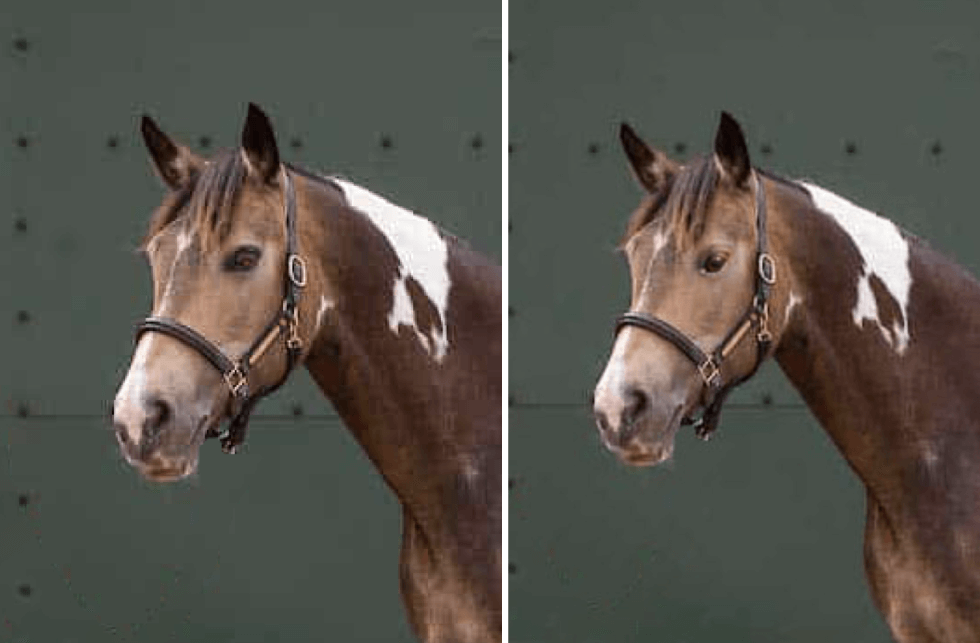
Step 6: Use the Eraser with a feathered edge to start blending this in. The feathered edge comes from having the Hardness slider down to 29%.

Here’s the final comparison.
Final Thoughts
Learning the ins and outs of Photoshop is key to building your graphic design skills. By taking the time to learn how to professionally blend and overlay images and use masks and adjustment layers, we’ve become familiar with helpful and universal tools that will make your future projects come to life.
How long have you been using Photoshop? What did you find most helpful in this tutorial? Let me know in the comments below.