
You can blur the background of an image in Photoshop by using the Blur tool or a layer mask and filter. This involves copying the image layer and selecting your subject before using the blur tool or layer mask.
Hello! I’m Jayde, I started learning Photoshop in 2009, but I am continually learning and impressed by the new features Adobe adds to the program.
In this tutorial, I’ll show you multiple ways to blur the background of an image in Photoshop. Photoshop offers many different ways to do the same thing, making it possible to achieve the precise look you want with any image.
Without further delay, let’s get started!
Table of Contents
Key Takeaways
- It’s always best to duplicate your image layer (Ctrl/Command + J) first to edit non-destructively, and in this case, we’ll be using the bottom layer for the blur.
- The Blur tool is the easiest way to blur the background of your image. Adjust the size and feathering at the top of the program window, and start blurring the deepest part of your image first and work your way out from there.
- You can also use Photoshop filters to blur the background.
- If necessary, edit the subject layer mask to conceal or reveal more.
Note: The screenshots from this tutorial are taken from the Adobe Photoshop Windows version. Mac or other versions can look different.
How to Blur the Background
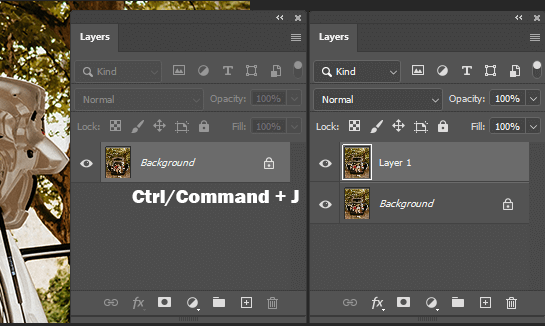
Step 1: Duplicate your image layer by using the shortcut Ctrl/Command + J.
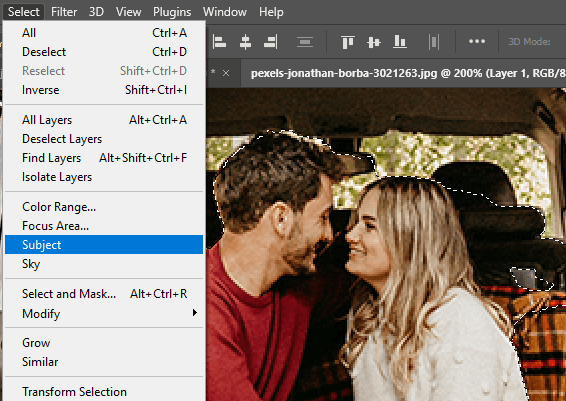
Step 2: Select the part of the object that you don’t want to blur using any selection tool.
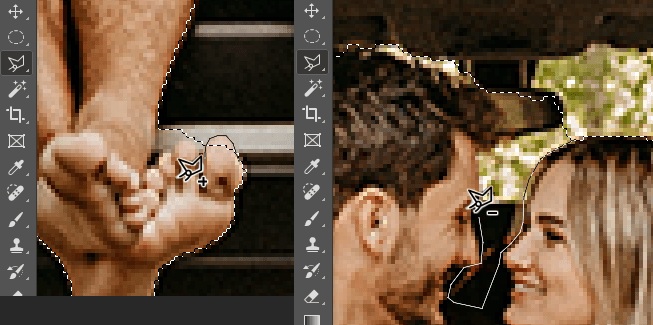
Tip: You can Correct any mistakes in your selection. To add to a selection, hold the Shift key with the tool of your choice. To subtract from a selection, hold the Alt key with the tool of your choice.
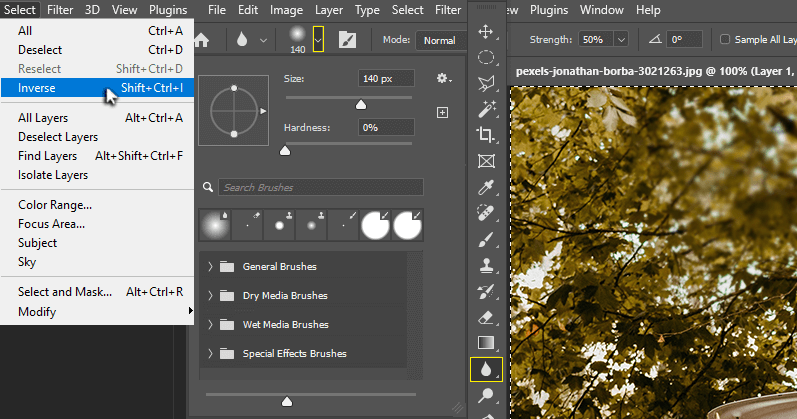
Step 3: Go to Select > Inverse to inverse the selection so that the image background is selected.
Step 4: Select the Blur tool and adjust the size and feathering in the tool’s settings. Start at the deepest part of your image and work your way around.
Use Ctrl + Z to Undo any mistakes.
I’m going to undo this step so I can show you how to use a layer mask to blur the background evenly with a filter.
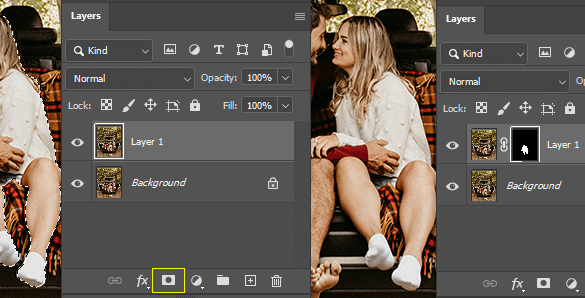
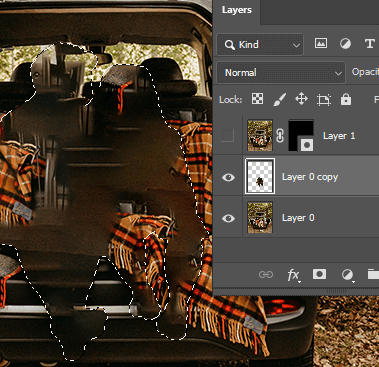
Step 5: Go to Select > Inverse if you did it previously so that our subjects are selected once again. Click on the layer mask symbol to create a mask with our subject selection.
Step 6: Hold Ctrl/Command and click on the layer mask thumbnail to make it your selection again.
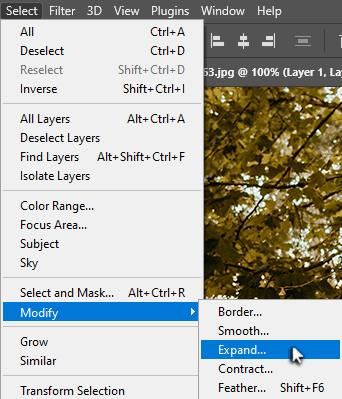
Step 7: Expand your selection just a bit by going to Select > Modify > Expand and adjust it anywhere between 1 and 50 pixels, depending on the size of your image.
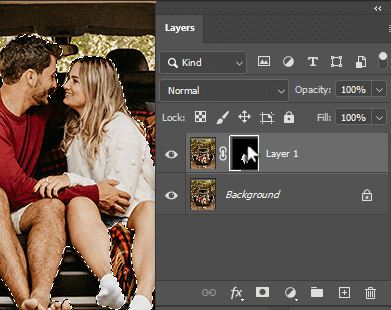
Step 8: Toggle off the layer visibility, so you can see the layer below. If your bottom image layer is locked, unlock it, or create another copy in the middle by selecting it and using the shortcut Ctrl/Command + J.
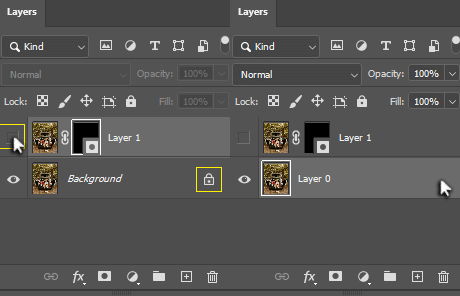
Step 9: Select the layer below and go to Edit > Content-Aware Fill. This creates an artificial background for us that doesn’t have to be perfect since our subjects will be in front of it.
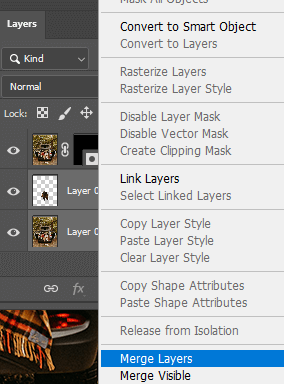
Step 10: Toggle on the visibility of the top layer, so we can see our subjects. Select the background image and content-aware fill layer and right-click on them to Merge Layers.
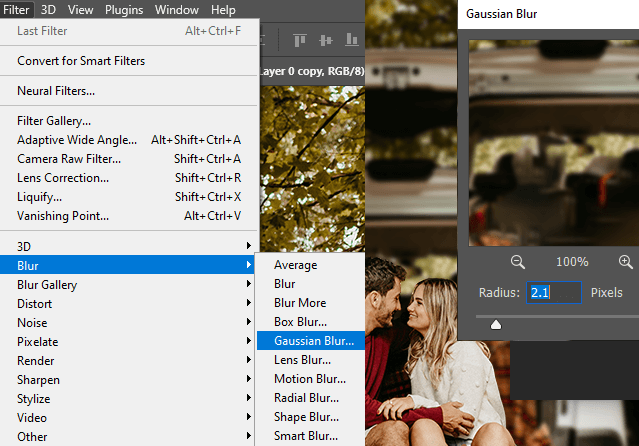
Step 11: Use the shortcut Ctrl/Command + D to deselect. Go to Filter > Blur > Gaussian Blur and change the value of the blur to whatever suits your image best.
You could use any of the blur filters listed here. I encourage you to experiment!
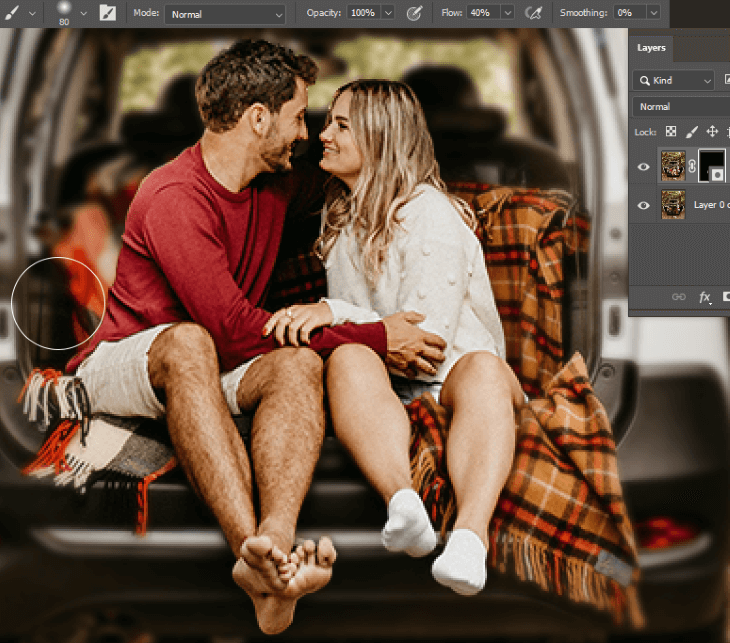
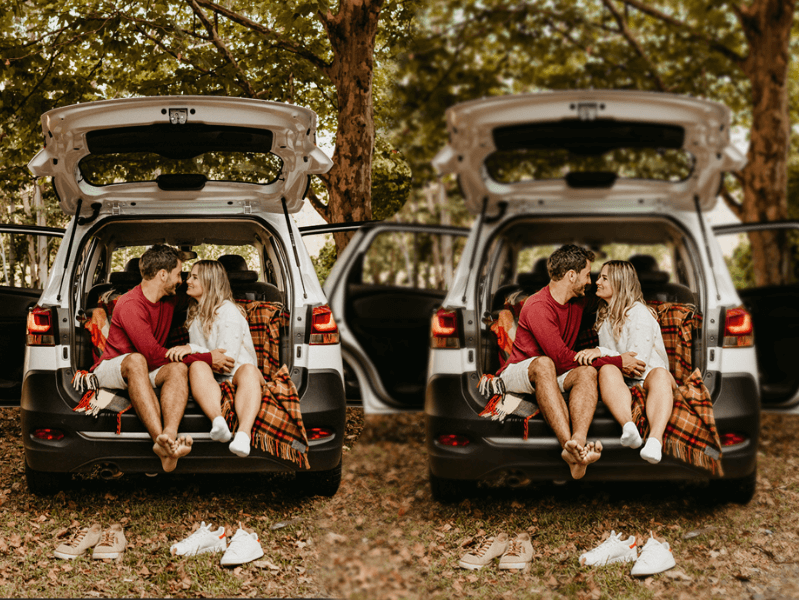
I noticed that some of the blanket, car, and ground would not be blurry in my image, so I’m going to select the layer mask and use a feathered Brush tool to paint white over the areas I want to see more clearly.
I reduced the flow of the brush tool to 40%, then 20%, and lowered the hardness to 0%.
Tips: To make the layer mask invisible, hold Shift and click on the thumbnail.
Resize your brush with the [ and ] keys.
Here’s our final comparison:
Final Thoughts
That concludes this Photoshop tutorial, covering how to blur the background of a photo! I covered multiple tips to get the job done, including how to target or exclude very specific areas.
Do you wear long sleeves with shorts? Is there a Photoshop task you’d like me to cover? Let me know in the comments below.