You can quickly change the color of your logo in Photoshop using Color Overlay or going to Image > Adjustments > Replace Color. Once you select a color with the eyedropper tool, click on the colored square that says Result and select a new color to replace it with.
Hello and welcome! Thank you for joining me along your journey to Photoshop mastery. Let’s use this wonderful design program to change the color of a logo, whether it is a PNG on a transparent background or a logo with a background attached to it.
Here we go!
Key Takeaways
- Duplicate your layer with the shortcut Ctrl/Command + J.
- Change the color of your logo by double-clicking on your layer to open the Layer Style box. Check off Color Overlay.
- When it comes to layer masks, black conceals and white reveals.
Note: The screenshots from this tutorial are taken from the Adobe Photoshop Windows version. Mac or other versions can look slightly different.
Method 1: Color Overlay
Follow this method when you’re working with a file that has a transparent background behind the logo.
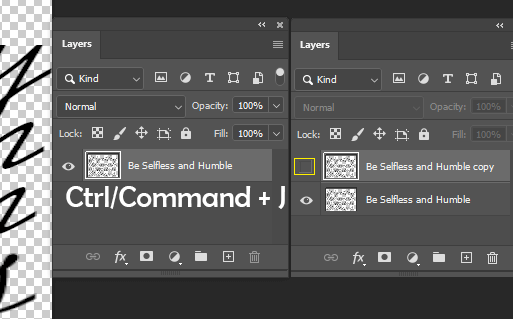
Step 1: Duplicate the layer using the shortcut Ctrl/Command + J. Hide the duplicated layer.
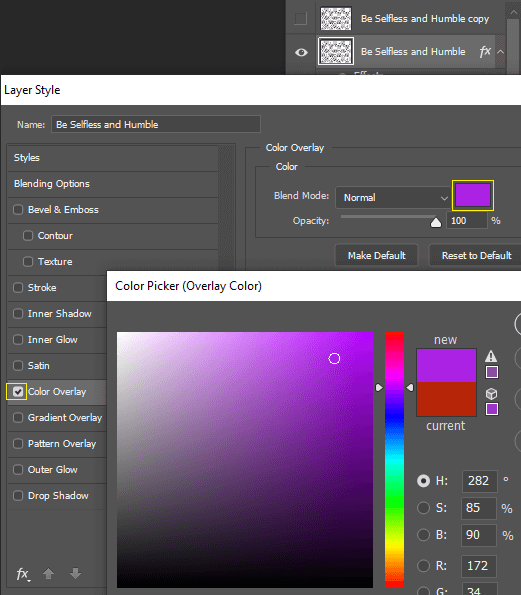
Step 2: Double-click on the original layer to bring up the Layer Style. Check Color Overlay. Click on the colored box to change the color.
Click OK on both boxes and your logo will be the new color.
I can hear your thoughts, “What if I only want to change certain parts of the logo?”
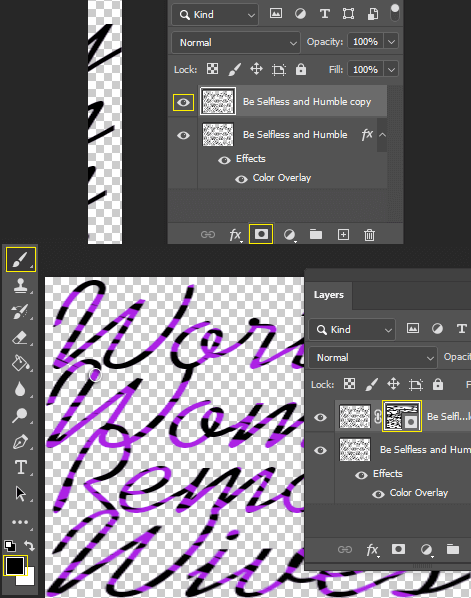
Step 3: Toggle on the copied layer’s visibility and select it. Click on the layer mask icon. Use the Brush tool to paint with black to conceal the original color, revealing the changed layer underneath.
Tip: Double-click on the layer style at any time to change the color you’ve chosen.
Method 2: Color Range
Follow this method to change the color of a logo with an attached background, all on one layer.
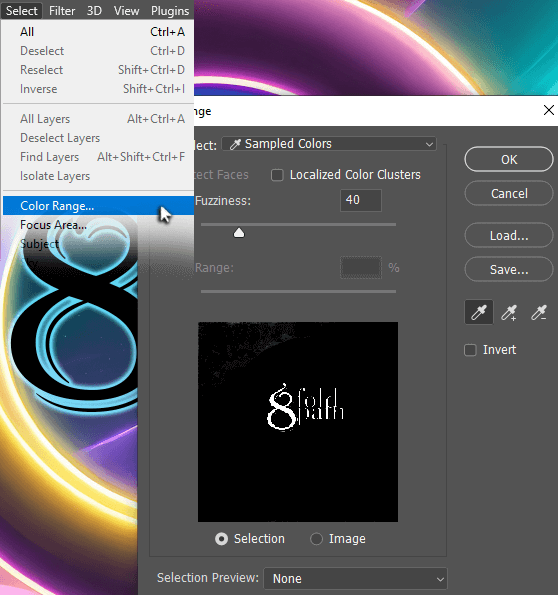
Step 1: Go to Select > Color Range. Use the eyedropper tool to select the color of your logo.
If your logo has more than one color you’d like to select, hold Shift and click on additional colors. You can also adjust the Fuzziness slider, which determines the range of the color(s) selected.

Step 2: Once you have your selection, use the shortcut Ctrl/Command + J to duplicate your layer, which will place your logo on its transparent background.
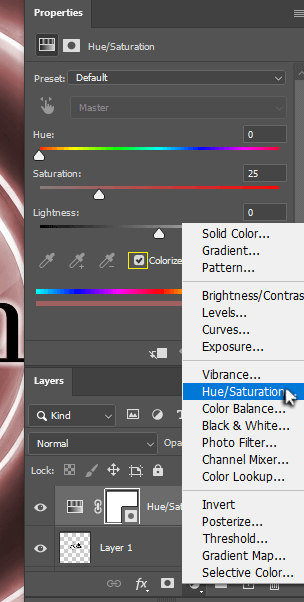
Step 3: Add a Hue/Saturation adjustment layer. Check Colorize.
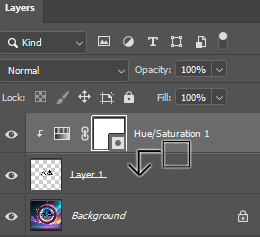
Step 4: Before changing the color, we must clip this adjustment layer to the layer below it. To do so, hold Alt/Option and hover the cursor in between the layers until it changes to a box with an arrow, then click.
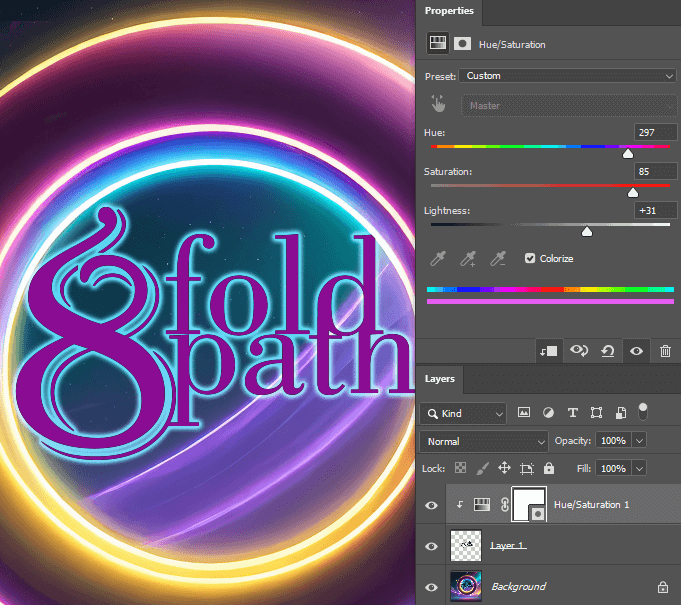
Step 5: Within the Properties panel, increase the Saturation and Lightness before adjusting the Hue slider to whatever you’d like.

Tip: Sometimes it becomes necessary to expand our selection slightly so that none of the previous colors can be seen.
Go back to Step 2, after copying your selection onto its layer. Right-click on its thumbnail to go to Select Pixels. Then, go to Select > Modify > Expand and change the value to 1 px.
With your expanded selection, add an adjustment layer for Hue/Saturation and it will come with a filled mask.
Final Thoughts
That concludes this short and sweet tutorial on how to change the color of your logo. Since Photoshop is a raster program, you can only use layer effects to change colors. If you want to edit a logo professionally, it’s recommended to use Adobe Illustrator.
Did this tutorial help? Do you have any suggestions for fellow graphic designers? Let us know in the comments below.
