
Knowing how to use solids and change their color is essential for creating backgrounds, visual effects, or just adding a splash of color to your projects. It can be achieved by navigating to Layer > Solid Settings and picking a new color.
Hi there! I’m Zoe, an illustrator and graphic designer. Today, I want to share a trick that sometimes stumps even the best of us: changing the color of a solid in After Effects. While altering colors in shapes is more obvious, solids can be a bit trickier if you don’t know where to look.
Let’s break down this simple process so you can add more color to your projects with ease! In this article, we’ll cover how to create a solid and set its initial color, change the color of an existing solid, and as a pro tip, we’ll dive into animating the color of a solid for dynamic effects.
Let’s get started!
Table of Contents
Key Takeaways
- Easily create solids in After Effects by navigating to Layer > New > Solid, setting dimensions, and picking a color.
- Change a solid’s color by selecting the layer, going to Layer > Solid Settings, and choosing a new color in the Solid Settings window.
- Use the Fill Effect (Effects & Presets > Generate > Fill) on a solid layer to change the color of a solid without modifying its original settings.
- For fluid color animations, apply the Fill Effect, enable keyframing for color changes in the Effect Controls panel, and adjust colors over time for transitions.
Note: All screenshots from this tutorial are taken from the After Effects Mac version.
This article will provide you with the knowledge and tools you need to successfully modify the color of a solid in After Effects.
How to Create Your First Solid in After Effects
In After Effects, solids are essentially blank layers that are filled with color. They’re incredibly useful for backgrounds, masks, or as a foundation for various effects. Let’s start by creating a solid and giving it some color:
Step 1: Go to Layer > New > Solid. A dialog box will appear. Here, you have the option to name your solid and set its dimensions to fit your project’s needs.
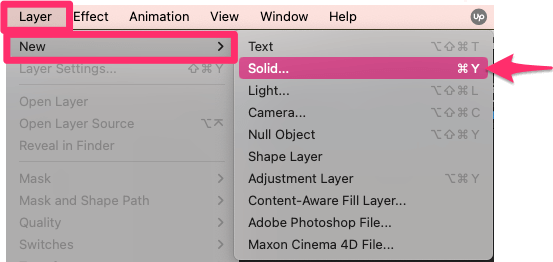
Step 2: Within the same dialog box, you’ll notice a color swatch. Clicking on this will open the color picker.
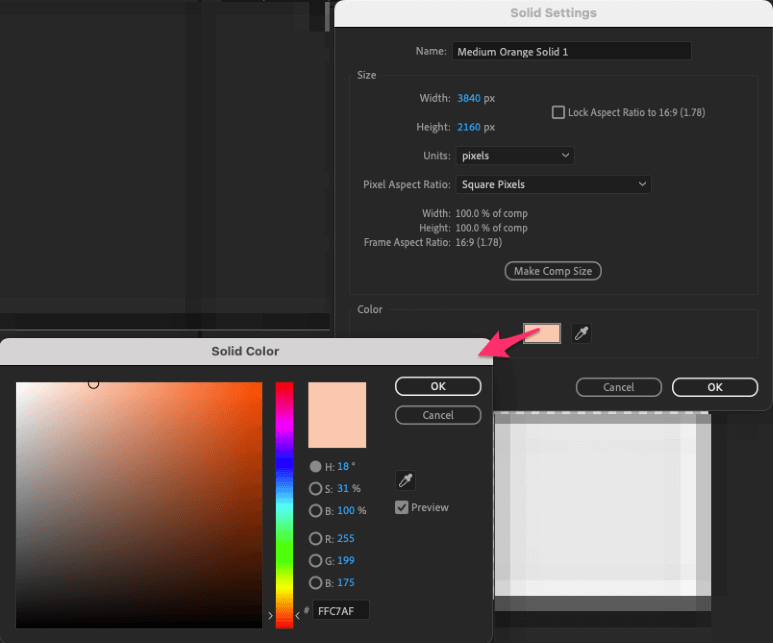
Step 3: After selecting your color, hit OK, and your new solid with the color you chose will appear in your composition.
By following these simple steps, you can create a solid of any color, ready to be used in your After Effects project. Whether it’s for a background, an overlay, or a base for further effects, solids are a fundamental element in your video editing toolkit.
Changing the Color of a Solid Layer in After Effect
Sometimes, you might need to change the color of a solid layer after it’s been created. Unlike shapes, where the color swatch is readily accessible, the color settings for solids are slightly more tucked away. But don’t worry, it’s still a straightforward process.
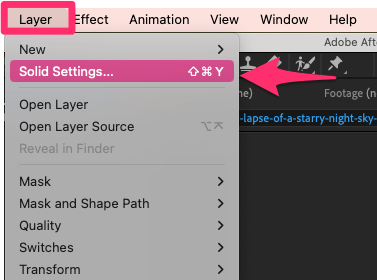
Step 1: First, select the solid layer whose color you want to change. Go to the Layer menu and choose Solid Settings from the drop-down menu.
Step 2: In the Solid Settings window, you’ll see various options to customize your solid. Click on the color box to bring up the Solid Color window. Here, you can pick a new color for your solid.
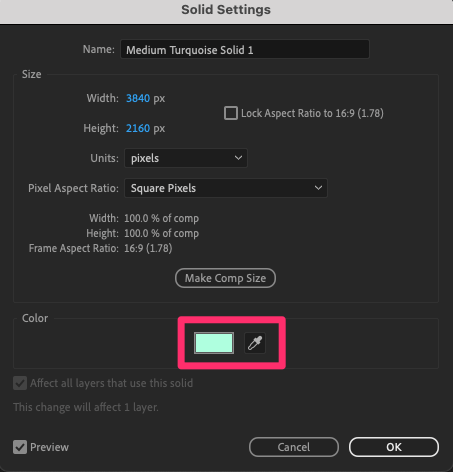
Step 3: Once you’ve selected the new color, click OK. This will apply the new color to your solid layer.
And that’s it! With just a few clicks, you can easily change the color of a solid layer in After Effects, making sure your visuals stay in tune with your project’s needs.
Pro Tip: Animating Color Changes
As straightforward as it is to set the color of a solid, this method lacks flexibility. For instance, if you aim to animate a sky transitioning through different colors, adjusting the Solid Settings won’t be enough.
If you want to animate changing colors, using the Fill Effect is your best bet. Here’s a step-by-step guide:
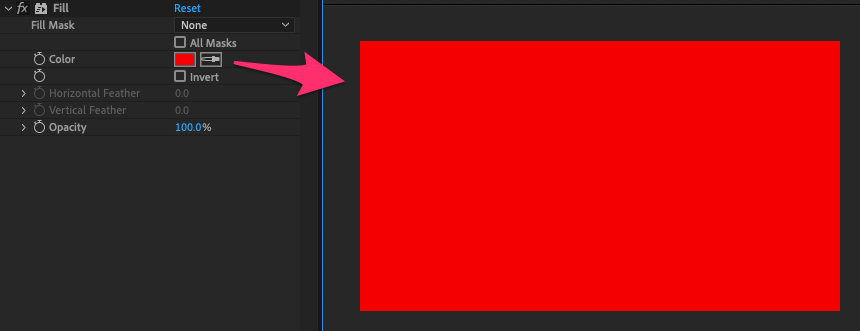
Step 1: Select your solid layer, then head to Effects & Presets > Generate > Fill and apply it.
Step 2: Click the color swatch next to Color in the Fill Effect to pick your starting color. This lets you change colors dynamically without altering the solid’s original settings.
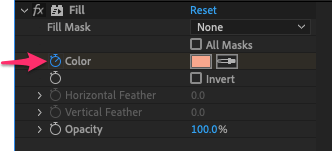
Step 3: To start animating, click the stopwatch icon next to Color in the Effect Controls panel. This enables keyframing.
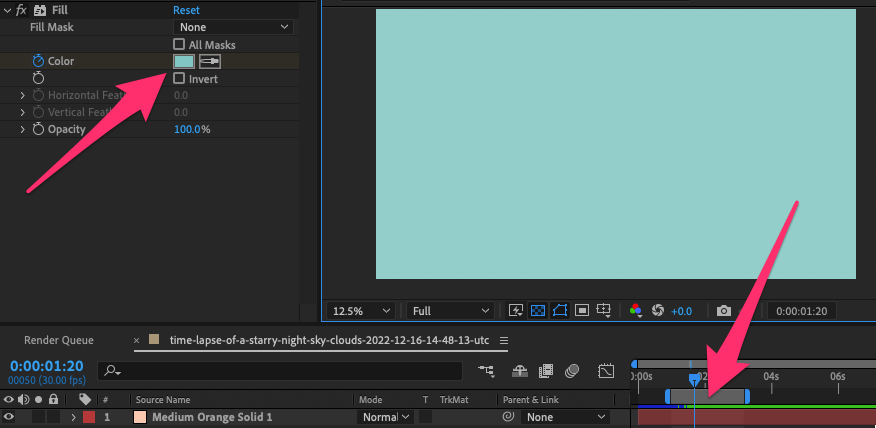
Step 4: Move the playhead forward in your timeline and change the color to create a color transition.
Step 5: Adjust the keyframes in your timeline for smooth color shifts. Expand your solid layer in the timeline, click on Effects, then Fill, and finally Color to see and adjust keyframes.
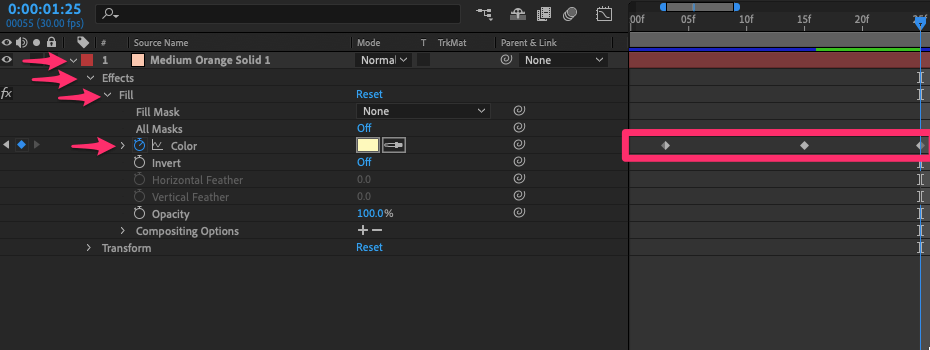
Step 6: You’re not limited to just two colors. Add more keyframes with different colors along the timeline for a variety of changes. To create a looping effect, make your final keyframe the same color as the first.
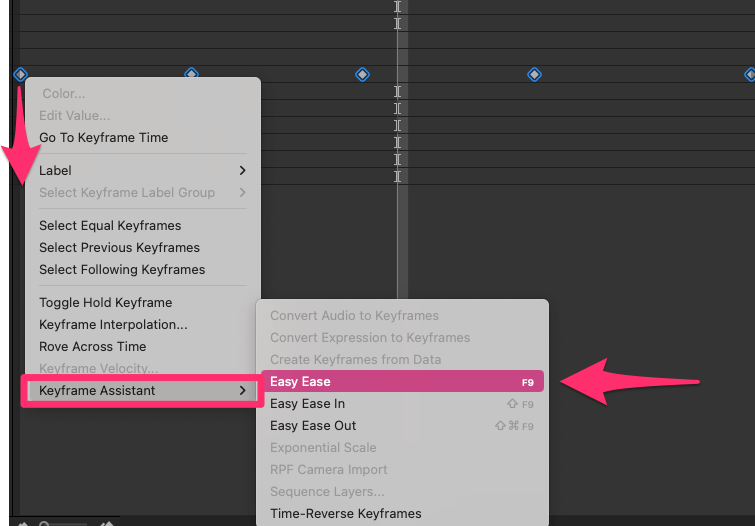
Step 7: For a more fluid animation, apply the Easy Ease option to your keyframes. Drag your mouse to select all your keyframes, right-click on a keyframe, select Keyframe Assistant, and then choose Easy Ease.
With these steps, you can create beautifully animated color changes in your solids, bringing your After Effects projects to life.

Final Thoughts
Changing the color of a solid in After Effects is a basic but essential skill. Whether you’re creating backgrounds, visual effects, or just adding color to your project, understanding how to manipulate solids is key.
By following the step-by-step instructions outlined in this article, you can easily modify the hue of a solid layer and even animate the color, adding more life to your work.
Have you tried changing the color of solids in your After Effects projects? What tips and tricks have you discovered? Share your experiences and insights in the comments below!